Web Server Communication Program
The PLC-E1616P CPU can host a web server. The web server allows the user to control data registers, CPU functions, and more. The web server runs on HTML, while most browsers use HTML5. However, most browsers can read HTML websites, allowing the web server to be viewed in browsers like Google Chrome, Mozilla Firefox, and Microsoft Edge.
Important notice: When the web server firmware is loaded onto the PLC-ES CPU, the CPU will lose all non-web server Ethernet functionality. The Modbus and other protocols will not work through the Ethernet port. A communication module like the MOD-SENT01 will be required to use the CPU’s original Ethernet functionality.
Required Items:
- PLC-ES1616P
- PLC-ES CPU Web Firmware:
- PLC-ES1616-WebServer
- SD Card
Create a WEB folder on the SD Card
Step 1: Plug the SD card into the computer. On the SD card, create a folder named WEB.

Load the Web Server Firmware on the PLC-ES CPU
Step 1: Connect the CPU to MapleLogic. To do this, navigate to Online and Connect. To change the method of connecting to the PLC-ES, navigate to Online and Connect Option. Afterwards, click Connect.
Optionally, the Connect icon in the toolbar can be clicked.

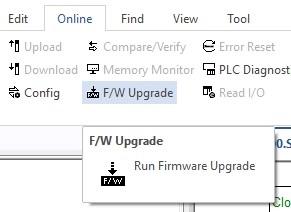
Step 2: Navigate to Online and click Firmware Upgrade.
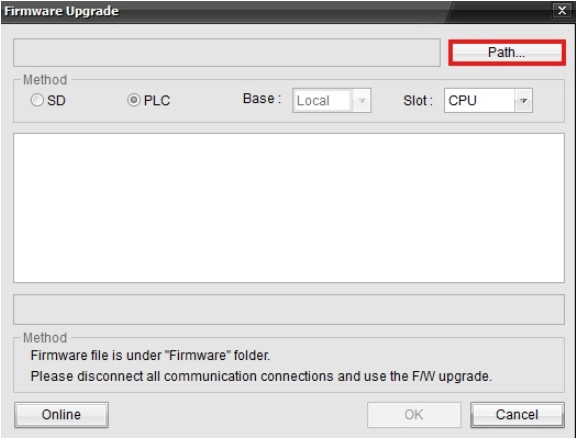
Step 3: Click the Path button to navigate to the web server firmware’s location. An example firmware name is PLCES1616P_v063408_20250224_SVN2671_WEB.bin. The firmware file must match the CPU type.
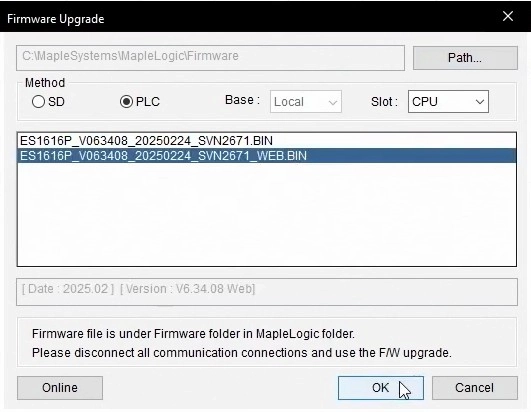
Step 4: Once the path is selected, the firmware should appear in the white box. Click the firmware to install, and then click OK.
Step 5: Click Yes to load the firmware onto the PLC-ES CPU.
This message will appear while the firmware is downloading:
“If you click [Yes] project in cpu will be erased. Please back up project file in cpu. Do you want to continue?”
Step 6: Once the firmware is downloaded, switch the PLC-ES CPU to STOP MODE, POWER CYCLE the PLC-ES CPU, and switch the PLC-ES CPU to RUN MODE.

Create a New Web Server Project
Step 1: Select the PLC-ES and click Next.
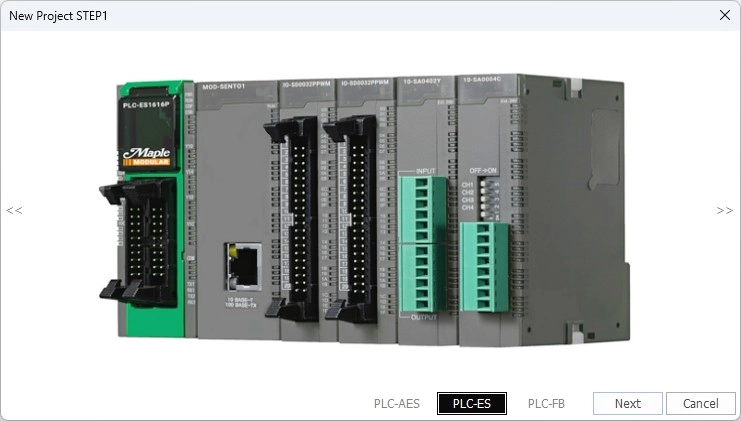
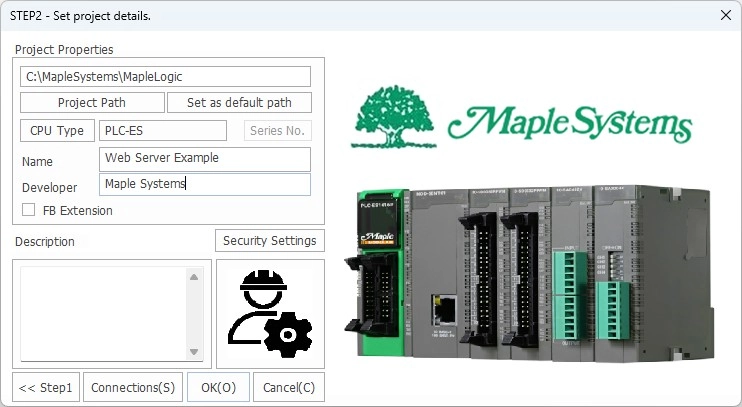
Step 2: Name the project, select the path, and click OK.
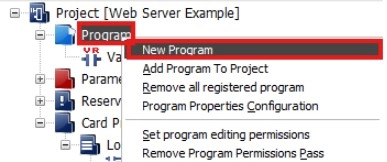
Step 3: In the Project Tree, right-click Program and click New Program.
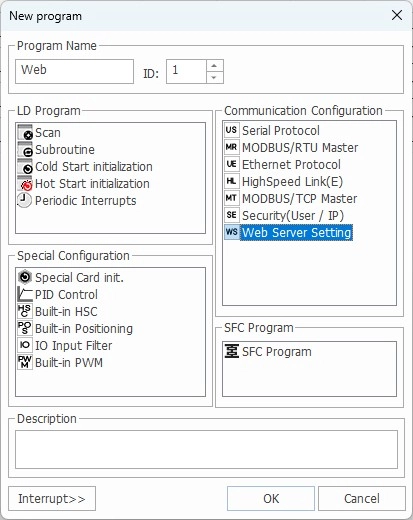
Step 4: Create a new Web Server Setting program. Select OK when finished.
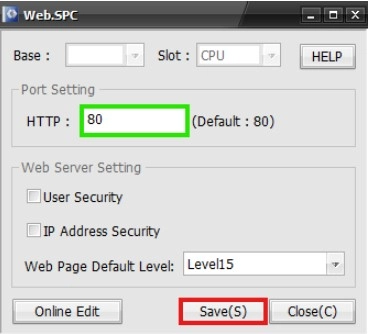
Step 5: Select the Port to use, User Security (optional), and IP Address Security (optional), and click OK.
Configure the Web Server Manager
The Web Server Manager is where the web pages for the web server are configured.
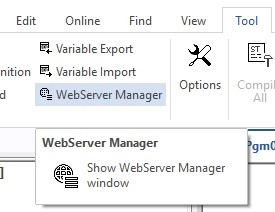
Step 1: Navigate to the Tool drop-down and select Web Server Manager.
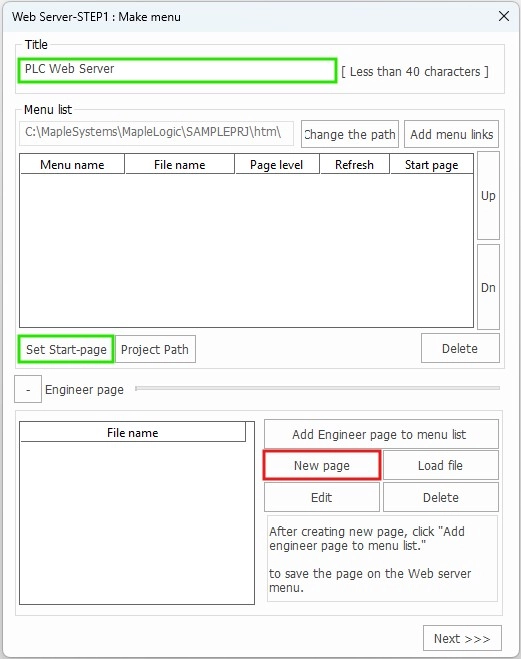
Step 2: This is where you can configure the web server name and primary page that will appear in the browser tab in green. To create a new page, select New page.
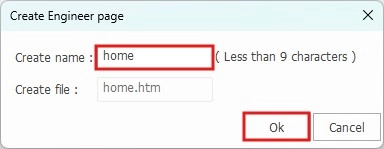
Step 3: Create a name for the page. MapleLogic will notify you if the name of the page is not valid. Select Ok when finished.
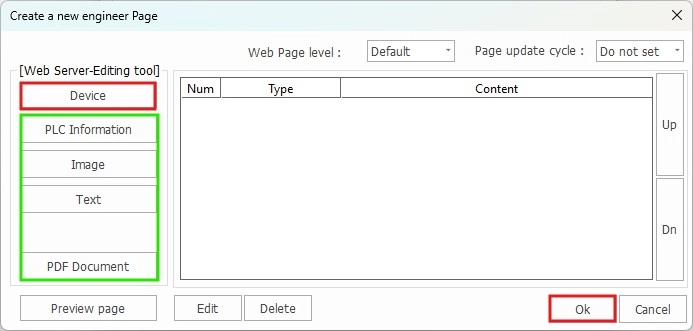
Step 4: The information in green is an optional setting to configure for the web server. To add controlled data registers to the web server, select Device.
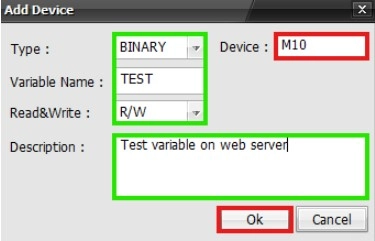
Step 5: These are the data register settings. The Device information box specifies the data register to include on the web server. This consists of all allowable data registers: M, X, Y, K, L, F, T, C, S, Z, R, Q, and D. The information in green defines the variable data type, name, read or write, and description.
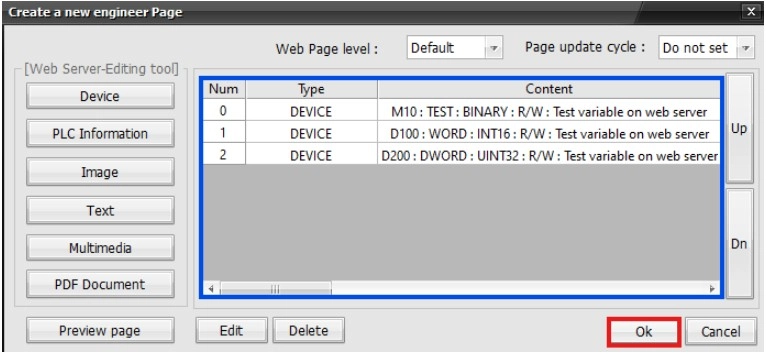
Step 6: All the added data registers will appear in the gray box highlighted in blue. Once complete, click Ok.
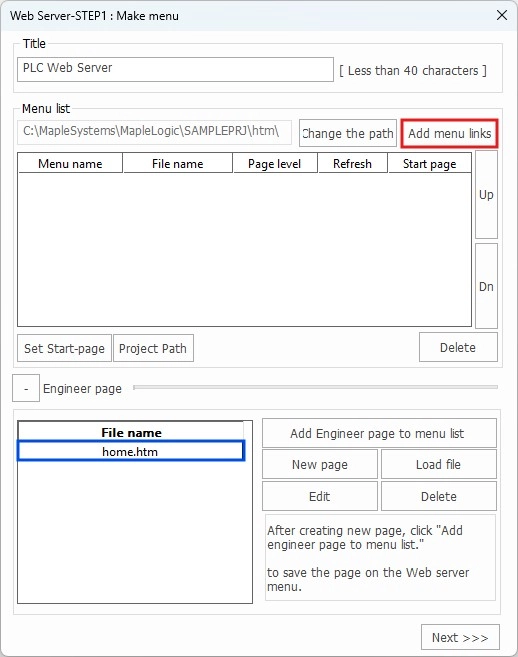
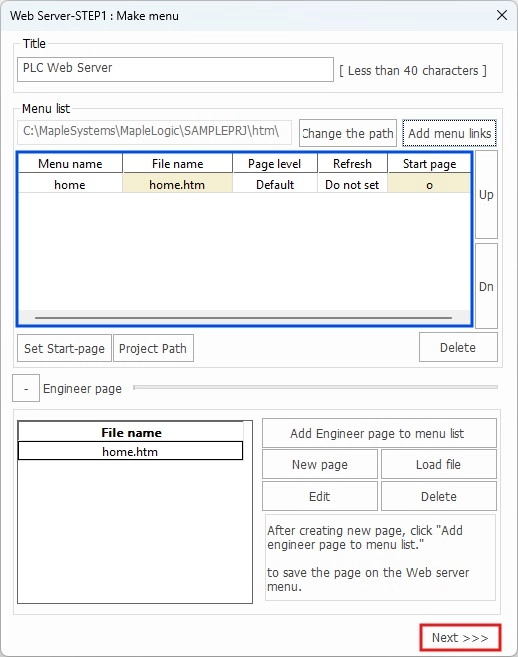
Step 7: To add the new page, click the page under the File name highlighted in blue. Then, click Add menu links.
Step 8: All pages to add to the web server will appear in the gray box highlighted in blue. Once complete, select Next.
Step 9: The files on the left will be written to the SD card. Confirm that the SD card is inserted into the PLC-ES CPU. Click Save.
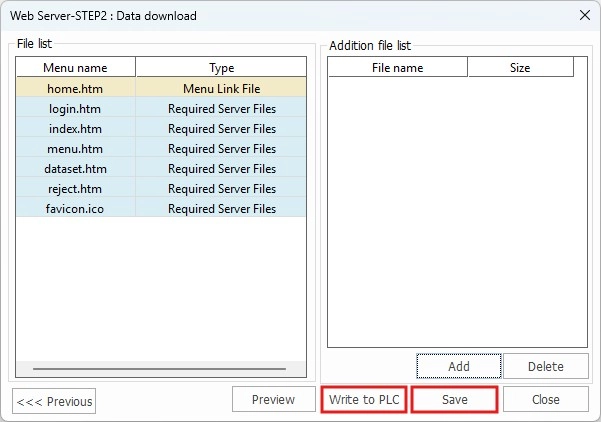
Step 10: After clicking Save, a message will appear with “Your data has been saved”, notifying that the information has been saved. Click OK.
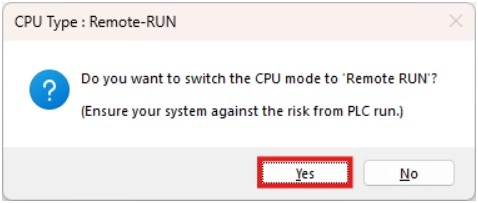
Step 11: Click Write to PLC. When the Remote-RUN window appears, select Yes.
Connecting to the Web Server
Step 1: Navigate to a browser that supports HTML. Make sure the PLC is connected to the network properly via Ethernet. The Ethernet cord must be plugged into the PLC-ES CPU. In the browser’s search bar, Type the IP address of the PLC followed by a colon and the port defined in the Web Server Project.

Step 2: The web server will redirect to the main page defined in the Web Server Manager. This is where the data registers can be modified. Click edit to modify a data register’s value.
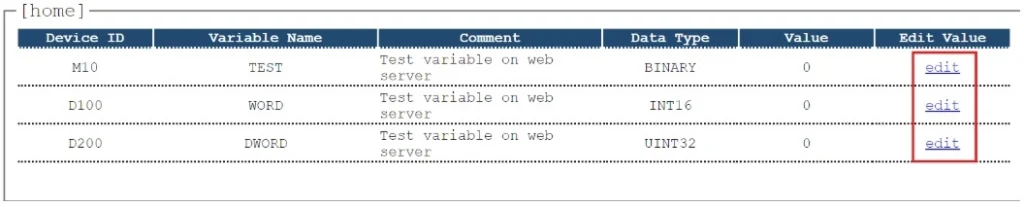
Step 3: Enter a value allowed by the data register’s data type. This example uses a DWORD data register. After clicking send, the Success! message will appear in the bottom left.
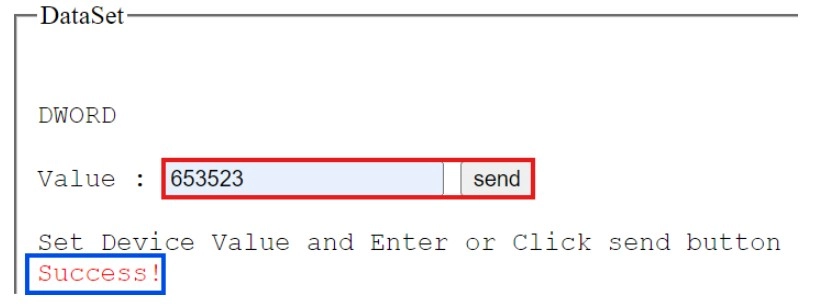
Step 4: The value of the data register on the web page will appear to be updated.

Step 5: In MapleLogic, the Memory Monitor will also display the updated changes made on the web server.

Adding Security to the Web Server
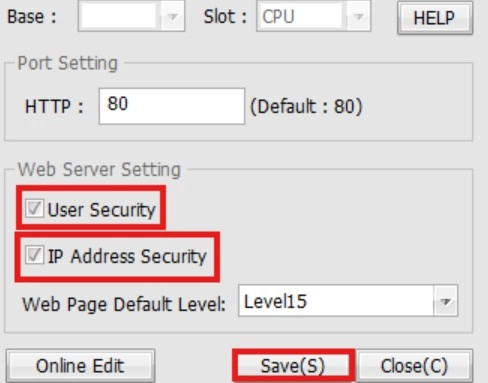
Step 1: To add security to the web server, navigate to the Web Server Project. Check either User Security, IP Address Security, or both. When complete, click Save.
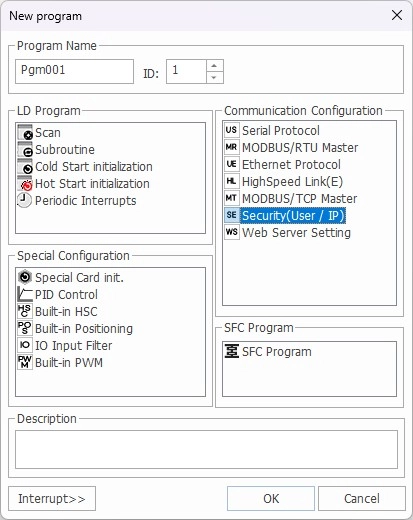
Step 2: In the Project Tree, right-click Program and click New Program. Create a new Security(User / IP) program. Click OK.
Enable User ID Security
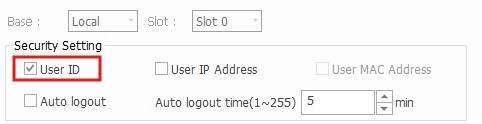
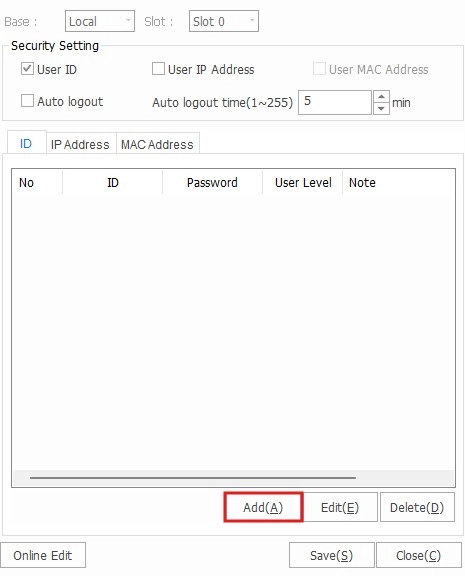
Step 1: In the newly created Security(User / IP) program, check the User ID box.
Step 2: Click Add to add a new user to the web server.
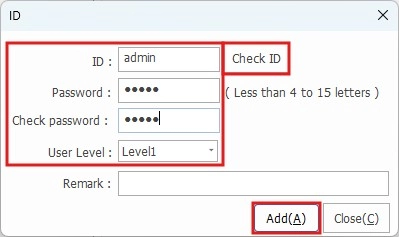
Step 3: Create a user ID, password, and user level. When finished, click Check ID to ensure the user ID is valid. If the success message says OK, click Add.
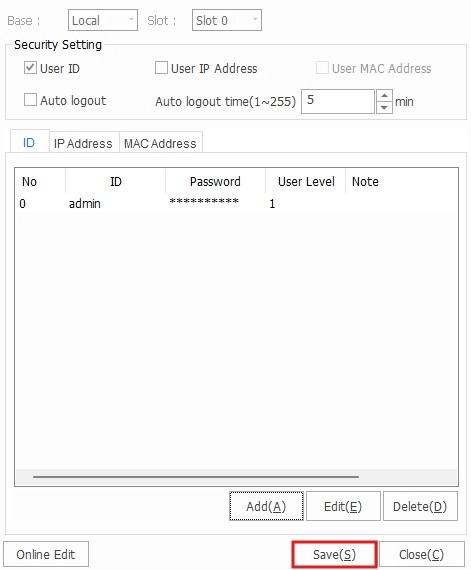
Step 4: All added users will appear in the white box below. Once complete, click Save.
Enable User IP Address Security
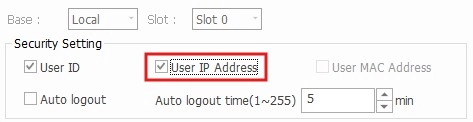
Step 1: To allow only specific IP addresses to view the web server, check the User IP Address box in the newly created Security(User / IP) program.
Step 2: Under the IP Address tab, select Add to add new IP addresses to the security program.
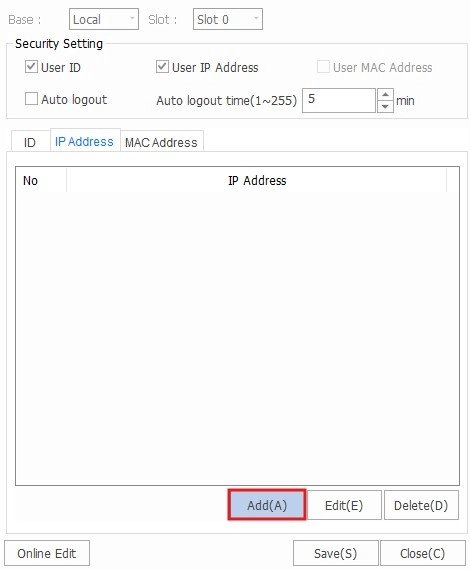
Step 3: Enter the IP address of the computer or device allowed to access the web server. The IP address must be on the same network as the web server/PLC-ES CPU. Click Add.
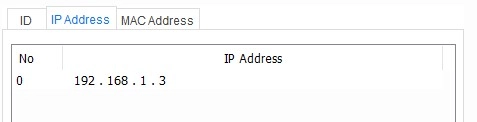
Step 4: All IP addresses added will appear in the white box below. Once complete, select Save.
Step 5: The following page will appear on the web server’s main page. If User IP Address is enabled, only IP addresses allowed to view the web server will see this page. Otherwise, the page will continuously load and never display on the web server.
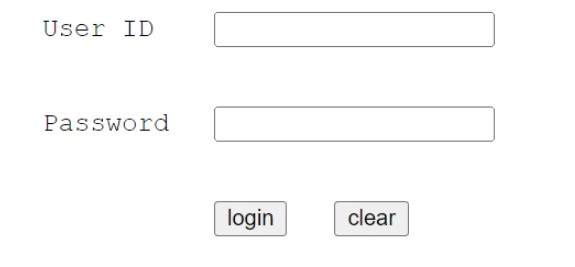
If User ID is enabled, the login page shown below will appear. The user viewing the page must know the user ID and password defined when enabling the User ID. Otherwise, they cannot log in to the main web page on the web server.