
Connection Setup
Notice: This section covers how to connect to the PLC. To download the MapleLogic project to the PLC, please refer to the Download Project section.

Step 1: To connect to the PLC, left-click Home and left-click Config.
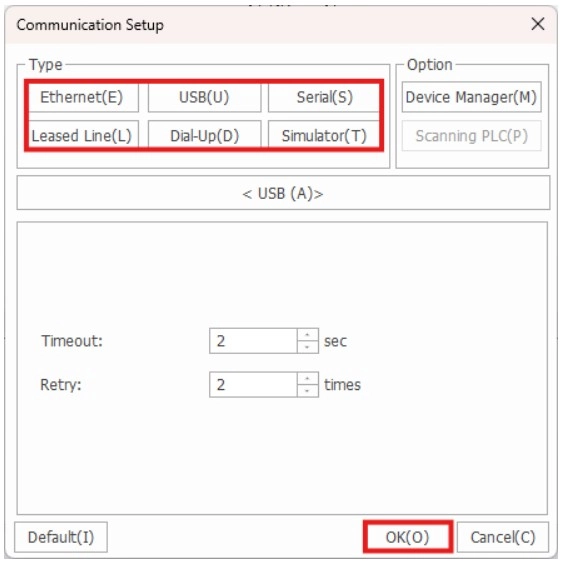
Step 2: Left-click the connection method and left-click OK.

Step 3: Left-click Home and left-click Connect.
Ethernet
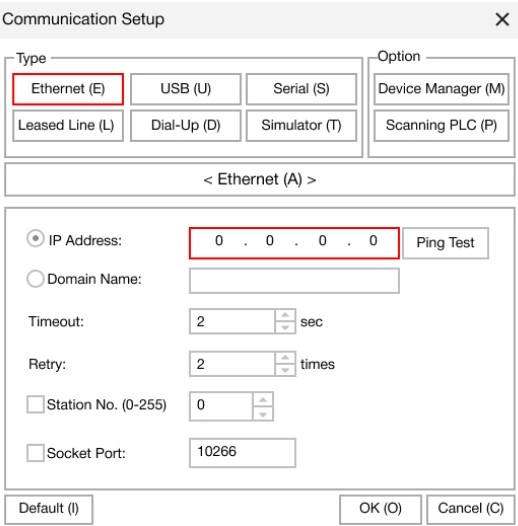
- For Ethernet connection:
- Enter the IP address of the PLC. Ping the IP address if necessary.
- To change the IP address of the PLC, refer to the PLC Parameter: Ethernet appendix section.
- Provide the station number if using Modbus
- Connect the PLC to the same network as the computer.
- PLCs listed on the right are PLCs connected and discoverable on the current network.
- Enter the IP address of the PLC. Ping the IP address if necessary.
USB
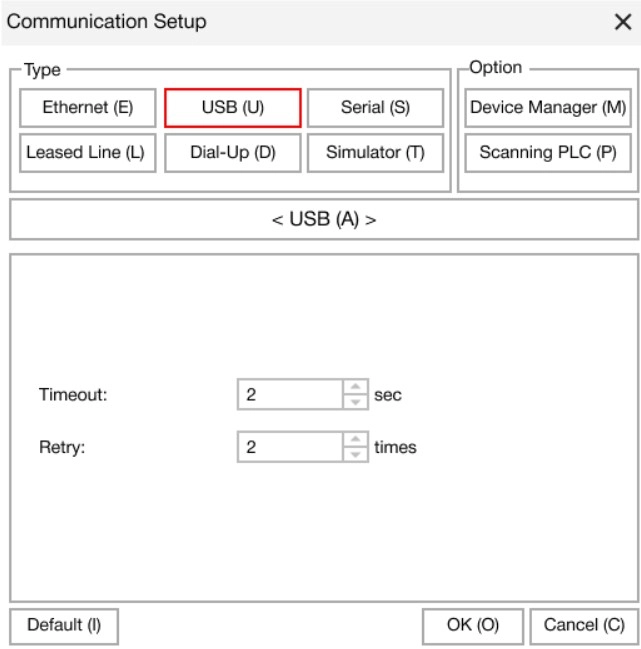
- For USB connection:
- Connect the USB mini-B cord to the PLC.
- For USB-C cables, refer to the serial connection setup setup.
- Select USB.
- The Timeout option will abandon connect attempts.
- The Retry option will retry connecting.
- Connect the USB mini-B cord to the PLC.
Serial
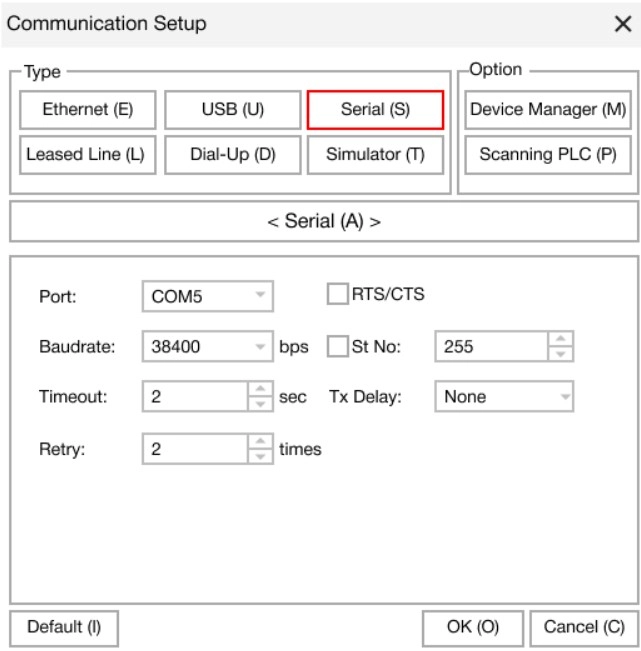
- For serial connection
- Connect to the serial port using RS-232(C) or RS-485 depending on the COM port.
- PLCs, such as the PLC-AES, using USB-C cables will connect using the Serial connection setup method.
- Select the baud rate (transmission rate).
- The Timeout option will abandon connect attempts.
- The Retry option will retry connecting.
- Provide the station number if using Modbus.
- Select RTS/CTS for request to send and clear to send flow control.
- Tx Delay is the transmission rate delay.
- Connect to the serial port using RS-232(C) or RS-485 depending on the COM port.
Leased Line
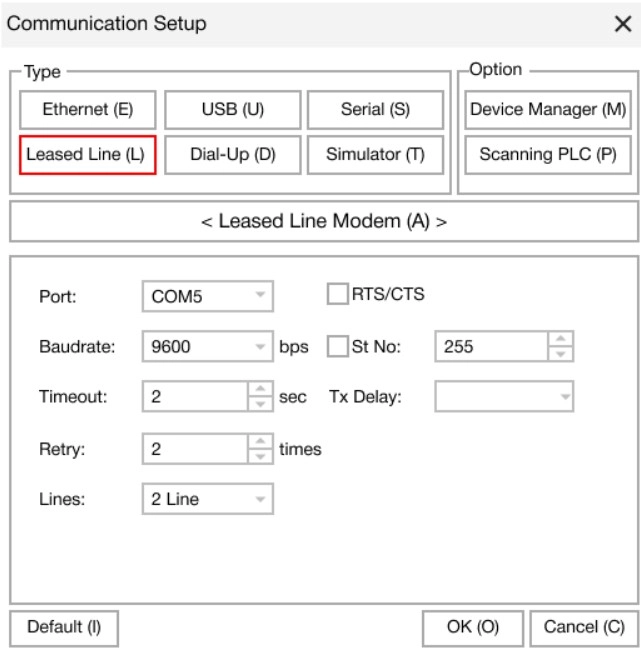
- For leased line connection:
- Connect to the serial COM3 port.
- Select the baud rate (transmission rate).
- The Timeout option will abandon connect attempts.
- The Retry option will retry connecting.
- Select 2 Line or 4 Line.
- Provide the station number if using Modbus.
- Select RTS/CTS for request to send and clear to send flow control.
- Tx Delay is the transmission rate delay.
Dial Up
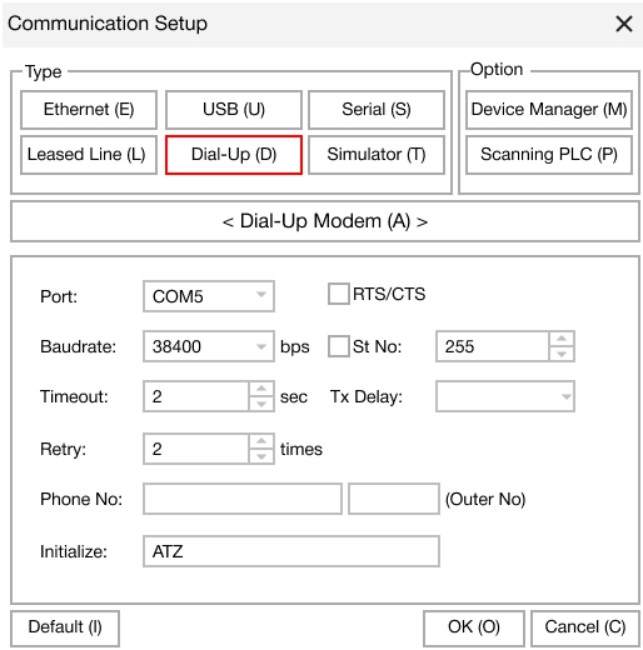
- For dial up connection:
- Connect to the serial COM3 port.
- Select the baud rate (transmission rate).
- The Timeout option will abandon connect attempts.
- The Retry option will retry connecting.
- Select 2 Line and 4 Line.
- Provide the station number if using Modbus.
- Select RTS/CTS for request to send and clear to send flow control.
- Tx Delay is the transmission rate delay.
- Provide the phone number.
Simulator
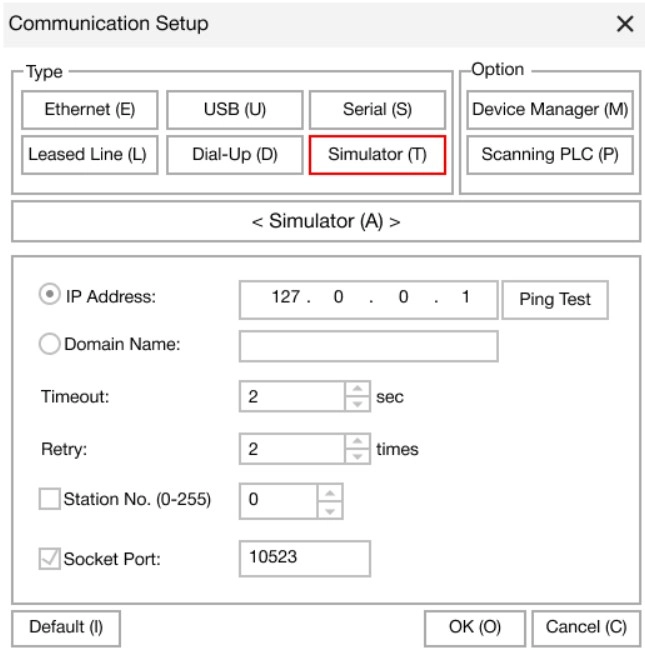
Step 1: Launch the MapleLogic simulator.
Step 2: The Timeout option will abandon connect attempts.
Step 3: The Retry option will retry connecting.
Step 4: The default IP for the MapleLogic simulator is 127.0.0.1.
For more information regarding the MapleLogic simulator, refer to the Simulator: Overview appendix section.