
Registering the Special Program
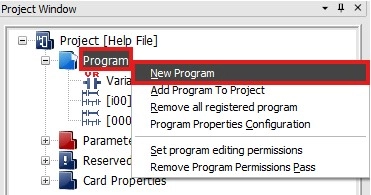
Step 1: In the Project Window, right-click Program and left-click New Program.
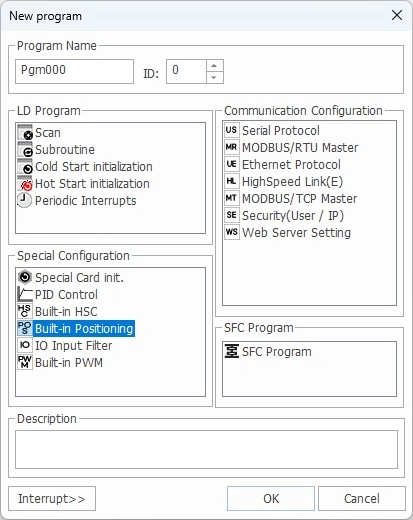
Step 2: In the New Program window, left-click Positioning for PLC-ES.
- Optionally, for organization, under Program Name, the name of the program and ID can be changed.
Step 3: Left-click OK.
Configuring the Positioning Program
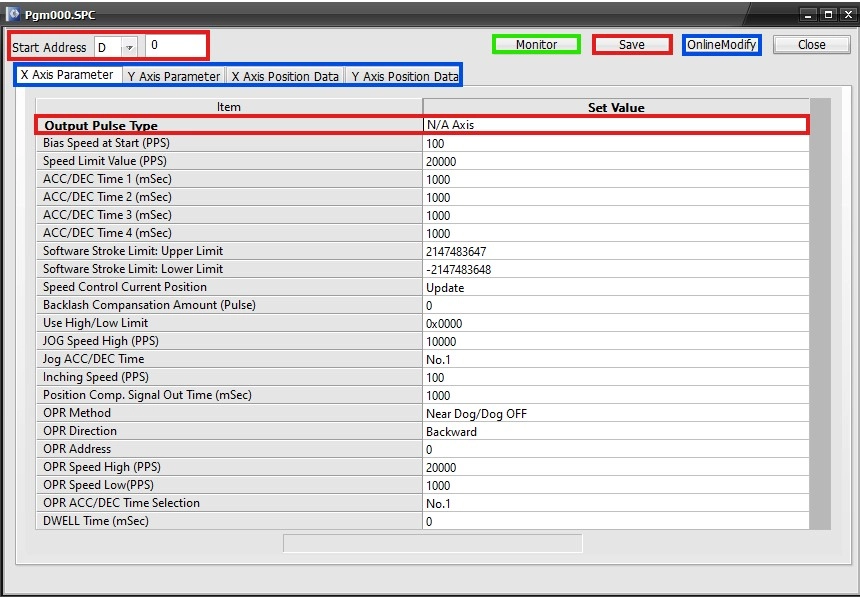
Step 4: Under Start Address, select the data register section to use.
- IMPORTANT: The positioning program can reserve 20 WORDs, 10 for the X-Axis, 10 for the Y-Axis, for operation data and 30 WORDs for positioning parameters.
- In this example, D0 ~ D19 are reserved for operation data and D0 ~ D30 are reserved for positioning parameters.
- Please refer to the positioning operation data or positioning parameters pages for more information.
- In this example, D0 ~ D19 are reserved for operation data and D0 ~ D30 are reserved for positioning parameters.
Step 5: To allow positioning to function, left-click the Output Pulse Type N/A Axis and select High Active or Low Active.
- This example uses High Active for the Output Pulse Type.
Step 6: Left-click X Axis Parameter or Y Axis Parameter to configure the X or Y axis positioning parameters.
Step 7: Left-click X Axis Position Data or Y Axis Position Data to configure the positioning data for the X or Y axis.
Step 8: Left-click Save or Online Modify (if the PLC-ES is connected) to save any changes made to the positioning program.
Step 9: To monitor the positioning operation, left-click Monitor.
Monitoring the Positioning Program
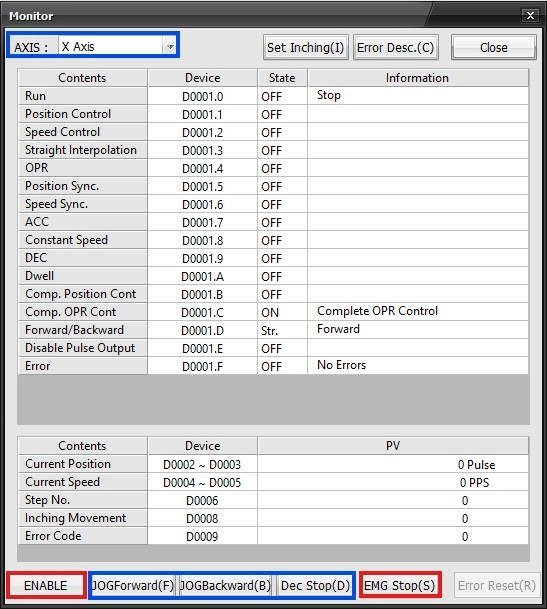
Step 10: To monitor the X or Y axis, select the axis in the top-left corner.
Step 11: To enable positioning for the X or Y axis, left-click ENABLE.
- The ENABLE box will change to DISABLE.
- This means the current axis is enabled for positioning.
Step 12: To JOG forward, backward, or stop positioning, left-click JOGForward(F), JOGBackward(B), or Dec Stop(D).
- Please refer to positioning parameters for more information.
Step 13: To initiate an emergency stop, left-click EMG Stop(S).
- This will create an error.
- The previous positioning operations are now unavailable.
- Left-click Error Reset(R) to reset the error and resume the positioning operation.
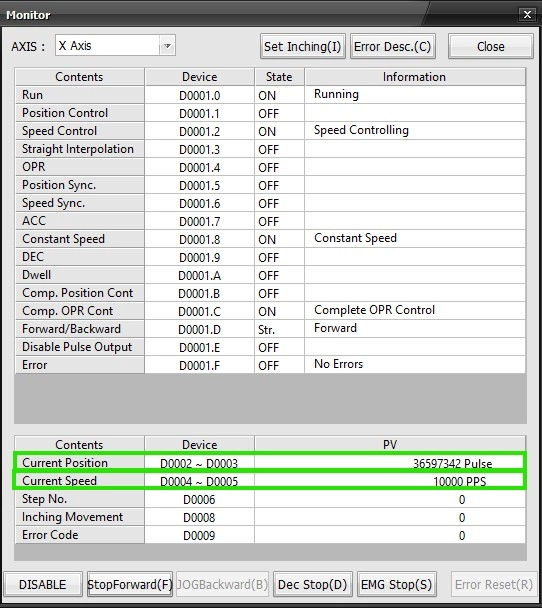
- The Current Position shows the current pulse output from the positioning operation.
- If the Current Speed is greater than 0 pulses per second, then the positioning operation is active.
Scan Program
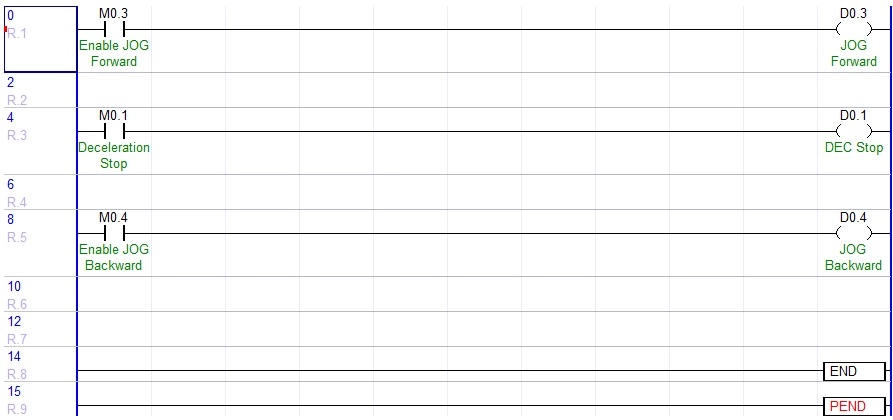
Step 14: Create a new scan program.
- This example uses the operation data bits 0, 3, and 4 for the X-axis (offset 0).

Step 15: Left-click the open contact, M0.3, and type shift + enter.
- This will turn the contact, M0.3, ON.
- The positioning operation will JOG forward.
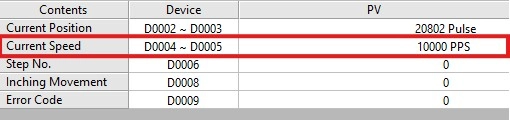
- The Current Speed is 10,000.
- The Current Position moves forward 10,000 pulses per second.

- The Forward/Backward status displays as Forward.

Step 16: Left-click the open contact, M0.1, and type shift + enter.
- This will turn the contact, M0.1, ON.
- The positioning operation will decelerate to a stop.
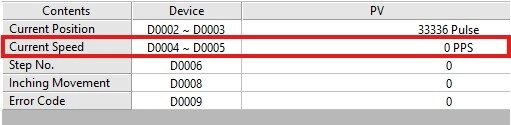
- The Current Speed is 0.
- The positioning operation has decelerated to a stop.
- The emergency stop option will halt to a stop immediately and produce an error.
- The positioning operation has decelerated to a stop.

Step 17: Left-click the open contact, M0.4, and type shift + enter.
- This will turn the contact, M0.4, ON.
- The positioning operation will JOG backward.
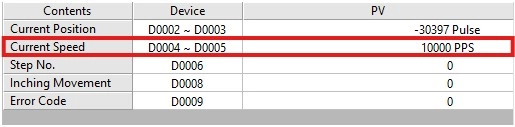
- The Current Speed is 10,000.
- The Current Position moves backwards 10,000 pulses per second.

- The Forward/Backward status displays as Backward.