
Web Studio OPC UA Client Configuration
Indusoft Web Studio
Web Studio can be run on any of Maple Systems Industrial Panel PCs. If you are new to Web Studio, you can download the development software here:
Web Studio will run as a full unlocked version for 40 hours before it must be licensed. You can find a number of videos and documents on the Indusoft website on how to set up OPC UA clients and servers:
This overview will walk you through creating a simple Web Studio test project to act as an OPC UA client and connect to the cMT project created in EasyBuilder Pro as described above.
Web Studio Project Set Up
Before setting up the Web Studio project, the EasyBuilder Pro project must be downloaded to a running cMT device. The cMT unit must be accessible on the same Local Area Network (LAN) as the machine running the Web Studio development tools to ensure that the tags created on the cMT device can be discovered by the Web Studio application.
How to set up the Web Studio project
Follow these steps to set up your project in Web Studio.
Instructions: How to set up the Web Studio project
Create new Web Studio Project
Create a new Web Studio project and click OK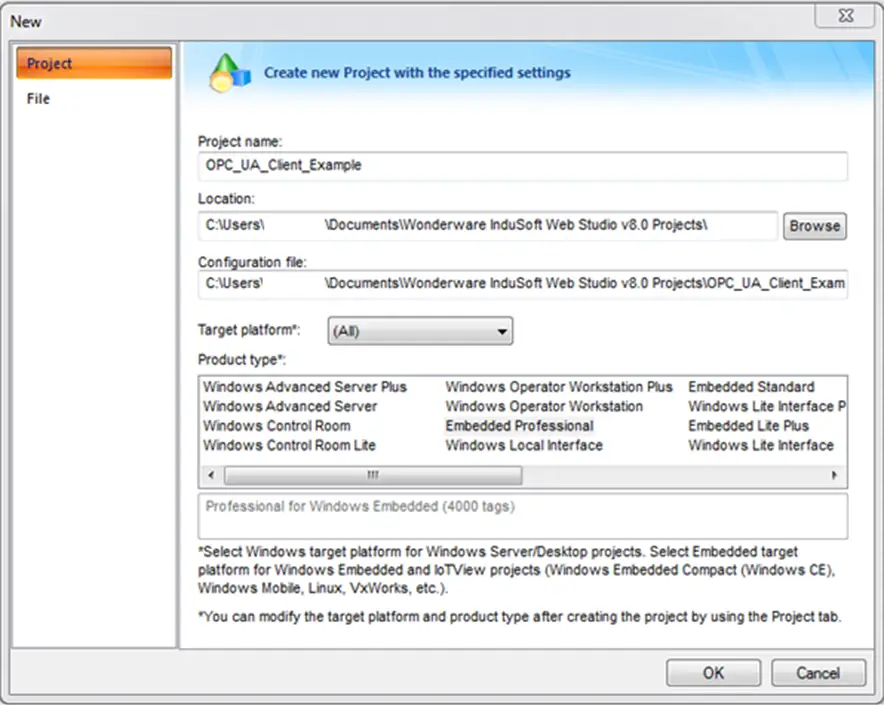
Configure OPC UA Client
To configure the OPC UA client click the communication tab at the bottom of the project explorer window:
Insert New Connection
Expand the OPC UA folder in the project tree and right click the Connections folder to insert a new connection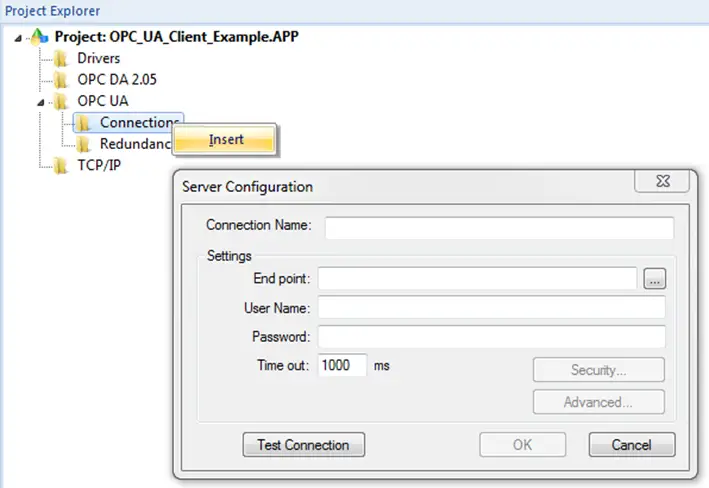
Enter Connection Details
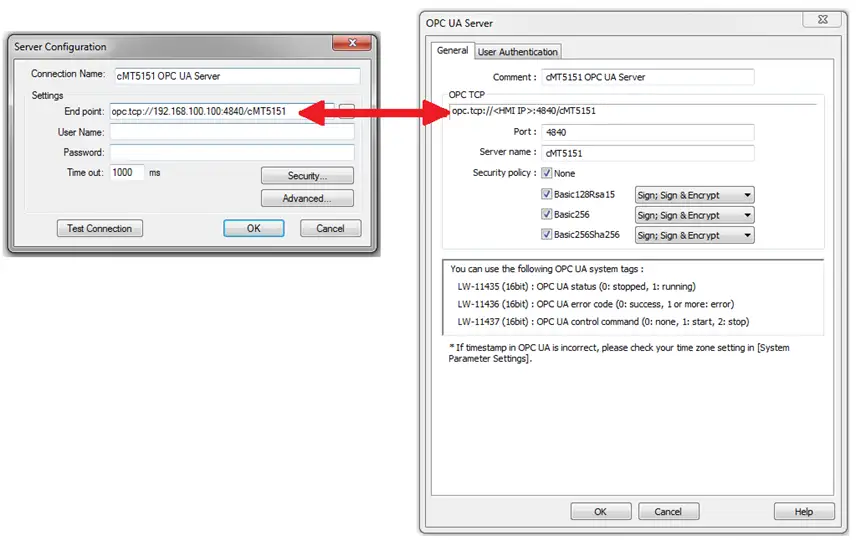
In the Server Configuration window enter the Connection Name and End point.
The End point should match the entry under OPC TCP in the OPC UA Server settings window in EasyBuilder Pro with the cMT device’s actual IP address replacing the field:
Configure anonymous access (optional)
If anonymous access is restricted, a User Name and Password must be entered that matches one of the accounts set up in the security tab of the System Parameter Settings window in EasyBuilder Pro (Edit > System Parameters > Security).
If anonymous access is unrestricted, make sure that write access is allowed in the OPC Server settings in EasyBuilder Pro.
Test the connection
Once the End point is entered, the Test Connection button can be used to check the connection to the cMT unit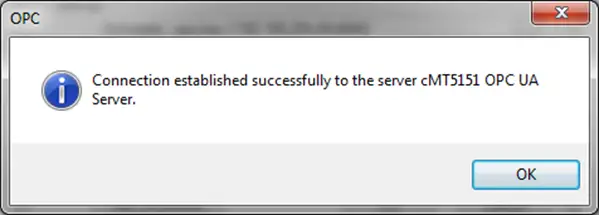
Exit the Server Configuration Window
Click OK to exit the Server Configuration window.Connection shown in Project Tree
The cMT connection should now be listed under the Connections folder in the project tree: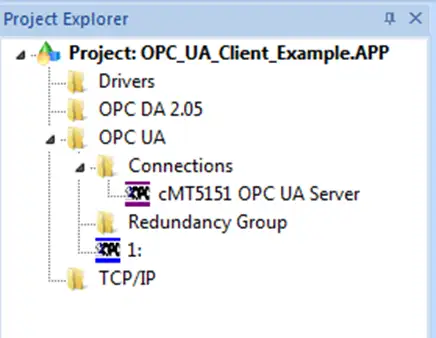
Insert OPC UA Client Driver
Right click the OPC UA folder in the project tree and select Insert from the context menu. This will open an OPC UA client driver sheet: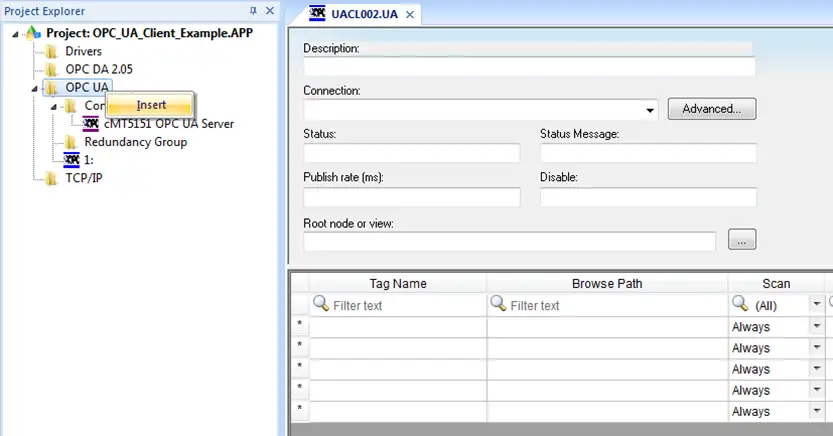
Select the cMT unit
Select the cMT entry from the Connection dropdown list.Enter a tag to use
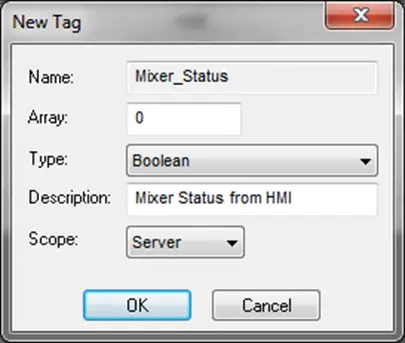
In the Tag Name column of the driver sheet, enter a tag name to use for the first tag. This is the name of the tag in the Web Studio project.If no tag with the entered name exists, a popup window will allow a new tag to be created. Make sure the tag’s data type matches the data type of the tag in EasyBuilder Pro.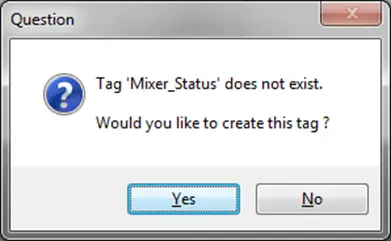
Find the Tag in the driver sheet
Double click the Browse Path column of the driver sheet. A browser window will appear. The tag will be located under the Objects > Local HMI > Tags folder. Any other groups created on the HMI will be available under the Objects folder, as well as tags containing information about the HMI: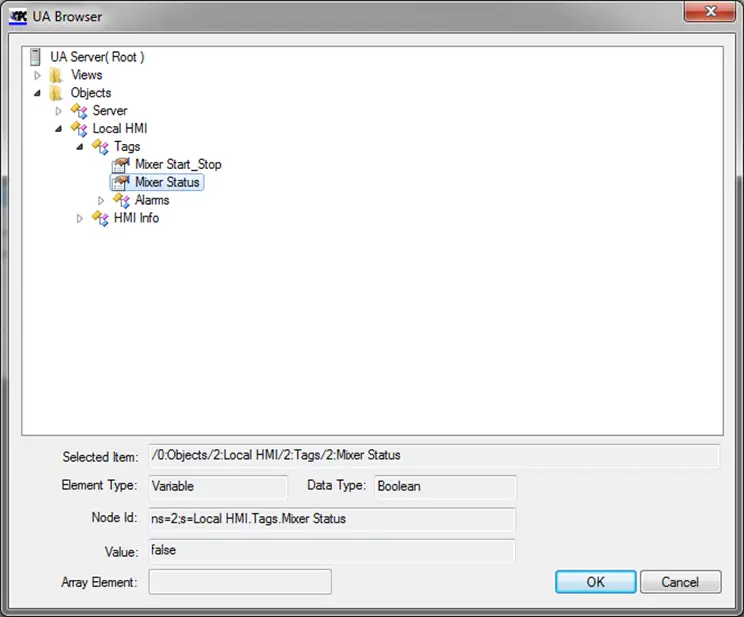
Select tag and click OK
Select the desired tag and click OK. The selected path will be added to the driver sheet.Repeat this process until all desired tags are added to the driver sheet.
Done!
Now these tags may be used in the Web Studio project. A simple test screen can be created and run on the OPC UA Client PC to connect to the cMT OPC UA Server.