
Selecting the Server in EZware Plus/EBPro
Note:
- Since the Global and China-based services use different VPN servers, it is important that you select the correct option. Activation Cards from Maple Systems require that you select the Global Server option.
With an activated HMI that has been registered to a Domain, each Domain User, if granted access, can log in remotely using the EasyAccess 2.0 application.
EasyAccess 2.0 PC Client Program
EasyAccess 2.0 is provided as a standalone program that can be installed on any PC. It can be used independently of the EZware Plus/EBPro software suite.
Download the EasyAccess 2.0 Installer – See the EasyAccess 2.0 Installation section.
Installing Adapters
During the first program run, the software will detect whether necessary network adapters are present. If not, they will be installed automatically. These network adapters allow your PC to connect to the Global EasyAccess 2.0 VPN servers.
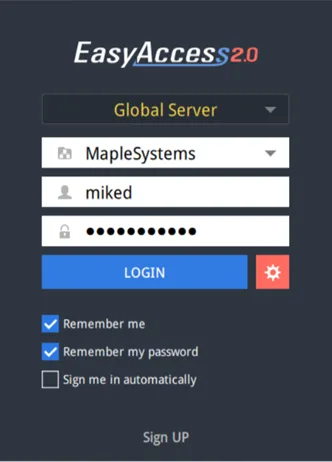
Log in
A Domain name, Username, and Password are required to log in to the EasyAccess 2.0 app
Main Screen
Once successfully logged in, the main screen will show all HMIs available for the User to access, along with their status (online/offline). HMIs that are online will have a Connect button and a Settings button. The PC version of the EasyAccess 2.0 app can be used to allow you to connect to up to 10 HMIs (vs. 3 for the mobile app). Once a User connects to an HMI, the HMI becomes “occupied”. While occupied, other Users will not be able to connect to it until the current connection has been terminated unless the multi- user connections option has been enabled in the domain settings.
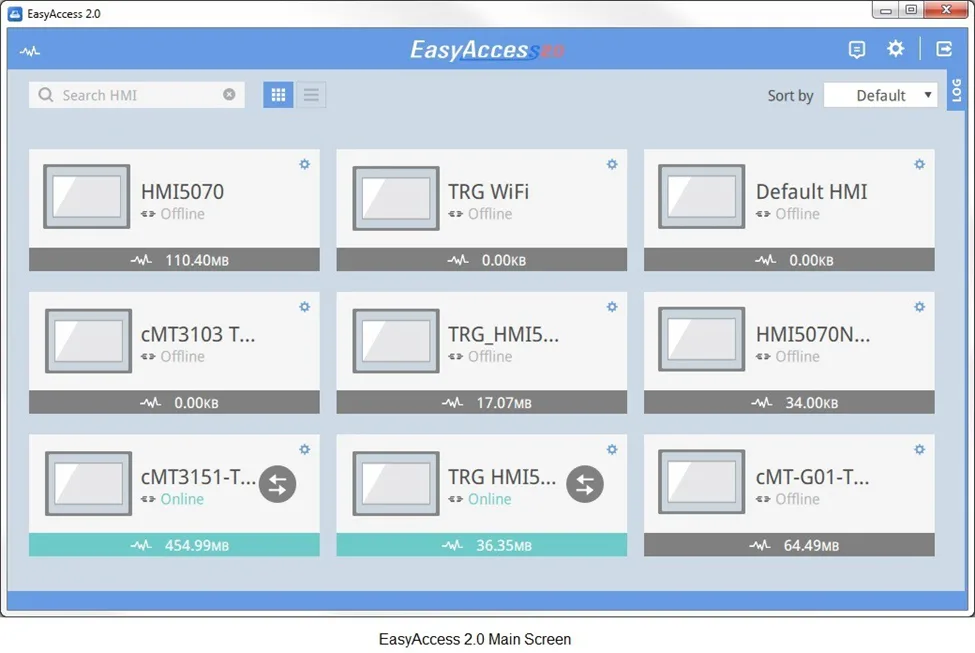
Functions of icons shown on the Main screen:

HMI search filter

Tile View / List View

Event Logs/Push Notifications

Settings

Log out current user

Display activity logs (All, VPN, Authentication, UAC, GUI)

Sort HMIs (Online, Recent, Events, Default)
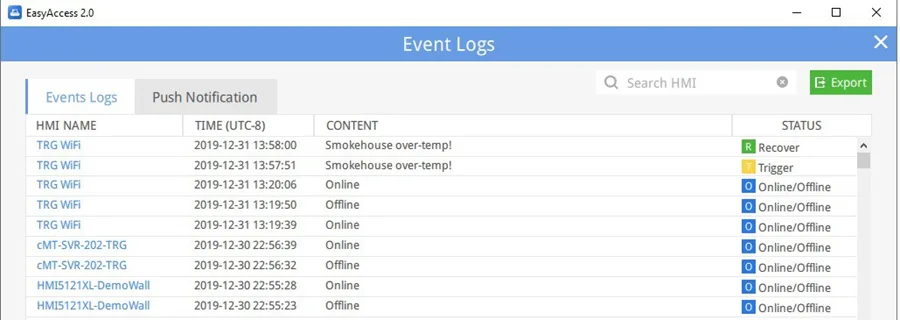
Event Logs/Push Notification
The Event Logs display a list of events (e.g., “HMI Online”, “HMI Offline”, etc.), as well as any alarms (configured with the Push Notifications feature) for HMIs assigned to the currently logged in user.
The Push Notification tab allows you to Enable/Disable push notifications for an HMI. Options include Trigger (when an event is triggered), Recover (when an event returns to normal), and Online/Offline.
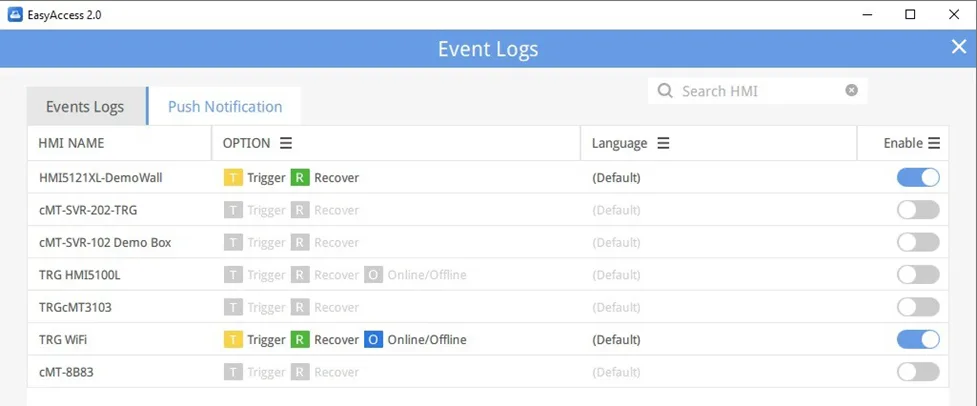
Events must be configured in the HMI project (in EBPro) before they can be shown in Push Notifications. Open the Event (Alarm) Log in EBPro, open the Settings for the individual Event/Alarm, and select Push Notification (EasyAccess 2.0) to enable this feature.
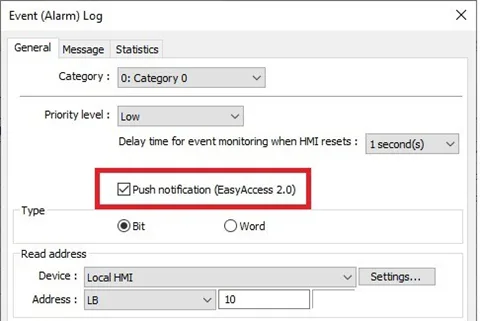
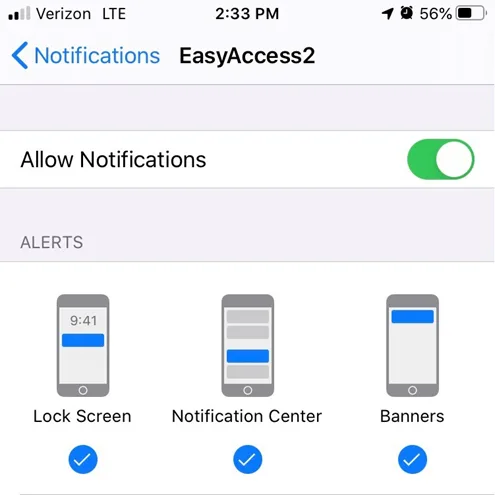
When an alarm is triggered with Push Notification enabled, a notification is sent to the mobile device associated with the User Account, if applicable. You must enable notifications for EasyAccess 2.0 on the mobile device to receive these.
Settings
| Tab | Description |
|---|---|
| General » Network traffic | Enable/Disable traffic display under the HMI |
| Information | Software version |
| Language | Select the language: English, French, Italian, Spanish, Russian, Simplified Chinese, Traditional Chinese, Korean, German, Japanese, and Polish |
| Path » Executable | Select executable (*.exe) path for VNC Viewer, HMI Viewer, and cMT Viewer, used to launch the viewers when connections are established. VNC executable path Location of the .exe executable of the VNC viewer. VNC viewer software must be installed separately. Some examples of popular, free VNC viewer programs include: Real VNC, TightVNC, and Veyon. (These are Third-Party Software Programs; Maple Systems does not provide support for any Third-Party Software.) HMI Viewer path Location of the GUI (gui_e30.exe). cMT Viewer path Location of the cMT Viewer, for use with the cMT Series. |
Note:
- Occasionally, you may need to update the GUI (gui_e30.exe) component used by EasyAccess 2.0. This executable is required to run HMI Viewer. A copy of GUI and cMT Viewer that are current (as of the date of the EasyAccess 2.0 release you downloaded) are included in the installation. An update of the GUI component may be required after the programming environment of the HMI has been updated; in this case, you can obtain the latest version of the GUI executable by updating your copy of EBPro on your PC.
HMI States and Access Setting
The HMI can be in any one of the following states at a time: Offline, Online, Connected, or Occupied.
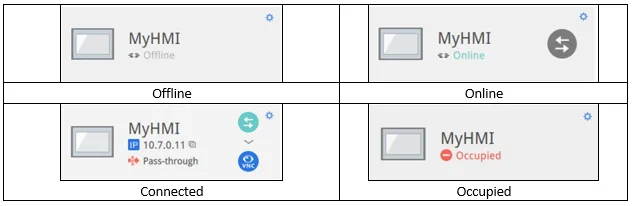
Note:
- The Domain Administrator can force someone to disconnect from an HMI should it become necessary. Log in to the EasyAccess 2.0 app using the ‘admin’ credentials. Click on the red circle in front of “Occupied” and click ‘confirm’ to forcefully disconnect the current user.
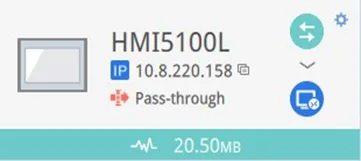
The functions of the icons as seen in EasyAccess 2.0:
HMI name (the HMI name is set in the System Settings on the HMI)

Virtual IP address assigned to the HMI. Click the button to the right of the IP Address to copy it

Connect to the HMI

Disconnect from the HMI

Access the HMI with VNC viewer (installed separately).1

Access the HMI with HMI Viewer2

Access cMT Series devices with cMT Viewer3

Enter access setting of the HMI, which allows selecting either VNC Viewer or HMI Viewer. To use VNC Viewer, set executable path in Settings page.
To use HMI Viewer, set executable path in Settings page.
Select how project data (project upload and history upload) should be handled.
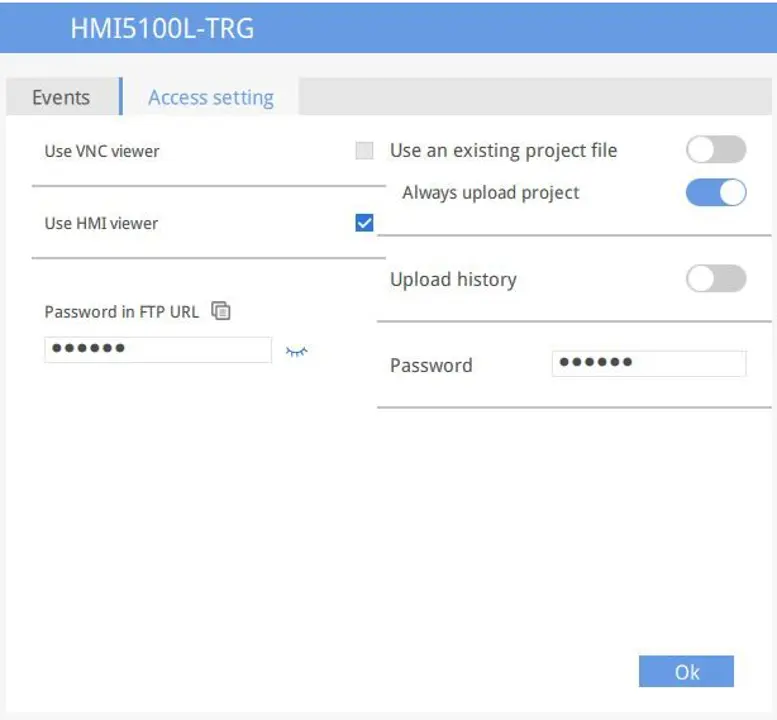
Password in FTP URL
Maple Systems HMIs have a built-in FTP server that allows access to files stored in the HMI inter connected USB drives or SD cards. Enter the FTP password in the password field (default: 11111 next to Password in FTP URL.
On your PC, open File Explorer and past the FTP URL into the URL field, then press Enter on the FTP server.
Notes:
- Must have a VNC viewer software program installed separately. Make sure the VNC Server function is enabled on the HMI.
- HMI Viewer can only be used with an Advanced HMI.
- cMT Viewer can only be used with a cMT Series device.
Display Data Usage
The HMI’s total data usage to date for the current month will be displayed at the bottom.
Connect to the HMI using EasyAccess 2.0 on a PC
Step-by-step instructions for establishing an EasyAccess 2.0 connection to an HMI.
Instructions: Connect to the HMI using EasyAccess 2.0 on a PC
Launch EasyAccess 2.0
Launch the EasyAccess 2.0 Application from your PC.
Log Into the Domain with your user credentials
Enter the Domain Name, Username, and Password, and then click LoginRemember: Logging into the domain as a USER, not Domain Admin.
Choose an HMI
Once logged in, the program will list HMIs assigned to each user along with the HMI’s current status.Connect to the HMI
Click on the Connect button to establish a connection to an HMI that is “online”. Once connected, the virtual IP address will be displayed. It is now possible to connect directly to the HMI via such networking protocols as VNC, HMI Viewer, or FTP.You can also download or upload a project from an HMI remotely given its Virtual IP address.Disconnect when Complete
When finished, click on the Disconnect button to terminate the session.