
Set up CODESYS and Device
Note that if you are using the cMT-CTRL01, please refer to the cMT-CTRL01 User Manual for instructions on getting started with CODESYS specific to that model.
Create a CODESYS account and download CODESYS v3.5.10.
- If in the USA, Canada, or Mexico, use this link: ttps://us.store.codesys.com/customer/account/login/. Otherwise, use https://store.codesys.com/.
Download the Weintek package file and install the package in CODESYS.
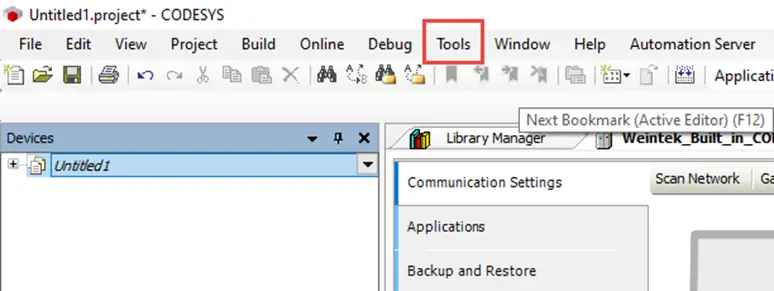
- Select Tools -> Package Manager:
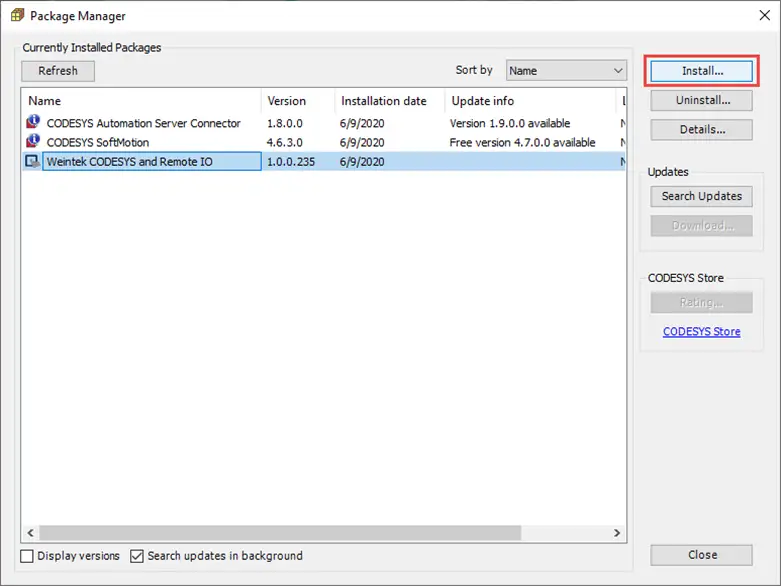
- Click Install and select the Weintek package file:
Activate CODESYS on your cMT device by connecting it to the internet, opening the HMI system settings menu, unlocking it, select the Network tab and ensure Obtain an IP Address Automatically is enabled. Then open the CODESYS tab and enter the CODESYS Activation Code and click Active.
Creating a CODESYS Project
Create a new project in CODESYS using the Weintek Built-in CODESYS device.
Instructions: Creating a CODESYS Project
Create New Standard Project
Select File -> New Project, then select Standard Project from the menu: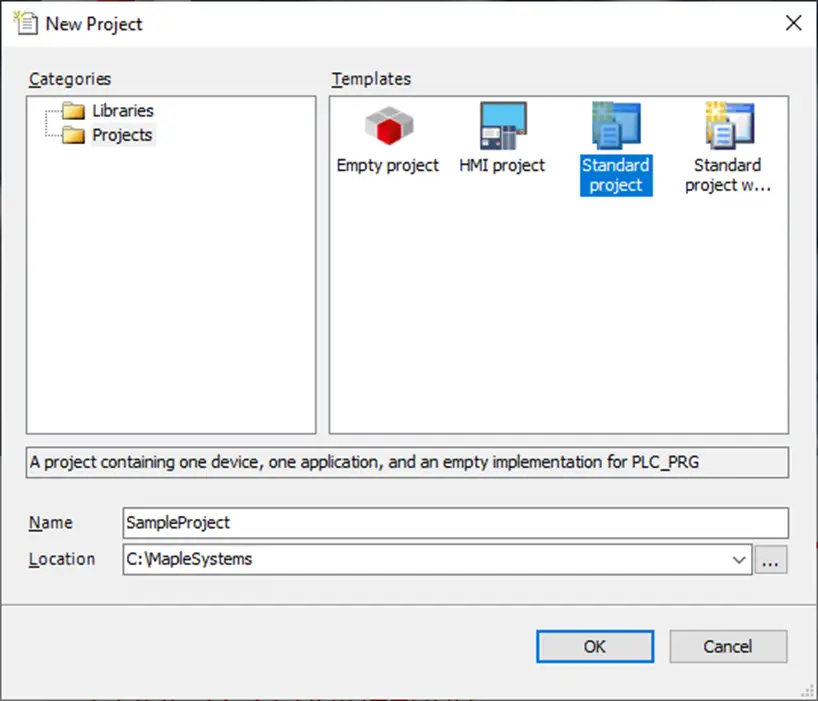
Select the Weintek Built-in CODESYS Device
In the Standard Project menu, select the Weintek Built-in CODESYS (Weintek Labs., Inc.) device: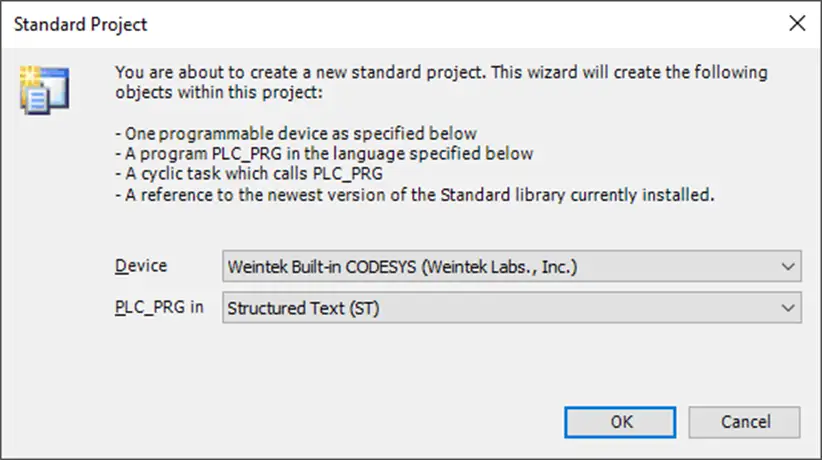
Success
A new Device is created, and should be available in the Devices pane.
Scan for the newly Activated HMI and connect to it
Once the new project has been created you need to attach an HMI to it; here’s how:
Instructions: Scan for the newly Activated HMI and connect to it
Double-click “Device”
Double click on the Device in the Devices paneThis is the Weintek Built-in CODESYS device you created above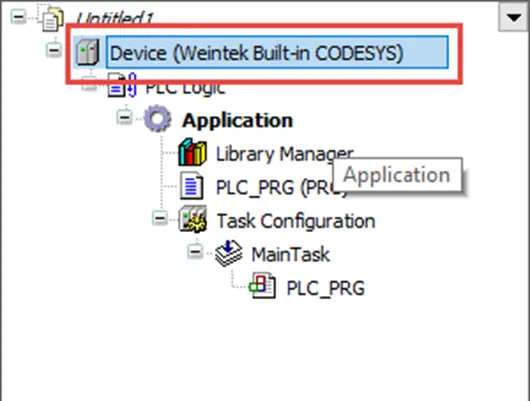
Select the cMT device
Click Scan Network and select the cMT-X device.Note that the last two IP address octets are converted to hex and used the identifier in square brackets seen here as cMT-1E10 [000E]. This makes the IP address of this cMT device xxx.xxx.0.14: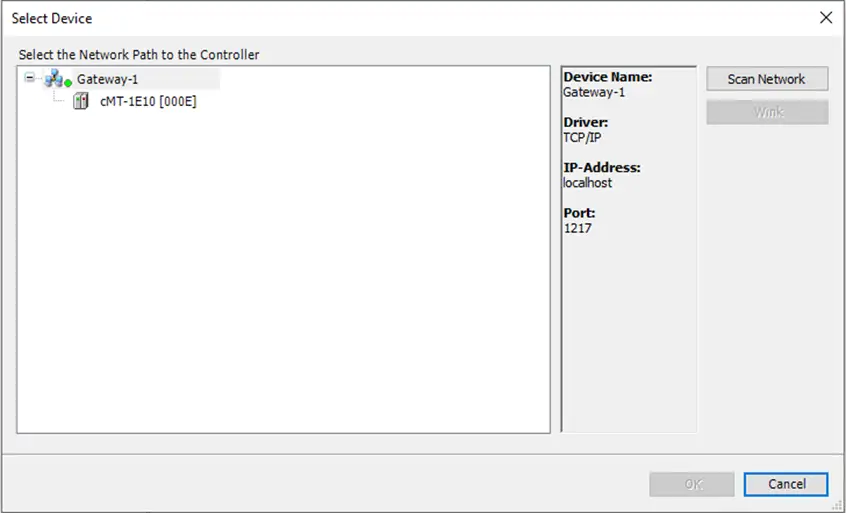
Connection Made
Now you should see the connection from PC to cMT-X in the Scan Network tab: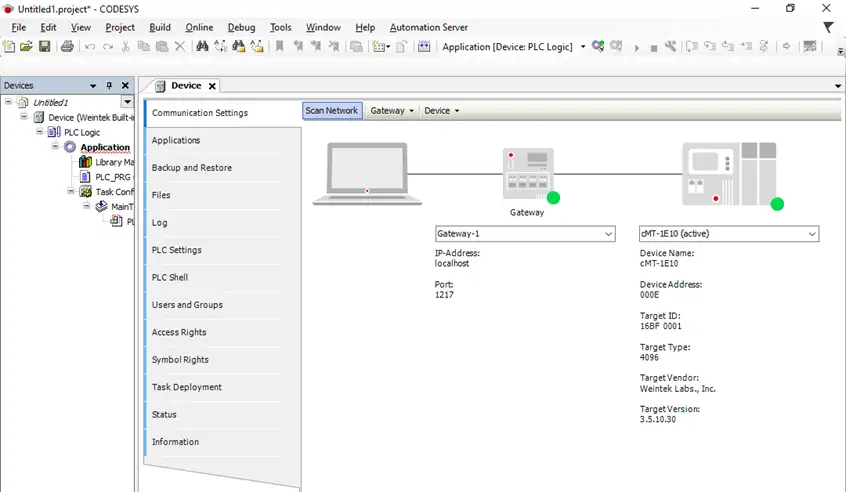
Optional: Search by cMT IP address
It is also possible to simply type the IP address of the cMT-X device into the Scan Network tab device section: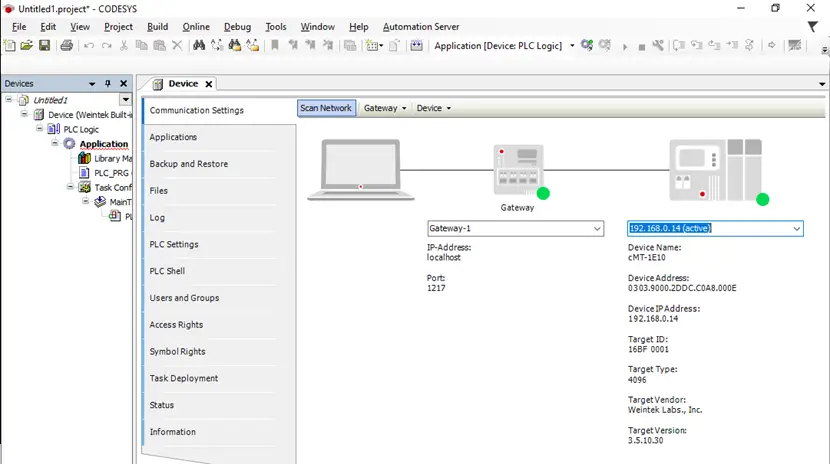
Connect CODESYS to EasyBuilder Pro
Create three tags in the CODESYS project.
These instructions will demonstrate how to add tags in the CODESYS project.
Instructions: Create three tags in the CODESYS project.
Double click PLC_PRG(PRG)
Double click on PLC_PRG(PRG) in the Devices panePLC_PRG is the name of the PLC Program that you are creating in the CODESYS software.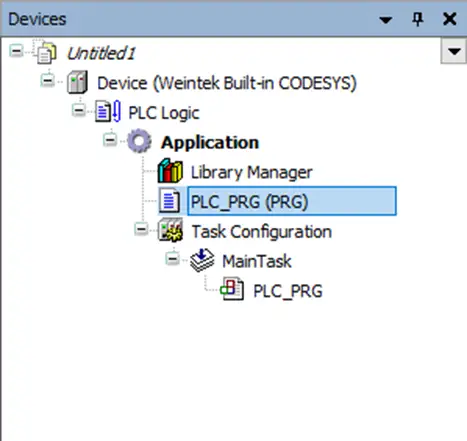
Create the three variables.
Add ST code to create three tags.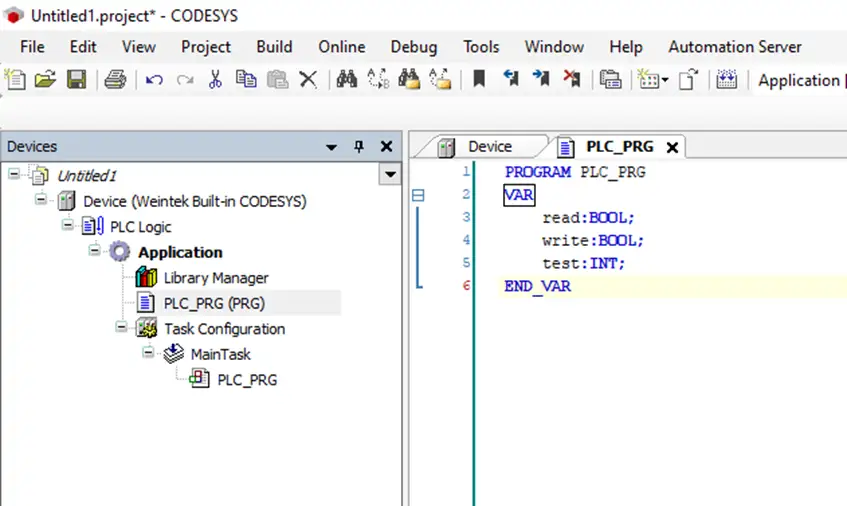
Add Symbol Config
Right click on Application in the Devices pane and select Add Object -> Symbol Configuration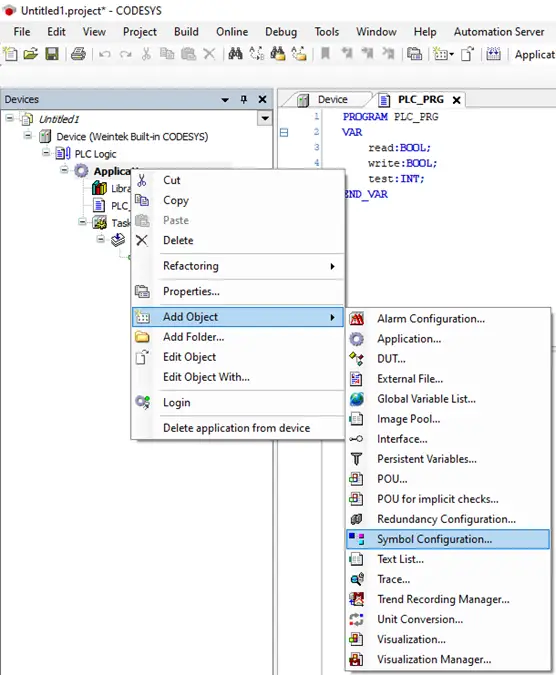
Use Defaults
Use the default values in the Add Symbol Configuration dialog.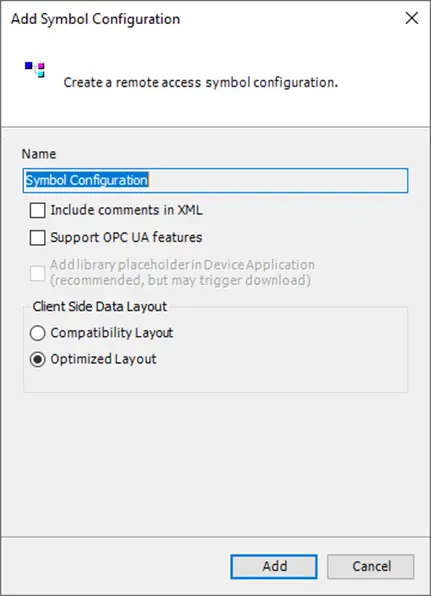
Project Build Complete.
Note, when done, the project automatically buildsBuild Errors may occur:
If there are build errors, they display in the bottom left corner.Clicking on this will open the errors and warnings.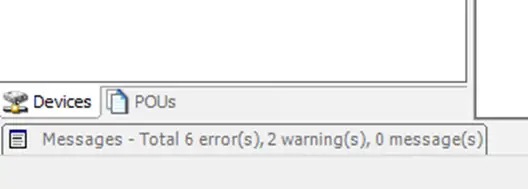
Open an error
If there are any errors, and this is the first CODESYS project created, build errors are likely due to missing libraries. Open the errors and double click one to open the Library Manager: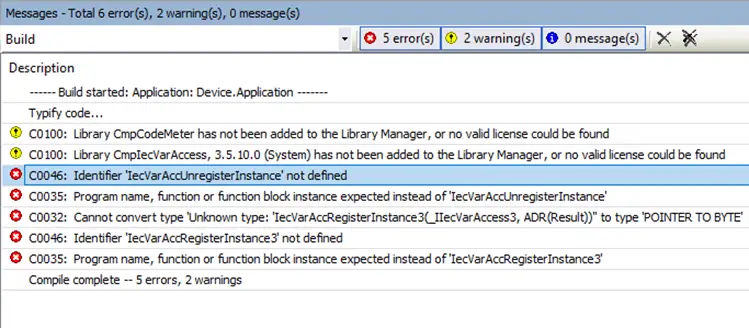
Download Missing Libraries
To fix this, simply click the Download Missing Libraries button, then with all libraries selected, click Download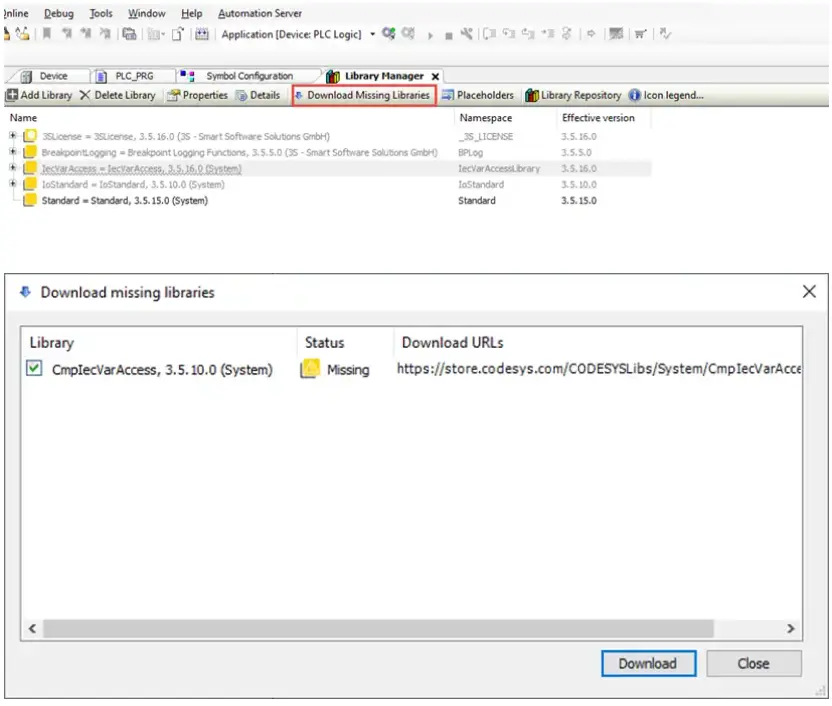
Export the CODESYS tags to an XML file
Now that the tags are created successfully, here’s how to export them:
Instructions: Export the CODESYS tags to an XML file
Select the tags by selecting the program
With the new Symbol Configuration selected in the Devices pane, check the PLC_PRG box to add all the new tags to export: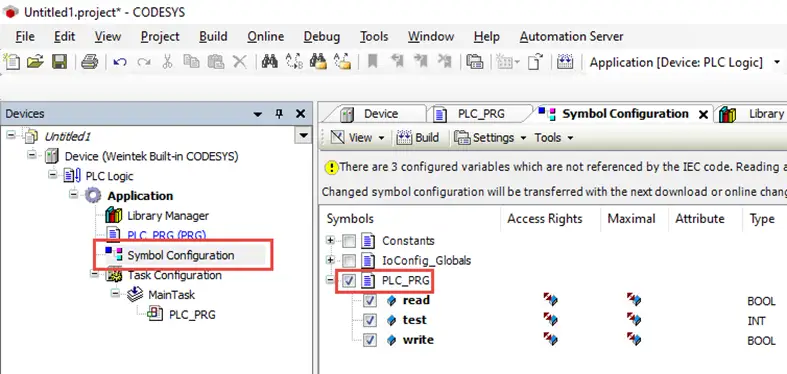
Create the XML tag file
Select Build -> Generate Code to generate the XML file, which can be found in the project directory.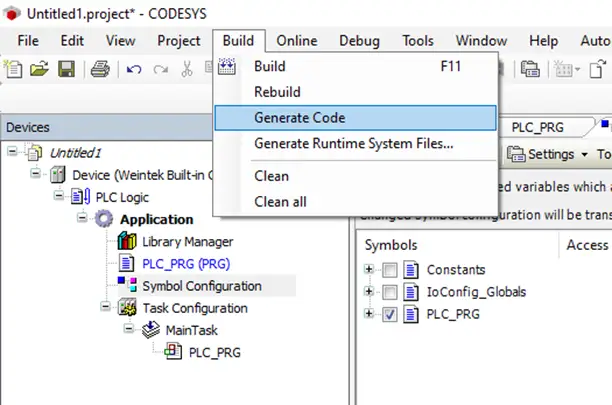
Add a Weintek Built-in CODESYS device to your EasyBuilder Pro project and import the XML file of CODESYS tags
Instructions: Add a Weintek Built-in CODESYS device to your EasyBuilder Pro project and import the XML file of CODESYS tags
Add a CODESYS device in EBPro
Add a Weintek Built-in CODESYS device to your project. Device tab, System Parameter settings menu.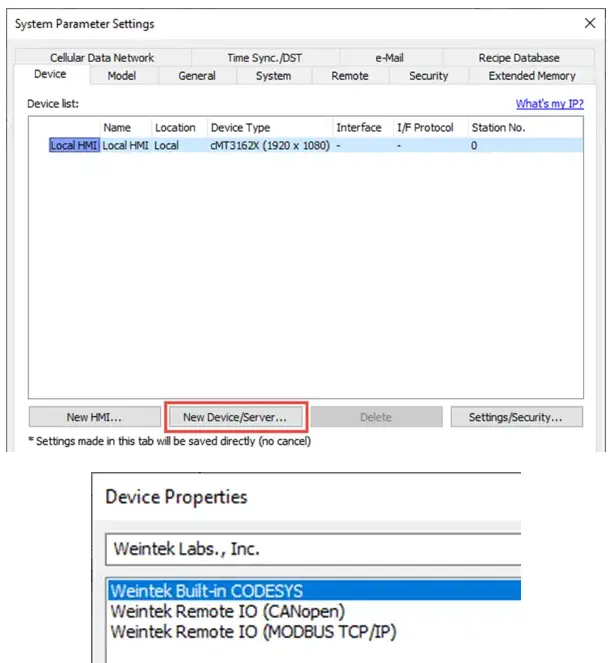
Click ‘Import tags’
Click the Import Tags button and navigate to the XML tag export file created for the CODESYS project previously. It will be in the CODESYS project directory.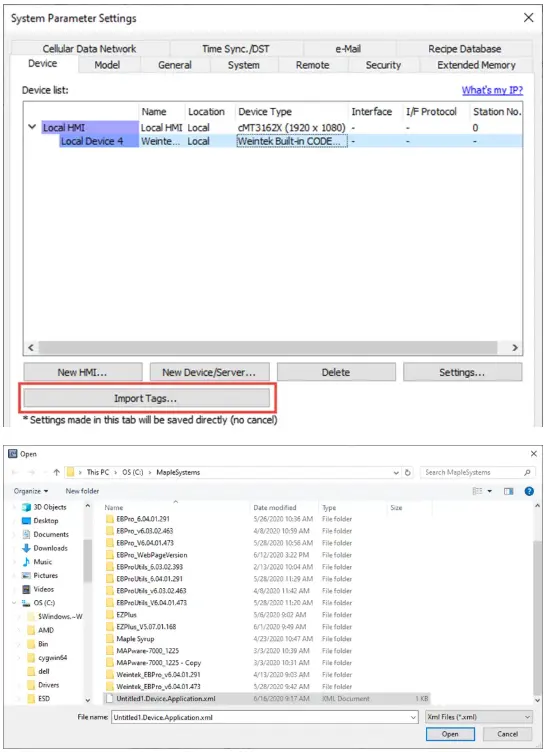
Success
You can now access all tags from your CODESYS project in EBPro.