

Overview & Concepts
WebView in EasyBuilder Pro allows an HMI screen to be accessed through a standard web browser without requiring dedicated client software. When WebView is enabled on the HMI, the device hosts a web interface that mirrors the HMI display so that operators or engineers can monitor the system remotely from a computer or mobile device.
WebView works by running a web service on the HMI. A remote device connects to the HMI’s IP address using a supported web browser, and the HMI delivers a browser-based interface that displays the project screens. This allows the HMI to be viewed and, depending on configuration, interacted with over the network.
Key characteristics of WebView implementation include:
- The HMI hosts a web server that serves the HMI interface to remote browsers
- Users connect by entering the HMI IP address in a browser
- The browser displays a web-based version of the HMI screens
Typical uses include:
- Monitoring HMI screens from a PC without installing additional software
- Allowing supervisors to view system status from network-connected devices
- Providing remote access to HMI data through a standard web browser
Because WebView relies on standard web browser technology, it provides a convenient way to access HMI information from many different devices across the network.
Implementation
Implementation of WebView is easy – there’s nothing to do on the EasyBuilder Pro side of things. Simply point a web browser to the HMI’s IP address on your local network and log in.
Now you have access to all the functions, data and project screens from your HMI application. You can access system settings, navigate to any window and fully control your HMI from anywhere. It works just like VNC but without requiring you to download or install any additional software.
WebView simply needs to be enabled when you connect to your HMI for the first time.
To connect to WebView all you need is a device that has a web browser and has access to the HMI’s IP address. To find the HMI’s IP address you can use the settings menu on the device, accessed by touching the icon in the upper left corner of the HMI.
Connecting to and Enabling WebView for the first time
Follow these steps to connect and enable WebView.
Instructions: Connecting to and Enabling WebView for the first time
Open a Browser window
Open your browser or open a new tab in your browser.Input the HMI IP Address
Enter the HMI’s IP address in the browser’s address bar and press Enter.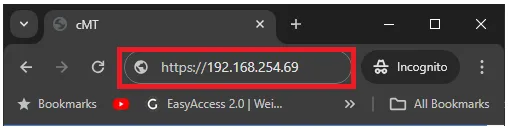
Enter Password
The HMI’s EasyWeb 2.0 system dashboard login page should appear in your browser screen. You will see a prompt for a password:By default the password is “111111”. We highly recommend updating this password once you are logged in. The password can be changed in the Account >> System Password section of the EasyWeb 2.0 system dashboard.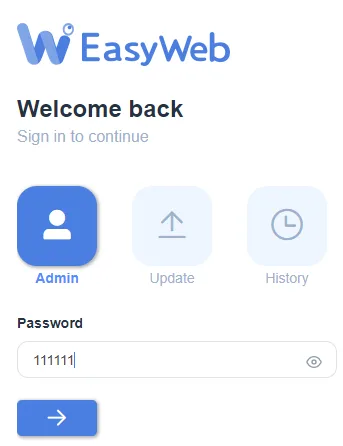
Dashboard is shown after logging in
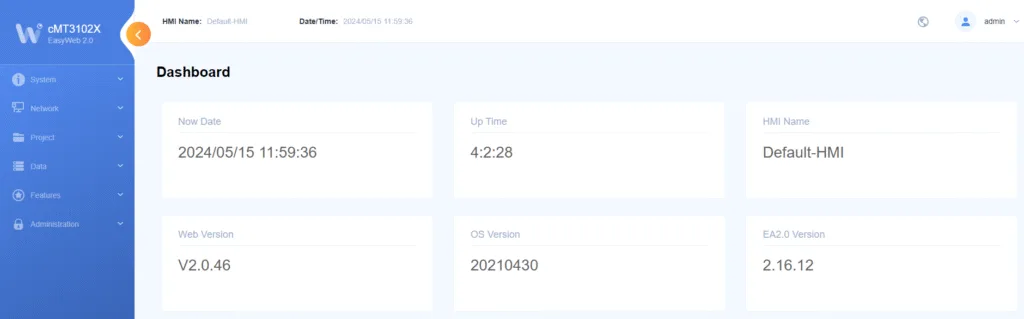
After logging in the EasyWeb 2.0 system dashboard will be displayed.When first logging in to WebView you may see a message warning that the website’s certificate could not be verified. This is because the connection to the HMI’s built-in webserver is encrypted using the https protocol and a self-signed public key certificate. This does not mean that the connection is not encrypted or secure.
To prevent this warning from displaying in the future, expand the navigation pane by clicking on the orange arrow icon, then select Administration >> Security. In the Security menu, click the toggle switch to enable HTTPS.
Click “WebView Setting”
Click on Features then WebView Setting.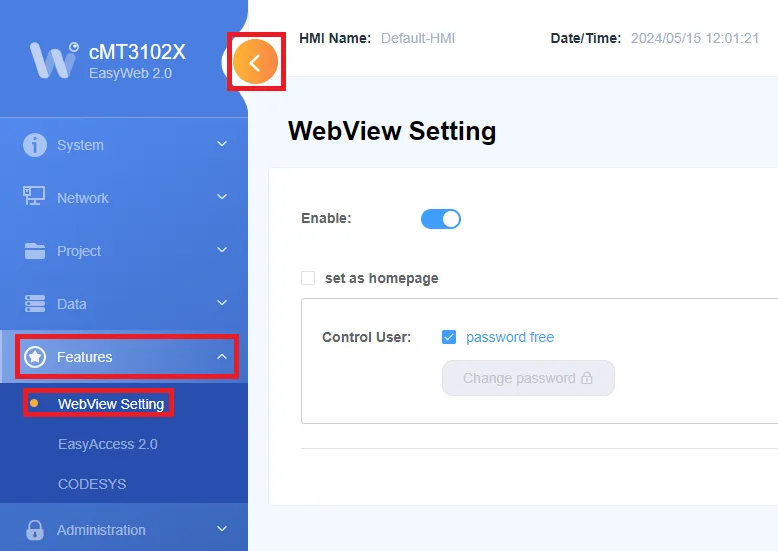
Enable WebView
Click the Enable toggle switch.Click WebView button
Click on the WebView button in the upper left of the screen.
Wait for WebView to load
The loading screen will be displayed.Success
After a short time, the active HMI screen will appear in the browser. The browser now has complete access to the project as if you were standing in front of the HMI.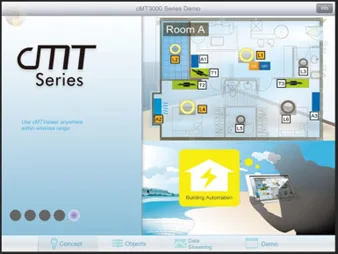
Exiting WebView
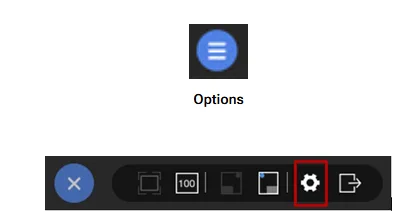
To get back to the EasyWeb 2.0 system dashboard click on the options icon in the top right corner of the WebView screen, and click on the gear icon.
Connecting Directly to the Project (Automatically Loading WebView)
If you want to have WebView load automatically instead of going through the EasyWeb 2.0 system dashboard first, simply check the Set as Homepage checkbox on the Features >> WebView Setting section of the EasyWeb 2.0 system dashboard.

Mobile Device Navigation
In cases where the HMI screen does not fit in the browser window a navigation tool is available in the bottom right (by default) of the browser window. This allows selecting a sub-section of the screen that is visible on the device. To move the viewport, simply drag the square around to select the section of the screen to view.
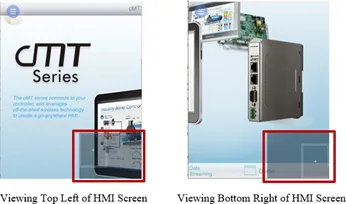
Other WebView screen icons and their actions are listed below.

Zoom to fit the HMI screen in the browser window.

Reset the Zoom to 100%, matching the resolution of the HMI.

Position the navigation tool in the bottom left of the window.

Position the navigation tool in the bottom right of the window.

Access the EasyWeb 2.0 system dashboard.

Log out of the HMI.
Passwords and Security
The password set in the EasyWeb 2.0 system dashboard in the WebView Setting screen is used to log into the WebView screen (assuming the password free checkbox is not checked). This is the password a user would have to enter if they went directly to the WebView interface, by passing the EasyWeb 2.0 system dashboard.
The security settings configured in the EasyBuilder Pro project still apply when navigating the project using WebView. If a user is logged in on the HMI, that user will also be logged in when another user connects via WebView and will have the same security classes as the local user.