Overview & Concepts
The Label Tag Library in EasyBuilder Pro allows developers to define reusable text labels that can be referenced throughout an HMI project. Instead of entering the same text repeatedly in multiple objects, labels can be stored in a centralized library and then applied wherever they are needed. This helps maintain consistency and simplifies updates when interface text needs to change.
Each label in the library is assigned a name and associated text value. Objects within the HMI project can reference the label tag rather than containing fixed text directly. If the label text is updated in the library, all objects referencing that label automatically reflect the change.
Label tags are commonly used for:
- Standard interface text such as button labels or status messages
- Repeated terminology used across multiple windows
- Simplifying updates when terminology or wording changes
By centralizing commonly used text in the Label Tag Library, developers can improve consistency across the HMI interface and reduce the effort required to maintain or modify project text.
EasyBuilder Pro also supports displaying interface text in multiple languages. When used together with the Label Tag Library, developers can define translated text for each supported language within a single label tag.
Implementation
The Label Tag Library feature enables a multi-language environment. When multiple languages are required, users can create the Label Tag Library and then select a suitable label in the project. The project will display the corresponding language in runtime based on the settings.
EasyBuilder Pro supports up to 24 different languages simultaneously. This page will explain how to create and use the Label Tag Library.
Label Tag Library Manager
Click [Project] » [Label] on the toolbar and the [Label Tag Library] dialog box appears.
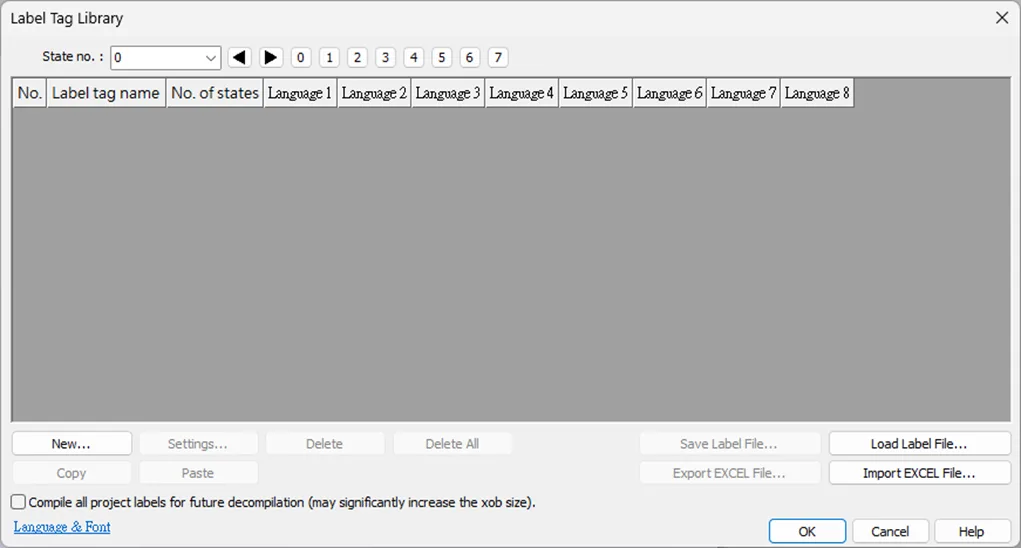
| Setting | Description |
|---|---|
| State no. | Indicates the current state. Each Label has a maximum of 256 states (state no. 0 ~ 255). The state no. is determined by [Language no.]. If less than 3 languages are used, the maximum state no. is 256. If more than 4 languages are used, divide 768 by the language number to get the maximum state no.. For example, the number of languages is 24, then there are only 768/24 = 32 states. |
| New | Adds a new Label. |
| Settings | Sets the selected Label. |
| Save Label File | Saves all Labels in .lbl format. |
| Load Label File | Loads the existing .lbl file to the Label Library. |
| Export EXCEL File | Saves all Labels in .csv, .xls, or .xlsx format. |
| Import EXCEL file | Loads the existing .csv, .xls, or .xlsx file to the Label Library. |
| Compile all project labels for future decompilation | With this option selected, all labels will be included in the compiled .xob file during the compilation process, allowing for the complete restoration of the Label Tag Library in the event of future decompilation. Note that this may significantly increase the size of the .xob file. |
Note:
- Unicode is not supported when importing and exporting an Excel file
Create the Label Tag Library
Follow the steps below to create the Label Tag Library
Instructions: Create the Label Tag Library
Click New Label
From the Library menu, click [Label]. The Label Tag Library dialog box appears. Click [New] to specify the name of the Label and the number of states to be displayed by this Label.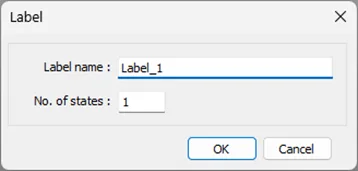
Click OK
Click [OK] and a new label is added to the Label Tag Library.Enter the Label Settings
Select the label and click [Settings] to edit its content.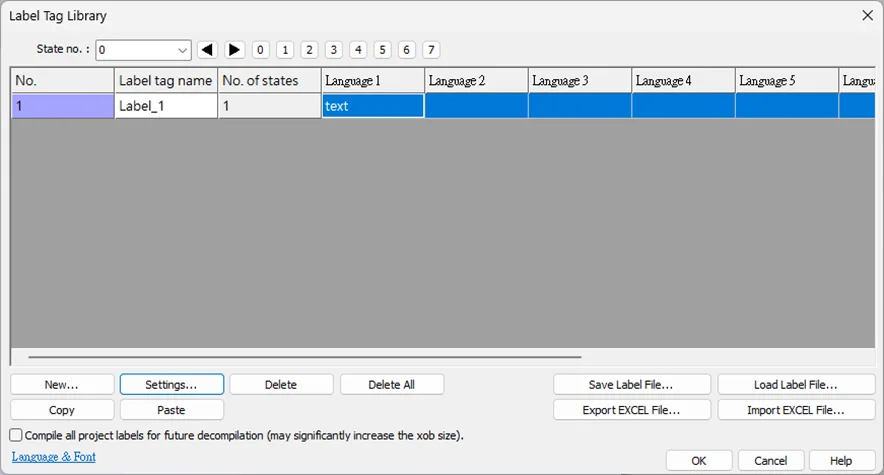
Edit Language
Edit the corresponding language content.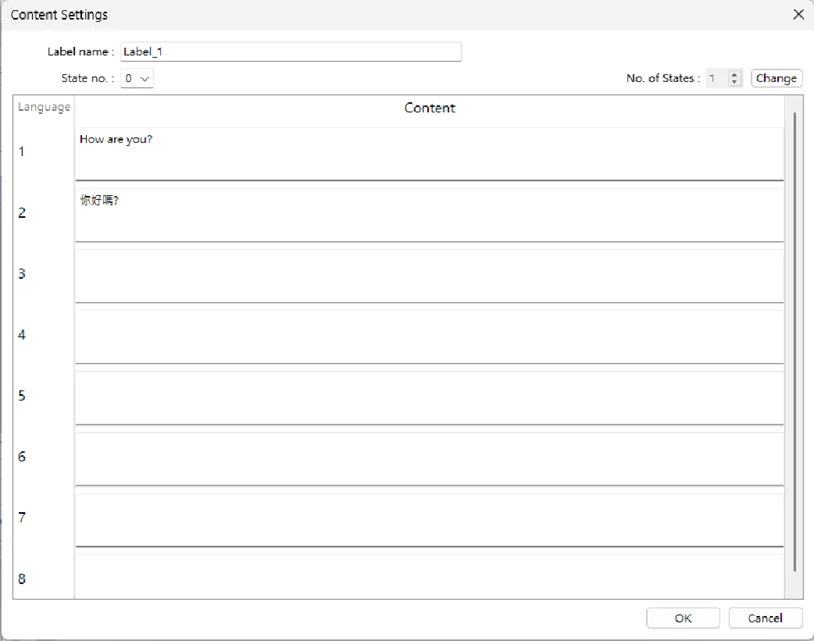
Using Label Tag Library
When there are defined labels in the Label Library, the labels can be found in the object’s [Label] tab. Select [Use label library] check box, and select the label from the pull-down list [Label tag].
In the below example we are using a bit lamp/toggle switch object, but the concept is the same for all objects with a [label] tab.
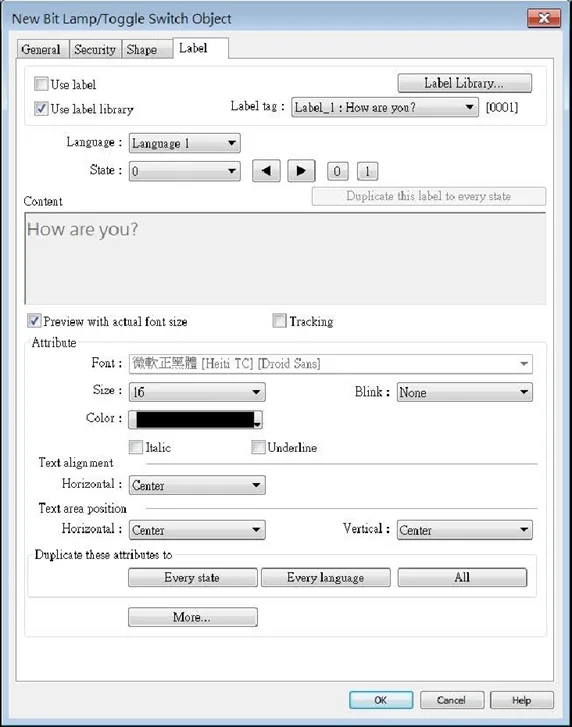
When a tag is selected, the content of the selected tag is shown in the [Content] field in its corresponding font style.
Note:
- Language 2 to Language 24 can only be set the Font [Size], the others such as [Color], [Align], [Blink], etc. will follow the settings of Language 1.
Selecting Language and Font
Language
Click [Project] » [Language & Font] on the toolbar and the [Language & Font] dialog box appears.
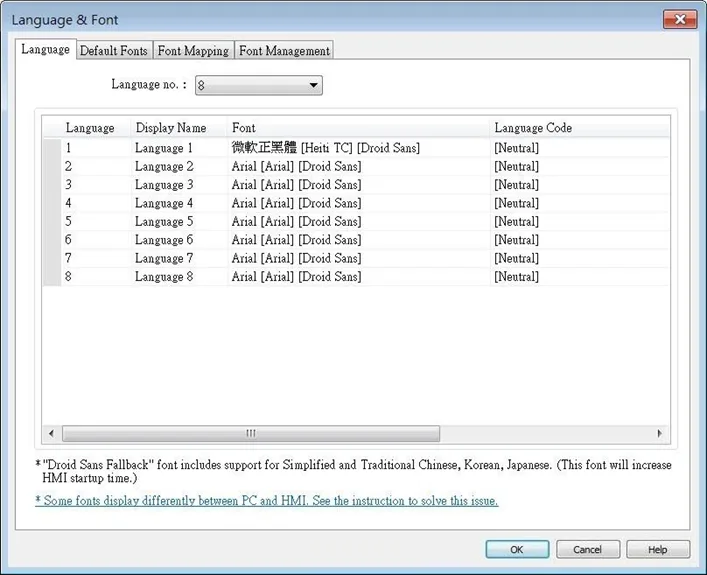
| Setting | Description |
|---|---|
| Language no. | Specifies the number of languages used in a project. |
| Font | Shows language names and the fonts used for each language. A font description can be entered. [Language Code] allows changing the language used for push notification about the events in EasyAccess 2.0, when [Push notification (EasyAccess 2.0)] is enabled in Event Log. |
Default Fonts
This settings page is used to configure fonts for characters not supported by the selected font. When such characters (e.g., Simplified Chinese, Traditional Chinese, Korean, and Japanese) are used, EasyBuilder Pro will automatically use the font specified here.
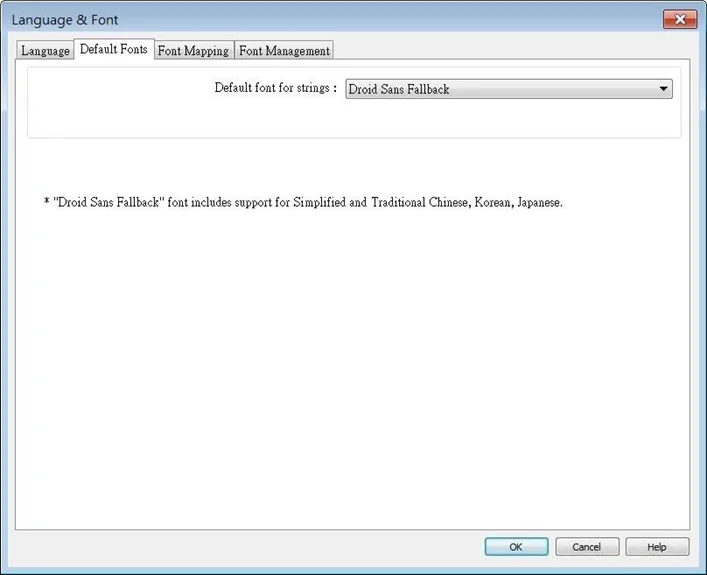
| Setting | Description |
|---|---|
| Default font for strings | When characters not supported by the selected font are used, EasyBuilder Pro will use this font as the default font. |
Font Management
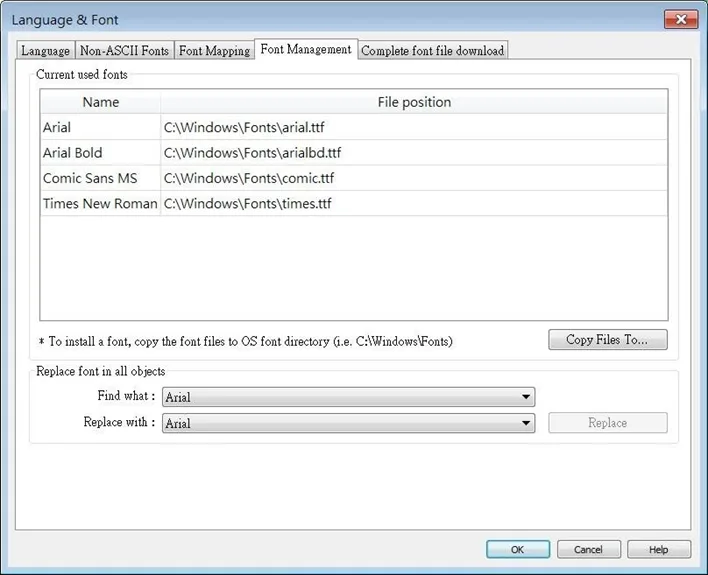
| Setting | Description |
|---|---|
| Current used fonts | This table shows all the fonts used in this project and the file position of its font file. |
| Copy Files To | Copy the font file to the specified position. |
| Replace font in all objects | Change font at a time for all the objects using that font. |
Font Mapping
This tab lists the fonts used in Windows / cMT3000 and the mapping fonts in iOS / cMT-iV5 /cMT-iV6 / Android devices.
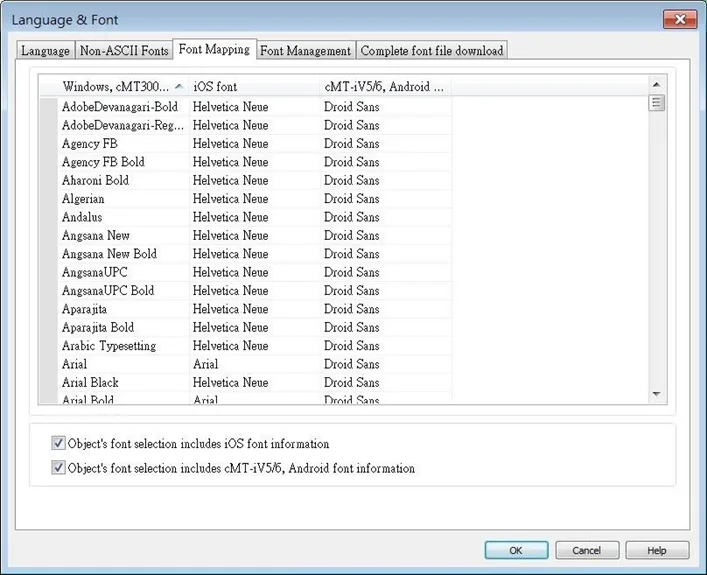
| Setting | Description |
|---|---|
| Object’s font selection includes iOS / cMT-iV5 / cMT-iV6 / Android font information | When the checkbox is selected, the fonts in iOS / cMT-iV5 / cMT-iV6 / Android that map to the select font in object property settings will be shown. |
Complete Font File Download
If the text on a webpage is not displayed correctly in the PLC Web Browser, the complete font file can be downloaded to HMI to add support for this font to the PLC Web Browser.
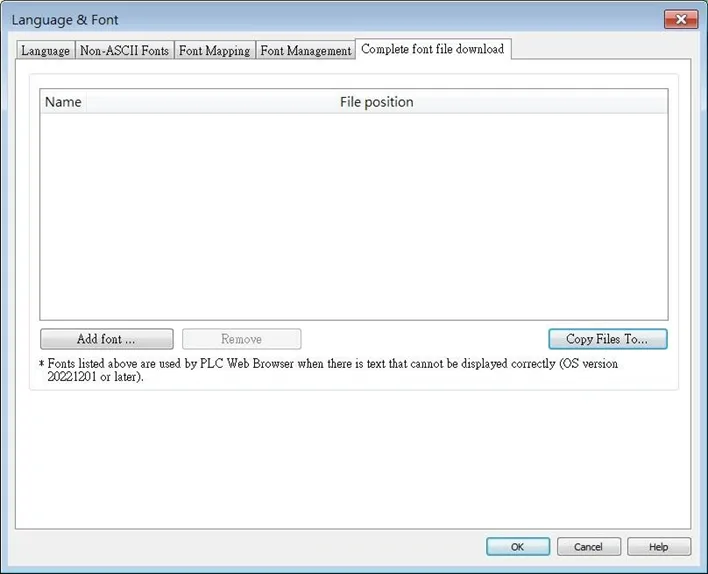
Multi-Language Settings
When displaying the texts in multiple languages, the system register “[LW-9134]: language mode” should be used too.
The value of [LW-9134: language mode] is ranged from 0 to 23. Different values correspond to different languages.
If not all languages are selected to compile and download, [LW-9134] will work differently. For example, user defines 5 different languages in the Label Tag Library:
- English
- Traditional Chinese
- Simplified Chinese
- French
- Korean
If only Language 1, Language 3, and Language 5 are selected to compile then the corresponding values of [LW-9134] are:
- English
- Simplified Chinese
- Korean
How to use Multiple Languages
Follow these steps to use multiple language feature in EBPro:
Instructions: How to use Multiple Languages
Create an Object that will have the language labels
Create a Text/Comment object and select [Use label library] checkbox.Create a “control” object
Create a Numeric Input Object and use the system register [LW-9134].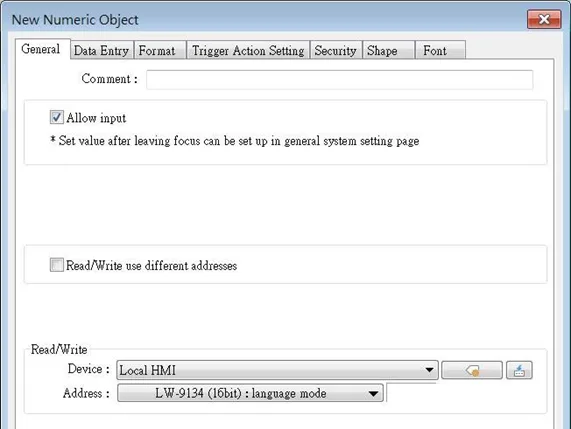
Compile Project and select languages
When compiling the project, select the defined languages.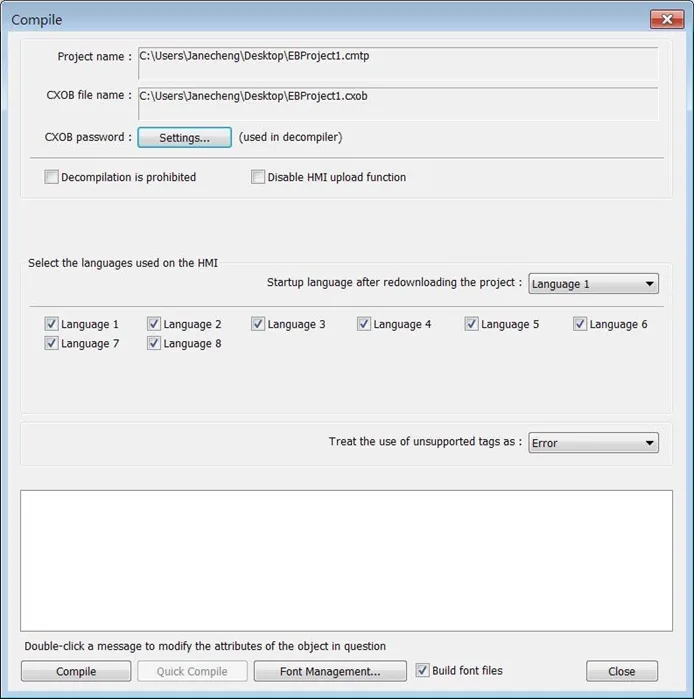
Change the number entry to change the language!
If the value of [LW-9134] is changed, the content of the Text object will be changed.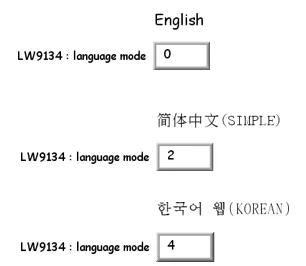
Notes:
- When using a cMT / cMT X Series model, system register [LW-9134] is used to change the language mode in server, while [PLW-9134] is used to change the language mode on a portable tablet device.
- Only the label tags that are used in the project file will be contained in the *.cxob / *.exob file generated after compilation; therefore, no unused label tags will be contained in the project file obtained by decompiling a *.cxob / *.exob file.
Adding to Label Tag Library
The “Add to Label Tag Library” function simplifies the process of adding text to the Label Tag Library. This section illustrates how to quickly add various texts to the Label Tag Library.
Object Labels
To quickly add labels to the Label Tag Library, follow one of these three methods:
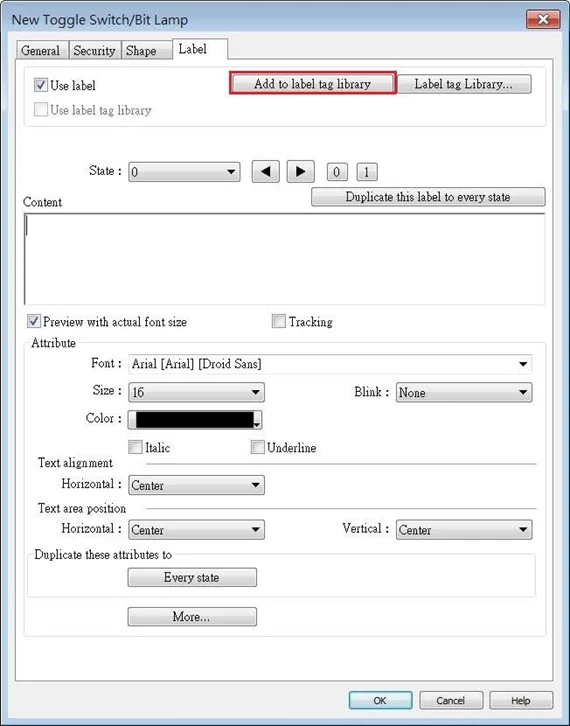
Method 1: From the Object’s Property Settings
- Open the object’s property settings and navigate to the Label tab.
- Click the [Add to label tag library] button.
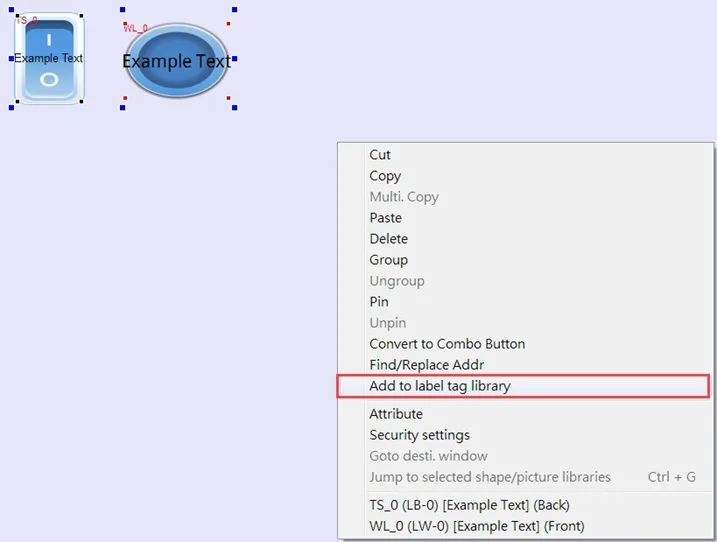
Method 2: From the Project Editing Window
- In the project editing window, select one or multiple objects.
- Right-click and select [Add to label tag library] from the menu.
Method 3: From the Toolbar
- From the toolbar, click [Project] » [Label] » [Add to label tag library].

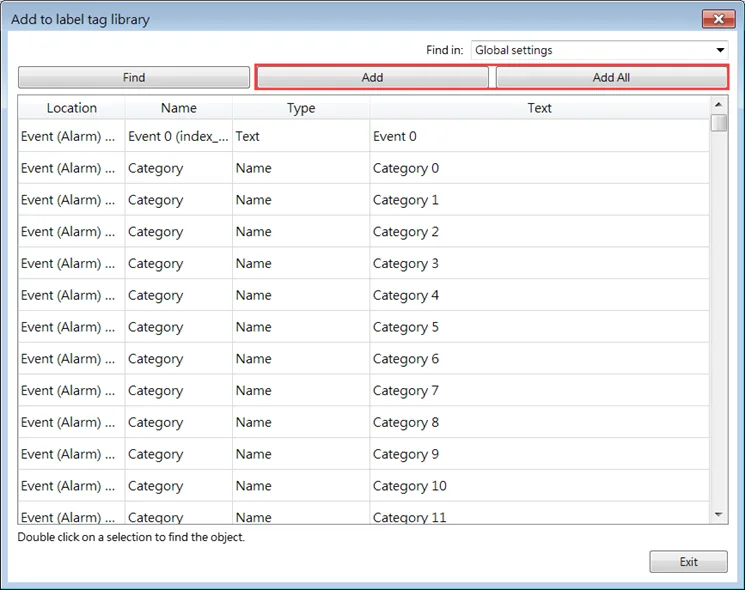
- In the [Find in] drop-down menu, select the window containing the objects and click [Find].

- The options in this window that are not yet added to the Label Tag Library will be displayed in a list. Proceed to add individual items or all.

How to add Non-Object Label Text
To quickly add texts other than object labels to the Label Tag Library, follow these steps:
Instructions: How to add Non-Object Label Text
Open the “Add to label tag library” menu
From the toolbar, click [Project] » [Label] » [Add to label tag library].Search for the Text
In the [Find in] drop-down menu, select [Global settings] and click [Find].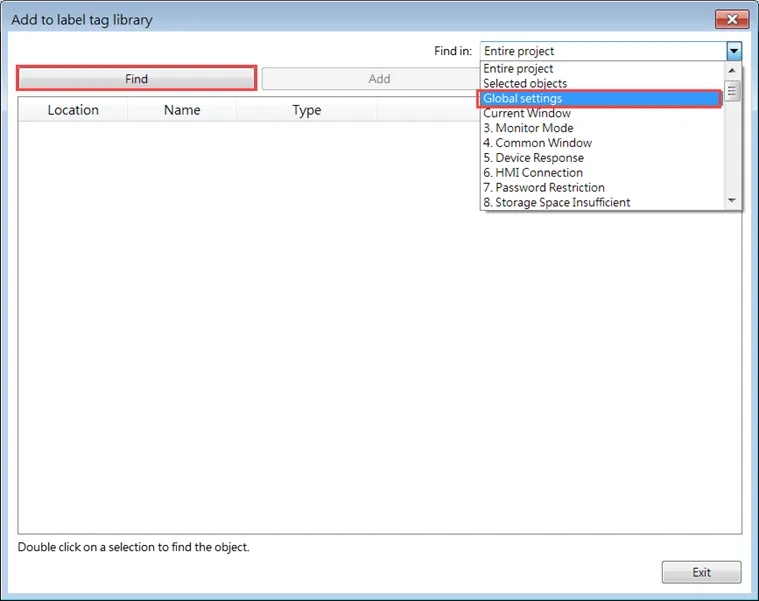
Select the text
The available texts for addition from the global settings will be shown in a list.Currently available categories include:
Operation Log Comment
Event Log Message
Event Log Category (Subcategory) Customize Name
Event Log Category (Subcategory) Name
Proceed to add individual items or all as required.