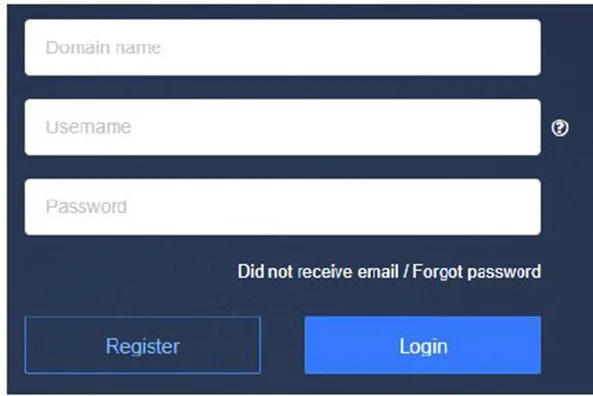
Go to https://weincloud.net/login to create your Domain and configure your Domain Management System. Click the Register button.
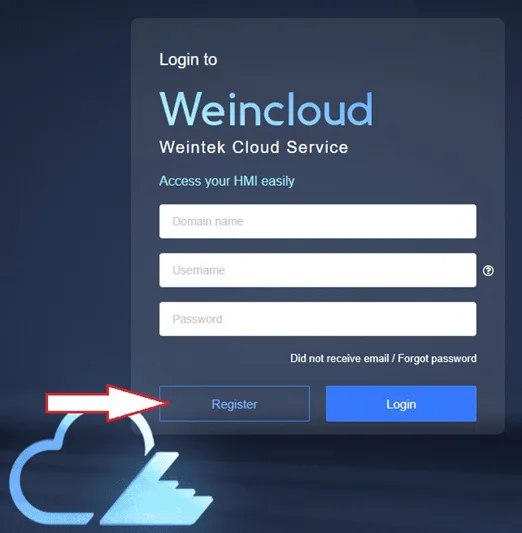
Domain Creation
Anyone can create a new Domain for free. A valid e-mail address is all that is required.
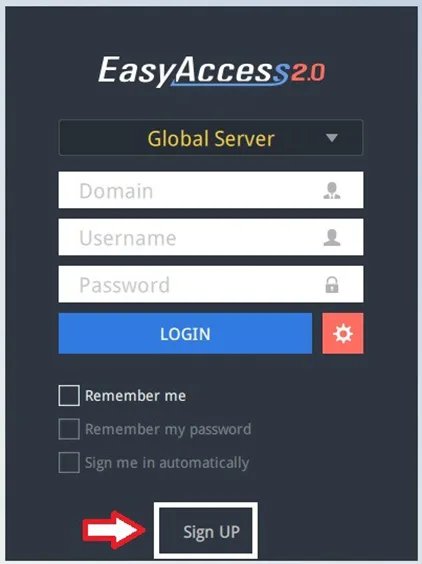
A domain can also be created from the EasyAccess 2.0 application. Click Sign Up at the bottom of the app to create a new domain account.
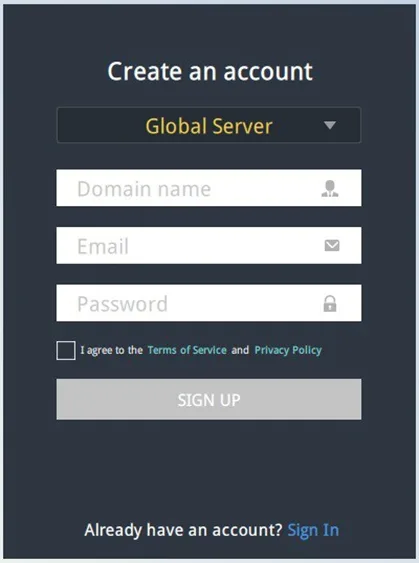
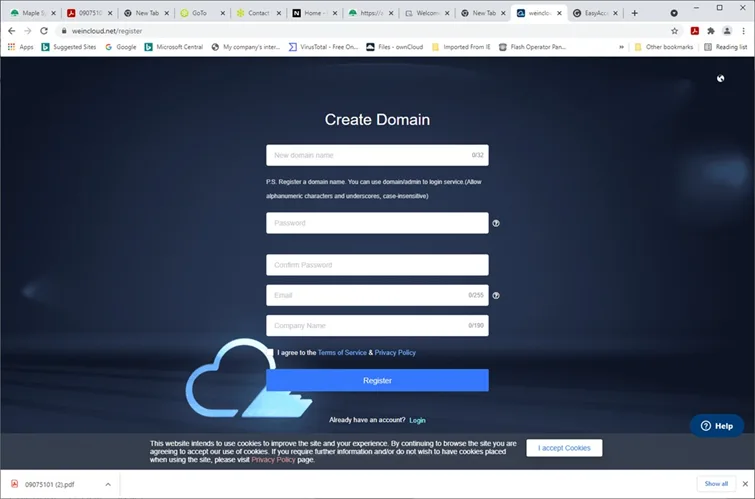
Enter the domain name, admin email address, and admin password to register a new domain account. Be sure to read and agree to the “Terms of Service” and Privacy Policy” first.
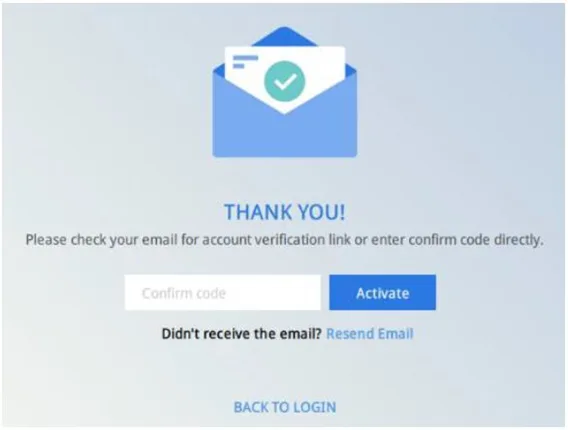
You will receive a confirmation email (EasyAccess 2.0 Domain Registration Confirmation). Please enter the “confirm code” in the EasyAccess 2.0 application or click the “Complete E-mail registration confirmation” link in your email to complete the domain registration. If you didn’t receive an email confirmation, try clicking “Resend Email.”
User Management
Go to https://www.weincloud.net/login and log in to your domain with the name of your domain, username (admin), and the admin password.
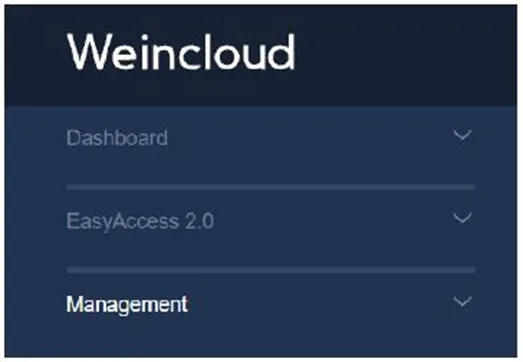
The menu on the left has three sections including Dashboard, EasyAccess 2.0, and Management
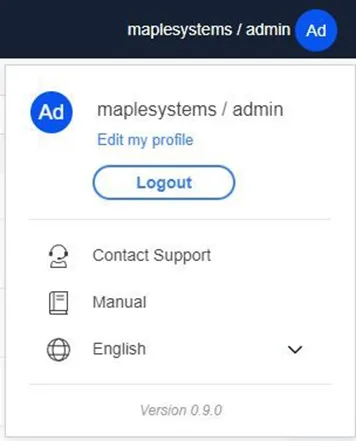
The admin icon in the upper-right corner shows the name of the domain followed by /admin. Click the Add button to see the drop-down menu. Click Edit my profile to change the admin password if desired.
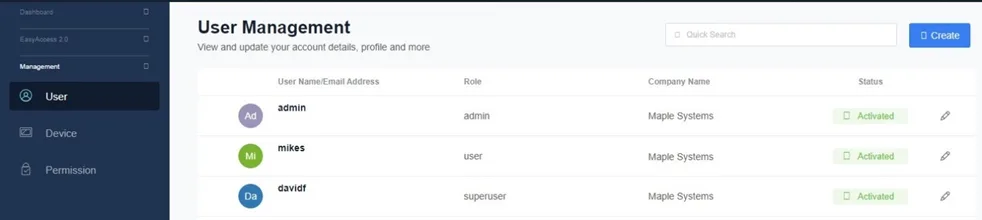
Under the Management menu, select User. On this page, the administrator can create a new user, edit a user, and delete a user.
Add User
A new user can be created by clicking on the Create button in the upper-right corner. In the popup window, enter the user name and password for the user account In addition, enter the user’s email address, role (User or Superuser), and company name.
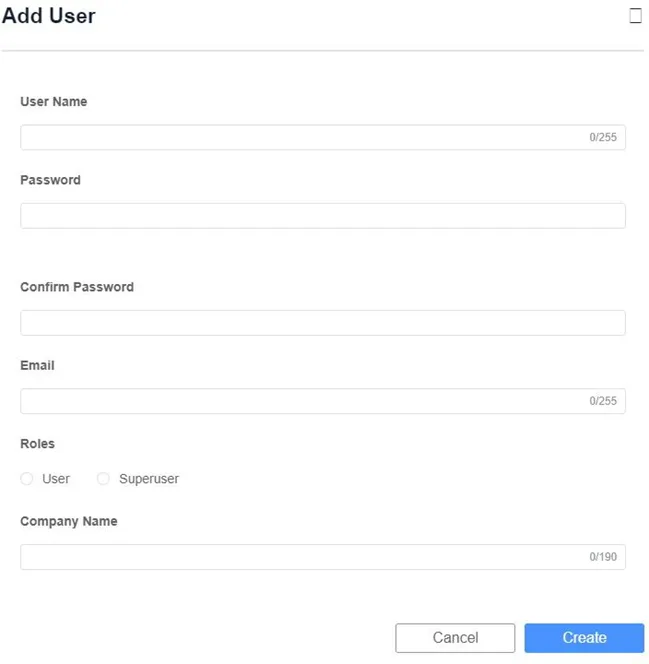
Click the Create button at the bottom. A confirmation email with essential information will be sent to the user’s email address. The user must activate the account by clicking on the confirmation link in the email.
Note:
- A Superuser can log in to the domain and create users, add HMIs, and manage the users and HMIs. A Superuser does not have the right to create or delete another Superuser. The administrator still has complete control over the domain.
Edit User and Delete User
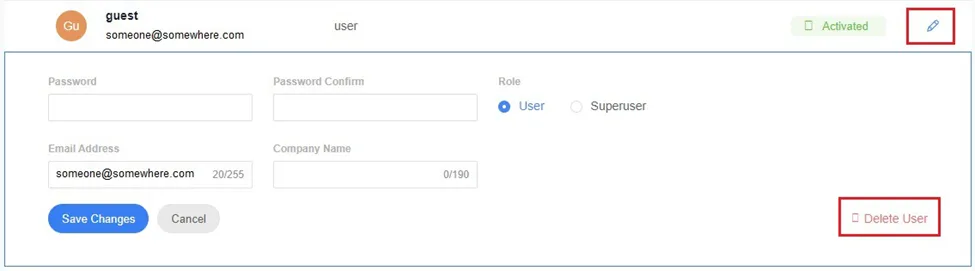
Click on the Edit icon to edit a user’s information such as changing the email address and password, the role of the user, and deleting the user.
Change User Password
When the User Account is first created, a default password is emailed to the registered email address. The password can subsequently be changed.
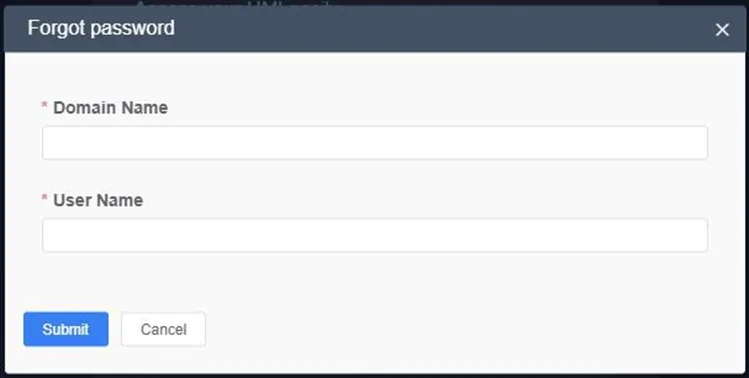
To do so, visit the homepage of the domain and select Forgot password.
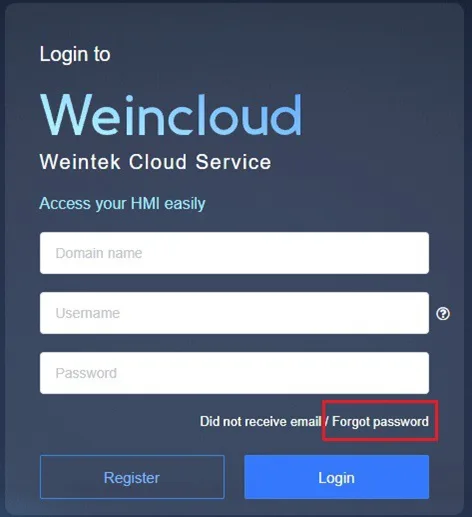
Enter the Domain Name and your User Name, then click Submit. An email will be sent to the email address assigned to the user name with a link to reset your password.
Note:
- This method can also be used by the administrator to change the admin password for the domain.
Device Management
Under the Management menu, select Device to see a list of all HMIs and Groups registered in the Domain.
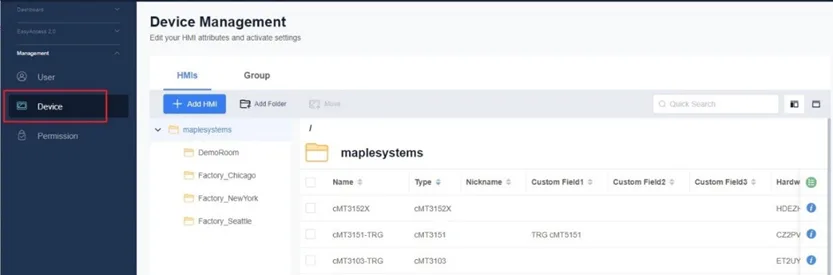
HMI
Click on the info icon to see the HMI information under the General Tab and the EasyAccess 2.0 tab including model name, nickname, private IP, public IP, activation date, hardware key, etc.
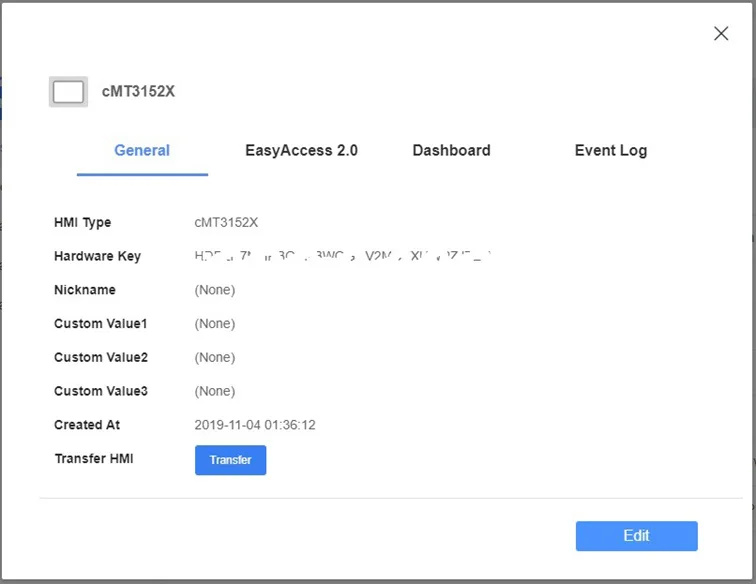
Click on the green button to edit the columns that appear under the General tab and EasyAccess 2.0 tab.
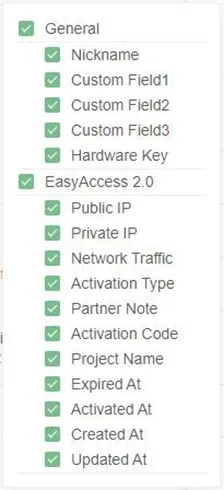
Click the Edit button on the General tab to edit the Nickname and Custom fields for the HMI.
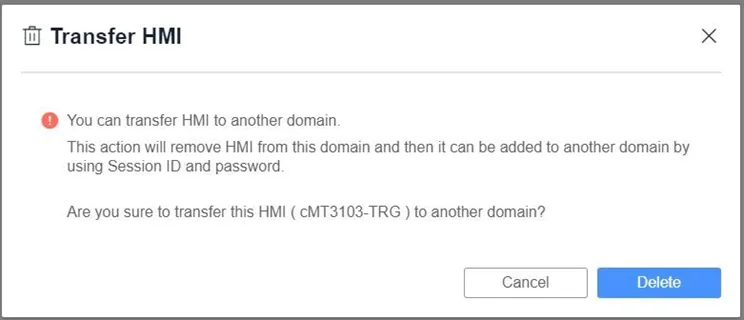
Click the Transfer button on the General tab to remove the HMI from the domain. Once it is removed from the domain, it can be added to another domain with a new Session ID and Password. Click Delete to complete the action.
The administrator can manage the HMIs in a domain by performing the following actions: Add HMI, Add Folder, Move HMI.
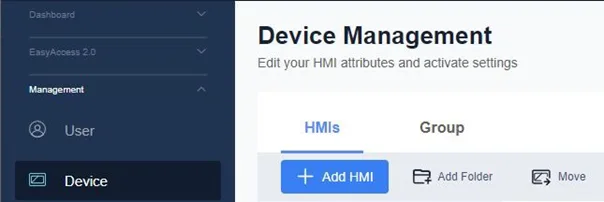
Add HMI:
There are three ways to add an HMI to a domain.
- Add by Session ID and Password: Use this method for HMIs with the EasyAccess 2.0 license already built in. When the HMI connects to the EasyAccess 2.0 server, a Session ID and Password will appear in the EasyAccess 2.0 Settings window (Window 76) as long as the HMI does not belong to any Domain. Use the Session ID and Password to activate the HMI in the Domain.
- Using Activation Card: Use this method for HMIs that do not have the EasyAccess 2.0 license already built in. The hardware key from the HMI and the activation code from the Activation Card are required. Once the HMI is activated, it will be able to connect to the EasyAccess 2.0 server and appear online.
- 30 days free trial: The HMI can be activated for 30 days using just the hardware key from the HMI. Note that once the HMI is activated using this method, it cannot be moved to another domain until it is activated with an Activation Card. Only then can it be transferred to another domain.
Add Folder:
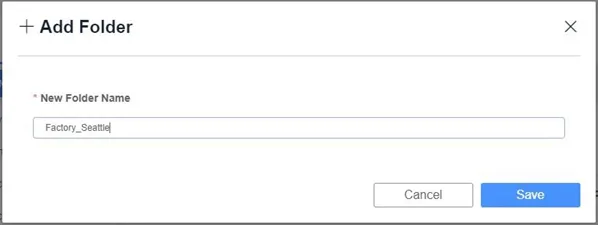
Use folders to organize HMIs by territory or function. Click the Add Folder button and name the folder, then click Save to create the new folder.
Select an HMI to add to the new folder, then click the “Move” button. In the popup window, navigate to the desired folder and click the “Move here” button.
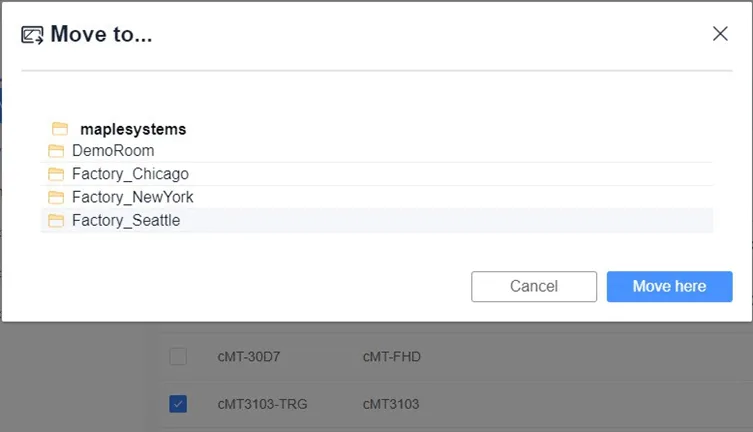
The HMI will be moved from the main directory into the new folder.
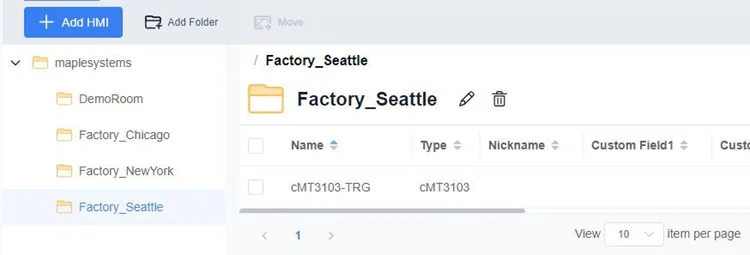
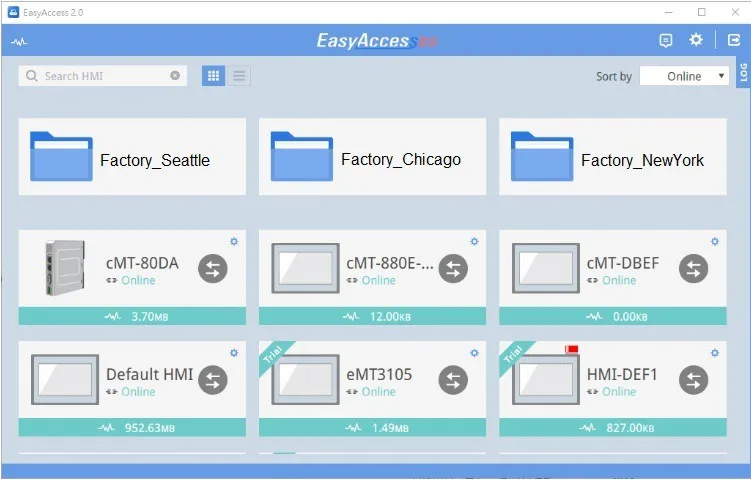
The folders are also displayed in the EasyAccess 2.0 app:
Group
Click the Group tab under Device Management to see a list of the HMI Groups in the domain.
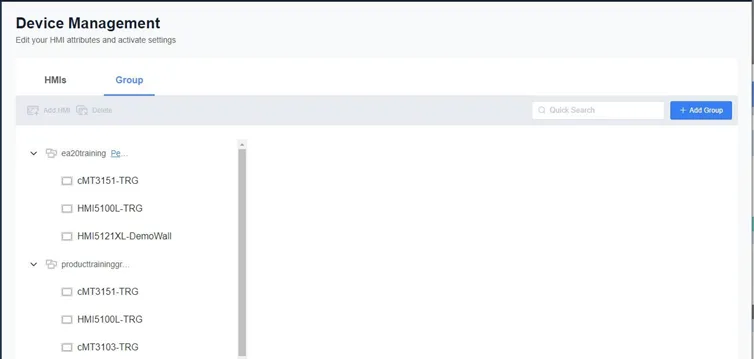
The administrator can manage the HMI Groups in a domain by performing the following actions: Add Group, Add HMI, and Delete Group.
Add Group:
Click the Add Group button to create a new HMI Group.
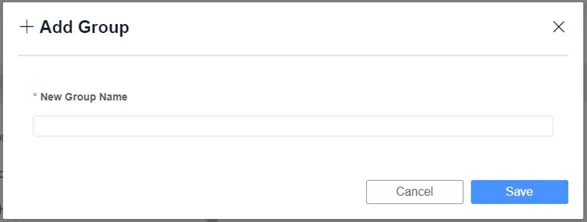
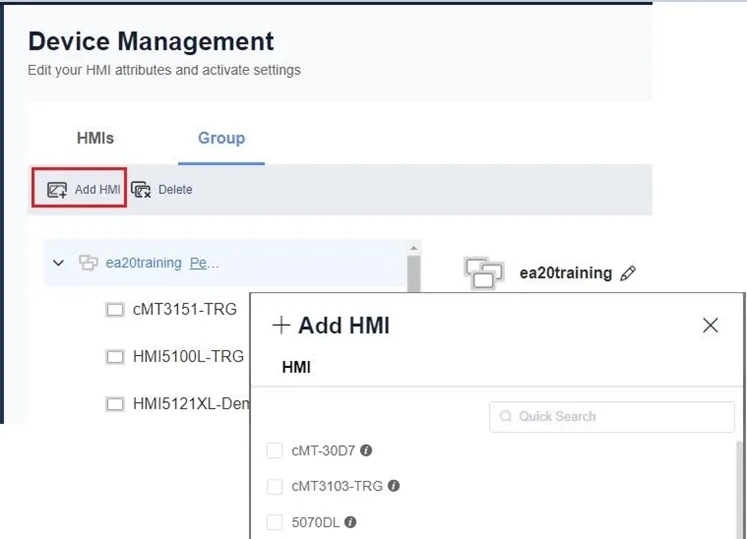
Add HMI to Group:
Select a group and click the Add HMI button to add an HMI to the selected group.
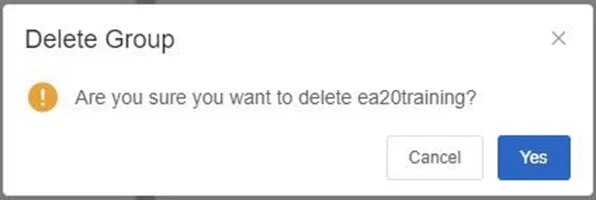
Delete Group:
Click the Delete button to remove the selected group from the domain.
Permission Management
Under the Management menu, select Permission to manage permissions for Users, HMIs, and Groups.
User
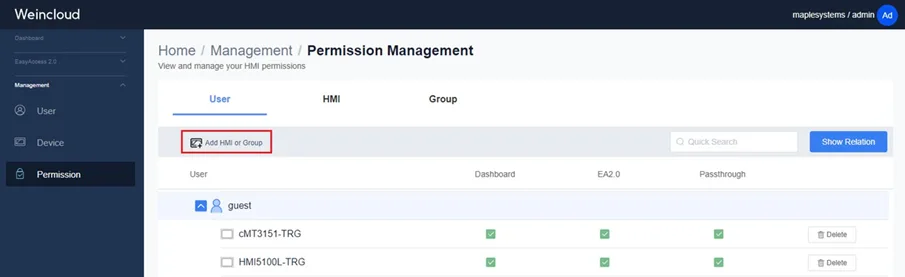
On the User tab, the administrator can assign an HMI or a Group to a user. Select a user from the list and click the Add HMI or Group button.
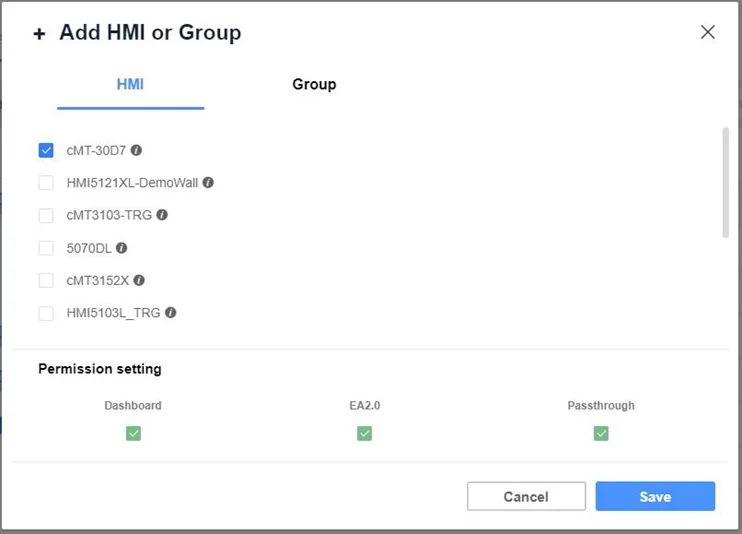
On the HMI tab in the popup window, select the HMI to add to the selected user. Choose the permission settings for the selected HMI. Dashboard (not yet implemented as of this writing). EA2.0 allows the user to access the HMI from the EasyAccess 2.0 app. Passthrough allows the user to use the passthrough feature and access the PLC connected to the HMI via EasyAccess 2.0 (not available if EA2.0 is disabled).
HMI
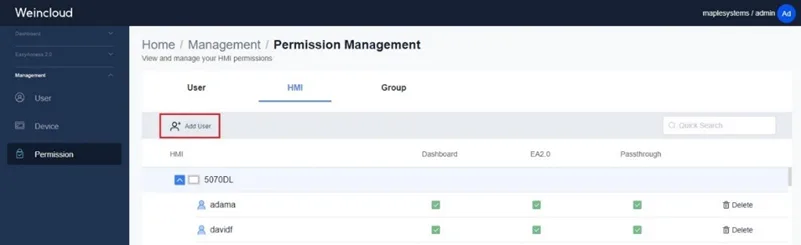
On the HMI tab, the administrator can assign a user to an HMI. Select an HMI from the list and click the Add User button to add a user to the selected HMI. As with the HMI, you can choose the permission settings for the user.
Group
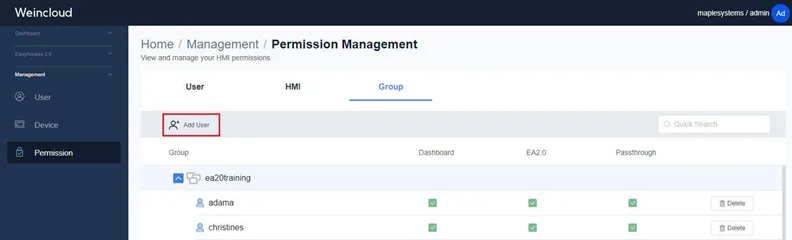
On the Group tab, the administrator can assign a user to a group. Select a group from the list and click the Add User button to add a user to the selected group. As with the HMI, you can choose the permission settings for the user.
Domain Setting
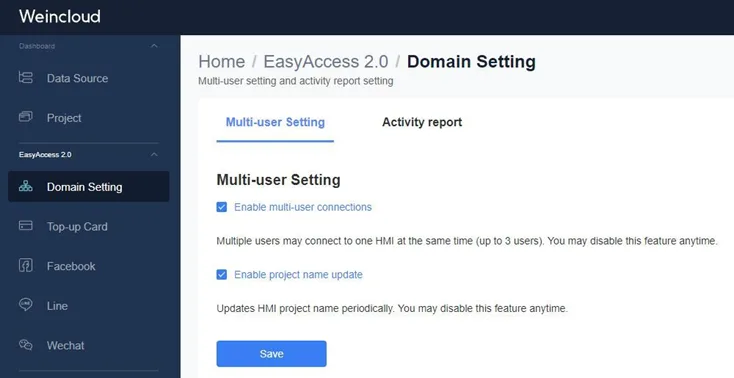
The Domain Setting section allows you to enable multi-user connections, enable project name update, and configure the activity report.
Multi-user Setting
On the Multi-user Setting tab, you can enable or disable multi-user connections. When enabled, up to three users can connect to a single HMI at the same time, otherwise, only one user can connect at a time.
You can check who is connected to an HMI by clicking the Occupied(n) or Connected(n) indicator for the HMI in the EasyAccess 2.0 app.
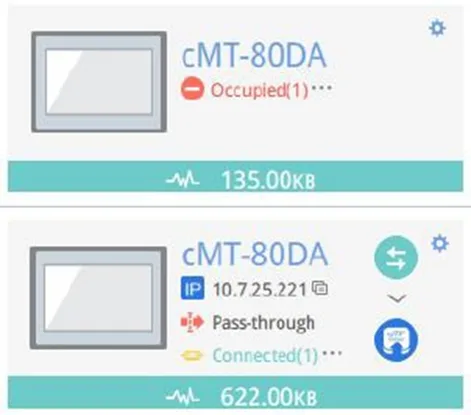
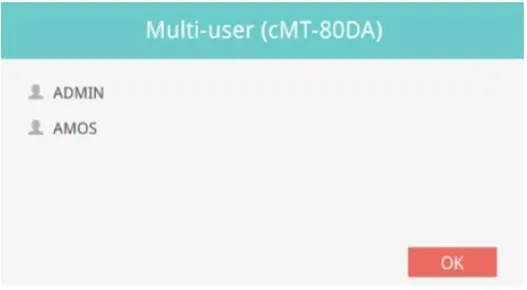
When connecting to an HMI that has already been connected, a warning message will pop up.
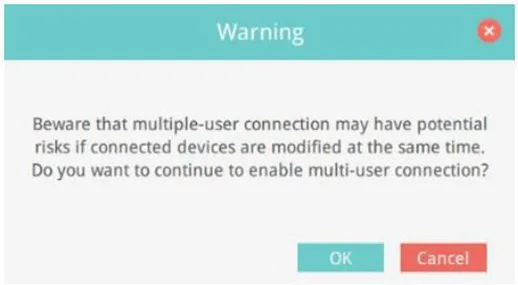
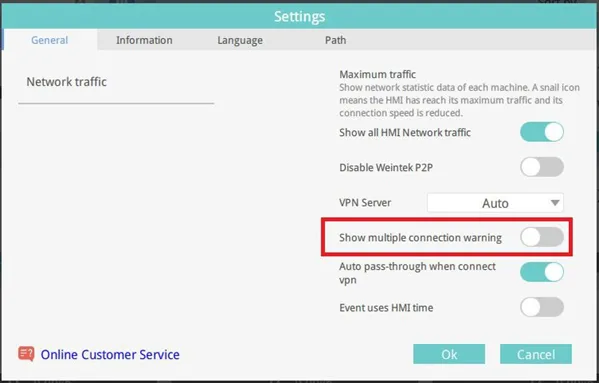
The warning message can be disabled in the EasyAccess 2.0 app Settings window.
Enable project name update
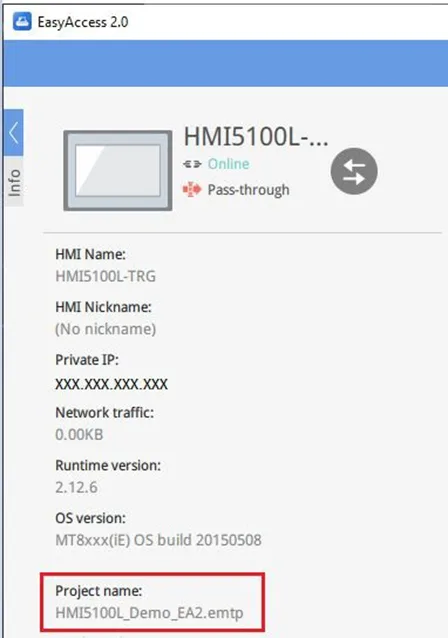
When Enable project name update is checked, the name of the project currently running in the HMI is periodically updated and displayed in the Device Management information window on the EasyAccess 2.0 tab.
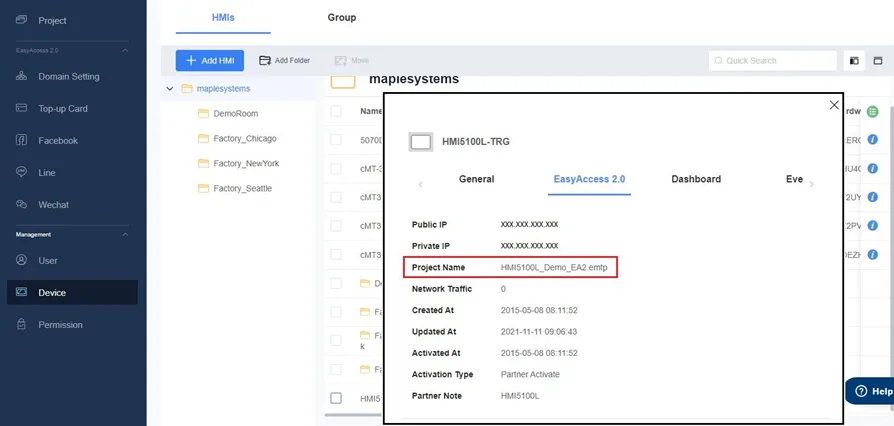
The project name also appears in the EasyAccess 2.0 app.
Activity report
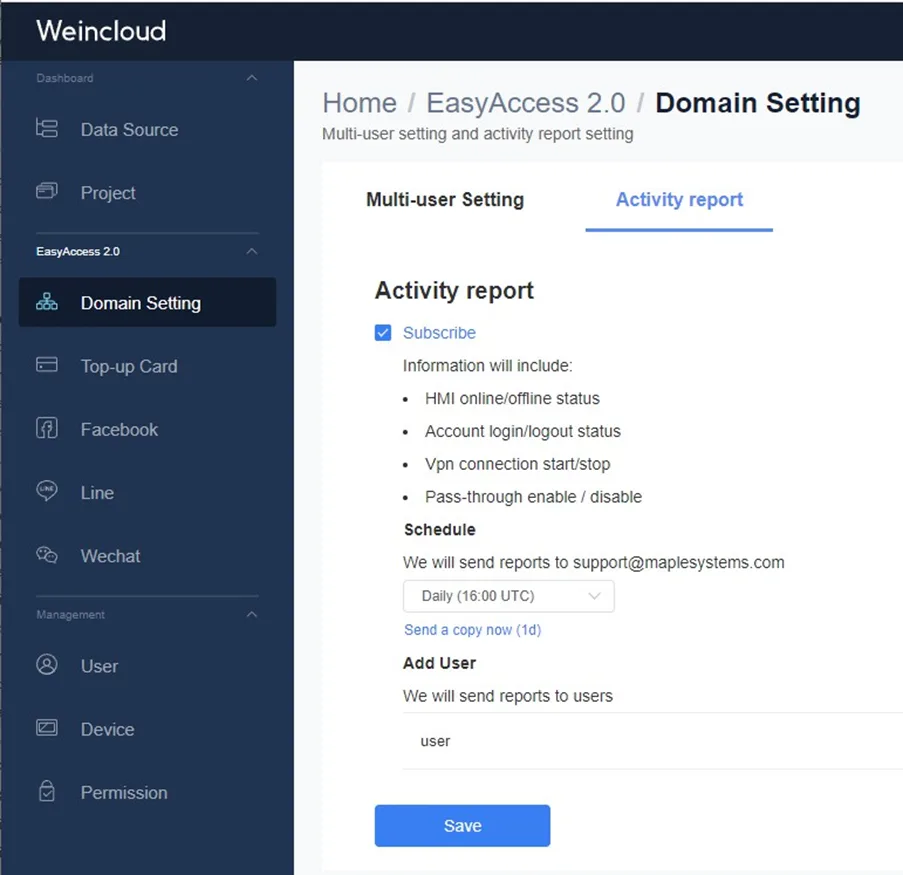
Use this option to subscribe to the EasyAccess 2.0 Activity Report. It can be scheduled to email the report daily, weekly, or monthly to the administrator’s email address. Other users on the domain can also receive the reports, if desired. The Activity Report contains information such as HMI online/offline status, account login/logout status, etc.
Top-up Card
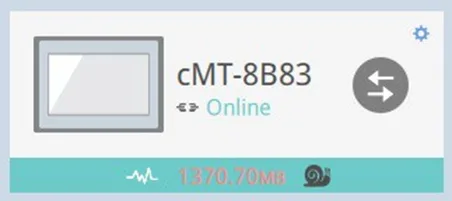
An HMI can use data at a rate of 100 KB/s, up to a total of 3 GB of data per month. After that, the data rate drops to 5 KB/s. This is noticeably slower, as indicated by the “snail” icon in the EasyAccess 2.0 app.
If one or more HMIs regularly exceeds the data limit, a Top-up Card can be purchased to add more data to a Domain. 5 GB or 10 GB of data can be added, which is good for one year. When an HMI reaches its data limit for the month, only then will any available Top-up Data kick in to allow the HMI to continue to use the high-speed data rate.
To Load a Top up Card
If you need to add more data to a domain you can purchase a Top up Card. Follow these steps to load the top up card to the Domain.
Instructions: To Load a Top up Card
Purchase Top up Card
Purchase a Top-up Card. It will come in electronic form and include a License Serial Number and an Activation Code.Open EasyAccess 2.0 and go to ‘Top Up Card’ section
Go to the Top-up Card section under the EasyAccess 2.0 menu.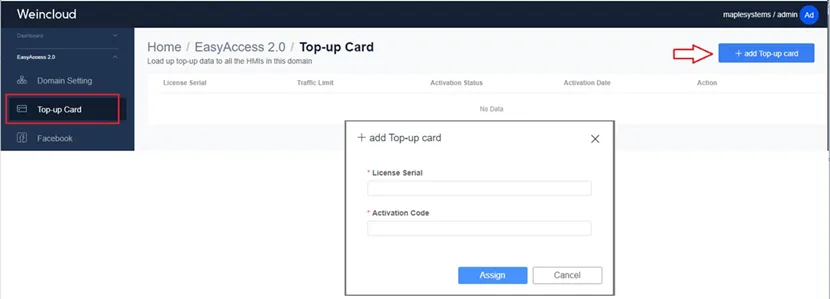
Enter the top up card information
Click the Add Top-up Card button and enter the License Serial Number and Activation Code to add the Top-up Card to the Domain.Success
Once the information is entered, the Top-up Data will be available to use within a few minutes.Double-click on any previously added Card to display the current usage and history for the Card. Similar “Domain Traffic Usage” is also visible in the top-left corner of the EasyAccess 2.0 app.
All HMIs in a Domain will have access to the Top-up Data added to the Domain. Adding multiple cards is allowed, and data from the card with the earliest expiration date will be used first.
Admin
Click the admin icon and Edit my profile to edit the email address associated with the domain and change the password for logging into the domain. Click Logout to log out of the domain.