
Pass-Through with EasyAccess 2.0
Pass-Through Serial Connection between an HMI and a PLC
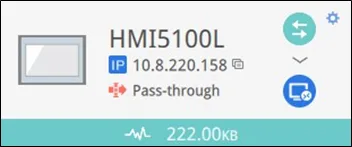
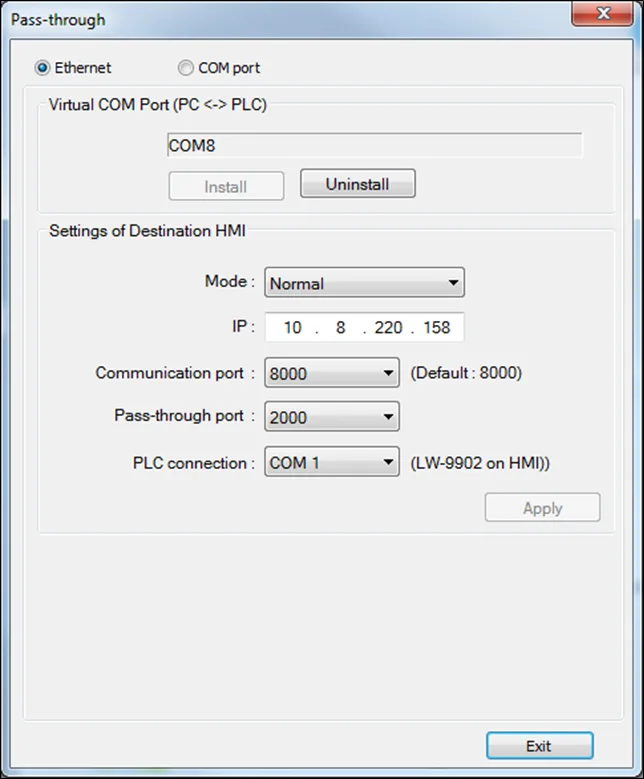
Remote Pass-through is made possible with EasyAccess 2.0. It is done with the Pass-through application in Utility Manager (installed automatically alongside EBPro). Simply enter the HMI’s Virtual IP address (obtained using the EasyAccess 2.0 app) in the Pass-through application, as shown in the following figure. The remaining steps are the same as when performing Local Pass-Through. In doing remote Pass-Through, additional port settings and modifications are not required.
Pass-Through Ethernet Connection between an HMI and a PLC
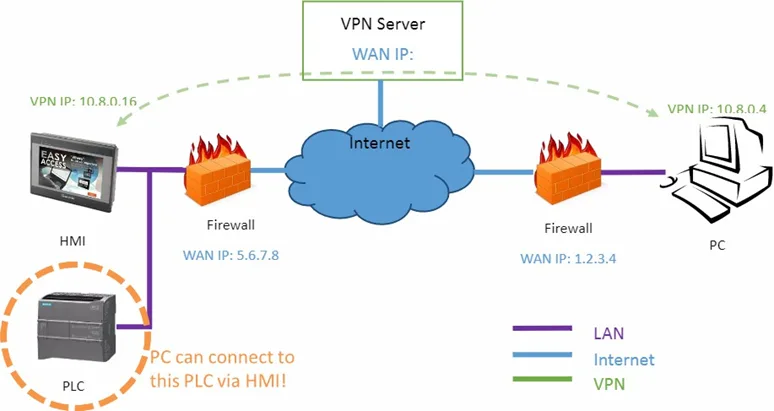
EasyAccess 2.0 not only makes possible direct connection to a Maple Systems HMI, but also provides Pass-Through functionality that enables the user to connect to the PLC on the remote HMI’s network. Consider an EasyAccess 2.0 network, as shown below, where a PLC is within the same LAN network as the HMI. Here, the PC, by first establishing an EasyAccess 2.0 connection to the HMI, may use the HMI as the relay to connect to the PLC as well.
How to setup Pass-Through to a PLC
Instructions: How to setup Pass-Through to a PLC
Click Pass-Through icon
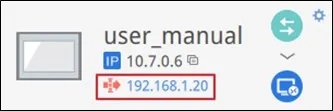
From the HMI list in the EasyAccess 2.0 app, click on the “Pass-through” icon which appears below the IP address (while connected to the HMI).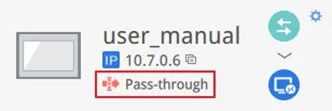
Enter PLC IP Address
Enter the IP address of the target PLC.You can connect with up to six PLCs using Pass-through.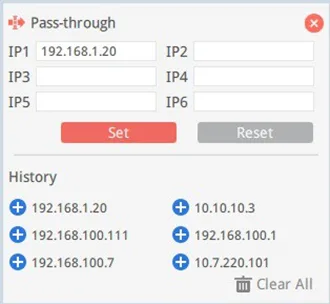
Success: PLC IP address shown
Once connected, the IP address of the PLC will be shown.
The user may now launch the designated PLC programming software and connect to the PLC remotely in this fashion.
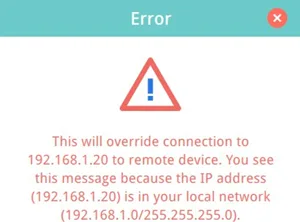
If the remote PLC and the local computer have the same private IP address range, a warning will appear, indicating that subsequent connections to the PLC’s IP address will be directed to the remote device instead of the local device (if there are any).
Proxy Server
A proxy server acts as an intermediary between clients and servers. In some network infrastructures, especially in large scale networks, proxy servers are used to provide additional ensure security, administrative control, and efficiency in the network. To establish a connection with EasyAccess 2.0 through a proxy, requires additional configuration in EasyAccess 2.0 and in the HMI project.
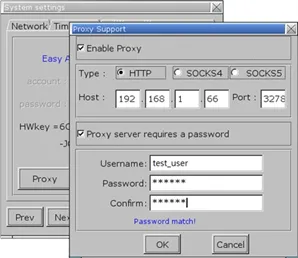
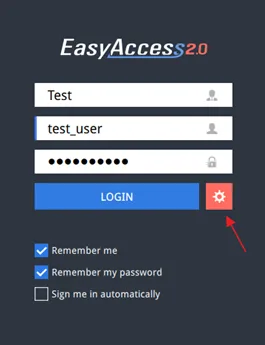
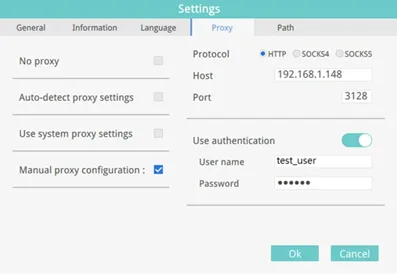
Proxy settings that apply to the PC’s EasyAccess 2.0 app are similar to those that will apply to the remote HMI. On the PC, the proxy settings window can be called from the settings button of the login screen. On the HMI, it is found in the [EasyAccess 2 tab] of the System Settings. Enter the Proxy Type, Host Address, Port Number and Login Credentials obtained from the network administrator.
Proxy-related System Tags
The following table lists the system tags reserved for EasyAccess 2.0 proxy settings:
| LW-11170 (16bit) | Proxy Disable/Enable (0: disable, 1: enable) |
| LW-11171 (16bit) | Proxy Type (0: HTTP, 1: SOCKSv4, 2: SOCKSv5) |
| LW-11172 (16bit) | Proxy Server IP0 |
| LW-11173 (16bit) | Proxy Server IP1 |
| LW-11174 (16bit) | Proxy Server IP2 |
| LW-11175 (16bit) | Proxy Server IP3 |
| LW-11176 (16bit) | Proxy Server Port |
| LW-11177 (16bit) | Proxy authentication (0: disable, 1: enable) |
| LW-11178 (16bit) | Proxy username |
| LW-11194 (16 words) | Proxy password |