
The HMI needs to have been activated in order to be accessible remotely using EasyAccess 2.0. Check the Activation Status of the HMI from the EasyAccess 2.0 tab of the System Settings pop-up window. Your HMI may have been activated previously, as is the case for select models from the factory.
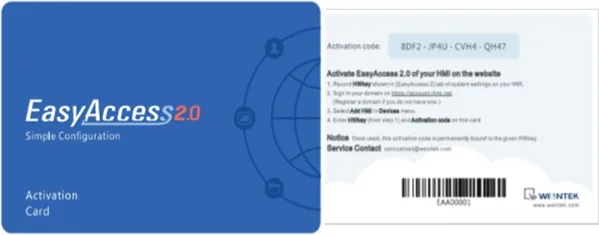
If the HMI is not pre-activated, you must purchase an Activation Card from Maple Systems. The HMI can be activated using any one of the following means:
- Go to your Domain web page (https://weincloud.net/login) and log in to your Domain account as the Administrator. NOTE: This is the most common method. It allows you to activate and register the HMI to your Domain during the same session.
- Use the PC Activator app that is included with EasyAccess 2.0 (start the PC Activator application on your PC and make sure all HMIs to be activated are already connected to the same local area network). This method automatically reads the Hardware Key from each HMI that needs to be activated.
In each instance, the HMI Hardware key is required. Locate it in the EasyAccess 2.0 tab of the System Settings pop-up window on the HMI, or from System Register LW-11210 (using an ASCII Object of 20 words in length).
With an Activation Card
Activate Through the Domain
If you have an Activation Card, you may activate the HMI with the Activation Code printed on the card through your Domain.
Instructions: Activate Through the Domain
Log into domain
Log in to your domain (https://weincloud.net/login/login) with your Admin credentials.Add HMI and enter the information
Click on Device under the Management menu.
On the HMI tab, click + Add HMI.
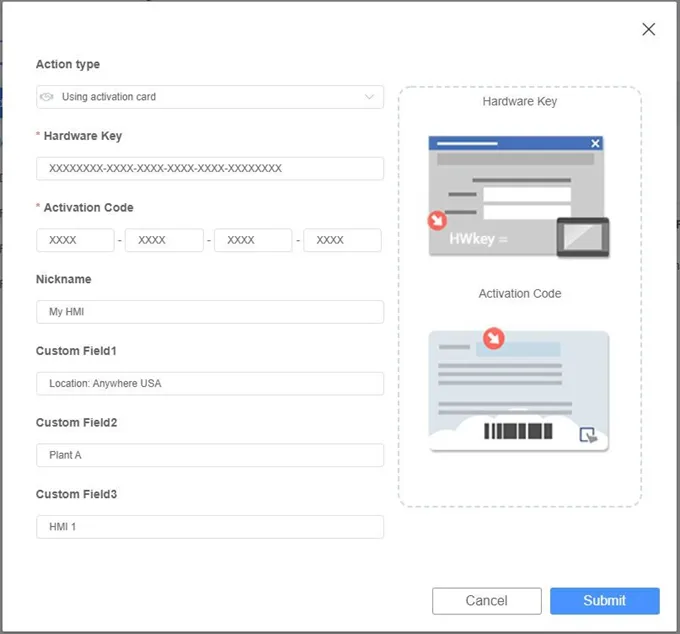
Select the Action Type Using activation card, and then enter the Hardware Key and your Activation Code.
Click Submit to complete the activation.
Success
The HMI is now activated, and automatically added to the Domain.Activation by activation card will also add the HMI to the domain. However, it may be necessary to enable EasyAccess 2.0 in the HMI/cMT Series.
Activate via the PC Activator Program
Alternatively, you can use the application “PC Activator” that is installed alongside EasyAccess 2.0
Instructions: Activate via the PC Activator Program
Open PC Activator Program
Run PC Activator, then click on the Activate tab.Enter domain admin credentials
Enter the Domain Administrator’s credentialsEnter Activation Code
Enter the Activation Code listed on the Activation Card.Select the HMI to be activated
From the HMI list, select the device to be activated. The Hardware Key will be loaded into the display field.Only HMIs that have been already added to the domain are able to be activated using this method.Click the Activate button
Click on the “Activate” button to complete activation.Depending on the HMI’s current activation status, the button may show “Activate”, “Already Activated” or “Not Supported”.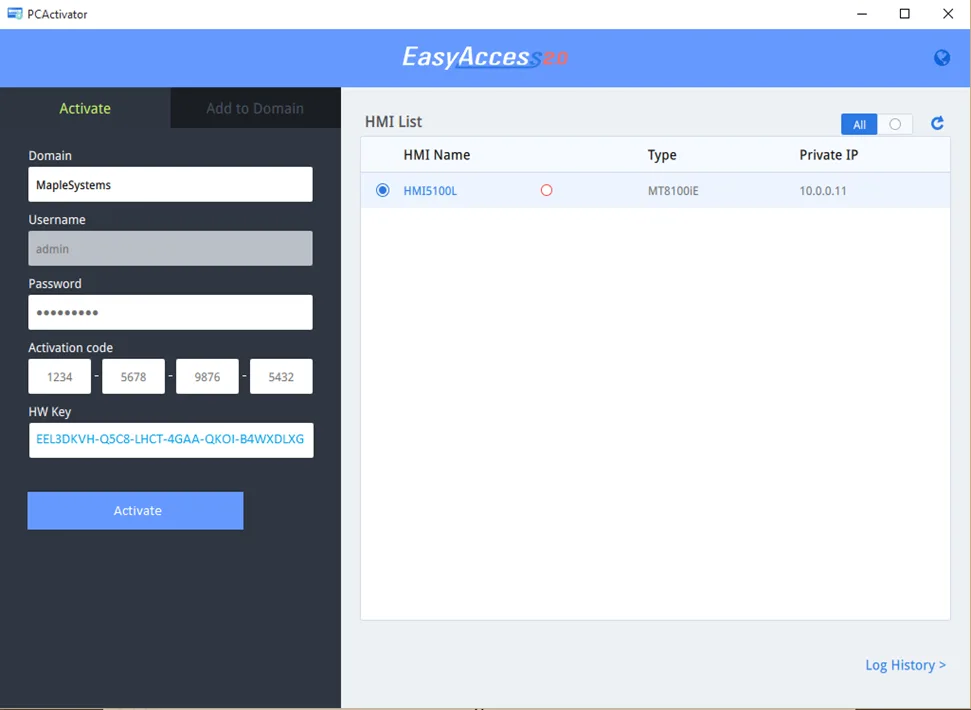
Success
The HMI has been activated.
Trial Activation
A one-time, 30-day free trial activation option is available for each HMI.
- Visit the EasyAccess 2.0 Domain website (https://weincloud.net) and log in to your Domain with your admin credentials.
- Click on Device under the Management menu. On the HMI tab, click + Add HMI. Select the Action Type 30-days free trial, and then enter the Hardware Key of the HMI.
Note:
- The HMI is permanently bound to the Domain in which the 30-day free trial is activated. It must be activated with an Activation Code before it can be deleted and transferred to another Domain.
Adding an HMI to a Domain using the Session ID/Password
An HMI must belong to a Domain before you can use EasyAccess 2.0 to access it remotely.
When an HMI is activated using an Activation Card, it is automatically added to the Domain from which it is activated. This can be done by going to the EasyAccess 2.0 Domain website (https://weincloud.net) or by using the PC Activator utility.
However, if the HMI has already been activated from the factory, you can add the HMI to a Domain by obtaining a Session ID and Password. (This method is also used when removing or un-registering an activated HMI from one Domain and moving it to a different Domain.) The EasyAccess 2.0 service requires that each HMI belong to only one Domain. Therefore, once an HMI has been added to one Domain, it cannot be added to another one. For an HMI to be transferred to another Domain, it must be removed from its current Domain first, and then registered to another domain using a new Session ID and Password.
How to find the Session ID and Password
A Session ID and Password are generated dynamically on each HMI once it connects to the Global EasyAccess 2.0 VPN servers. If an HMI has already been activated but does not yet belong to a Domain, you can determine the Session ID and Password by connecting the HMI to the Internet and following the steps below
Instructions: How to find the Session ID and Password
Create a project that references the corresponding system registers
First, create and download an EZwarePlus /EasyBuilder Pro project that displays Session ID/Password (system registers LW-10821 to LW-10827), and allows setting system register LW-10820, the connection control register.Give HMI Internet Access, write a “1” to the LW-10820 register.
Allow the HMI to go online and connect to the Global EasyAccess 2.0 VPN servers by writing a 1 to LW-10820 (as configured in the “Start” button on the built-in Window #76, the “EasyAccess 2.0 Settings” window).Session ID and Password are shown
Once successfully connected, the HMI will display the Session ID and Password.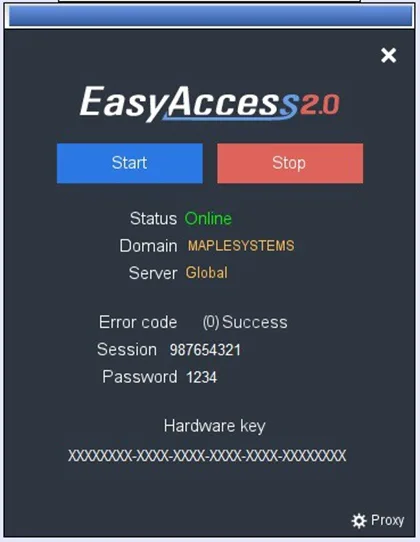
Add to Domain using Session ID/Password
With the Session ID and Password in hand, go to your Domain webpage (https://weincloud.net) and log in as the Administrator. Click the Device tab under the Management menu and click + Add HMI. Select Add by Session ID/Password under Action Type. Enter the Session ID/Password, along with any notes in the Custom Fields, if desired. Then click Submit.
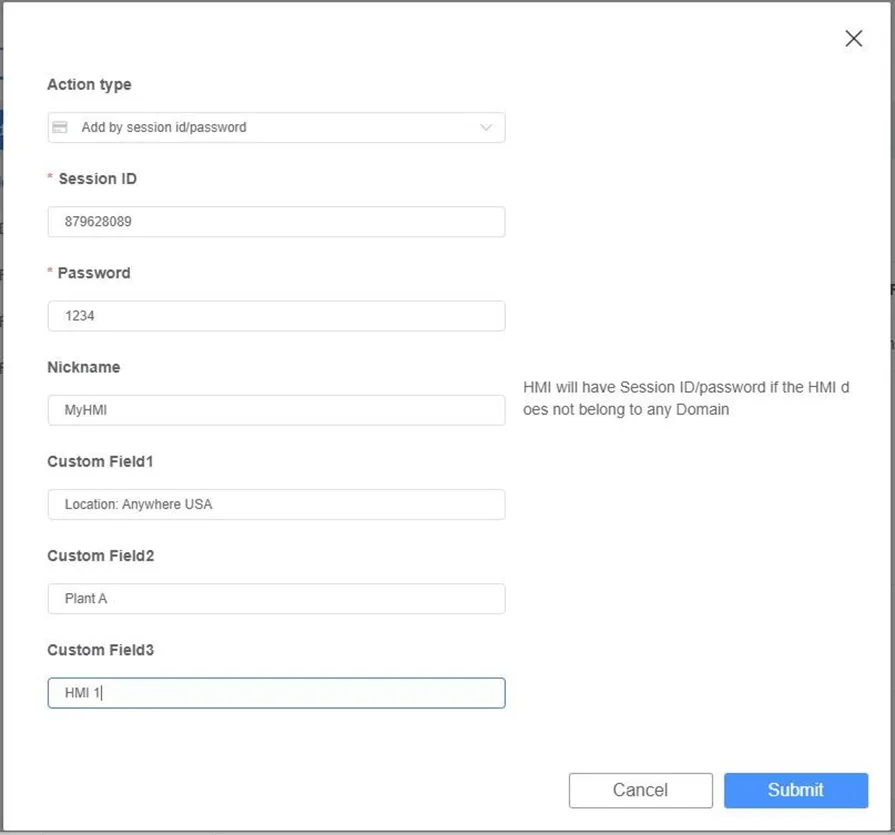
Connect the HMI to the EasyAccess 2.0 Server
Regardless of how the HMI is added to the Domain, it must be able to connect to the Global EasyAccess 2.0 VPN servers before it will appear in the EasyAccess 2.0 app as “Online”. The easiest way to accomplish this is to create a new project in EBPro and place a Function Key on Window 10 (the default ‘Main’ window) and configure it to show a pop-up window with Window 76: “EasyAccess2.0 Settings”.
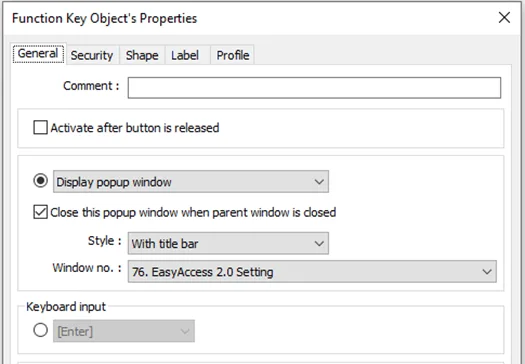
Make sure the HMI is connected to the Internet through a router and that the Gateway IP address in the HMI matches that configured in the router. Download the project to the HMI and press the Function Key to show the pop-up of Window 76.
Note:
For Dual-Ethernet model HMIs, use the LAN 1 Ethernet port to allow connections out to the Internet.
Press the Start button to initiate the connection between the HMI and the EasyAccess 2.0 server. This could take up to one minute for the HMI to establish connection and display “Online” in the State field.
Transfer HMI
To move the HMI to another domain, select the HMI under the Devices tab in the domain, click on the info icon and click Transfer.
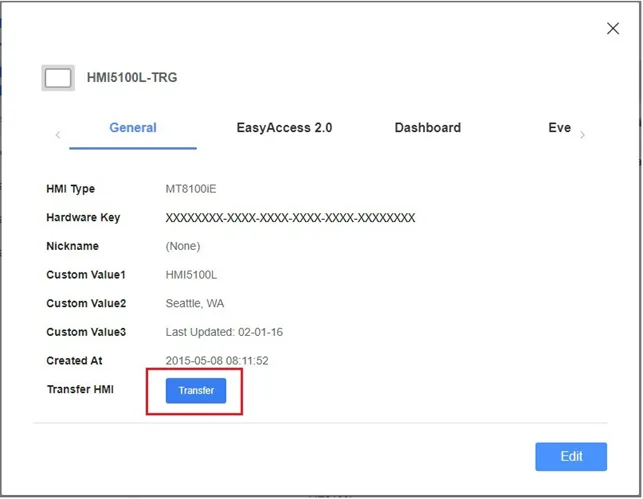
A confirmation dialog will pop up to confirm that you want to remove the HMI and transfer it to another domain. Click Delete to complete the action.
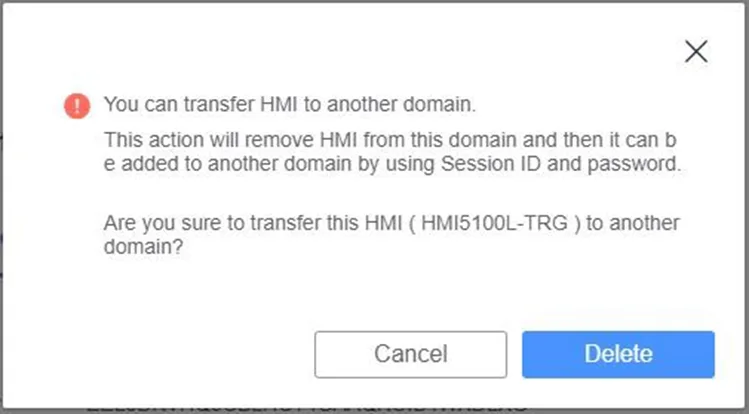
Once the HMI has been removed from the domain, it can be added into another domain using the Session ID and Password.