cMT Viewer
cMT Viewer is an application that runs on a Windows PC or tablet and on Apple iOS and Android devices. The cMT Viewer application connects to and interacts with the project in the cMT device. cMT Viewer is a free download from the App store or Google Play store.
cMT Viewer is pre-installed on the cMT-iV Series displays. The look and feel are the same across all platforms.
However, some configuration options may vary due to differences in PC, Apple, and Android hardware.
Note:
- The use of the cMT Viewer application is discussed in this document. Setup of the smart phone or tablet device is the user’s responsibility.

To start the cMT Viewer app, tap the icon on the Apple or Android device.
Note:
- cMT Viewer is also available for the PC. It is installed with EBPro or can be downloaded from the maplesystems.com website. If installed, it can start from the EBPro Tools menu or from the Utility Manager.
Configuring cMT Viewer on the cMT-iV Series
When the cMT-iV powers up, it displays the default cMT Viewer screen.
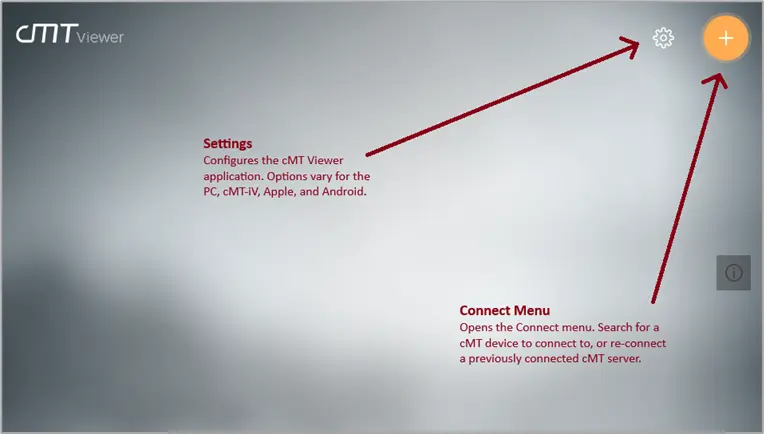
When the cMT-iV does not have any active connections to cMT projects or devices, it looks like the above. There are two buttons on the top-right corner of the cMT Viewer screen, a Settings button and a Connect Menu button.
Settings Menu
Tap the gear icon at the top right part of the screen to open the Settings menu.
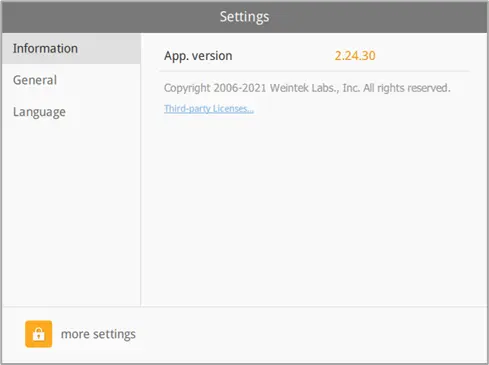
The closed padlock on the Settings tab indicates that security is in place, and only the System password can be changed. The current System password is required to change the password.
Note:
- The default System password is 111111. If the user forgets the password to get into the system settings on cMT-iV, the password can be reset by entering: default111111. This erases any uploaded projects stored on the cMT-iV and resets the password to 111111. This operation does not erase the project on the cMT device.
The Information tab displays the current configuration.
The General tab allows changing of the password (current password required) and adjusting the brightness, audio output level, and backlight saver (no password needed).
The Language tab selects the language that is displayed by the cMT Viewer’s menus and selections. Languages used by the cMT project are specified in the project itself.
Note:
- International keyboards are selected with the “Earth” key on the pop-up keyboard. To change the Date/Time, IP information, and the unit’s name, you must access EasyAccess 2.0 by following the instructions in the Configuring the cMT section of this document.
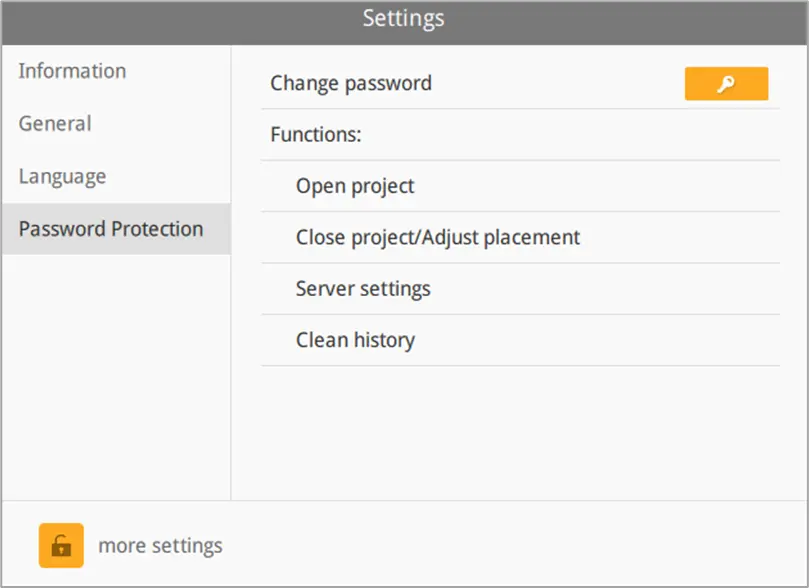
The Password Protection tab allows changing various passwords (current password not required). When selected, each password option enforces different access requirements.
- Open Project: Password is required to connect to and open a project in a cMT device.
- Close Project: Password is required to close a project and disconnect from a cMT device.
- Server Settings: Password is required to change settings in the cMT device from the cMT-iV.
- Clean History: Password is required to clear the historical data files stored on the cMT device.
Connect Menu
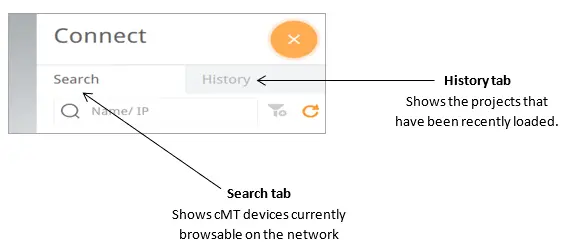
Select the orange plus symbol in the top right to access the Connect Menu.
Search Menu
Tap the Search tab to open the Search menu. The Search menu displays all the cMT devices on the current network.
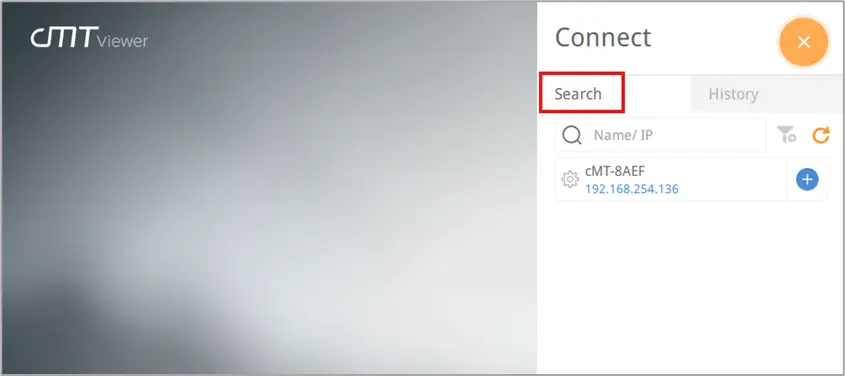

In the Name/IP box, enter the name or IP address of the cMT server to connect to and press the Enter key, or tap the Go button for the corresponding cMT unit in the list.

Tap the Refresh button to update the displayed information

Tap the Close button to close the main screen.
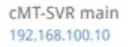
Tap the cMT-SVR image to identify the unit. The green LED on the unit will blink 3 times.
(Only available on cMT-SVR series.)

Tap the Go button to connect to the corresponding cMT device and load the project. A password may be required.

Tap the Setup button to open the configuration page for the corresponding cMT device. A password may be required.
History Menu
Tap the History tab to open the History menu. The History screen displays all cMT devices that cMT Viewer has connected to in the past.
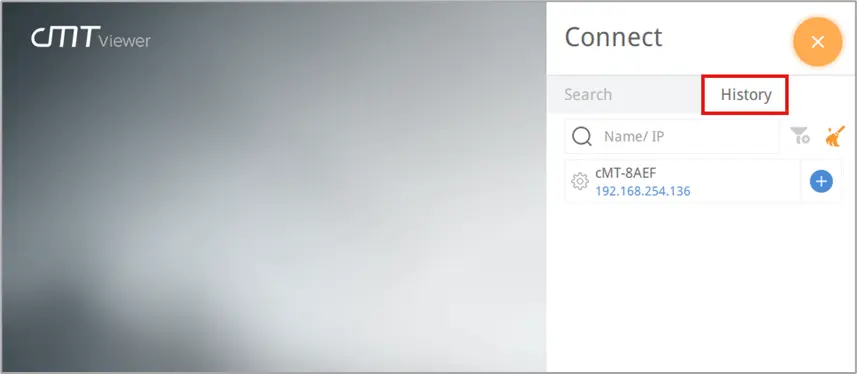

Tap the Clear History icon to remove all items from the History.
Tap the Close icon to return to the main screen.
Tap the cMT-SVR image to identify the unit. The green LED on the unit will blink 3 times. (Only available on cMT-SVR series.)
Tap the Go button to connect to the selected cMT device and load the project. The password may be required.
Tap the Setup button to open the configuration page for the selected cMT device. The password may be required. These are the same configuration settings that are shown in the web browser
Return to Main Screen (Project Screen)
Tap the Start Button when connected to a cMT device and view a project to open the Project screen. A thumbnail image of the last-viewed screen will be displayed for the most recently connected cMT devices. Tap the image to quickly resume that project.

The start button appears in the top left corner of the cMT Viewer window and is visible to take the operator back to the default cMT Viewer screen when a cMT project is being viewed. It can be moved by holding and dragging the icon elsewhere.
The button can also be hidden under General in the Setting dialog. There is an option for Show Start Button. When this Show Start Button option is disabled, a Hidden Start position option is available allowing the user to place a hidden start button in the top left or top right corner of the window. The hidden start button works the same as the normal start button above but is not visible to the user.
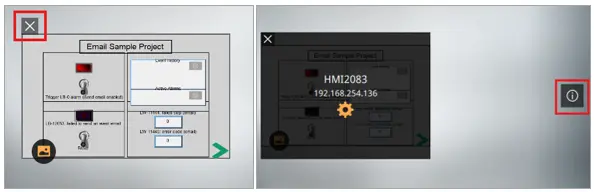

Tap the Close icon to remove the selected project from the list.

Tap the Information icon to show the IP address and HMI name for each of the cMT projects shown.

Tap the Setup button to open the configuration page for the selected cMT device. The password may be required. These are the same configuration settings that are shown in the web browser.
Using cMT Viewer on a Windows PC
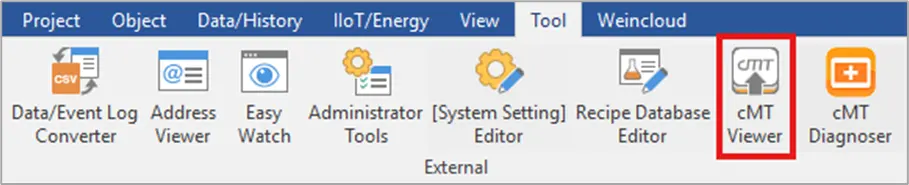
To start the cMT Viewer on a PC, click on the Tools menu in EBPro and select cMT Viewer.
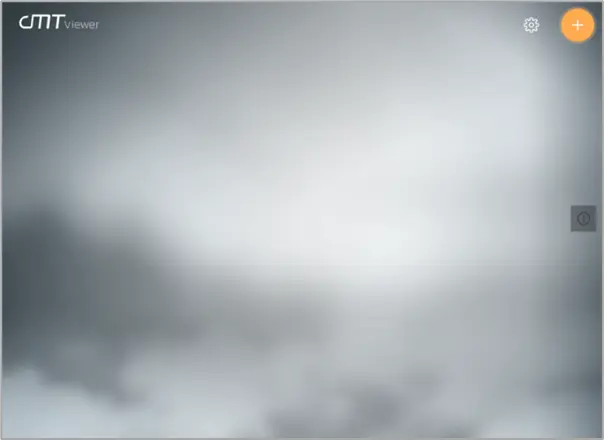
The main page will appear
Settings Menu
Click the gear icon at the top right corner of the cMT Viewer main page to open the Settings menu. The Settings menu controls how the cMT Viewer application looks and feels.
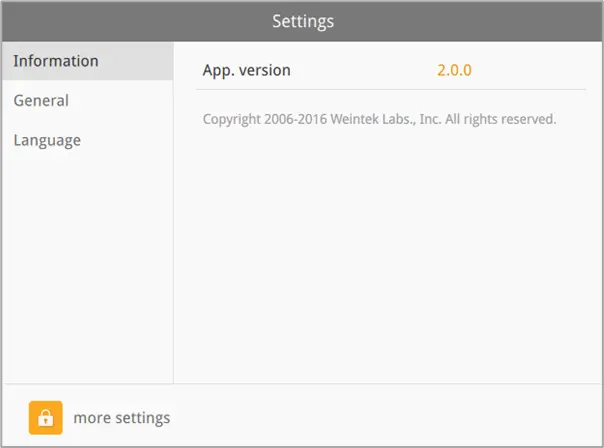
The Information tab displays the current application version.
The General tab allows adjusting the cMT Viewer to fit the window when maximized and switching between landscape and portrait mode.
The Language tab selects the language that is displayed by the cMT Viewer’s menus and selections. Languages used by the cMT project are specified in the project itself.
To change password settings, you must log in with the System password. Click the closed padlock icon on the settings tab. Enter the System password and select OK.
The Password Protection tab is displayed after the System password has been entered. That tab allows changing various passwords (current password not required), and the selection of which actions will require the password:
- Open Project: if selected, the password is required to connect to and open a project in a cMT device.
- Close Project: if selected, the password is required to close a project and disconnect from a cMT device.
- Server Settings: if selected, the password is required to change settings in the cMT device from the cMT-iV.
- Clear History: if selected, the password is required to clear the historical data files stored on the cMT device.
The menu and navigation structure within the cMT Viewer application on the PC operates the same way as illustrated above for the cMT-iV.
Monitor Mode
Monitor Mode enables real-time viewability of values using the cMT Viewer program. Monitor Mode is only available in the PC version of cMT Viewer. Monitor Mode is off by default but is easily enabled.
Note:
- A maximum of 50 cMT projects can be shown in Monitor Mode.
Creating the Monitor Mode screen in a cMT project
Here’s how you create the Monitor Mode screen in EasyBuilder Pro:
Instructions: Creating the Monitor Mode screen in a cMT project
Enable Monitor Mode in System Parameters
To enable Monitor Mode in a cMT project, open the .cmtp project file in EBPro. Enter the Home menu and select System Parameters. Select the General tab, and check the Enable checkbox.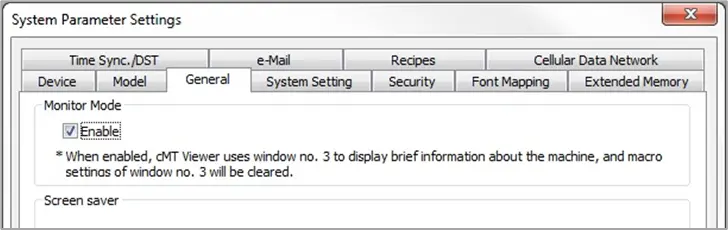
Confirm creation of Monitor Mode (Window 3 in project)
Select OK to close the System Parameter Settings window. A confirmation window will appear.
Select OK.
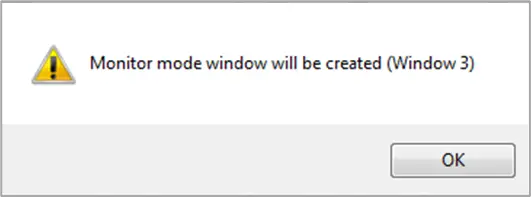
Done!
Notice that a new window has been created, Window 3, titled Monitor Mode. This window is the thumbnail image of the project as seen with the cMT Viewer application.Double-click the Monitor Mode Window to make changes to the contents of the window. You can place objects, numeric displays, indicators, alarm displays, bar graphs, and more on this window.
Note:
Information placed on this window will be updated in real-time to be seen with the cMT Viewer application only.
Enabling Monitor Mode Visualization in cMT Viewer
To enable Monitor Mode in the cMT Viewer application, follow these steps
Instructions: Enabling Monitor Mode Visualization in cMT Viewer
Enter Settings Menu
From the main cMT Viewer window, enter the Settings menu.Enter the System Password
Select the closed lock icon and enter the System Password (default is 111111).You are not selecting any cMT units here, simply entering the password to the local cMT Viewer applicationFlip the Switch
Select the General tab and click the switch to enable Monitor Mode.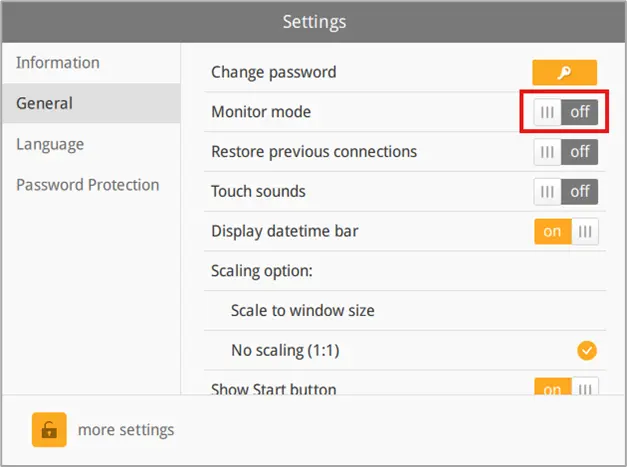
Close the Window
Once Monitor Mode is enabled, select the Close button to return to the main screen.Notice the additional icons now present.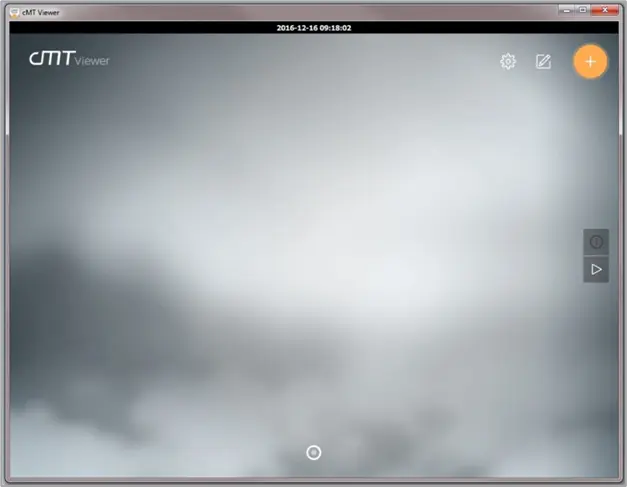
Monitor Mode Icons and their functions
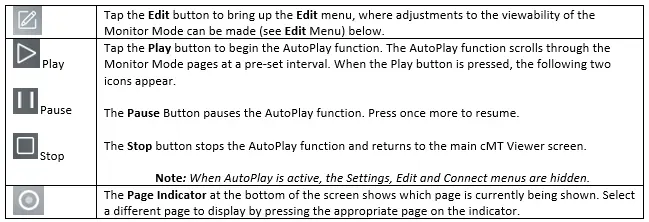
Tap the Edit button to bring up the Edit menu, where adjustments to the viewability of the Monitor Mode can be made (see Edit Menu) below.
Tap the Play button to begin the AutoPlay function. The AutoPlay function scrolls through the Monitor Mode pages at a pre-set interval. When the Play button is pressed, the following two icons appear:
The Pause Button pauses the AutoPlay function. Press once more to resume.
The Stop button stops the AutoPlay function and returns to the main cMT Viewer screen.
Note: When AutoPlay is active, the Settings, Edit and Connect menus are hidden.
The Page Indicator at the bottom of the screen shows which page is currently being shown. Select
a different page to display by pressing the appropriate page on the indicator.
Edit Menu
The Edit Menu is the Monitor Mode viewability configuration menu. The Edit menu controls the pages, layout, and AutoPlay configuration settings.
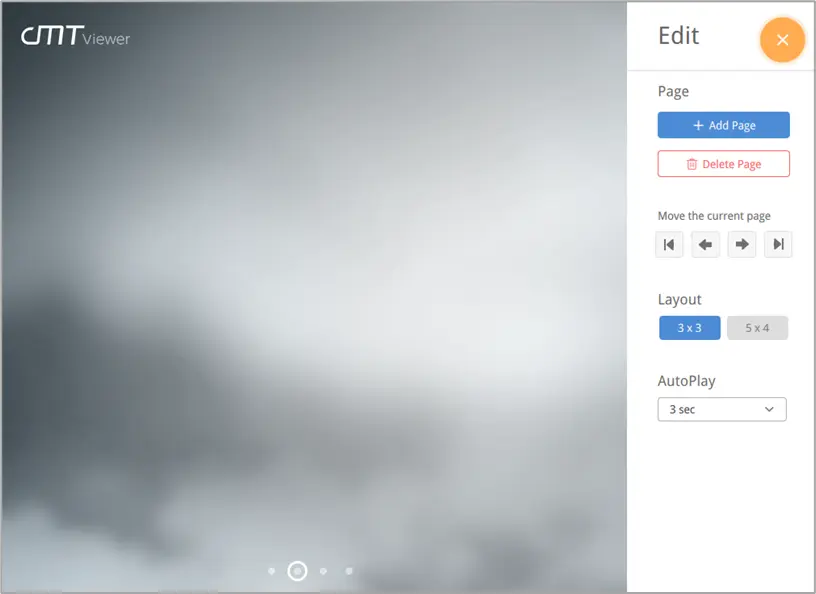

Press the Add Page button to add a page to the Monitor Mode display. Up to nine pages can be created and a single page can show one or more cMT projects.

Press the Delete Page button to delete the selected page (the current page is shown by the page indicator at the bottom of the screen). You will be asked to confirm the delete.

Press any of the Page Management buttons to move the currently selected page. Pages can be moved forward or backward by one location or can be moved to the beginning or ending page in the page order.

Press the Layout button that corresponds with your desired page layout. A maximum of nine (in 3×3 format) or 20 (in 5×4 format) cMT projects can be viewed on a single page. This is a global setting and will apply to all the pages in Monitor Mode. Regardless of the layout chosen, the maximum number of cMT projects that can be viewed in Monitor mode is 50.

Press the AutoPlay Timing button to adjust the amount of time each page is shown before advancing to the next. Three Seconds is the default setting but can be changed to allow up to 60 seconds before advancing. This is a global setting and will apply to all the pages in Monitor Mode.
Once the Monitor Mode settings have been adjusted to their desired values, select the Close icon to exit the Edit Menu and return to the main cMT Viewer screen. Then, connect to a cMT device via the Connect menu. Once a cMT device is connected, you will be able to view thumbnail images of the cMT projects from the main cMT Viewer overview screen.
If the cMT projects have Monitor Mode enabled, the thumbnail image of the cMT project will be Window 3. This window updates automatically so the user will always see up-to-date accurate information without having to enter the specific cMT project and navigate to the desired screen. If the cMT projects do not feature Monitor Mode, a thumbnail image snapshot of the last cMT project is shown on the overview screen.
Update cMT-iV OS and/or Firmware
The Utility Manager included with EBPro includes a mechanism for updating the cMT-iV operating system and/or firmware. Updating of the cMT-iV operating system (OS) is not normally something that needs to be done by the end user. However, in certain situations, updates in the field may be necessary.
Update the firmware in the cMT-iV device anytime you program the cMT device with a newer version of EBPro software. To update the firmware, use the Utility Manager tool included with EBPro.
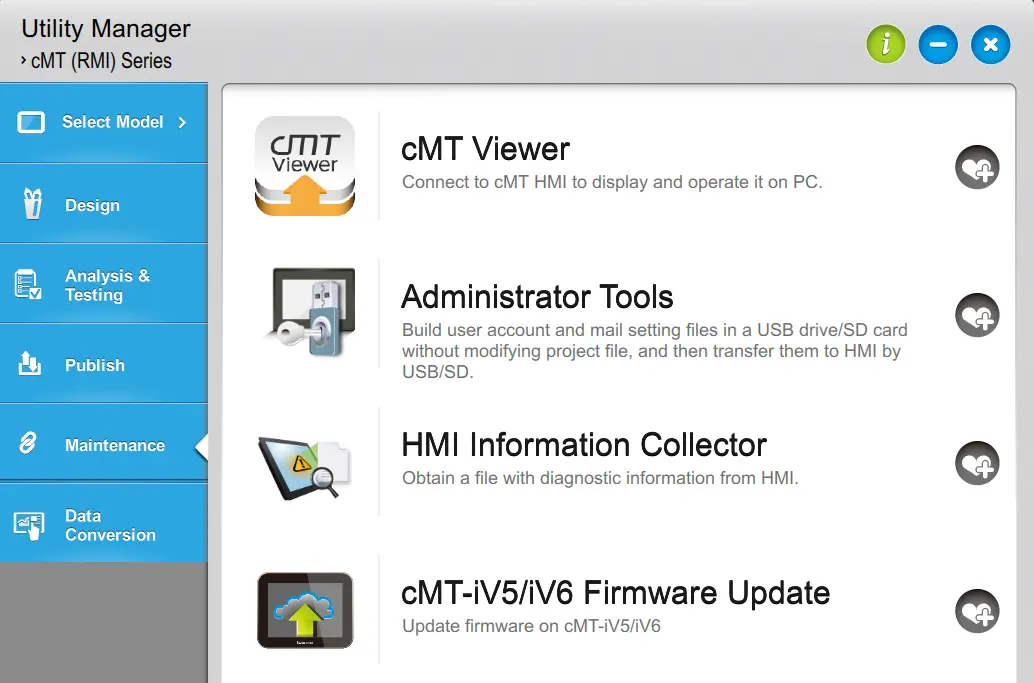
Click Select Model in the upper-left corner of the Utility Manager. Select the cMT (RMI) Series from the list of devices shown. Then, click the Maintenance tab and select cMT-iV Firmware Upgrade.
After selecting your unit, the following window will appear. Select your cMT device from the HMI list under the HMI Name tab or type in the cMT device’s IP address under the IP tab.
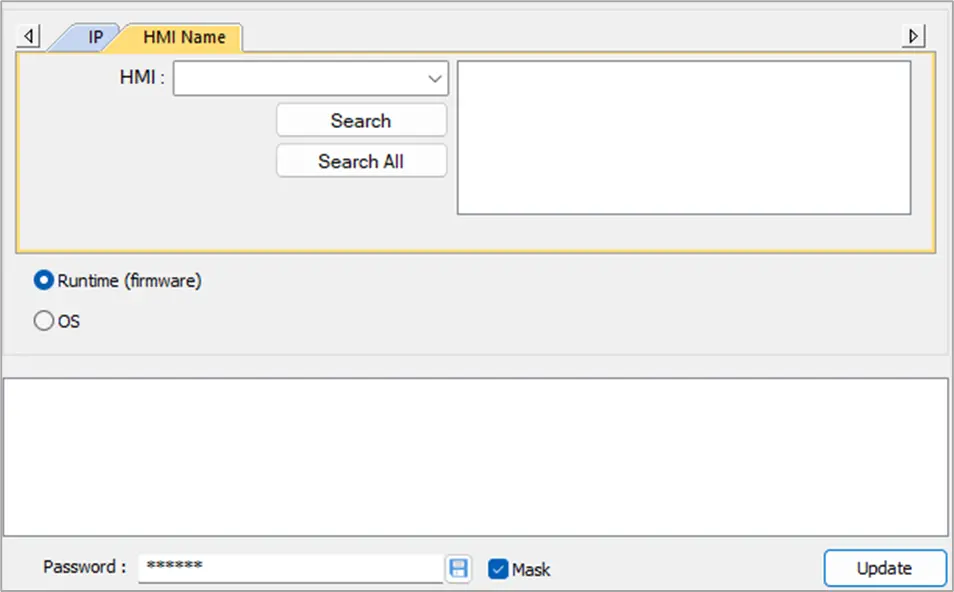
After selecting your device, select Runtime (firmware) and click the Update button to update the firmware. The utility will locate the proper firmware file and transfer it to the cMT-iV.
Note:
- Please do not attempt to update the Operating System (OS) without first contacting Maple Systems Technical Support. Unlike the firmware, the OS file is not supplied with EBPro.