Overview
This guide explains how to set up a device on Azure IoT Hub and utilize MQTT features in EBPro. It’s important to note that while the IoT Hub functions as an MQTT message broker, it may not fully support all behaviors specified in the MQTT v3.1.1 standard.
For more detailed information, please visit the Microsoft Azure website at:
https://learn.microsoft.com/en-us/azure/iot/iot-mqtt-connect-to-iot-hub
Additionally, the CMT X series offers a straightforward way to connect with devices on the IoT Hub using the MQTT protocol through simple configuration in EBPro. This guide provides a step-by-step walkthrough of setting up IoT Hub devices and configuring EBPro.
Setting up Devices on IoT Hub
The IoT Hub is located within Microsoft Azure, and all configurations are performed through the web portal. To get started, you need to register as a user on the Azure website by following these steps:
Instructions: Setting up Devices on IoT Hub
Create new Account
Visit the Microsoft Azure website at https://portal.azure.com and register for a new account.
Search for IoT Hub
After logging in, search for “IoT Hub”.
Add a new IoT Hub
Once in the IoT Hub interface, click on +Create to add a new IoT Hub.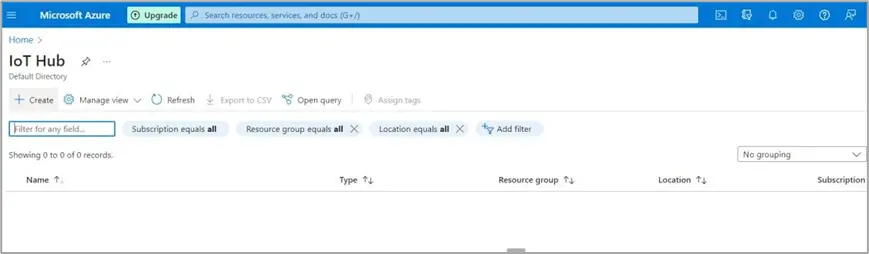
Configure IoT Hub Parameters
Configure the Subscription, Resource group, IoT hub name, Region, and Tier according to your preferences. Leave the remaining settings as default and click Review + create.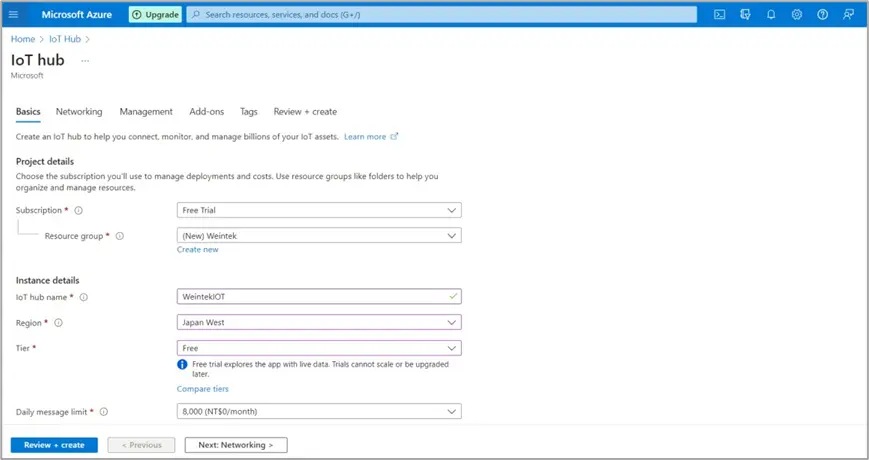
Open the newly-created IoT Hub
Click on the IoT Hub created in step 5 to access it.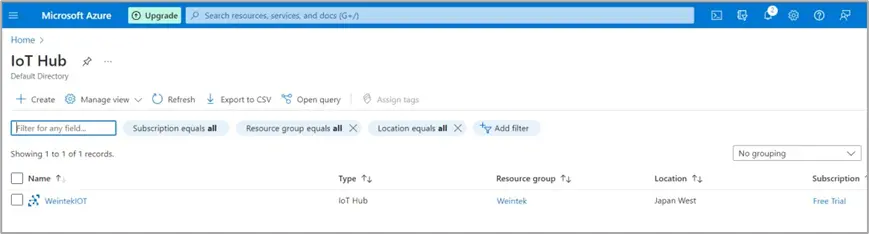
Add a new Device
Within the IoT Hub, click on +Add Device to add a new device.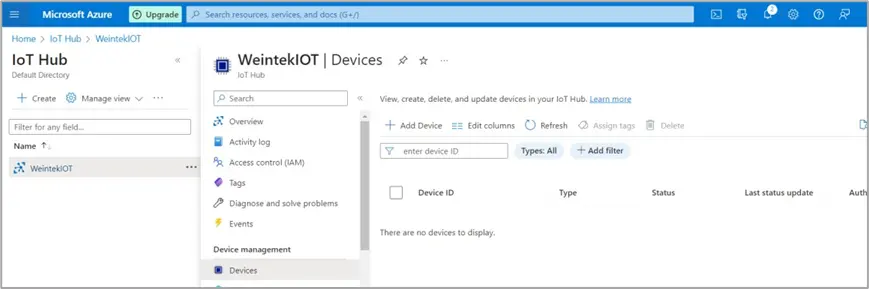
Configure Device Parameters and Save
Configure the Device ID, select Auto generate keys, set the authentication type to Symmetric key, and enable Connect this device to an IoT hub. Then, click Save to add the device.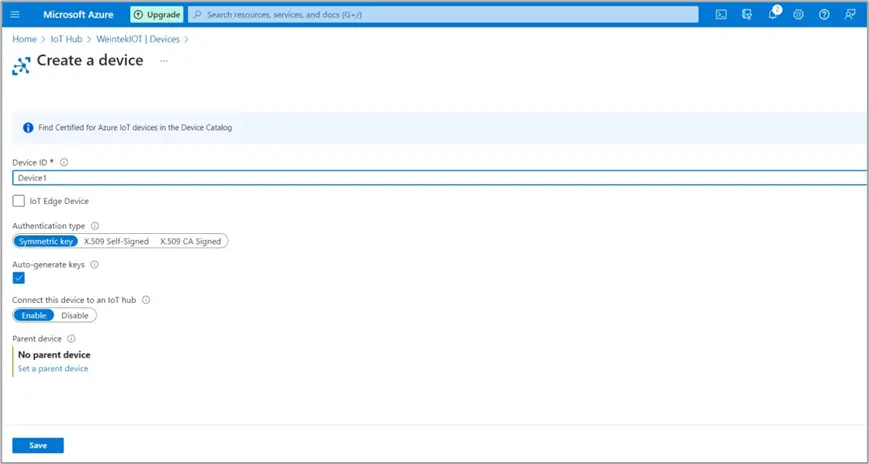
Configure Device Settings
Click on the device created in step 8 to access its settings.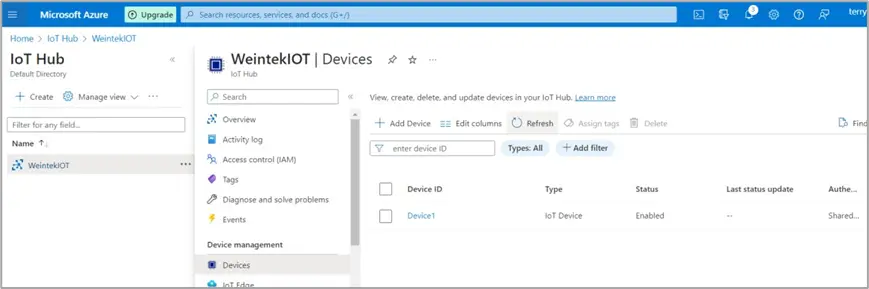
Copy Primary Connection String
Copy the primary connection string.This will be used in the MQTT settings in EBPro, so please ensure that you remember it.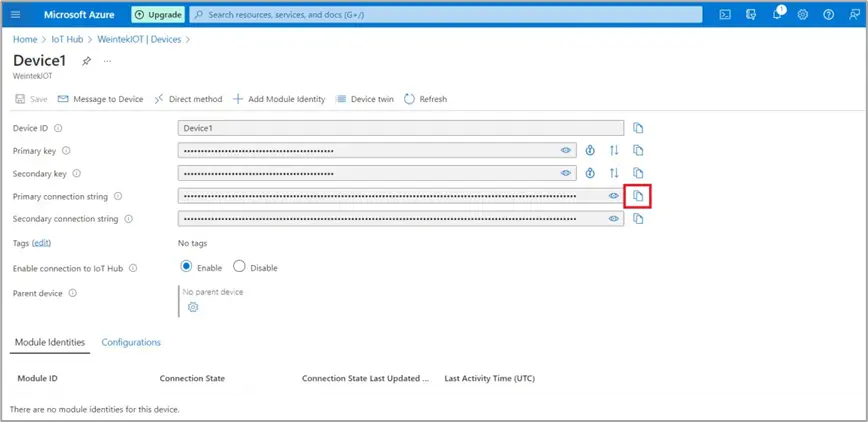
EasyBuilder Pro Settings
How to configure devices from the Azure IoT Hub in EBPro.
Instructions: EasyBuilder Pro Settings
Create a new MQTT Object.
Click on IIoT/Energy > MQTT to open the MQTT settings page.
Configure General Tab Properties
General settings: Choose Azure IoT Hub as the cloud service, use the primary connection string obtained earlier for the connection string, and leave the remaining settings as default.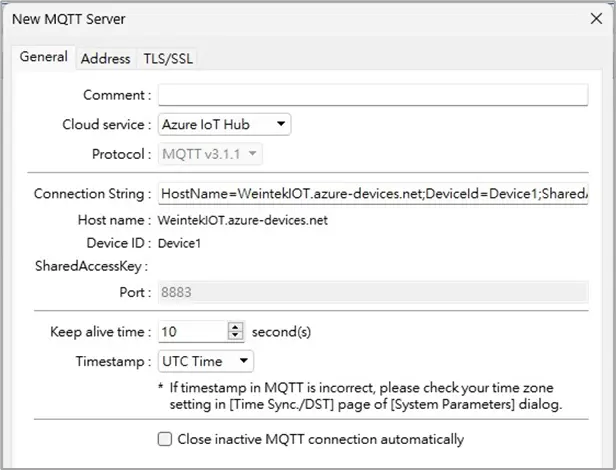
Configure Address Tab Properties
Address settings: Configure the relevant parameters for the address.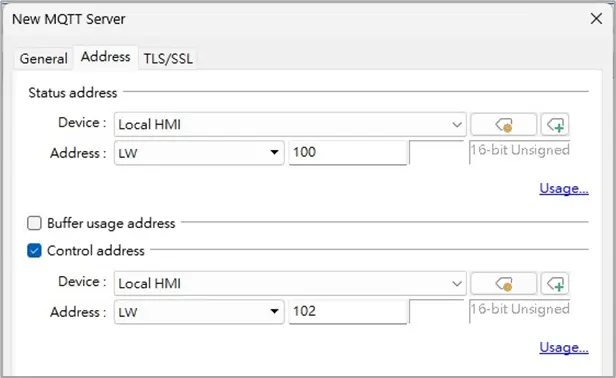
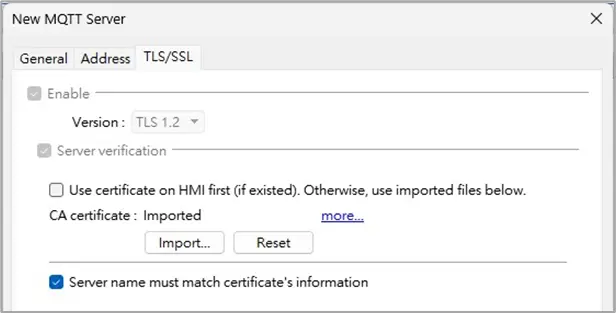
Confgure TLS/SSL Tab Properties
TLS/SSL settings: Import the CA certificate. To use the CA certificate, download and import DigiCert Global Root G2.For more information about the certificate, visit:
Publishing / Subscribing Clarification
After completing the server configuration, the IoT Hub is not a fully functional MQTT broker and may not support all the behaviors specified in the MQTT v3.1.1 standard. Therefore, follow the instructions below for publishing and subscribing to topics.Publishing
After the device is connected, the HMI will use “devices/{device-id}/messages/events/” or “devices/{device-id}/messages/events/{property-bag}” as the topic name to send messages to the IoT Hub.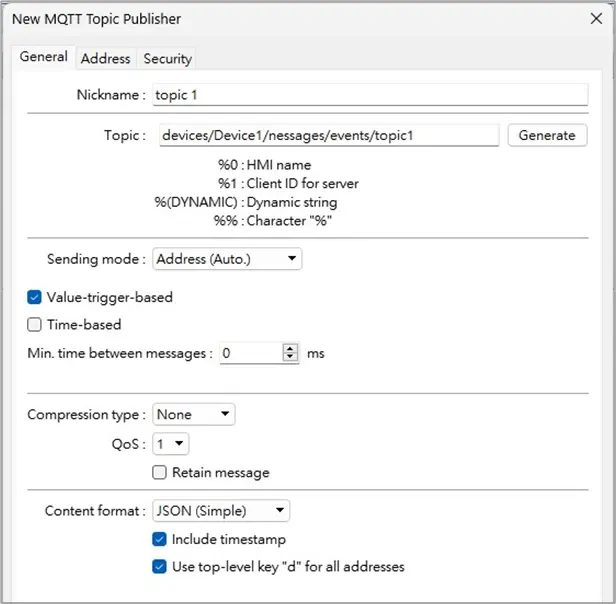
Subscribing
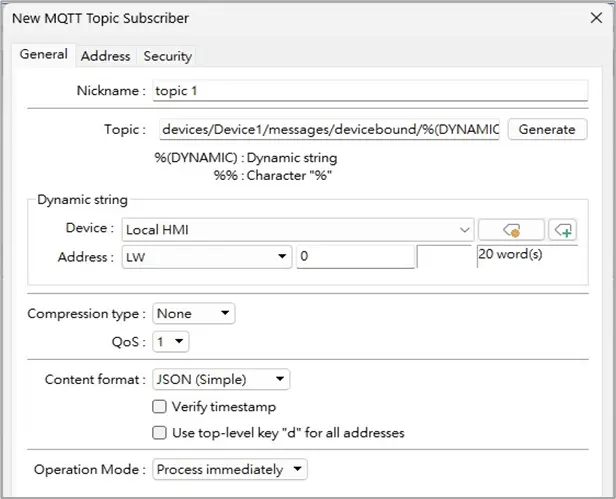
To receive messages from the IoT Hub, use “devices/{device-id}/messages/devicebound/#” as the topic filter to subscribe to the topic.Note: Since “#” is a reserved character in EBPro, you need to use dynamic string and set the “#” as the string content during runtime.