Choosing a Broker
Built-in Broker in HMI
To use the built-in broker in HMI, set the IP address to 127.0.0.1 in MQTT Server settings dialog box. MQTT will use the built-in broker in HMI, and client programs can connect to the broker using the IP address of the HMI.
The HMI’s MQTT Broker must be downloaded to the HMI from EasyBuilder Pro. Select [Runtime] when downloading to set up an MQTT Broker.
External Broker
To use an external public broker, enter the IP address or domain name of the external broker when configuring MQTT server information.
For example, when using a public broker HiveMQ, the data of the broker is:
- Host: broker.hivemq.com
- Port: 1883
(http://www.hivemq.com/try-out/)
Self-built Broker
It is possible to host an MQTT Broker on your own server hardware using third party software. The following are some verified choices:
- Mosquitto (http://mosquitto.org/download/)
- HiveMQ (http://www.hivemq.com/downloads/) (test version provided)
- EMQ (http://emqtt.io/)
Please visit their respective official websites for details on installation and restrictions.
Getting MQTT Data
Getting MQTT data updates requires an MQTT client program. The client program connects to the broker and registers to receive data updates (subscribes to topics) from the HMI. Many free client programs can be found on the web. This chapter introduces one of the free programs for PC: MQTT.fx, available for free download here:
http://mqttfx.jensd.de/index.php/download
Client Program
Many free MQTT client programs for PC and portable can be found on the web. The following briefly walks through the steps to use MQTT.fx on PC to connect to the broker in order to get message updates from HMI. For other programs, configuration steps may be similar.
Suppose an HMI is running MQTT Demo project. It’s been configured to connect to MQTT Broker at broker.hivemq.com, port 1883. It has an MQTT topic called Data_Bit.
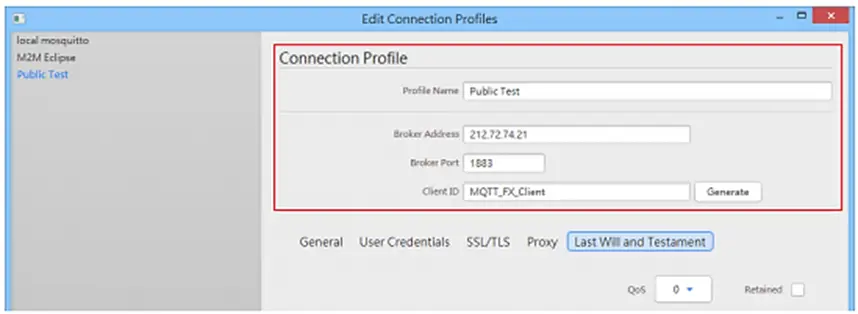
In MQTT.fx » Edit Connection Profiles window, the connection profile should be set as follows.
- Broker Address: broker.hivemq.com
- Broker Port: 1883
- Profile Name: user defined
- Client ID: user defined
The rest of the settings can remain in default. The connection with broker will start after clicking [Connect].
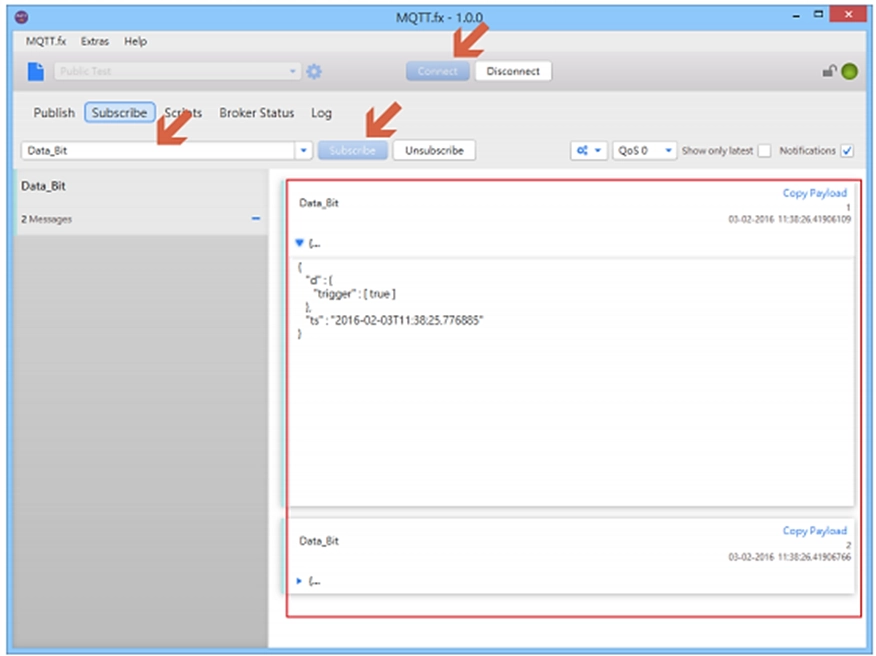
Open the Subscribe tab » enter Data_Bit in the field shown below » click [Subscribe] button. Once successfully subscribed, when there are MQTT message updates, they will be received and displayed on the main screen.