
Overview & Concepts
Downloading a project in EasyBuilder Pro allows a user to transfer a compiled project from a computer or external storage to an HMI so the project can run on the device. This process is typically used when deploying a new project, updating an existing installation, or restoring a project to an HMI during maintenance. The download function writes the compiled project file to the HMI’s internal memory and starts the project for runtime operation.
Projects can be downloaded to an HMI using two common methods:
- Direct download – A computer connects to the HMI using Ethernet communication. EasyBuilder Pro then transfers the compiled project file directly from the engineering workstation to the HMI.
- USB / SD storage download – A USB or SD storage device containing the compiled project file is connected to the HMI. The HMI system menu can then be used to load the project file from the external storage into the device.
These methods provide flexibility depending on system access. Direct download is typically used during development or commissioning when an engineering computer can connect to the HMI over a network, while USB / SD download is useful during field service when direct communication with the HMI is not available.
It is important to note that downloading a project may be restricted if project protection features have been enabled, such as device binding or password protection. In those cases, the HMI may only allow authorized project files to be loaded. See the Project Protection section for information on how HMIs can be protected from unwanted project editing or download.
Implementation

Direct Download via EasyBuilder Pro
With an open project in the EasyBuilder Pro software, click the Project Tab => Download Option.
The project will automatically compile; when complete, the Download window will show.
In the Download Window, enter the HMI IP address, and ensure the correct download password is entered in the [Settings] menu. The download password field needs to be filled out with the proper password (See the Project Protection section for information on how HMIs can be protected from unwanted project editing or download) or the download will fail.
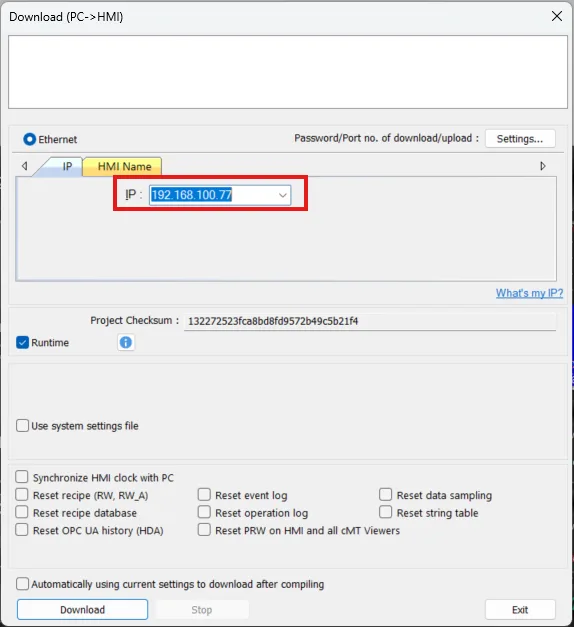
If you want data sampling and event logs to be reset after the download, you can select the relevant check boxes here.
Once you’re done with that, click the [Download] button. When the download is completed, you will see the Finished message:
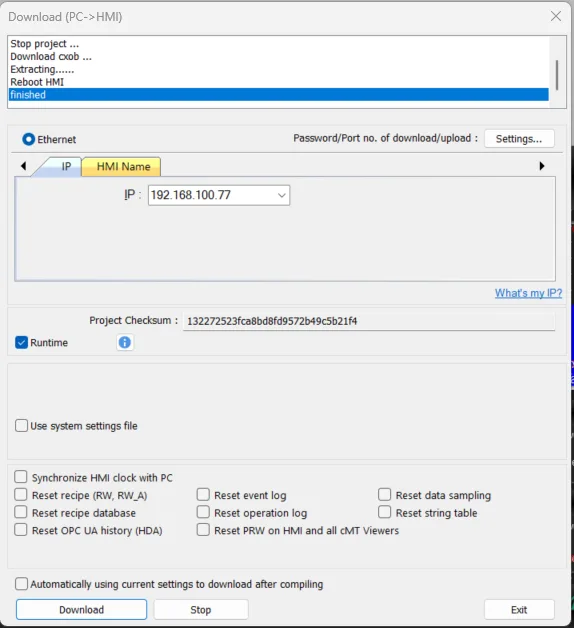
The project now resides in the HMI.
Direct Download via Utility Manager
Using the Utility Manager program, located in the EasyBuilder Pro Installation directory is another method of downloading the project file direct to the HMI, provided you know the file path to the compiled project in your development PC.
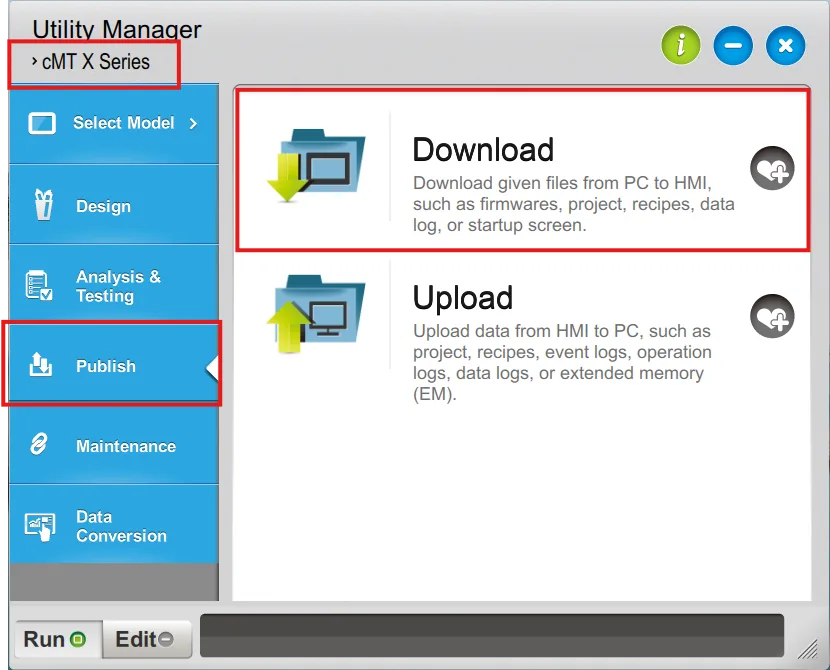
Open Utility Manager and select the model of HMI to which you are downloading. Then under the [Publish] tab on the left, select the [Download] option:
The Download window pops up. Enter the HMI IP address in the IP field, and navigate to the existing compiled project halfway down the window.
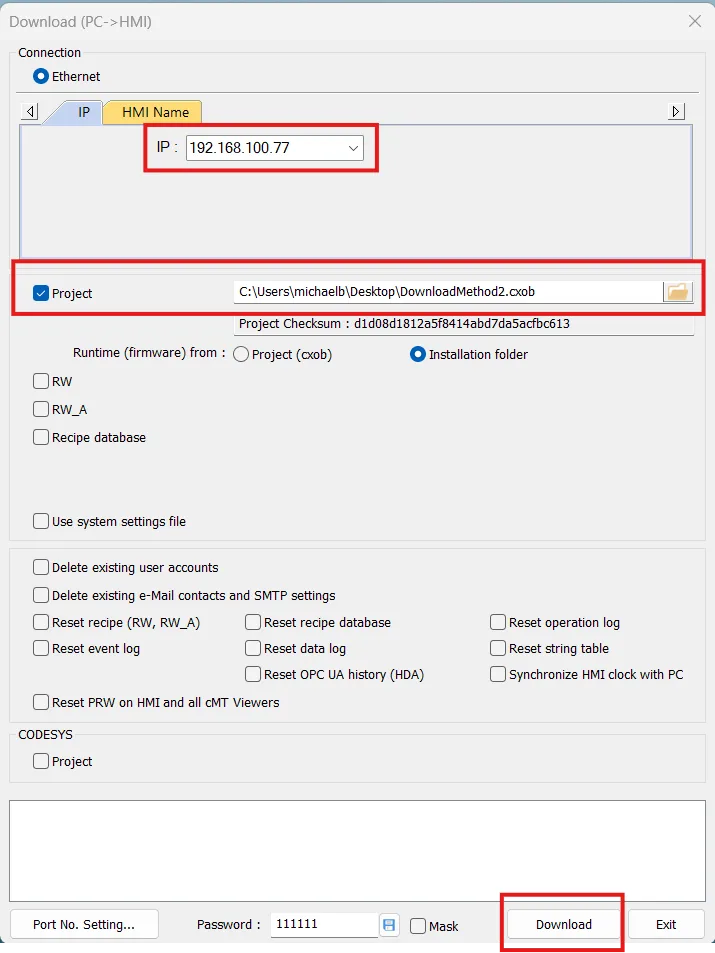
If you want to reset other records from the HMI such as recipes, event logs and such, select the appropriate check boxes as desired.
Ensure the correct password is entered in the [Password] field. If the password is incorrect, you will encounter a Password Error message, and the project will not download. See the Project Protection section for information on how HMIs can be protected from unwanted project editing or download.
Click the [Download] button to download the compiled project file to the HMI.
When the download is completed, you will see the Finished message:
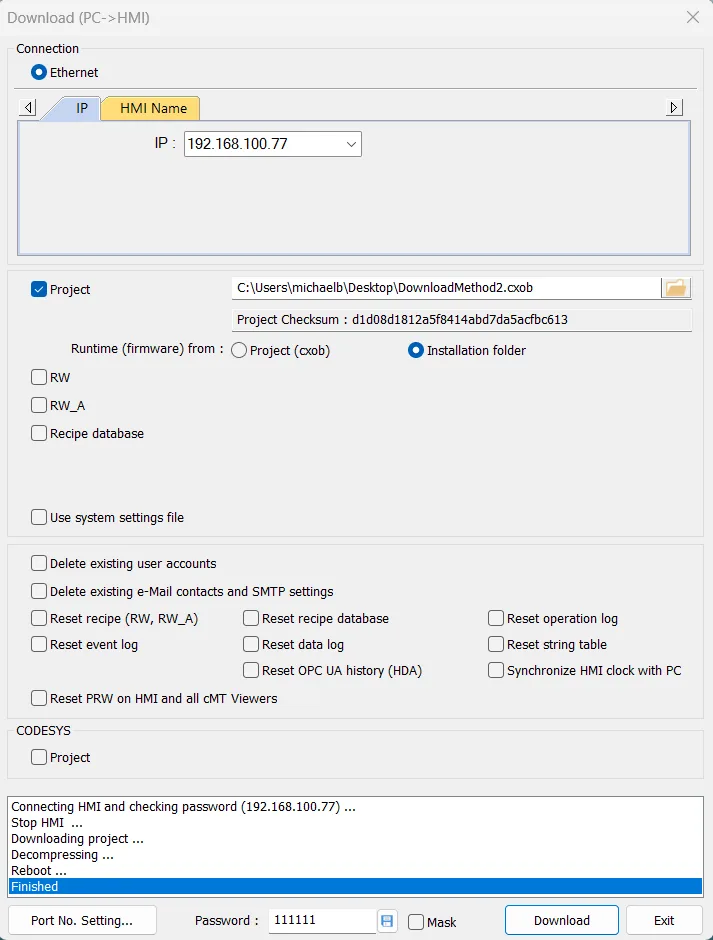
The project now resides in the HMI.
Direct Download via EasyWeb (cMT / cMT X Series)
If you don’t have EasyBuilder Pro or Utility Manager, you can connect to a cMT or cMT X Series HMI via EasyWeb, and download the project into the HMI that way.
Instructions: Direct Download via EasyWeb (cMT / cMT X Series)
Enter the IP of the HMI:
Open your web browser of choice, and in the address bar, enter the IP address of the HMI to which you want to connect: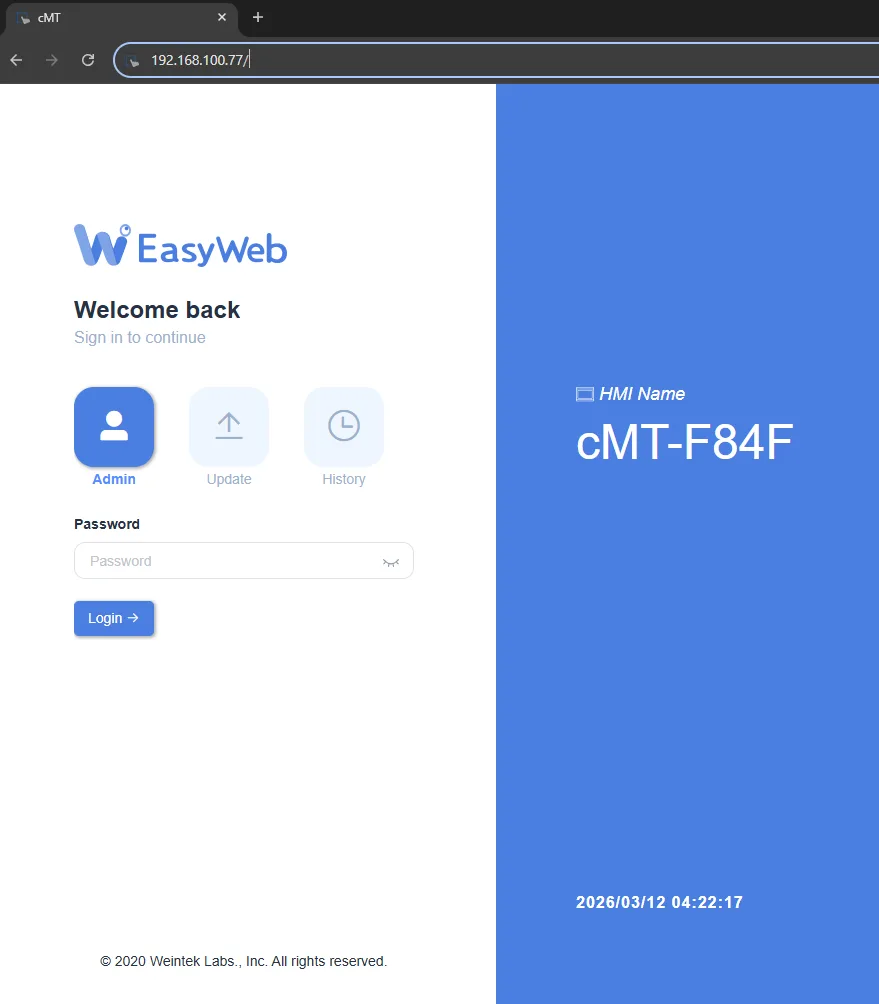
Enter Password
Enter the HMI System Settings Password and then click the arrow button.Typically, the default password here is 111111, but it can be changed for security purposes.Select Project Management
Once logged in, select the Project tab, and then Project Management: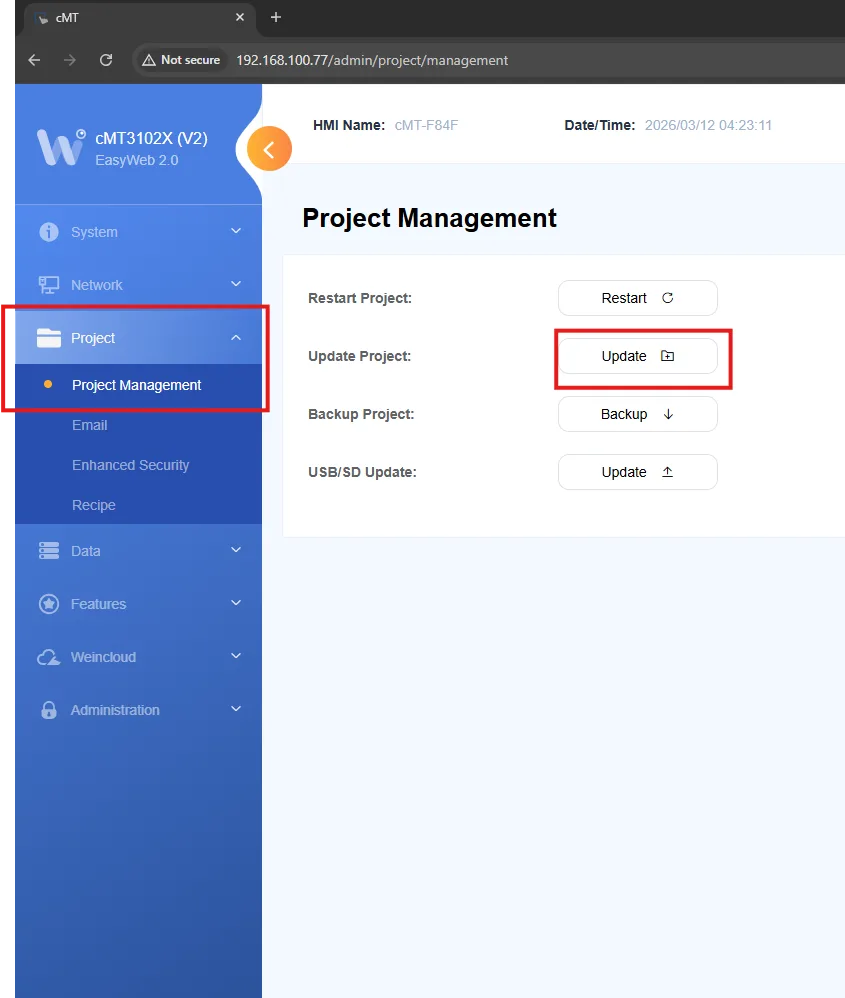
Select Update, Navigate to project file location
Click the “Update” button and then navigate to the .cxob complied project file on your PC:The screenshot uses the term “upload”. This is true, from the perspective of the PC the project is being uploaded OUT of the PC and IN to the HMI.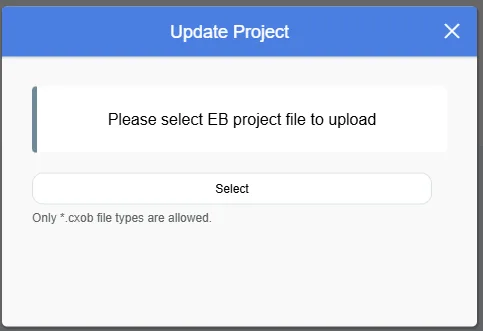
Project Update begins
When you select the file, the updating project window immediately shows: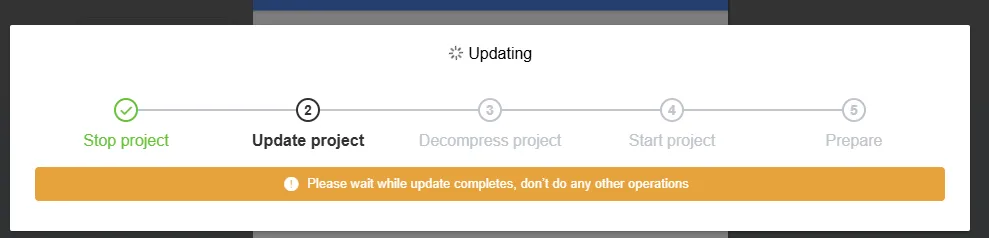
Done!
When all the steps have been completed, the window goes away, you will temporarily see a “Successful” message on the screen, and you will be sent back to the EasyWeb Project Management menu.
The project now resides in the HMI.

USB / SD Card Storage Download
How to download to a USB Disk or SD card, and then Download to the HMI.
In order to download a project file to an HMI via a USB disk or SD Card, you must first compile the file and properly transfer it to the external storage device.
Instructions: How to download to a USB Disk or SD card, and then Download to the HMI.
Build Download Files
In EasyBuilder Pro Project menu, select [Build Download Files] option:
Select your USB / SD Card
Navigate to the external media device folder and then click [Build]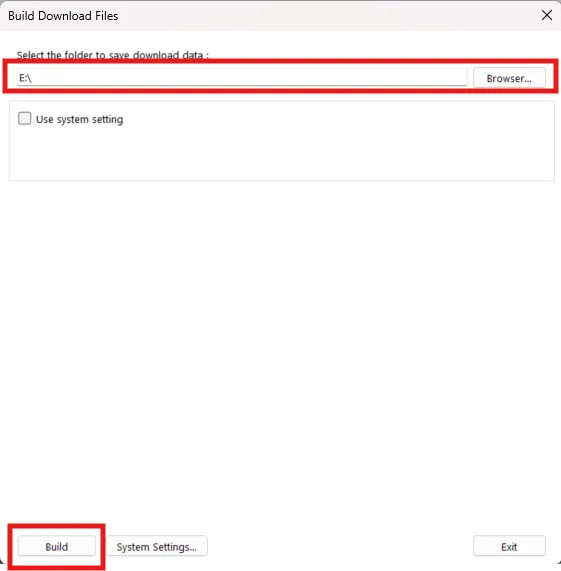
Click “Build”
Click the [Build] button when the desired directory has been chosen.Successful Build
When the build process is complete, you’ll see the status window.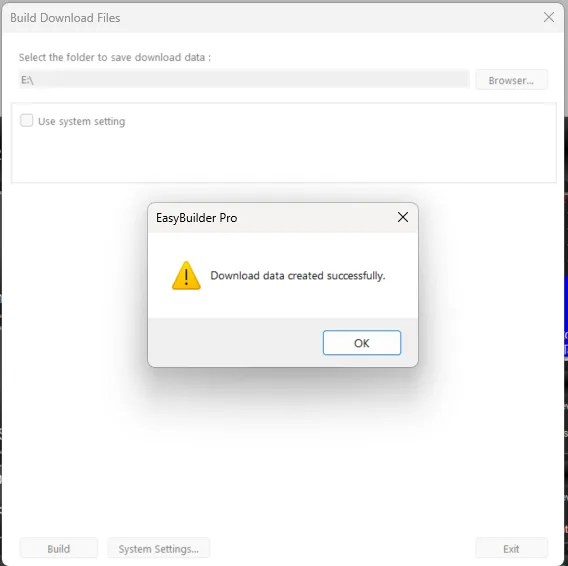
Remove Storage from PC and plug into HMI
Remove your external storage device from the development PC and plug it into the HMI.
When a USB disk or SD Card is plugged into the HMI, the Upload/Download window pops up.
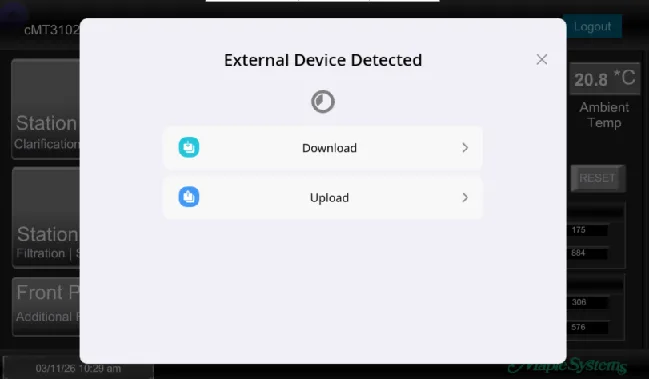
Select “Download” and enter Password
Click [Download] and then enter the correct password at the Login screen, and click [OK}Ensure the correct password is entered in the [Password] field. If the password is incorrect, you will encounter a Password Error message, and the project will not download. See the Project Protection section for information on how HMIs can be protected from unwanted project editing or download.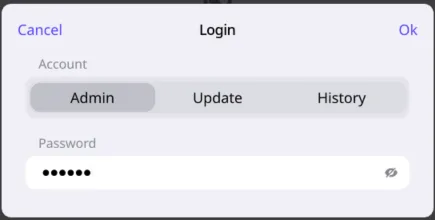
Select download file type
Choose the items you wish to download to the HMI by selecting them.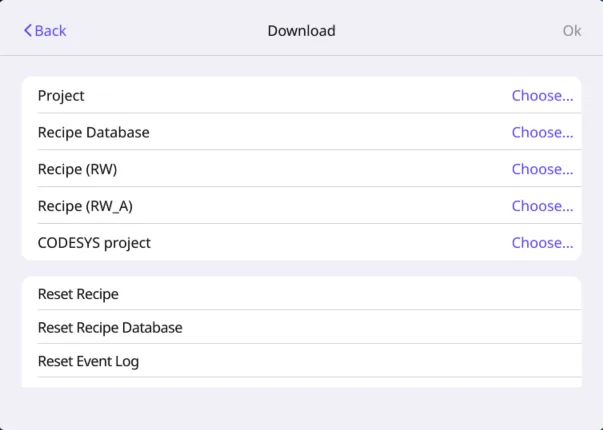
Choose the file(s) to download
Click the [Choose] button to navigate to the external device and select a folder.In the above case, disk_a_1 is the root directory of the USB disk plugged into the HMI and project.cxob is what the EasyBuilder Pro software named the project.
Regardless of the saved project fie name in EasyBuilder pro, the compiled project file on the external storage device will be “Project.cxob”.
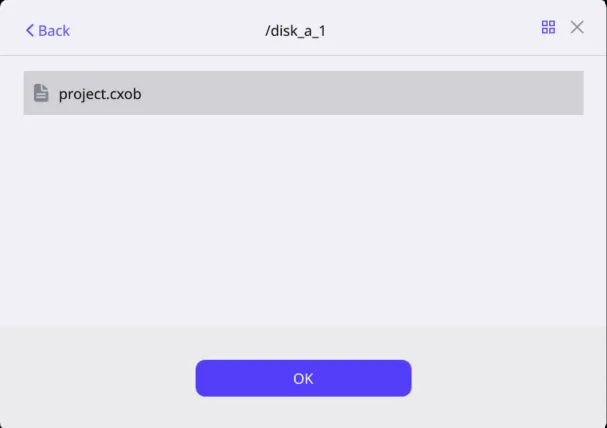
Click OK
Click the blue [OK] button, and you will be taken back to the download window, with the file path of your selected entry filled out.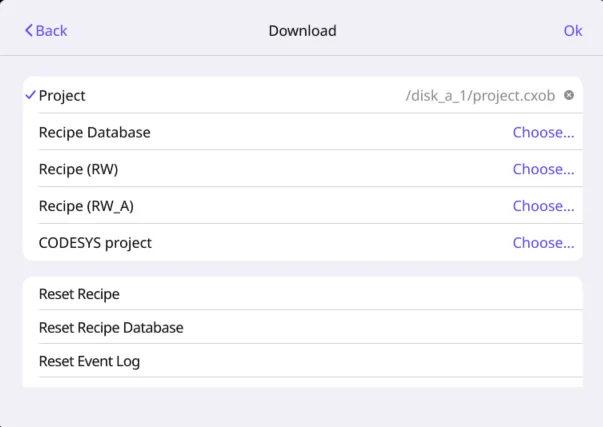
Click OK to download – Success
Click the [OK] button at the top right corner, and then the download will commence.
When successful, you will see the HMI reboot and the new project will be displayed.
Note:
If the upload/download window does not automatically pop up on the HMI screen, it may be disabled. To enable it, click the circle in the top left corner of the HMI screen to enter the HMI Settings menu:

Select the System properties menu on the left, and scroll down to the “Show Download Popup Window” entry:

It should be enabled, as shown above.