
Example of String Operation Functions
String operation functions are added to macro to provide a convenient way to operate strings. The term “string” means a sequence of ASCII characters, and each of them occupies 1 byte.
The sequence of characters can be stored into 16-bit registers with least significant byte first. For example, create an ASCII Input object and setup as follows:
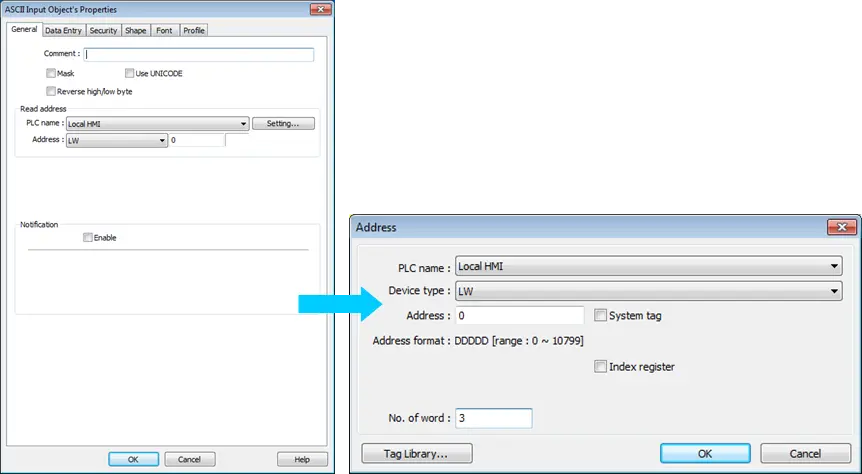
Run simulation and input “abcdef”:

The string “abcdef” is stored in LW-0~LW-2 as follows (LB represents low byte and HB represents high byte):
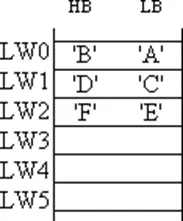
The ASCII Input object reads 1 word (2 bytes) at a time as described in the previous chapter. Suppose an ASCII Input object is set to read 3 words as shown in the above example, it can actually read at most 6 ASCII characters since that one ASCII character occupies 1 byte.
In order to demonstrate the powerful usage of string operation functions, the following examples will show you step by step how to create executable project files using the new functions; starts from creating a macro, ends in executing simulation.
To read (or write) a string from a device:
- Create a new macro and edit the content:
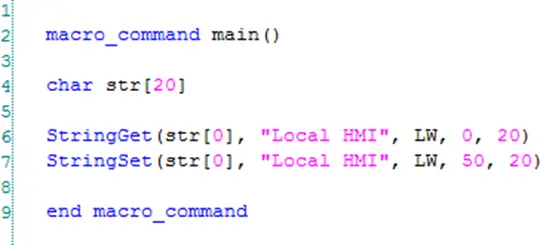
The first function “StringGet” is used to read a string from LW-0~LW-19, and store it into the str array. The second function “StringSet” is used to output the content of str array.
Add one ASCII Input object and one Function Key object in window 10 of the project.
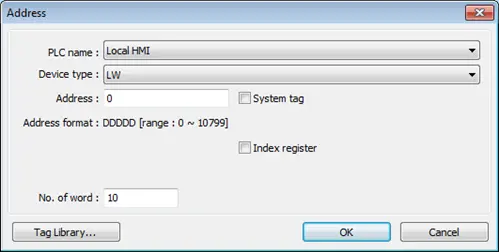
The settings of these objects are shown as below. Function Key object is used to execute macro_0.
- ASCII Input object:
- Function Key object:
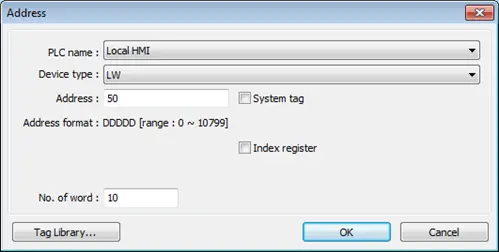

Lastly, use [Compile] to compile the project and execute [Off-line simulation] or [On-line simulation]. Follow the steps below to operate the executing project:
- Input string.
- Press “GO” button.
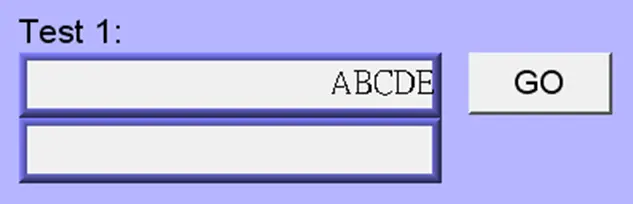
- Output string.
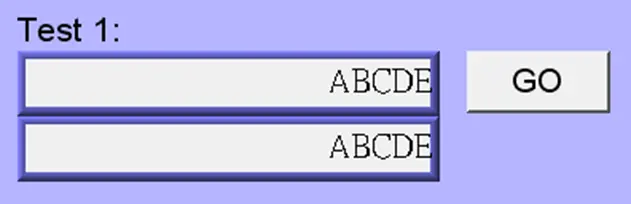
Initialization of a string.
Create a new macro and edit the content:
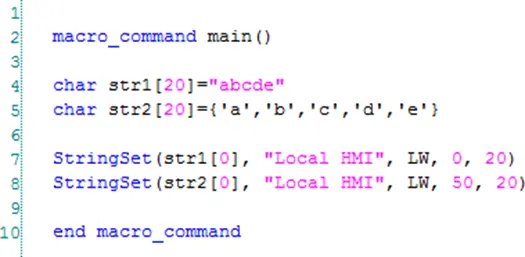
The data enclosed in double quotation mark (” “) is viewed as a string. str1 is initialized as a string while str2 is initialized as a char array. The following snapshot of simulation shows the difference between str1 and str2 using two ASCII Input objects.
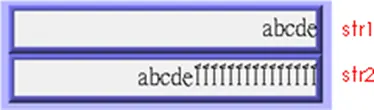
Macro compiler will add a terminating null character (‘’) at the end of a string. The function “StringSet” will send each character of str1 to registers until a null character is reached. The extra characters following the null character will be ignored even if the data count is set to a larger value than the length of string.
On the contrary, macro compiler will not add a terminating null character (‘’) at the end of a char array. The actual number of characters of str2 being sent to registers depends on the value of data count that is passed to the “StringSet” function.
A simple login page.
Create a new macro and edit the content, for example, Macro [ID:001] macro_1.
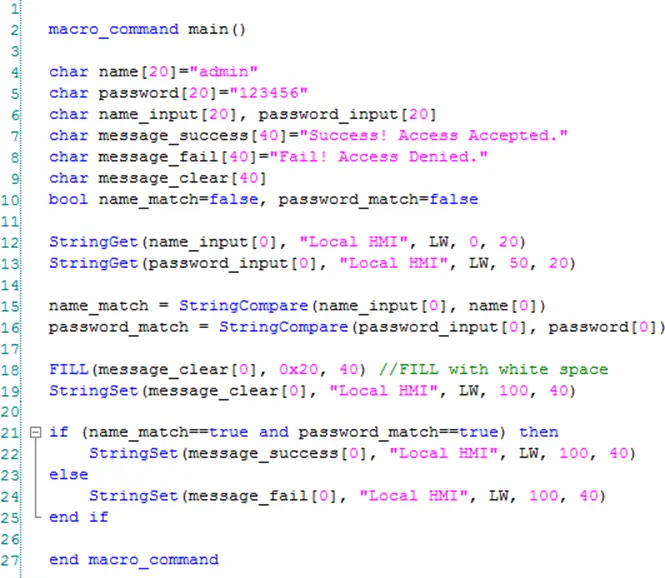
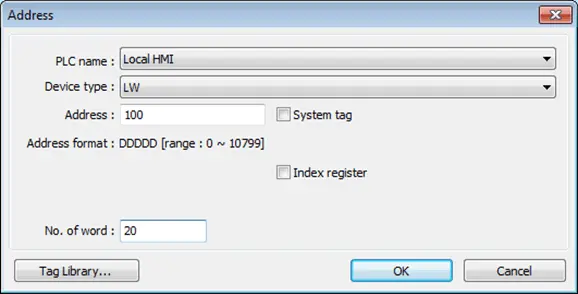
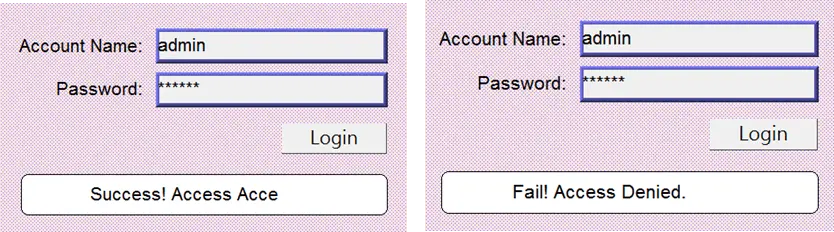
The first two “StringGet” functions will read the strings input by users and store them into arrays named name_input and password_input separately. Use the function “StringCompare” to check if the input account name and password are matched. If the account name is matched, name_match is set true; if the password is matched, password_match is set true. If both name_match and password_match are true, output the string “Success! Access Accepted.”. Otherwise, output the string “Fail! Access Denied.”.
Add ASCII Input and Function Key objects in window 10 of the project. The settings of these objects are shown as below. Function Key object is used to execute macro_1.
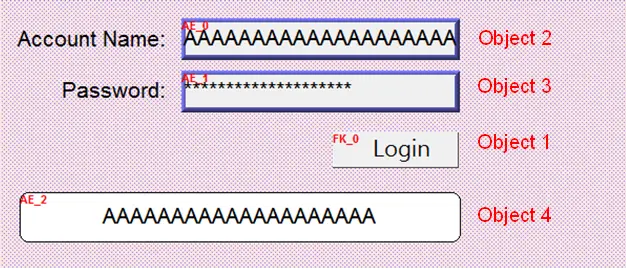
Object 1: Function Key
- Select [Execute macro] and Macro: [ID:000] macro_1.
Object 2: ASCII Input
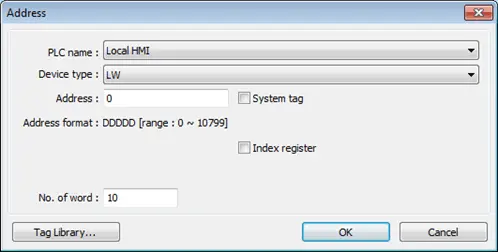
Object 3: ASCII Input
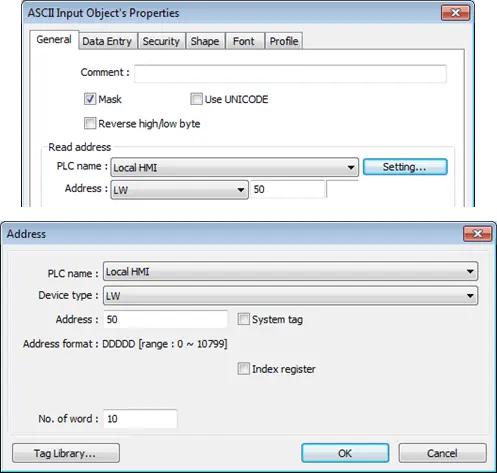
Object 4: ASCII Display
Lastly, use [Compile] to compile the project and execute [Off-line simulation] or [On-line simulation].
Follow the steps below to operate the executing project:
- Enter account name.
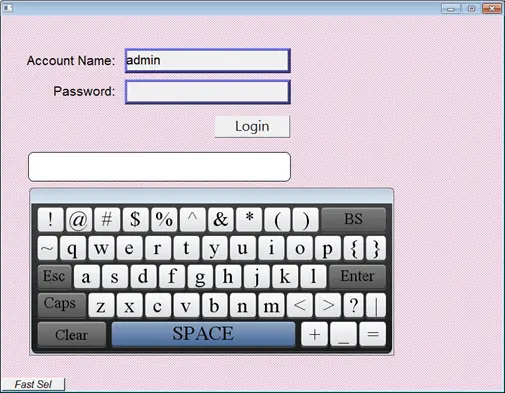
- Enter password and press [Login] button.
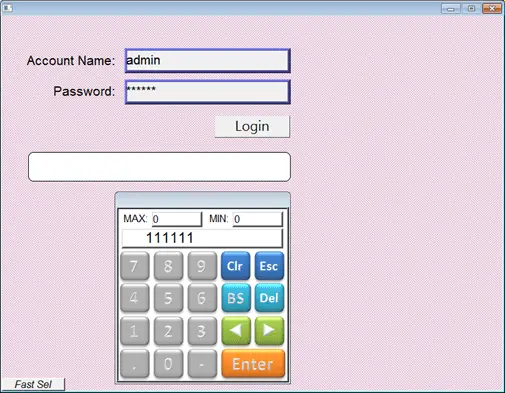
- Login succeeded or failed.
Macro Password Protection
A password can be set to protect all the macros in the list, or an individual macro.
Protecting all macros:

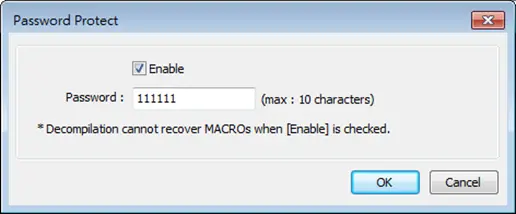
In Macro Manager window there’s the [Password Protect…] button, click it and then click [Enable] to set a password less than or equals to 10 characters (support ASCII character only, e.g. “a$#*hFds”).
After setting the password, users will have to enter correct password when opening Macro Manager.
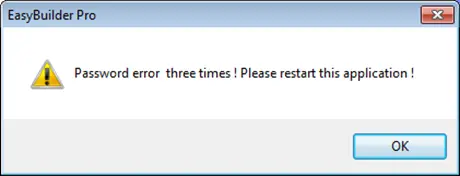
EasyBuilder Pro should be rebooted for typing the password again after 3 incorrect attempts.
Protecting individual macro:
In the Work Space for editing an individual macro, click the [Password Protect…] button and then click [Enable] to set a password less than or equals to 10 characters (support ASCII character only, e.g. “a$#*hFds”). [Encrypted] and [Read only] modes work as follows.
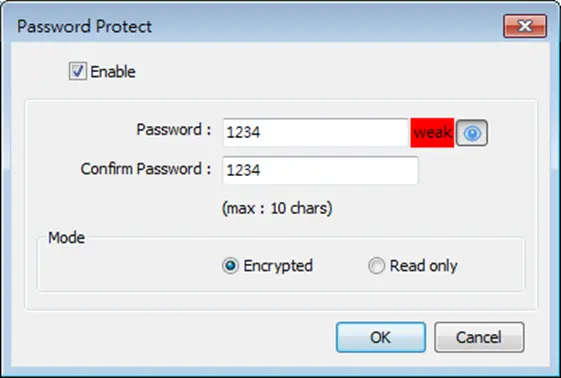
[Encrypted]
Encrypt the macro content. Entering macro editing window will require password. EasyBuilder Pro should be rebooted for typing the password again after 3 incorrect attempts opening the same macro.
(The number of allowable incorrect attempts may vary between macros.)
[Read-only]
The user can only view the content of the macro and will not be able to edit it.
With this mode selected, macro editing window can be opened directly from Macro Manager; however, a password is required after clicking [Password Protect…] button.
EasyBuilder Pro should be rebooted for typing the password again after 3 incorrect attempts.
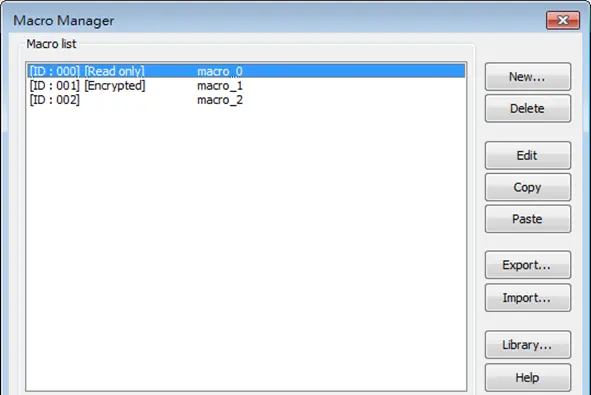
In the macro list, the selected mode for each macro is shown.
Read/Write CANbus Address Using Variables
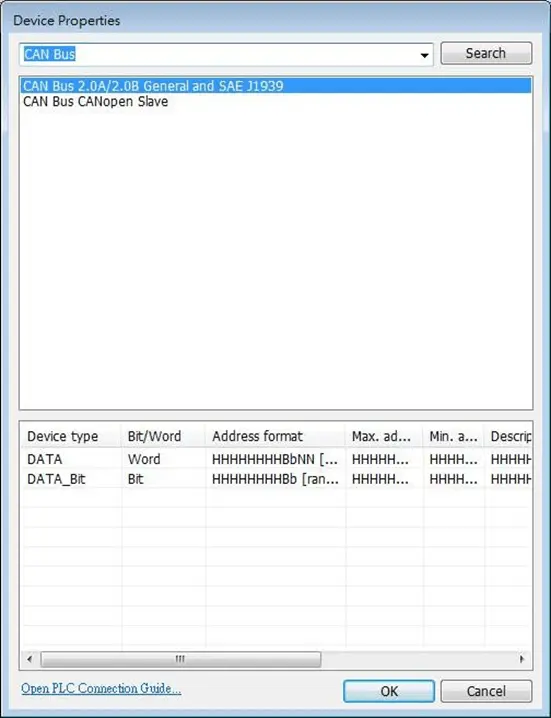
In “CAN Bus 2.0A/2.0B General and SAE J1939” driver, two device types can be found: DATA and DATA_Bit, and the formats of these device types are shown in the following window.
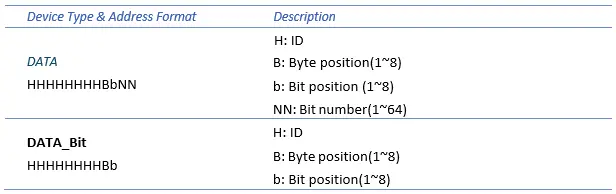
The ID is represented in hexadecimal while the position and number are represented in decimal, please see the usage below.
Examples:
Variable is not used:
short f
GetData(f, “CAN Device”, DATA, 4e55108, 1)
GetData(f, “CAN Device”, DATA, 4e65108, 1
Variable is used:
short f
unsigned int address = 0x4e55108
GetData(f, “CAN Device”, DATA, address, 1) address = address + 0x10000 // == 0x4e65108
GetData(f, “CAN Device”, DATA, address, 1)
Note:
Declare variable as “Unsigned int” and use hexadecimal to represent address.
- Since the size of Unsigned int is 4 bytes and Bb, NN take 1 byte respectively, when using a variable for address parameter to read/write DATA_Bit device type, the format will change to HHHHHHBb (Max. ID: 0xffffff), and when using a variable for address parameter to read/write DATA device type, the format will change to HHHHBbNN (Max. ID: 0xffff).