
How to Create and Execute a Macro
How to Create a Macro

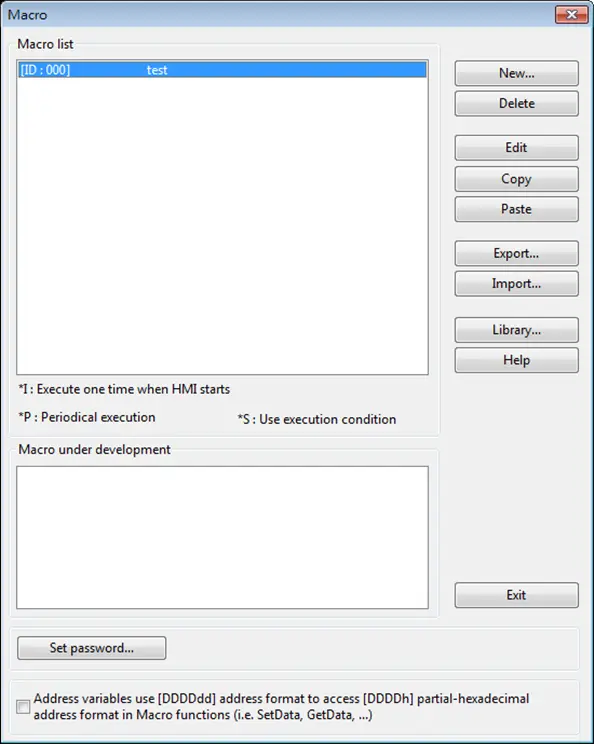
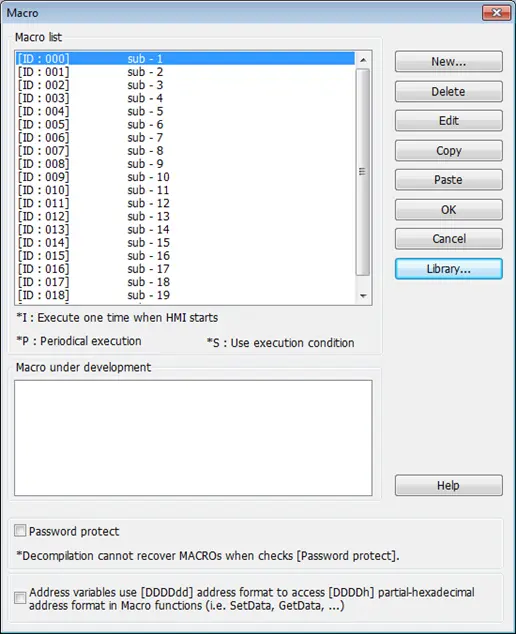
Click [Project] » [Macro] to open Macro Manager dialog box.
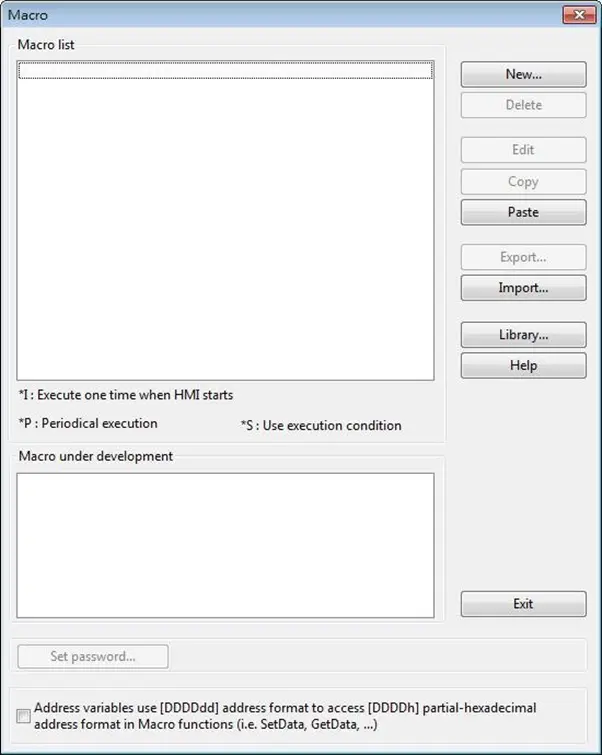
In Macro Manager, all macros compiled successfully are displayed in “Macro list”, and all macros under development or cannot be compiled are displayed in “Macro under development”. The following is a description of the various buttons.
| Setting | Description |
|---|---|
| New | Opens a blank “WorkSpace” editor for creating a new macro. |
| Delete | Deletes the selected macro. |
| Edit | Opens the “WorkSpace” editor, and loads the selected macro. |
| Copy | Copies the selected macro into the clipboard. |
| Paste | Pastes the macro in the clipboard into the list, and creates a new name for the macro. |
| Export | Saves the selected macro as *.edm file. |
| Import | Imports an *.edm file to the project. |
| Library | Opens Macro Function Library managing dialog. |
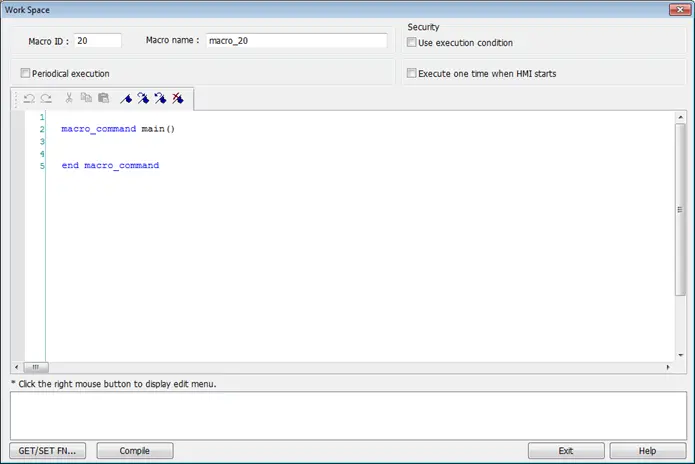
Press the [New] button to create an empty macro and open the macro editor. Every macro has a unique number defined at [Macro ID], and must have a macro name, otherwise an error will appear while compiling.
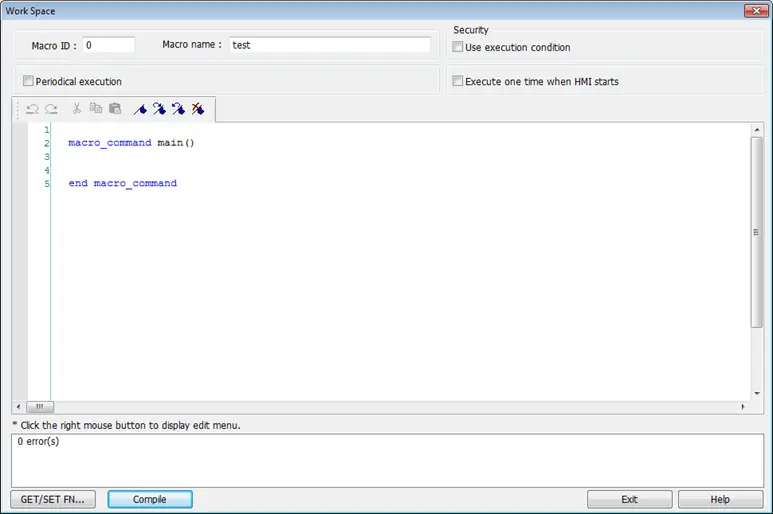
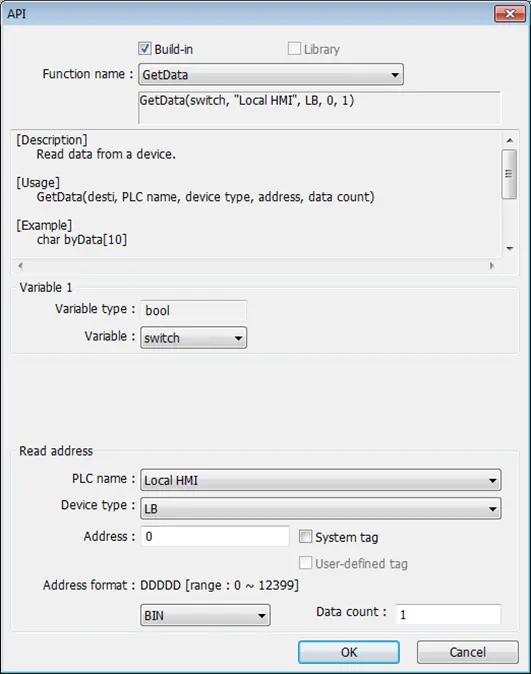
Design your macro. To use built-in functions (like SetData() or GetData()), press [Get/Set FN…] button to open API dialog box and select the function and set essential parameters.
After the completion of a new macro, press [Compile] button to compile the macro.
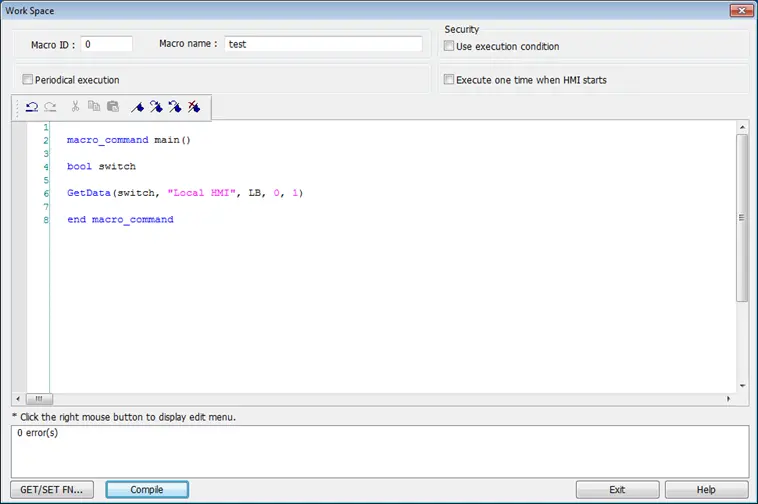
If there is no error, press [Exit] button and a new macro “macro_test” will be in “Macro list”.
Execute a Macro
There are several ways to execute a macro.
- Use a PLC Control Object
- Open [PLC Control] and add one PLC Control object with the [Type of control] as [Execute macro program].
- Select the macro in [Macro name]. Choose a bit and select a trigger condition to trigger the macro. In order to guarantee that the macro will run only once, consider latching the trigger bit, and then resetting the trigger condition within the macro.
- Use a [Set Bit] or Toggle Switch object to change the bit to activate the macro.
- Use a [Set Bit] or Toggle Switch object
- On the [General] tab of the [Set Bit] or [Toggle Switch] dialog box, select the [Execute Macro] option.
- Select the macro to execute. The macro will be executed one time when the button is activated.
- Use a Function Key object
- On the [General] tab of the [Function Key] dialog, select the [Execute Macro] option.
- Select the macro to execute. The macro will execute one time when the button is activated.
- Within the Macro Editor
- [Periodical Execution]: Macro will be triggered periodically.
- [Execute one time when HMI starts]: Macro will be executed once HMI starts.
- In Window Settings, Macro group box
- [Open]: When the window opens, run the selected macro once.
- [Cycle]: When the window opens, run the selected macro every 0.5 second.
- [Close]: When the window closes, run the selected macro once.
User Defined Macro Function
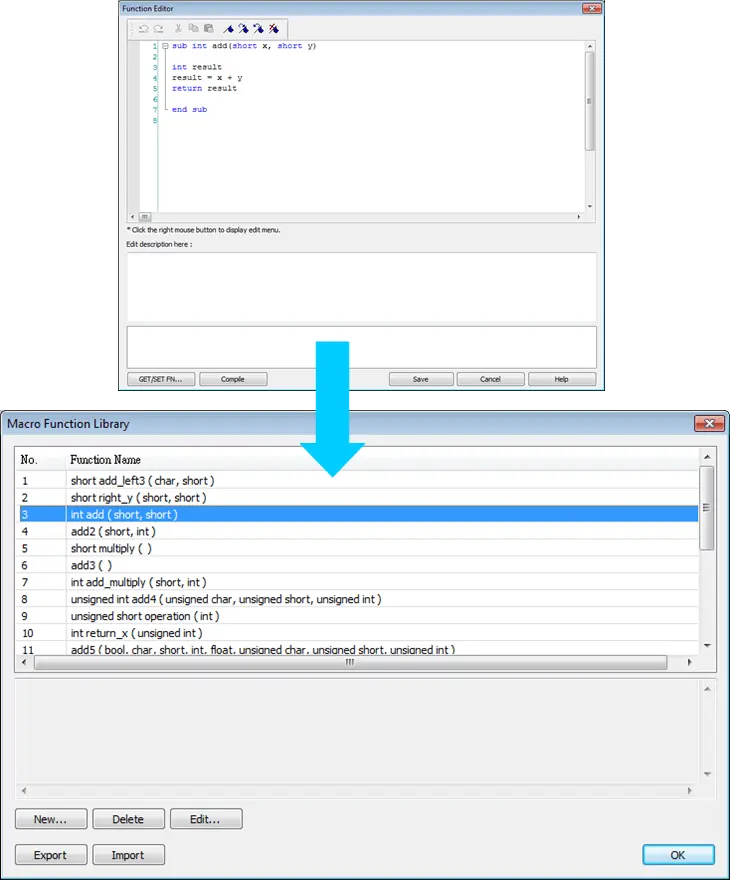
When editing Macro, to save time of defining functions, user may search for the needed from built-in Macro Function Library. However, certain functions, though frequently used, may not be found there. In this case, user may define the needed function and save it for future use.
Next time when the same function is required, the saved functions can be called from [Macro Function Library] for easier editing. Additionally, [Macro Function Library] greatly enhances the portability of user-defined functions. Before building a function please check the built-in functions or online function library to see if it exists.
Import Function Library File
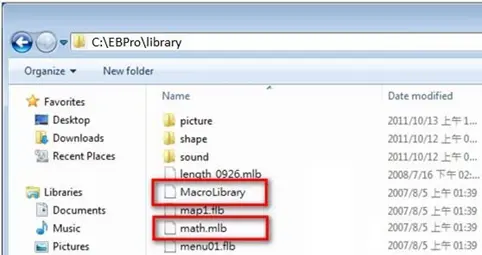
Open a project in HMI programming software, the default Function Library File will be read automatically and the function information will be loaded in. At this moment if a user-defined function is called, the relevant .mlb file must be imported first.
- Default Function Library File Name: MacroLibrary (without filename extension)
- Function Library Directory: HMI programming software installation directory\library (folder)
- Library (folder) contains two types of function library files:
- Without filename extension: MacroLibrary, the Default Function Library for HMI programming software to read at the beginning.
- When opening HMI programming software, only the functions in Default Function Library will be loaded in, to use functions in .mlb files, please import them first.
How to Use Macro Function Library
Select the function directly from Macro Function Library.
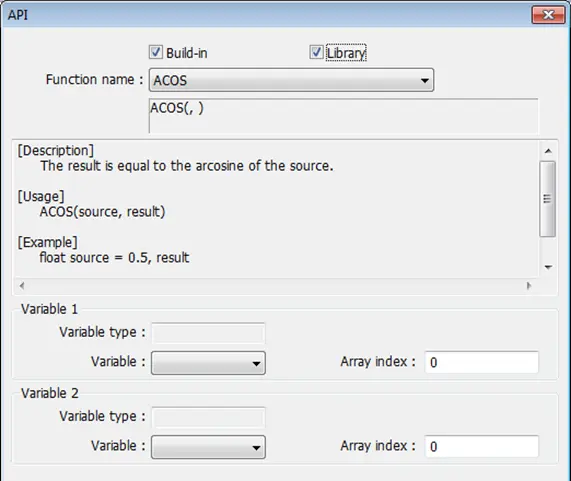
In WorkSpace click [GET/SET FN…] to open API dialog box.
At least check one from [Library] or [Build-in] and select the function to be used.
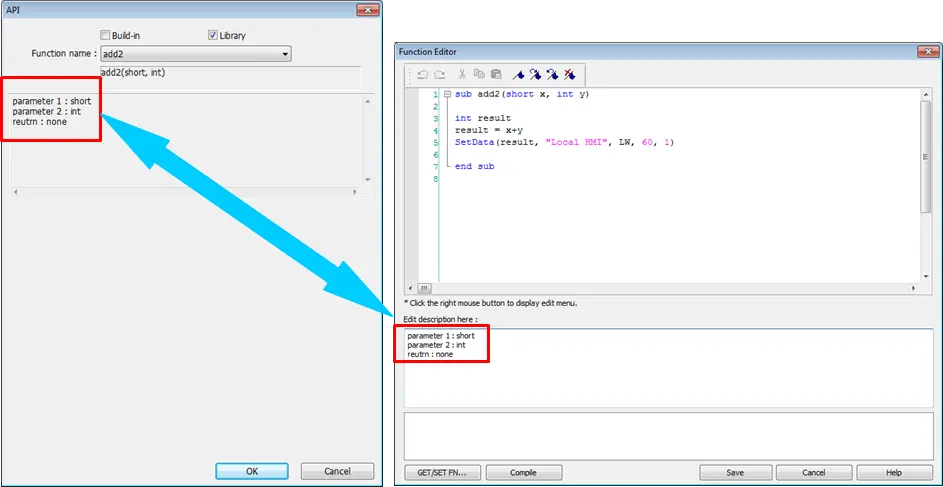
The description displayed in API dialog box is the same as written in Function Editor.
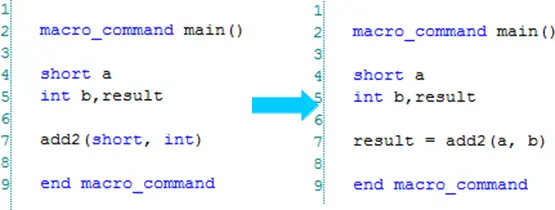
Select the function to be used, fill in the corresponding variables according to the data type.
Function Library Management Interface
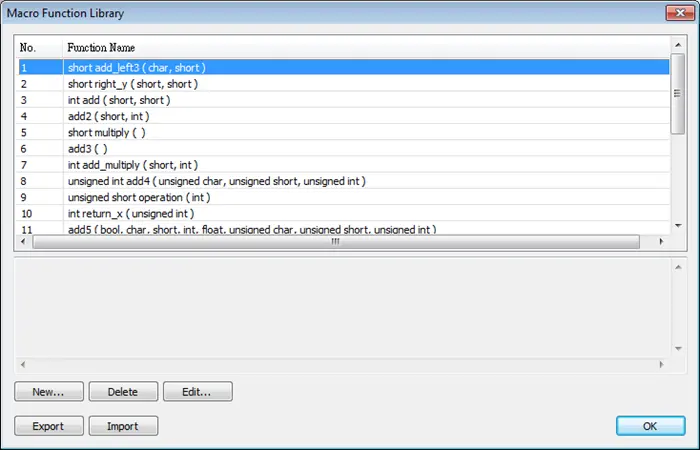
Open macro management dialog, click [Library] to open [Macro Function Library] dialog box.
A list of functions is shown. When the project is opened, the software will load all the functions in the Macro Function Library.
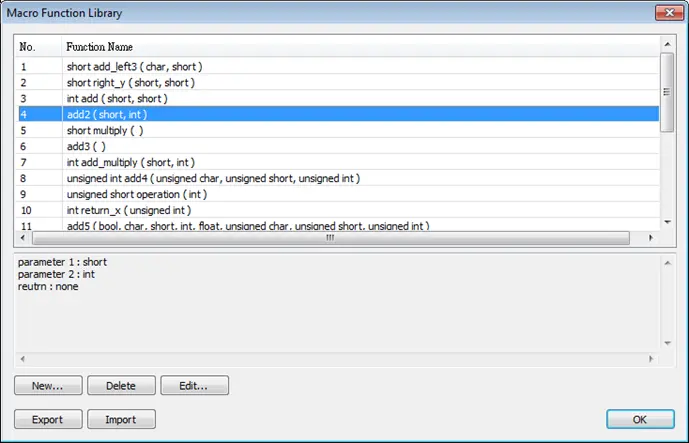
Each listed function has the following format:

- return_type indicates the type of the return value. If this value does not exist, this column will be omitted. function_name indicates the name of the function. “N” in parameter_typeN stands for the number of parameter types. If this function does not need any parameter, this column will be omitted
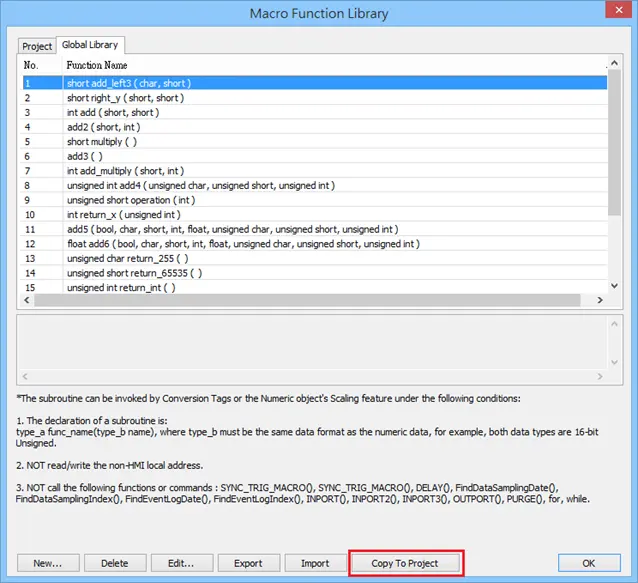
Macro function can be embedded in the project file. Select the function and then click [Copy To Project], then you can find this function in [Project] tab. When opening the project on another computer, this function can still be used. When compiling the project, the .exob file will included the functions that are used.
Please note that decompiling the project will only produce the macro commands that are used.
Create a Function
Follow these steps to create a new function and add it to the Macro Function Library
Instructions: Create a Function
Click “New”
In the Function Library, click [New] to enter Function Editor.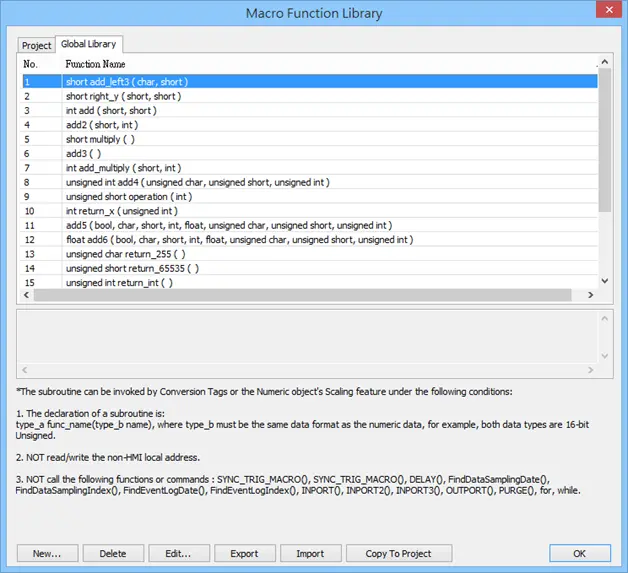
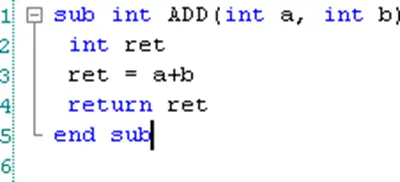
Edit the function to your desired operation
Edit function in Function Editor.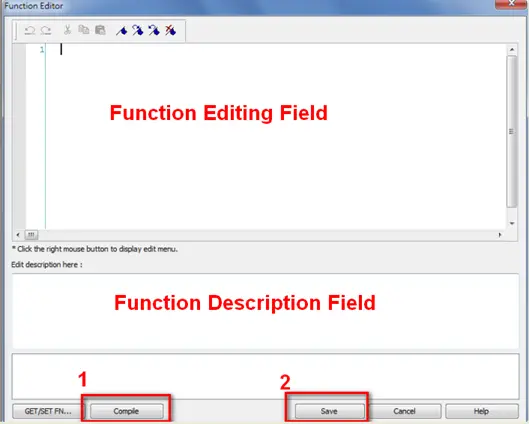
Describe the function
Edit the function description to describe what the specification is, how to use … etc.Compile and save
After editing, click [Compile] and [Save] to save this function to the Library.if the function is not compiled and saved, a warning is shown.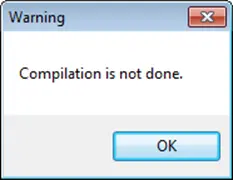
Success
Successfully added a function into Macro Function Library.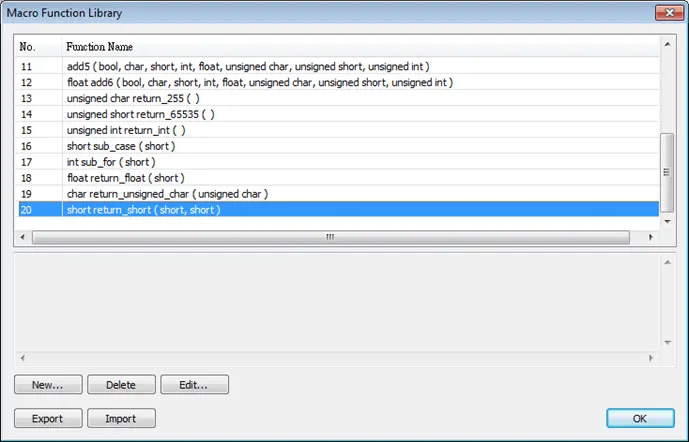
Delete a Function
Follow these steps to delete an existing function from the Macro Function Library
Instructions: Delete a Function
Select the function to delete
In function list select the function to be deleted and click [Delete].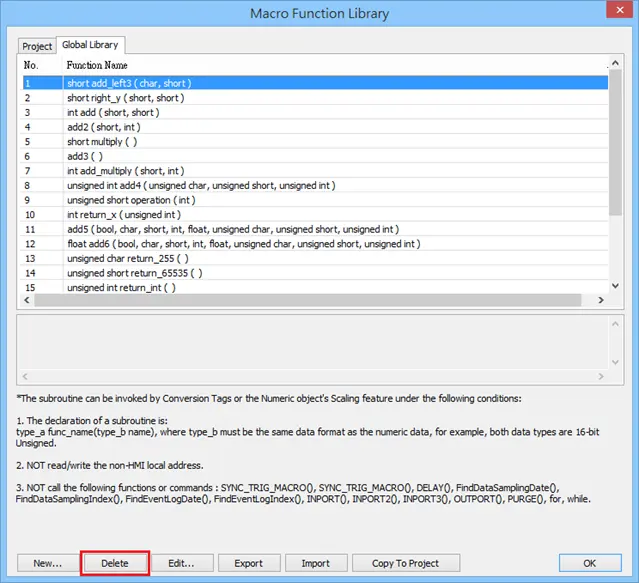
Confirm deletion request
Click [Yes] to confirm, [No] to cancel the deletion.In this example, we are looking to delete the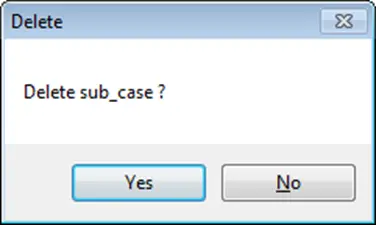
Modify a Function
Users can modify the functions existing in the Library; follow the below steps.
Instructions: Modify a Function
Select a function
Select a function to modify by clicking [Edit] to enter Function Editor.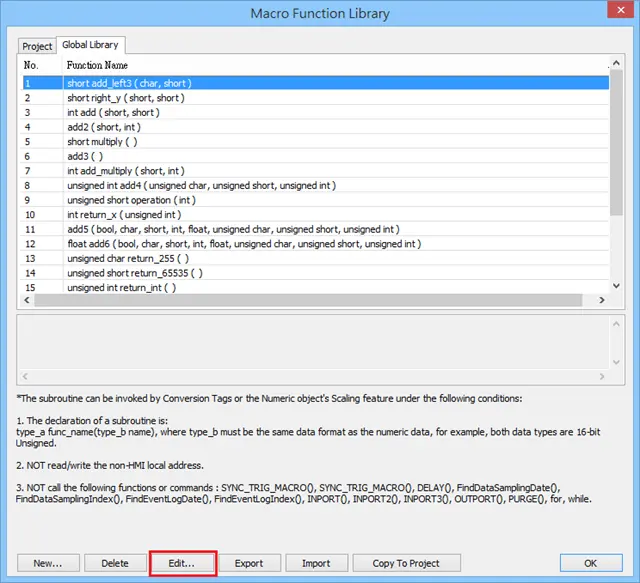
Double-Click the function to modify.
Double click the function to be modified; you will enter Function Editor.Compile + Save
After modifying, [Compile] then [Save] before leaving.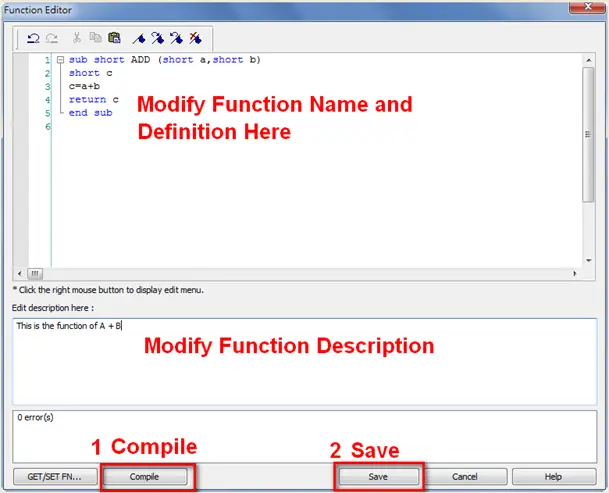
Import a Function
Functions can be imported using an external .mlb file.
Instructions: Import a Function
Click the ‘Import’ button
Click the [Import] button in the main Macro Function Library to begin the process of importing a new function into the library.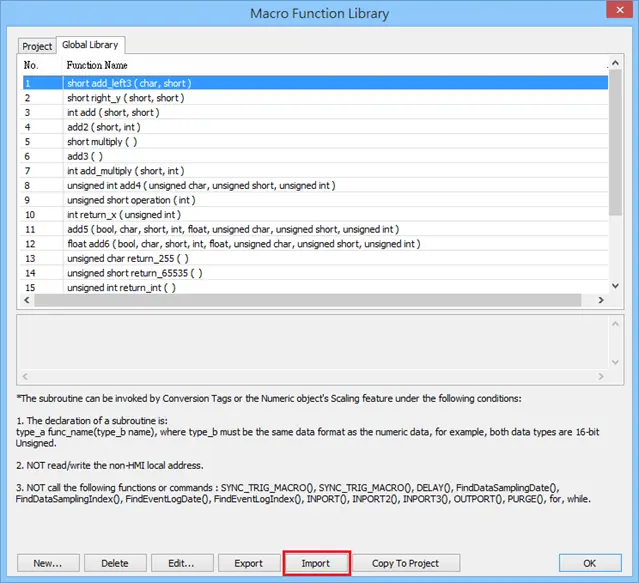
Navigate to the file and click ‘Open’
Click [Open].We are importing a function library “math.mlb” which contains a function “test1”.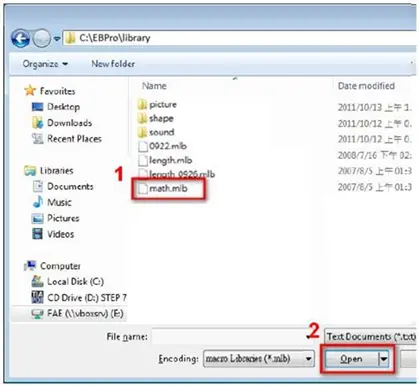
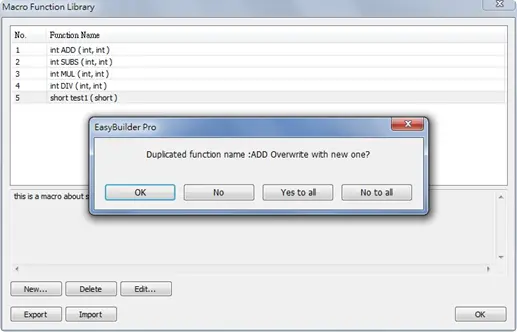
If importing a function which already exists, you’ll get a confirmation window.
Confirmation Window Options:
[OK]: Overwrite the existing function with the imported one.
[NO]: Cancel the importing of the function with the same name.
[Yes to all]: Overwrite using all the imported functions with the same name.
[No to all]: Cancel the importing of all the functions with the same name.
Import successful
The imported functions will be saved in Default Function Library, so if “math.mlb” file is deleted, “test1” will still exist in the Library, even restarting EasyBuilder Pro.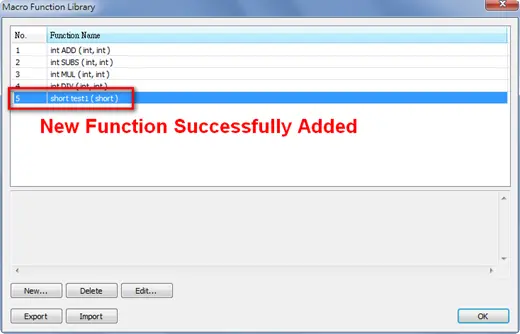
Export a Function
Export the function from Function Library and save as .mlb file.
Instructions: Export a Function
Click Export from the Function Library
Click the [Export] button in the main Macro Function Library to begin the process of exporting a function from the library.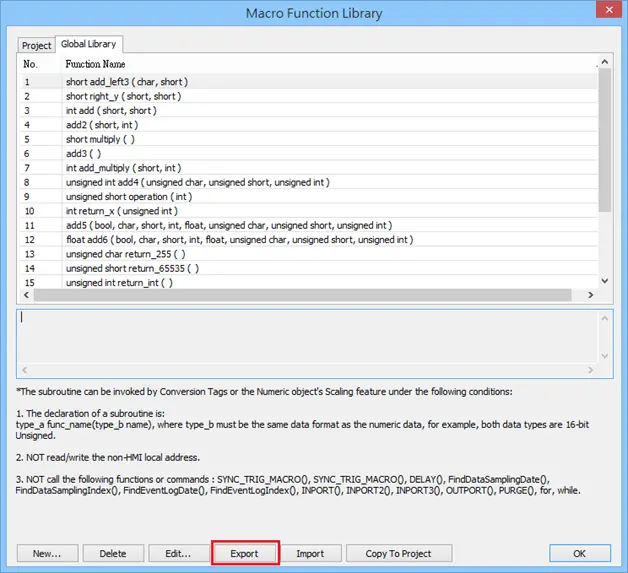
Click ‘Export’
Select the function to be exported, and click [Export].A “math.mlb” file can be found under export directory. This file contains 4 functions: ADD, SUBS, MUL, and DIV.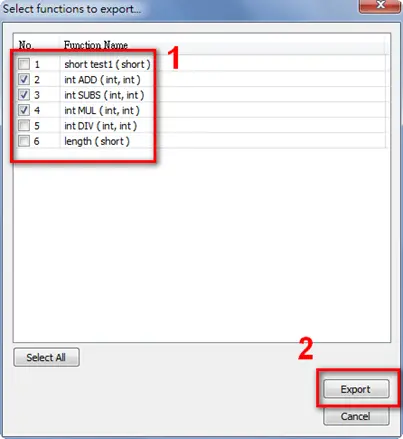
Export success
The exported .mlb file can be imported on another PC. Open HMI programming software, import, then the functions in this file can be used.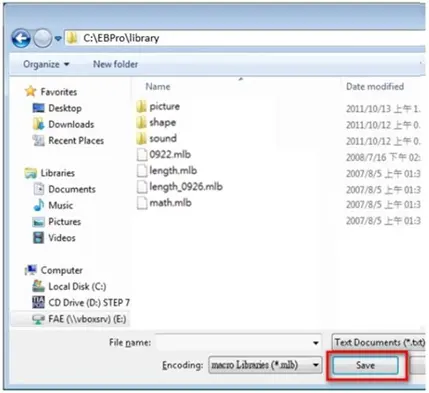
Macro Usage Notes
- The maximum storage space of local variables in a macro is 4K bytes. So the maximum array size of different variable types are as follows:
- char: a[4096]
- bool: b[4096]
- short: c[2048]
- int: d[1024]
- float: e[1024]
- long: f[512]
- double: g[512]
- A maximum of 255 macros are allowed in an EasyBuilder Pro project. However, for cMT X Series projects, that number is increased to 500.
- A macro may cause the HMI to be unresponsive. Possible reasons may include:
- It contains an undesired infinite loop.
- Array size exceeds the available variable storage space in a macro.
- The device communication speed may affects execution speed of the macro . Similarly, having too many macros may slow down the communication between an HMI and a device.