
Security
The HMC touchscreen models offer varying levels of screen security, from the simplest password protected screen, to sophisticated user accounts and password access. In addition, the entire MAPware project can be password protected to protect the programmers intellectual property.
Users and Access Levels
Access Levels and Users can be used to control access to Base Screens and Popup Screens. When a screen’s Access Level property is something other than zero, the operator must be logged in to a user account that has been granted access to that Access Level to view the screen.
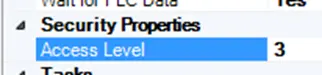
If the user does not have the required Access Level a Screen Access Denied message is displayed and the screen is not opened.
There are four steps to set up the Access Level feature in the MAPware project:
- Create User Accounts, assigning a Username, Password and Access Level to each user.
- Assign access levels to screens (see Editing a Base Screen or Editing a Popup Screen sections above).
- Configure a button to allow the user to log in.
- Configure a way for the user to logout.
Creating Users
Users and Passwords are configured using the Define > Access Level menu option. Current Users are listed in the Access Level folder in the Project Information Window.
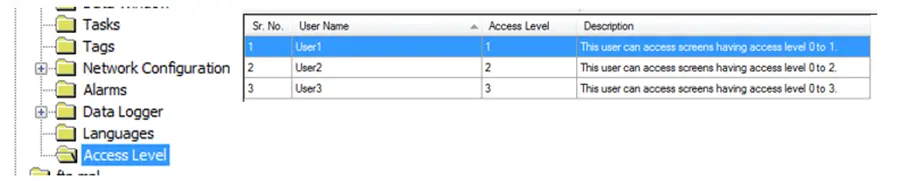
This screen can also be used to Add, Edit and Delete users. Right-click in the editor window and select the desired option from the context menu.
The Access Level: Create User window has fields to assign Username, Password, and Access Level.
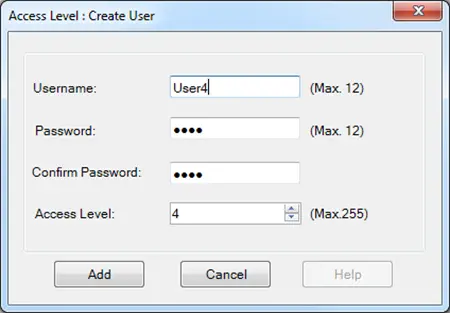
Users have access to screens assigned access levels less than or equal to the Access Level assigned to their user account. So User4 with Access Level 4, could open screens with Access Level 0 to 4, but not 5 and above.
Logging In
For the user to gain access to protected screens they must be able to log in to their account. This is done with a button that runs a task to display a login screen. The login button should be placed on a screen that all users have access to.
How to Log into a user account
Follow these steps to provide access to the login screen
Instructions: How to Log into a user account
Create a button (Multi-Task, Single State)
From the Draw Toolbar select Advanced Objects > Multi-Task Single-State Button.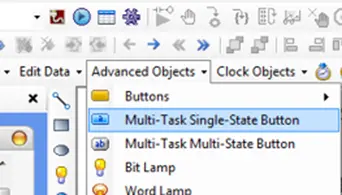
Place the button on the screen
Click the screen location you wish to place the button.Display task list
In the property grid for the new button click the Tasks property field then click the ellipsis button to display the Touch Screen Tasks List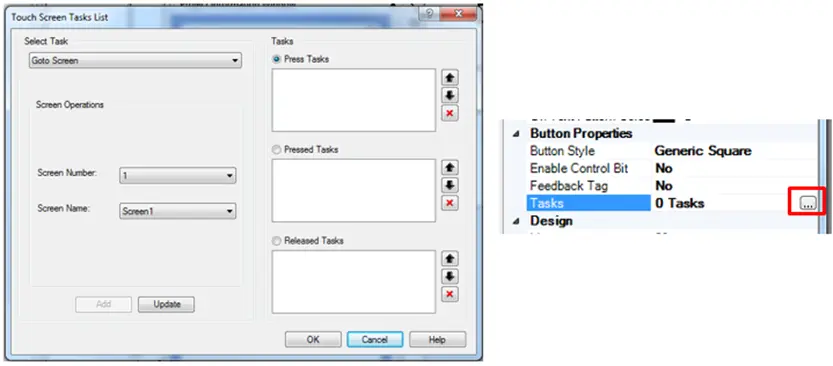
Define behavior of button
With the Press Tasks radio button checked, Select Key’s Specific Task in the Select Task dropdown list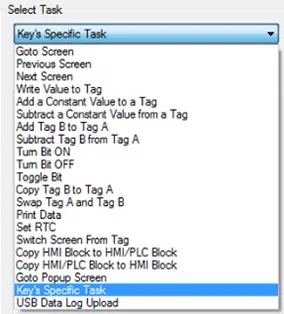
Select the specific task (Show Login Screen)
Scroll down to the bottom of the Key’s Specific Tasks selection box and check the radio button for Show Login Screen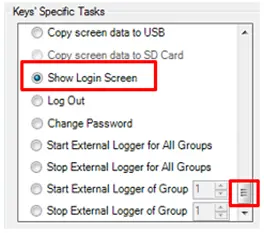
Click “Add”
Click Add to place the task in the Press Tasks section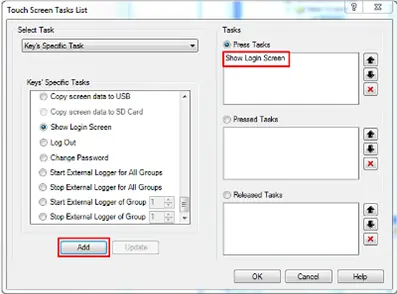
Click OK
Click OK to save the task and close the popup window.Change the button’s text properties to reflect the task
Change the “On Text” property to indicate that the button is used to login
When the operator presses this button they will be prompted for a Username and Password.
Logging Out
There are two ways for a user to be logged out:
- Create a logout button
- Automatically logout the current user after a set timeout period
To create a logout button, follow the steps in the Logging In section above, only select the Log Out radio button in the Key’s Specific Tasks selection box.
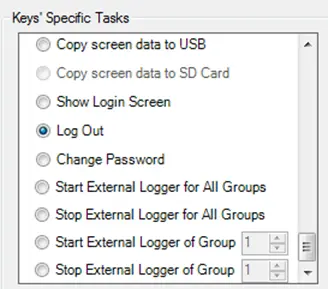
Automatically Log Out
Follow these steps to set up a project to automatically logout the current user after a set timeout period
Instructions: Automatically Log Out
Go to the Project Properties Menu
From the Menu Bar select Project > Properties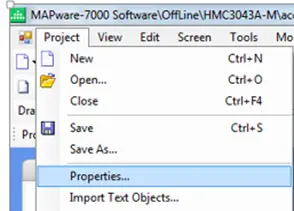
Enter the Settings section
In the Project Configuration window click the Settings tab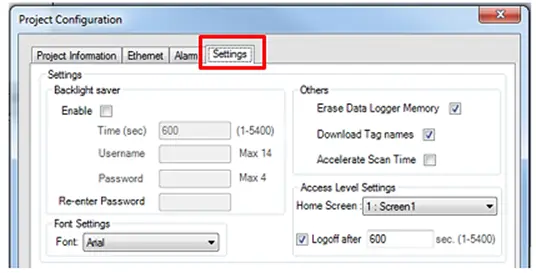
Configure the auto-logoff time
Check the “Logoff after” checkbox and enter the time in seconds after which the user will be logged out.The time set in the Logoff After field is the period of screen inactivity. It the user is actively using the touchscreen they will not be logged off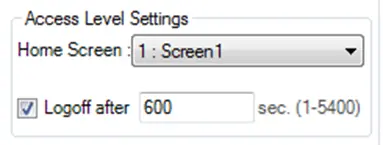
Select a “Home” Screen
Select a screen to use as the Home Screen. This is the screen that will be displayed if a user is auto-logged out while a protected screen is being displayed.Any screen with an Access Level of 0 can be used as a home screen.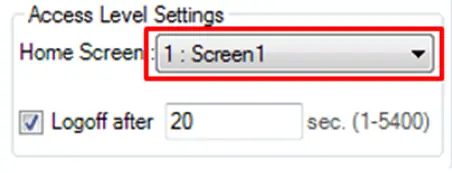
Confirm
Click OK to save the settings and close the Project Configuration Window.
Updating a Password
A user’s password can be updated from the HMC touchscreen. To provide this functionality follow the steps in the Logging In section above, except select Change Password as the Key’s Specific Task.
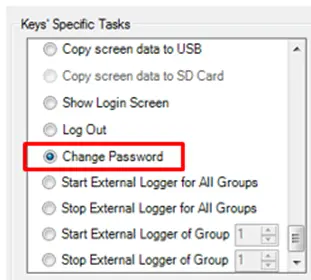
This will create a button that opens a change password dialog. The operator will be prompted to:
- Enter their current password
- Enter the new password
- Confirm the new password
A user must be logged in before using this function.
Note: the new password will not be retained when power is cycled on the unit.
Basic Screen Level Security
Each individual screen can also be assigned a numeric password, separate from the Access Level feature. The password is added in the screen property grid.
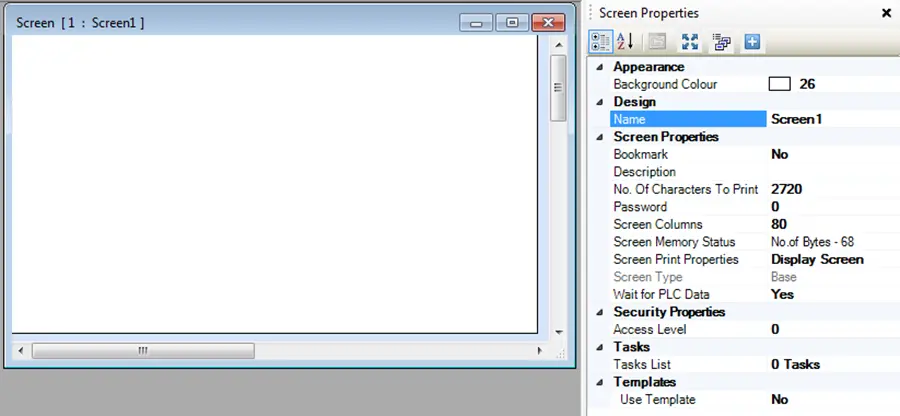
The acceptable password range is 0 to 9999 (0 is no password assigned) and no username is required for this feature. When password-protected, a request to display the target screen causes a dialog box to appear, asking user to enter correct password:
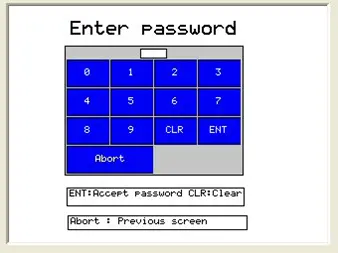
If correct, the secured screen will then display.
Backlight/Screen Saver Password Security
The HMC can be configured to go into a backlight/screen saver mode after a predefined length of time, up to 90 minutes, without any operator input. The operator reactivates the screen by touching it, but a username and password can be configured before normal operation is restored. This can be used as an auto-logout type feature at the end of shifts, ensuring that only authorized personnel can reactivate the HMC to begin the next shift.
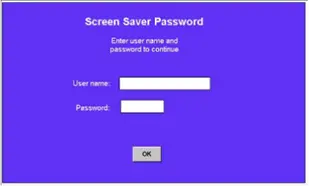
The Backlight saver is enabled in the Settings tab of the Project Configuration window, accessed from Project > Properties. This is not available for the HMC4000 series
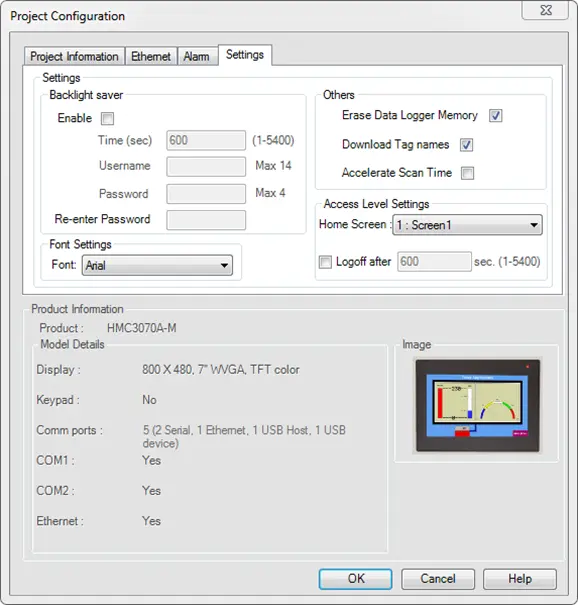
- Backlight saver Enable: Checkbox to enable the backlight saver. If enabled, a blank screen is displayed on the HMC after the specified time-out. The operator can reactivate the screen by touching it.
- Time (sec): Enter the amount of time in seconds (of touchscreen inactivity) that must elapse before the backlight saver is engaged.
- Username: Optional. If used, a screen is displayed that requires the operator to enter a username and password to reactivate the screen. Maximum of 14 alphanumeric characters allowed.
- Password: Optional. If used, maximum of 4 alphanumeric characters allowed.
- Re-enter Password: Re-enter the desired password to set it.
Intellectual Property Protection
The ability to password protect your project is available in the Project Configuration window, Project > Properties.
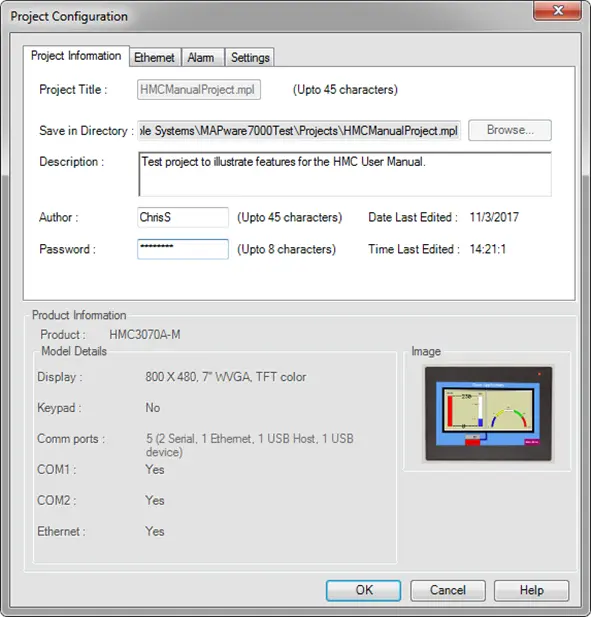
Creating an optional project password is a way to protect your project (and intellectual property) from unauthorized modification. The password can be up to 8 alphanumeric characters in length. If a password is entered in the Project Information tab of the Project Configuration window, the programmer will be required to enter the password whenever project is opened or uploaded from the HMC.
Care must be taken to remember the project password, as it is not recoverable if forgotten. Maple Systems does not have a backdoor into password protected projects.
If the password is not available, the project must be recreated from scratch.