
MQTT (HMC4000 Series only)
MQTT Stands for “Message Queueing Telemetry Transport”. It is an extremely simple and lightweight messaging protocol (subscribe and publish) designed for limited devices and networks with high latency, low bandwidth or unreliable networks. Devices configured as clients can publish and subscribe to topics. Data published to a topic is sent to a centralized Broker, which can reside on a local device or on a cloud server. The Broker then forwards this data to all clients that are subscribed to that topic.
Any HMC4000 Series model is configurable as an MQTT client. Click on the MQTT folder in the Project Information Window:
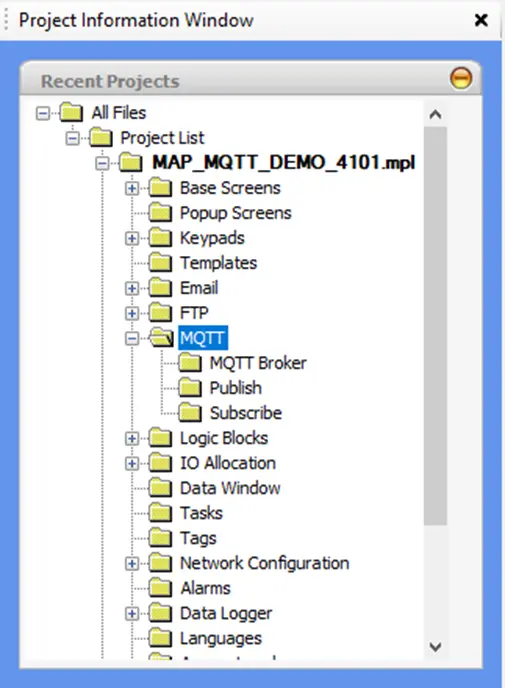
MQTT Broker Folder
Click MQTT Broker to define the parameters of the broker that your HMC will be publishing to.
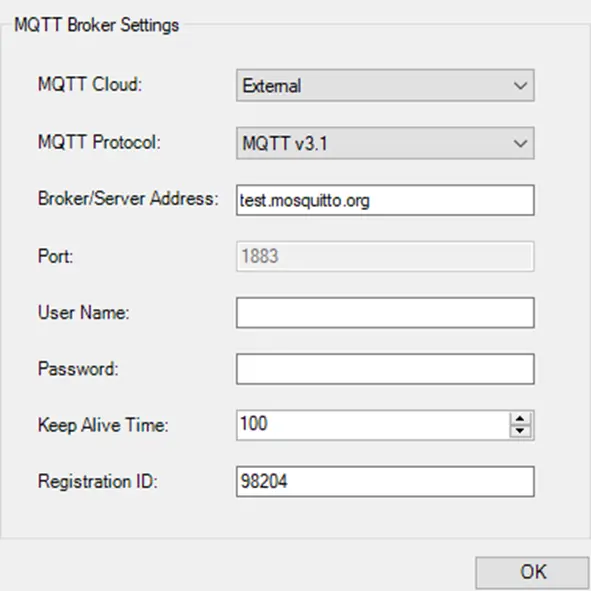
MQTT Cloud
Select External to enable MQTT functionality and start configuring your HMC to connect to an MQTT broker.
MQTT Protocol
Set this option to match the MQTT protocol version that matches the version used by your MQTT Broker
Broker/Server Address
Enter the URL or IP address of the broker that the HMC4000 will be publishing to.
Port
The port setting is fixed at the default MQTT port 1883.
User Name/Password
If your broker requires authentication, enter those credentials here. Otherwise leave blank for an anonymous connection.
Keep Alive Time
MQTT uses a TCP/IP connection. This connection is normally left open by the client so that is can send and receive data at any time. If no data flows over an open connection for a certain time period then the client will generate a PINGREQ and expect to receive a PINGRESP from the broker.
This time period is known as the Keep Alive Time and is measured in seconds.
Registration ID
This is the value that will identify the MQTT client on the network. Often a Registration ID is not provided, so any value will work. It should be unique and uncommon, especially if using a public open source broker.
Publish Folder
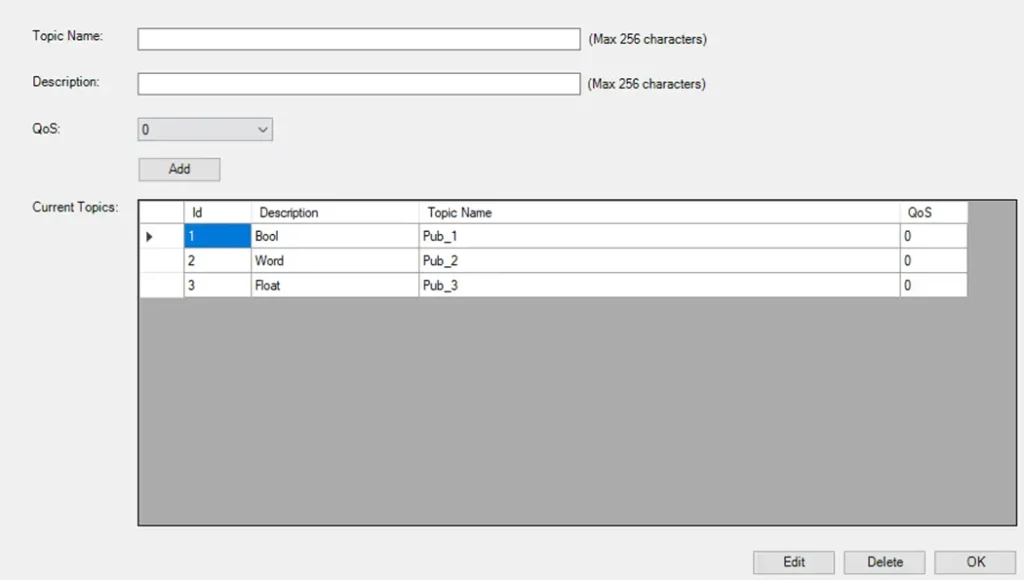
Topic Name/Description
In MQTT, the word topic refers to an UTF-8 string that the broker uses to filter messages for each connected client. The topic consists of one or more topic levels. Each topic level is separated by a forward slash (topic level separator).
Refer to https://www.hivemq.com/blog/mqtt-essentials-part-5-mqtt-topics-best-practices/ for information and best practices regarding topics.
Enter the topic name that the client will publish to and a short description for your reference (up to 256 characters in length). Click Add to add the topic to the Current Topics list.
QoS
The Quality of Service (QoS) level is an agreement between the sender of a message and the receiver of a message that defines the guarantee of delivery for a specific message. There are 3 QoS levels in MQTT.
- QoS 0: This service level guarantees a best-effort delivery. There is no guarantee of delivery. The recipient does not acknowledge receipt of the message and the message is not stored and re-transmitted by the sender.
- QoS 1: This service level guarantees that a message is delivered at least one time to the receiver. The sender stores the message until it gets a PUBACK packet from the receiver that acknowledges receipt of the message. The message can be sent or delivered multiple times.
- QoS 2: This service level guarantees that each message is received only once by the intended recipients. QoS 2 is the safest and slowest service level. The guarantee requires at least two request/response flows (a four-part handshake) between the sender and the receiver.
Subscribe Folder
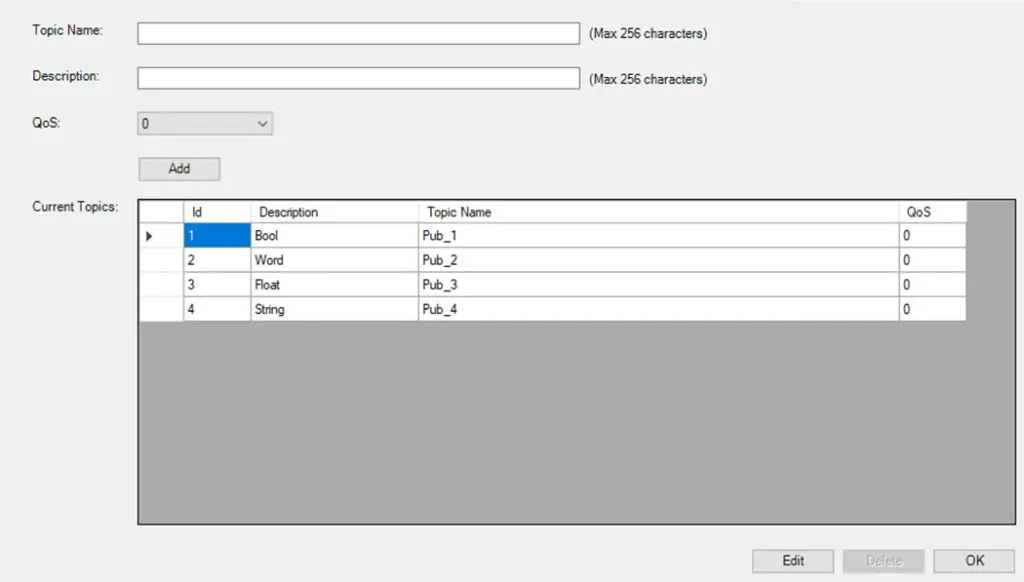
Enter the topic name that the client will subscribe to and a short description for your reference. Click Add to add the topic to the Current Topics list.
Tags
After configuring the MQTT broker, publish and subscribe topics, tags must be individually assigned to a topic, and whether their data will be published to or subscribed from the selected topic.
This can be done by navigating to the Tag Database and adding a new tag or editing an existing tag. Multiple tags can be assigned to the same topic.
Only local tags can be configured for MQTT. For networked node tags, transfer their data to a local tag using a task.
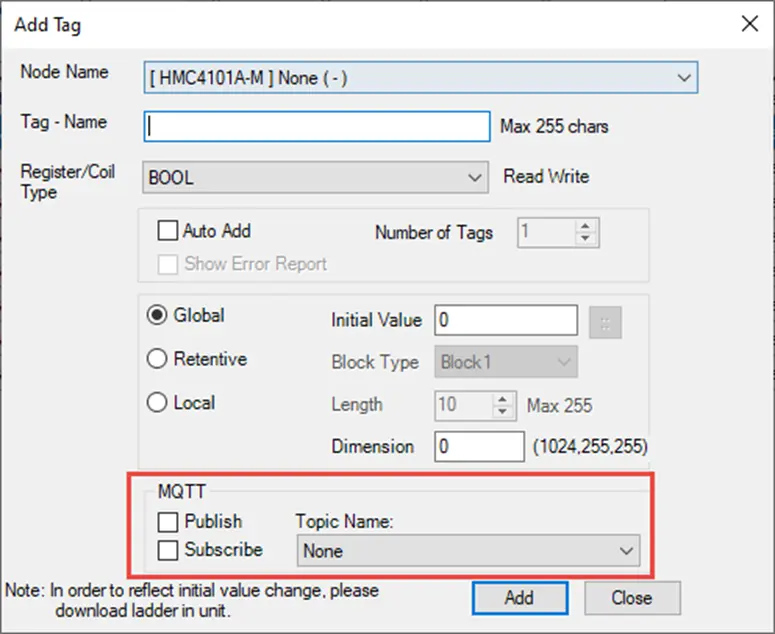
MQTT Default Tags
The following system tags can be used to control and provide information on the connection to the broker.
| Tag Name | Type | Address | Description |
|---|---|---|---|
| MQTT_Status | WORD | SW0276 | The value of this register is a code for the current status of the MQTT connection. (READ ONLY) 0 – Disconnected 1 – Connected to MQTT broker |
| MQTT_Error | WORD | SW0277 | Contains an error code value for the connection. (READ ONLY) 0 – No error 1 – Connection Refused 2 – Remote Host closed 3 – Host Not Found 4 – Socket Access Error 5 – Socket Resource Error 6 – Socket Timeout Error 7 – Socket Error |
| MQTT_Run_Stop | WORD | SW0278 | Used to manually start the connection to the broker. It can be used like a toggle switch. (READ/WRITE) 0 – Stop (Stop the connection) 1 – Run (Attempt to connect) |
Email is a feature unique to the HMC4000 series. The email function works by sending a screenshot of a specific Email Screen that is either attached or embedded in the email. This screen can contain basic shapes, text, register display objects and bit display objects. To configure Email server settings, create contact lists and screens, click on the Email option in the Project Information Window.
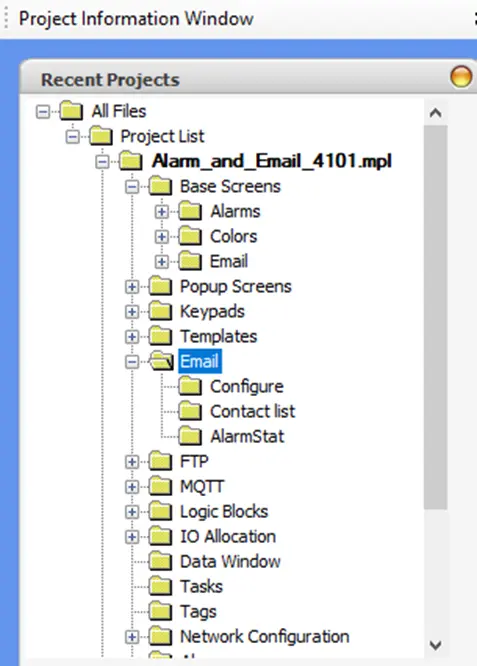
Configure
Click on Email > Configure to open the following window:
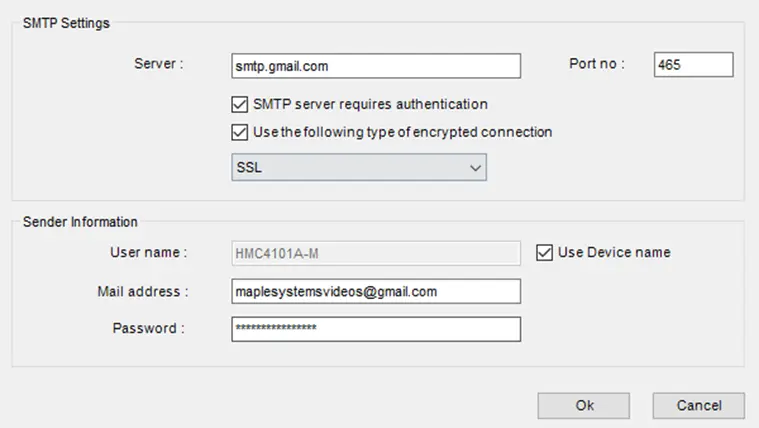
You will need the password of an email account, as well as the server and port number.
Below are some common Email Servers and ports:
| Server | Port for SSL | Port for TLS |
|---|---|---|
| smtp.gmail.com | 465 | 587 |
| smtp.yahoo.com | 465 | 587 |
Gmail Server (smtp.gmail.com)
Gmail uses OAuth2.0 protocol to authenticate a Google account, and they’ve restricted the ways to enable the use of your Gmail account for the HMC4000.
You’ll have to turn on two step authentication and create an application specific password. Then use this app password to login to the account
https://support.google.com/accounts/answer/185839?co=GENIE.Platform%3DDesktop&hl=en
Yahoo Server (smtp.yahoo.com)
Similar to Gmail account, your best option is to create application specific password. Then use this app password to login to your account https://help.yahoo.com/kb/SLN15241.html
Contact List
Click on Email > Contact List to add recipients and organize them into groups.
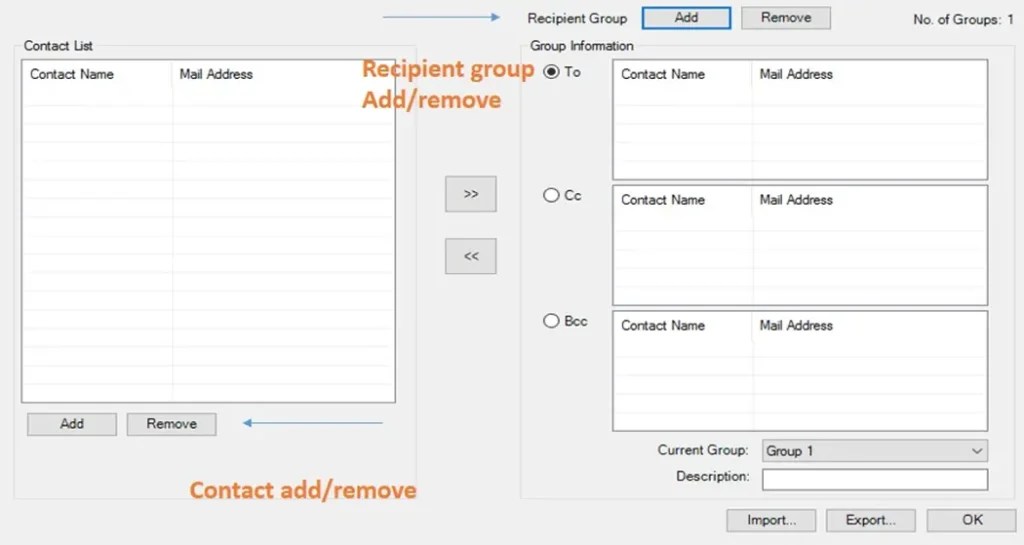
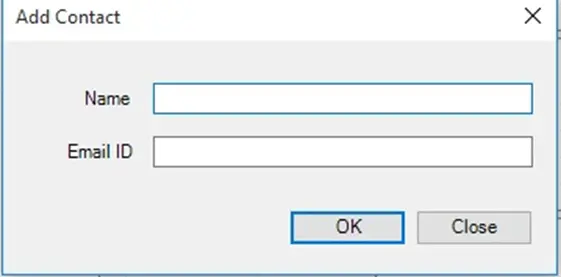
Add or remove email addresses by clicking the Add button.
In a similar fashion, groups can be added and selected. Up to 16 groups are supported.
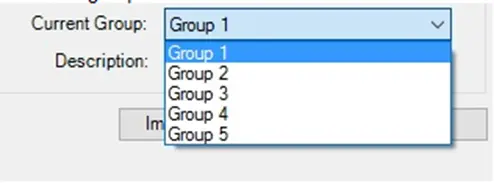
Click the right and left arrow buttons to add or remove a contact from the selected category for the selected group.
Email Screens
Right-click on Email in the Project Information Window > Click New Email Screen.
Email screens are similar to Base Screens. Place basic shapes, text and numeric and bit displays to show data on the Email screen. Bit Status and tag values will be recorded in the screenshot when an email is sent.
In the screen properties for the email screen, configure Attachment to be yes if the screenshot will be sent as an attachment or no if the screenshot is to be embedded in the email body. Configure the Subject property to be the subject for the email.
Sending Email
Email can be sent in various ways:
By Logic
The following System Tags can be used to trigger an email to be sent from logic.
| Tag Name | Tag Type | System Address | Description |
|---|---|---|---|
| Email_control_bit | BOOL | S00060 | Triggers an email of the screen in the email screen number register to be sent to the group in the email group number register. |
| Email_screen_number | WORD | SW0251 | Set the number of the email screen that will be sent |
| Email_group_number | WORD | SW0252 | Set the group number of the group to which the email will be sent |
| Email_status_reg | WORD | SW0253 | Contains a number code of the status of the email sent |
Email Status Register Code Table:
| 255 | Initial State |
| 0 | Server connection timeout |
| 1 | Response timeout |
| 2 | Send data timeout |
| 3 | Authentication failed |
| 4 | Server error |
| 5 | Client error |
| 6 | Invalid screen number |
| 7 | Invalid group number |
| 8 | Mail Sent Successfully |
By Task
Email can be sent directly by task using a task button.
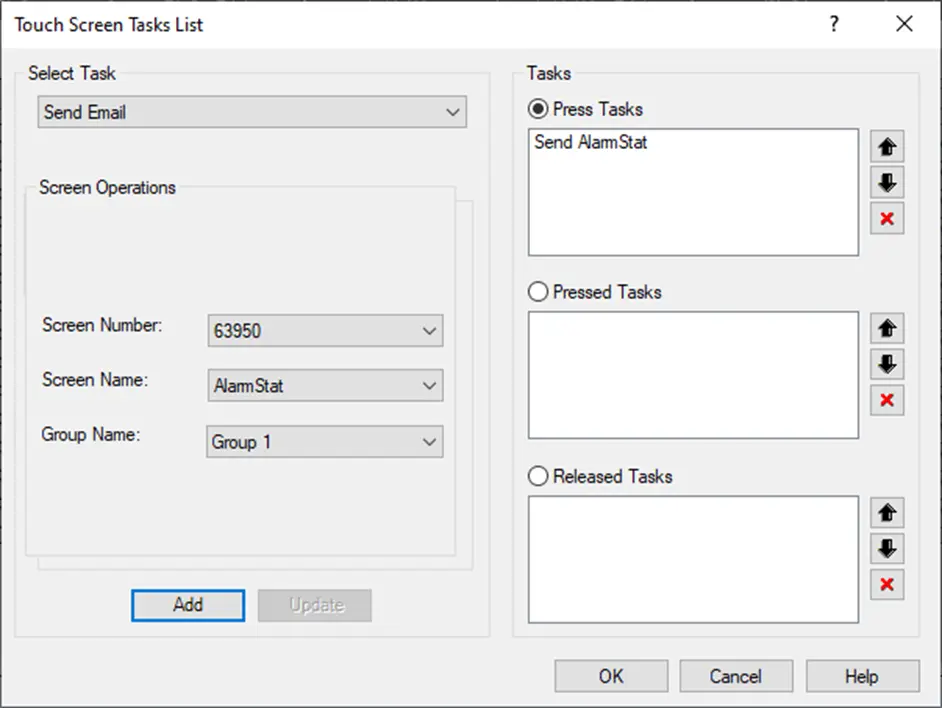
Single state or multistate task buttons can be found in the Advanced objects menu in the Base Screen editor.
By Alarm
Refer to the email section of the alarms description.
Email on Fly
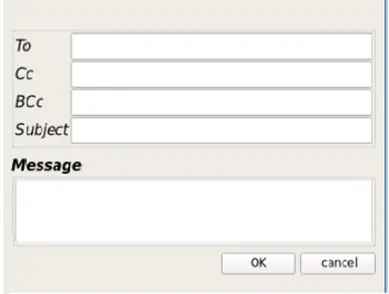
The Email on Fly task can be assigned to a task button. Pressing the button on the HMC at runtime will open the Email GUI. The recipient email addresses, subject and message of the email must be entered from the screen using the on screen keyboard.
Email Log
If you open the “Advanced Objects” drop-down, you can add a log of emails the device has sent.
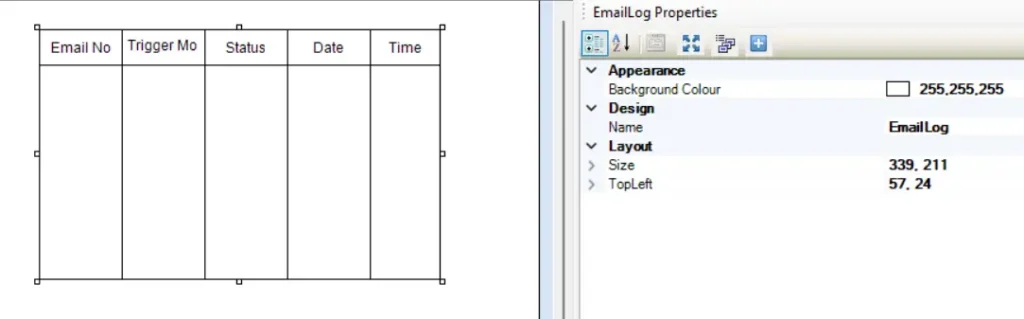
This will display various info about each email that’s been sent from the HMC unit.
VNC Server (HMC4000 Series)
The HMC4000 series support a VNC server functionality that can allow connection from a VNC client running on a PC or mobile device such as Android or iOS.
VNC client software must be installed on the PC or mobile device in order to connect to the VNC server on the HMC.
VNC requires that the client and server be on the same network (local or virtual) otherwise port forwarding must be used. The VNC connection is not encrypted. Ony one client can connect to a VNC server at a time.
There are two options for authentication; either using a VNC server password or no authentication.
Authentication and Connection
To configure authentication, enter the system settings menu by pressing (or left-click-hold) the top left corner of the screen for 5 seconds.
Navigate to the VNC Server tab. By default, Not Authentication will be selected. To set a password, select the VNC Server Password option.
If a server password is set, the client will be prompted to enter this password when attempting a connection. Otherwise anonymous connections will be allowed.
Return to the About tab of the System Settings and take note of the IP address.
Open the VNC client software on your PC and enter the IP address of the HMC4000 and attempt a connection.
The HMC4000 screen will appear on the VNC client exactly as it does on the device itself. The HMC4000 can still be operated directly from the screen as well as from the client.
System Settings Menu (HMC4000 Series)
The System Settings Menu can be accessed on any HMC4000 model by pressing (or clicking) and holding the top left corner of the screen for 5 seconds.
About
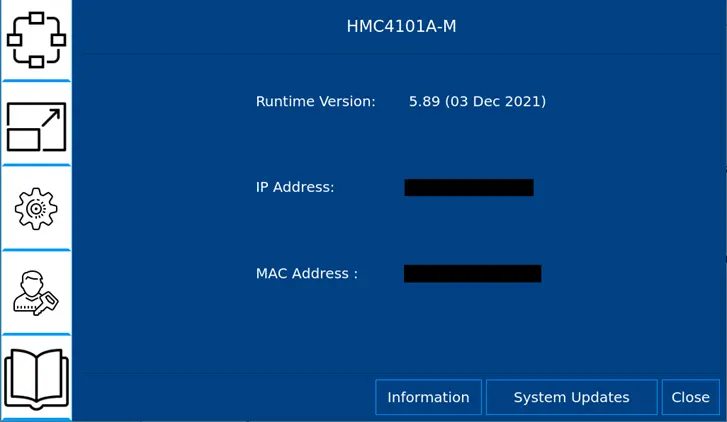
A screen will appear that will display info such as Runtime Version (the firmware), the IP address and MAC address of the unit. The System Updates feature allows a version of firmware to be uploaded to the device from a USB flash drive.

Network Settings
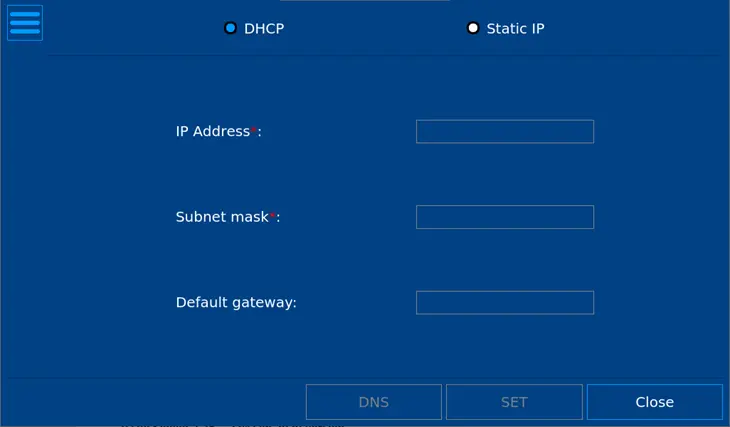
Provides the option of obtaining the IP address using DHCP or setting a Static IP.
VNC Server
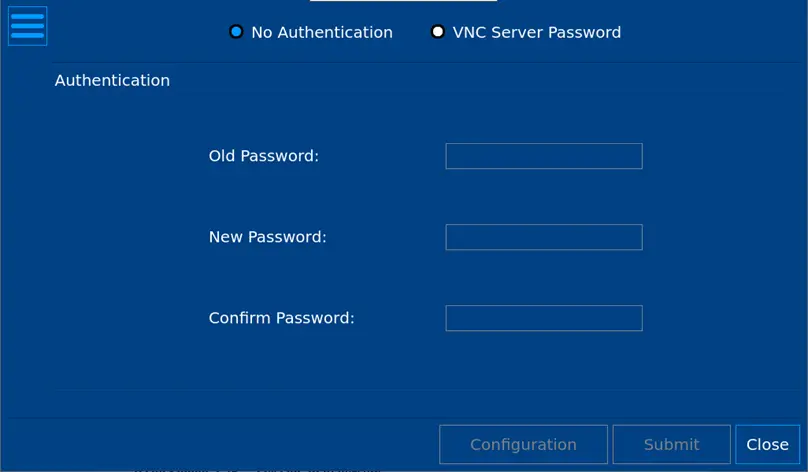
See the above section on how to configure the VNC Server.

Other Settings

RTC Settings
Set the date and time for the Real Time Clock. There is also the option to sync the HMC with an external NTP server.
Beeper Control
Enable or disable the beep sound when an action is completed.
Brightness
The backlight brightness can be adjusted between 6 settings, ranging between full brightness and completely off.
Screen Calibration
Selecting this button causes the HMC to reboot and enter screen calibration mode.
USB Update/Upload
Allows a project to be uploaded from a USB flash drive.
Reboot
Selecting this option will cause the HMC to reboot.
Mouse Cursor
Selecting this option allows a mouse cursor to appear on screen, so that a USB mouse can be used to navigate the HMC screen. Forces a reboot of the HMC.

Access
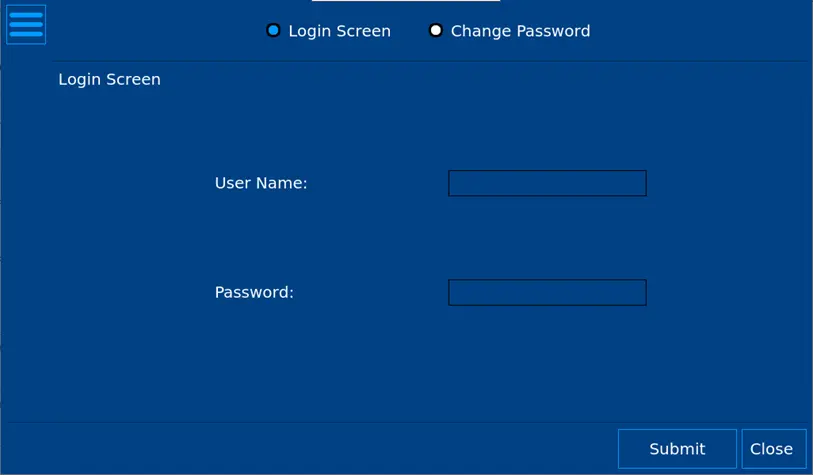
This is the screen from which the operator can log into a user account or change the password for that account.

Recipe Import/Export
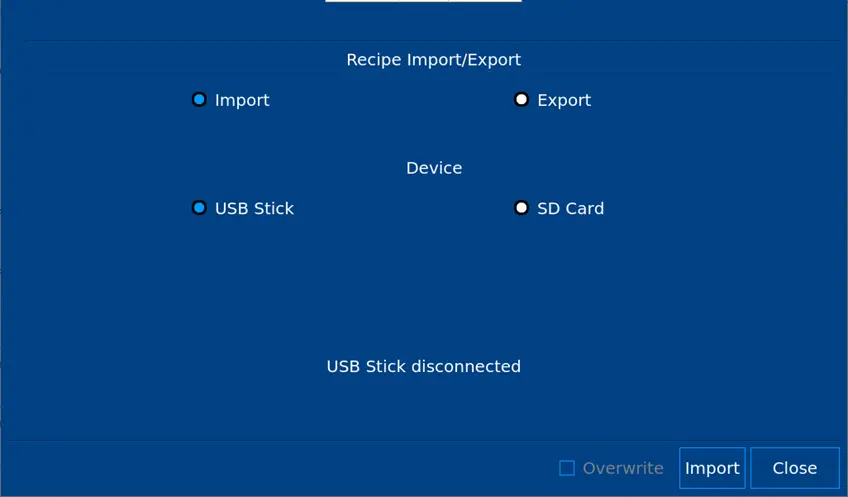
From this screen, recipe data can be imported or exported in .csv format from a USB drive inserted into the HMC Host port.
Boot Up Screen
In MAPware V2.36 and newer, a custom boot up screen (HMC4000) or message (HMC2000) can be configured to display after the HMC has powered on and before the project has loaded. If no custom boot up screen is configured, the default “Maple Systems” boot up screen will display.
For HMC2000:
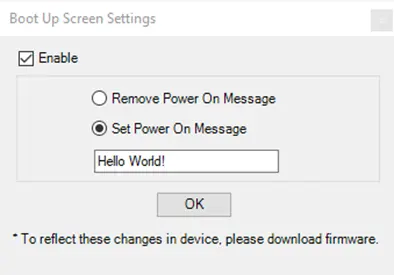
Click OK and download the firmware to the HMC to make the change.
For HMC4000:
Go to Tools > Bootup Screen Setting and select “Enable”.
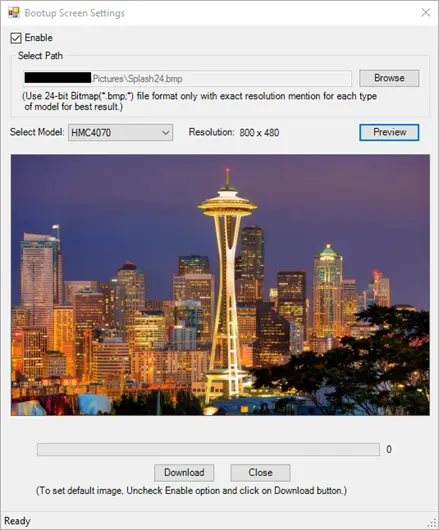
The image file must be a bitmap (.bmp) and be the exact resolution of the screen. Select the model of your HMC from the menu to determine the resolution. Click Download to download the splash screen.
Barcode Scanner
In MAPware-7000 V2.36+, the HMC4000 Series HMCs can be configured to display a string of ASCII data received from a USB barcode scanner connected to the USB Host port.
To do so, open a base screen in your project and select the Edit Data > Barcode object and place it on the screen.
Create a String type tag in the Tag Database to assign to the Barcode object.
Barcode Properties
In the Object Properties window for the Barcode object, the Mode property can be set to “Manual” or “Auto”.
Manual

When the mode is set to Manual the Barcode object must be selected on the screen before the code can be scanned. The scanner is ready to use when the Barcode object begins to flash. After the code is scanned, the ASCII string will appear in the Barcode Object.
In this mode, the value displayed in the Barcode object can be edited from the screen. This can be done when the “Tag Show Keypad” tag is set high and the keyboard appears on the screen.
Auto

When the mode is set to Auto the Barcode object is ready to receive data from the scanner as long as the “Tag Auto Mode Enable” tag is set high. The “Tag Trigger After Scan” tag will be set high after the scan is complete.