Introduction
All Maple Systems HMIs programmed with EBPro (EasyBuilder Pro), including every cMT X Series and cMT Series model, are compatible with Delta Electronics DVP 50MC Series (Modbus) (Ethernet). Configure your Controller and HMI/cMT with the following parameters to establish reliable communication.
Supported Series: DELTA DVP 50MC Series
Website: http://www.deltadriver.com
HMI Setting
| Parameters | Recommended | Options | Notes |
|---|---|---|---|
| PLC type | DELTA DVP 50MC Series (Modbus) (Ethernet) | ||
| PLC I/F | Ethernet | ||
| Port no. | 502 |
Device Address
| Bit/Word | Device type | Format | Range | Memo |
|---|---|---|---|---|
| B | IX | DDDo | 0 ~ 1277 | |
| B | QX | DDDo | 0 ~ 1277 | |
| B | MX | DDDDDDo | 0 ~ 1310717 | |
| W | IW | DD | 0 ~ 63 | |
| DW | ID | DD | 0 ~ 31 | |
| W | QW | DD | 0 ~ 63 | |
| DW | Q | DD | 0 ~ 31 | |
| W | MW | DDDDD | 0 ~ 32767 | |
| DW | MD | DDDDD | 0 ~ 16383 |
Support Device Type
| Data type | EBPro (EasyBuilder) data format | Memo |
|---|---|---|
| Bool | bit | |
| Word | 16-bit BCD, Hex, Binary, Unsigned | 16-bit |
| Int | 16-bit BCD, Hex, Binary, Signed | 16-bit |
| UInt | 16-bit BCD, Hex, Binary, Unsigned | 16-bit |
| DWord | 32-bit BCD, Hex, Binary, Unsigned | 32-bit |
| DInt | 32-bit BCD, Hex, Binary, Signed | 32-bit |
| Real | 32-bit Float | 32-bit |
| UDInt | 32-bit BCD, Hex, Binary, Unsigned | 32-bit |
| LWord | 64-bit Unsigned | 64-bit |
| LInt | 64-bit Signed | 64-bit |
| ULInt | 64-bit Unsigned | 64-bit |
| LReal | 64-bit Double | 64-bit |
Import Tags
Open Global Symbols Main Table
[Main Table] -u0026gt; [Global Symbols] creates address related information.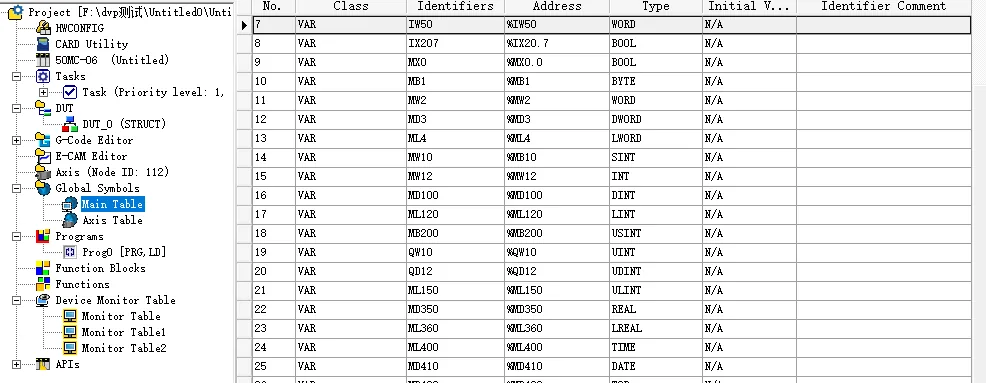
Export Global Symbols File
[File] -u0026gt; [Export] -u0026gt; [Global Symbols]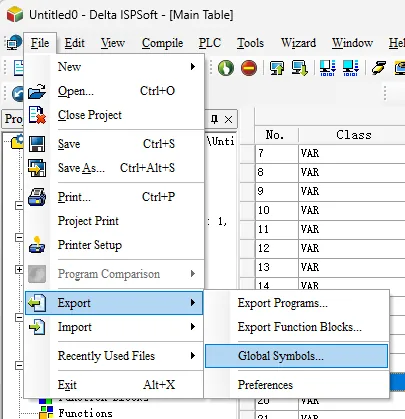
Import Tags After Driver Setup
After adding the driver settings, click [Import Tags] and select the imported tag file.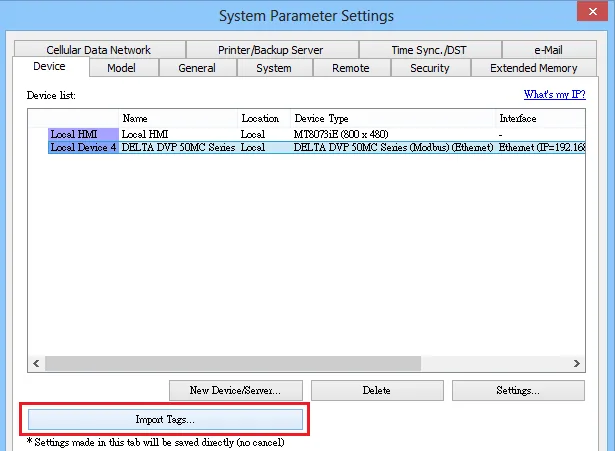
Configure and Start Tag Import
Choose to remove or keep the old tags and press [Import].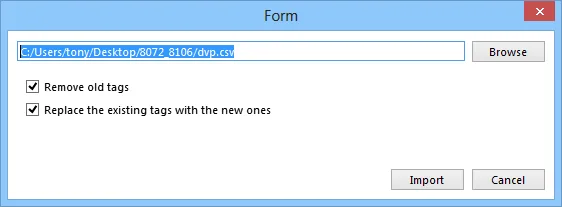
Select Tags to Import
Check the tags you want to import and click [OK] to import them.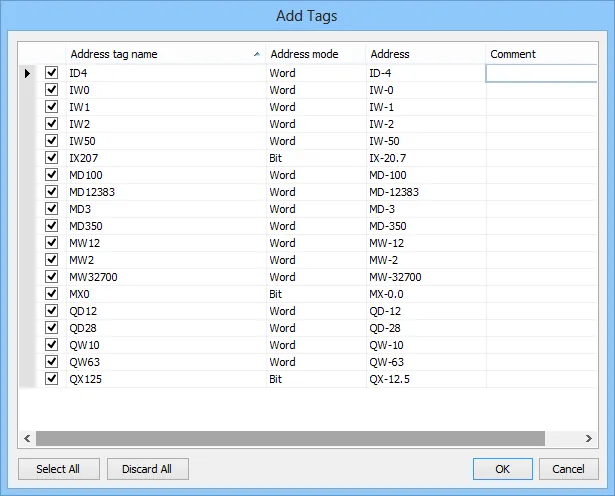
Confirm Successful Tag Import
Display a message that the import was successful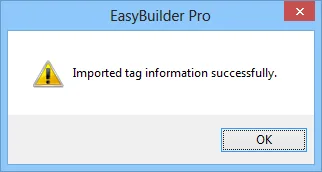
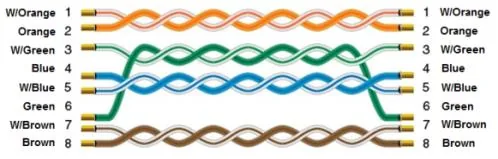
Wiring Diagram
The diagram below shows the Ethernet cable wiring.