Introduction
All Maple Systems HMIs programmed with EBPro (EasyBuilder Pro), including every cMT X Series and cMT Series model, are compatible with Maple Systems Built-in CODESYS. Configure your Controller and HMI/cMT with the following parameters to establish reliable communication.
HMI Settings
| Parameters | Recommended | Options | Notes |
|---|---|---|---|
| PLC type | Maple Systems Built-in CODESYS | ||
| PLC I/F | Ethernet | ||
| Online simulator | NO |
How to Import Tags
Set POU in MainTask
Under MainTask, set POUPLC_PRG.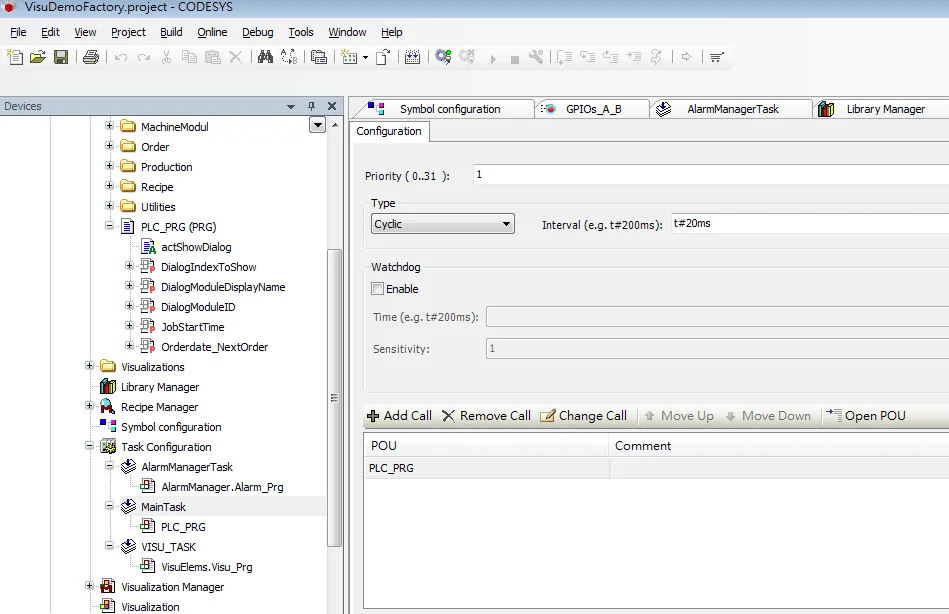
Add Symbol Configuration to Devices list
Right-click the Application node, choose Add Object, then select Symbol configuration…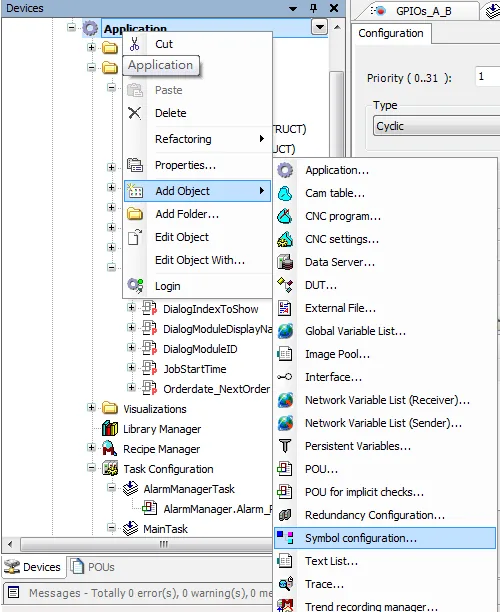
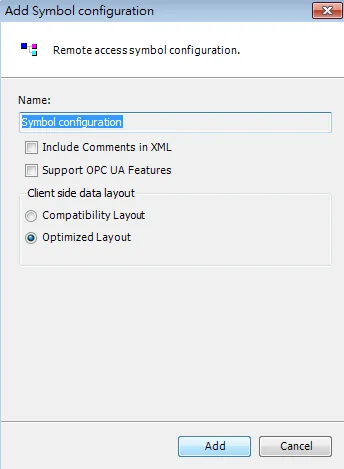
Select PLC_PRG and build the project
SelectPLC_PRG— its tag information is shown. Then build the project via Build → Generate Code.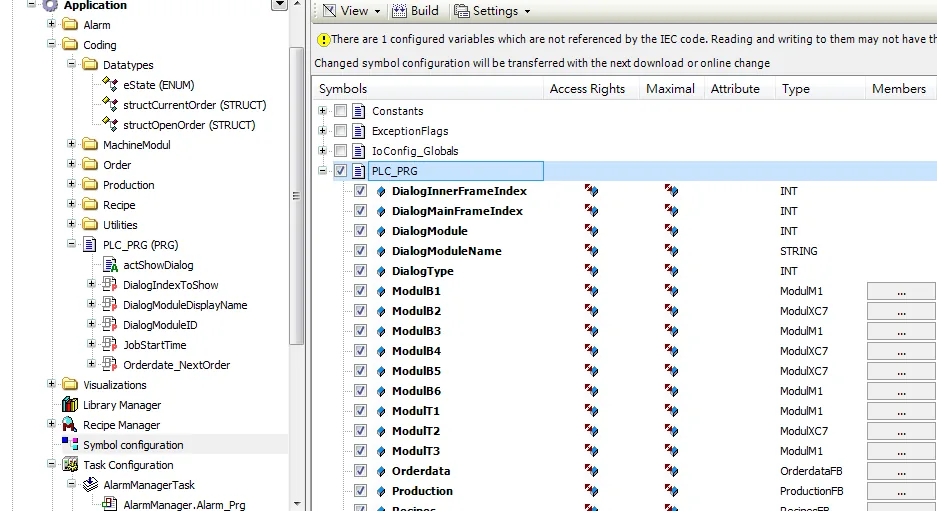
Locate the generated XML file
A*.xmlfile is generated in the project directory after the build completes.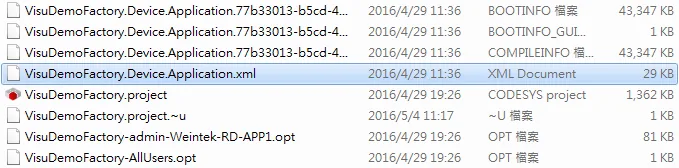
Add Maple Systems Built-in CODESYS driver in System Parameter Settings
In System Parameter Settings, click New HMI… to add the Maple Systems Built-in CODESYS driver to the device list, then click Tag Manager…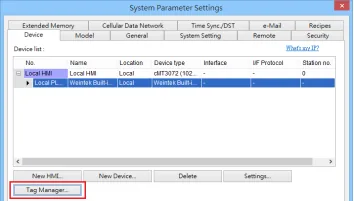
Import the tag file in Tag Manager
In Tag Manager, click Get tag → Import Tag…, then select the.xmltag file generated by the PLC software.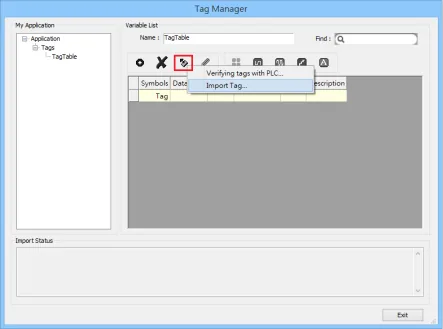
Confirm import and exit
When tags are imported successfully, click Exit to leave Tag Manager.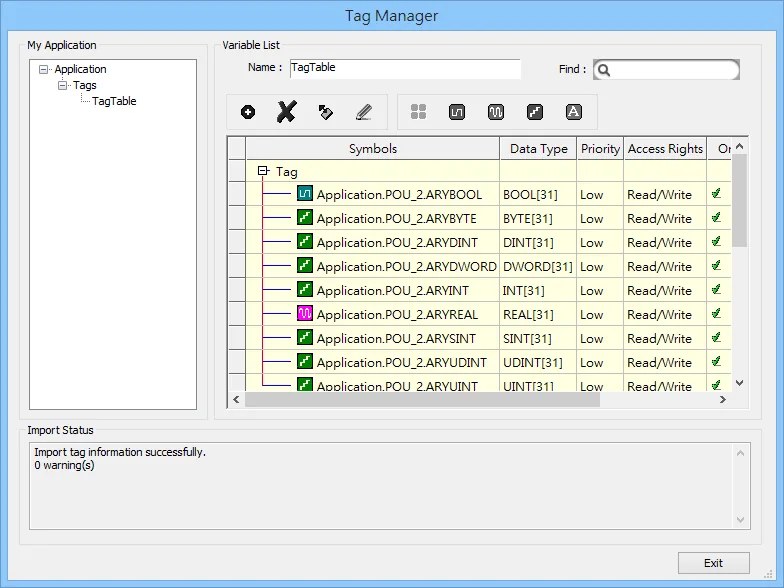
Supported Device Types
| Data type | EBPro (EasyBuilder) data format | Memo |
|---|---|---|
| Bool | bit | |
| Byte | 16-bit BCD, Hex, Binary, Unsigned | 8-bit |
| SInt | 16-bit BCD, Hex, Binary, Signed | 8-bit |
| USInt | 16-bit BCD, Hex, Binary, Unsigned | 8-bit |
| Word | 16-bit BCD, Hex, Binary, Unsigned | 16-bit |
| Int | 16-bit BCD, Hex, Binary, Signed | 16-bit |
| UInt | 16-bit BCD, Hex, Binary, Unsigned | 16-bit |
| DWord | 32-bit BCD, Hex, Binary, Unsigned | 32-bit |
| DInt | 32-bit BCD, Hex, Binary, Signed | 32-bit |
| Real | 32-bit Float | 32-bit |
| UDInt | 32-bit BCD, Hex, Binary, Unsigned | 32-bit |
| LInt | 64-bit Signed | 64-bit |
| ULInt | 64-bit Unsigned | 64-bit |
| LWord | 64-bit Unsigned | 64-bit |
| LReal | 64-bit Float | 64-bit |
| String | Word array for ASCII input and display | Length=word |
NOTE: String length must be set identical to the length in CODESYS software.
NOTE: EBPro V6.03.02 or later supports 64-bit data types (cMT Series only), but note that the address limit range is 48 bits maximum.
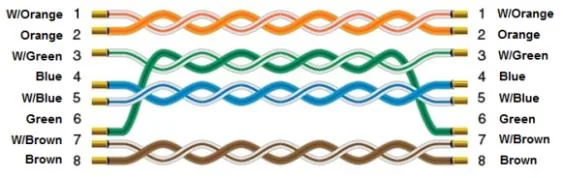
Wiring Diagram
The diagram below shows the Ethernet cable wiring.