Getting Started
Unpacking the Unit
Carefully unpack the Monitor. Check all material in the container against the packing list. Maple Systems will not accept responsibility for shortages against the packing list unless notified within 30 days. The equipment and accessories were inspected and tested by Maple Systems before shipment.
Examine the equipment carefully; if any shipping damage is evident, notify the carrier immediately. Maple Systems is not responsible for claim negotiations with the carrier.
Save the shipping container and packing material in case the equipment needs to be stored, returned to Maple Systems, or transported for any reason.
| Packing List |
|---|
| MON6000AP Series Projected Capacitive Touch Monitor |
| DC Power Connector (3-pin Terminal Block) |
| VGA Cable |
| USB Cable (for touch functionality) |
| Panel Mounting Clamps (Quantity Dependent on Monitor Display Size) |
| Warranty Statement Insert |
Safety Precautions
Please observe the following precautions when installing the MON1000 Series. Failure to comply with these restrictions could result in loss of life, serious personal injury, or equipment damage.

Warning: Disconnect this equipment from any power before cleaning. Do not use liquid or spray detergents for cleaning. Use a damp cloth.
Warning: Keep this equipment away from humidity.
Warning: Before applying power the unit make sure the voltage of the power source is within the input voltage rating of the unit.
Operating the unit outside of this voltage specification can damage the unit and void your Warranty.
Warning: Never open the equipment and do not operate equipment with its rear cover removed- there are dangerous high voltages present inside. For safety reasons, the equipment should be opened only by a qualified service technician.
Warning: This equipment generates, uses and can radiate radio frequency energy and if not installed and used in accordance with the instruction’s manual, it may cause interference to radio communications. It has been tested and found to comply with the limits for a Class A computing device pursuant to FCC Rules, which are designed to provide reasonable protection against such interference when operated in a commercial environment. Operation of this equipment in a residential area is likely to cause interference in which case the user at his own expense will be required to take whatever measures may be required to correct the interference.
Warning: If any of the following situations arise, get the equipment checked by qualified service personnel.
- The power cord or plug is damaged.
- Liquid has penetrated into the equipment.
- The equipment has been exposed to moisture.
- The equipment does not work well, or you cannot get it to work according to this operations manual.
- The equipment has been dropped and damaged.
- The equipment has obvious signs of breakage.
Warning: Risk of explosion if the battery is replaced with an incorrect type.
Batteries should be recycled where possible. Disposal of used batteries must be in accordance with local environmental regulations.
Warning: Do not leave this equipment in an uncontrolled environment where the storage temperature is below -30°C (-22°F) or above 70°C (158°F). It may damage the equipment.
Overview
MON6000AP Series Projected Capacitive Touch Monitors are industrial, heavy duty touchscreen monitors, designed for use with Industrial PC Computer Systems. Display size options range from 10.1 ~ 21.5”, with all displays offering a sunlight readable, high-brightness (1000 nits) output.
High Brightness displays are ideal for use in environments where there is a larger than normal amount of ambient lighting, allowing for the user to maintain readability of the display. MON6000AP Series Monitors are rated for operational use in extended temperature environments of -4~140°F (-20~60°C).
All MON6000AP Monitors feature Projected Capacitive Touch Screens, which allow for a more natural, intuitive user touch experience compared to traditional analog-resistive touch screen terminals. Benefits of projected capacitive touchscreens include multi-touch response (pinch and zoom functionality) and personal tablet-like operation. In most cases, projected capacitive touchscreens do not require calibration.
MON6000AP Series Monitors are NEMA4 rated and carry a rugged IP66 certification (when panel mounted).
For detailed specifications for the MON1000AP Series models, including CAD drawings, please see the datasheet posted on the unit’s product page on maplesystems.com.
PC Connection
You will need to set up your MON6000AP Series monitor to a PC. MON6000AP Series Monitors include USB and VGA cables in the box to allow for ease of setup and use.
Note: If your PC does not have an VGA connector, you can use an HDMI™, DVI or DisplayPort cable (each sold separately) to connect your monitor to your PC, the steps are the same.
When connected to a computer running a Windows® 8.x or 10 Operating System, there are no additional drivers required for operation. Your MON6000AP Series monitor uses standard Windows® HID (Human Interface Device) Drivers. When connected to a computer running a Windows® 7 Operating System, it is recommended to connect to Windows Update and download the most recent touch panel drivers.
Connecting to a PC
Follow these simple steps to connect your Monitor to a PC.
Instructions: Connecting to a PC
Power Off All Equipment
Be sure all equipment is powered off.Connect Video Signal Cable
Connect one end of the video signal cable to the input connector on the monitor, the other end to the matching connector on your PC.Connect USB Touch Cable (Optional)
If touch operation from the monitor is desired, plug the “rectangular end” of the included USB cable to a USB port of your PC.The MON6000AP Series can be used as a simple, non touch monitor if desired. Simply do not connect the USB touch cable if you do not want touch functionality with your Monitor.Connect Power Cable
Connect one end of your power cable to the power connector on the monitor, and the other end to the VDC output of your power supply.Power up the PC and MON1000 Series
Apply power to your monitor and PC. Your monitor should now be displaying your PC desktop.Your monitor is configured to automatically detect which display input connection method is used and will default to that connection.
If you wish to manually adjust the display input selection, see the On-Screen Display Operation section below.
Display Resolution
Your MON6000AP Series monitor comes pre-configured with a maximum resolution of 1280 x 800 pixels (10.1” screen size), 800 x 600 pixels (12.1” screen size), 1024 x 768 pixels (15” screen size), or 1920 x 1080 pixels (21.5” screen size). It is highly recommended that the display resolution output of your PC matches the native resolution of the monitor.
If you wish to change the monitor’s display resolution, go to the Display Settings menu of your system and adjust from there. Note that the above-listed resolutions are the maximum displayable for each respective screen size; you can adjust to a lower resolution, but not higher.
Mounting Options
Mounting options include Panel Mounting and VESA 100 x 100 mm (VESA mounting stands / brackets sold separately). MON6000AP Series monitors do not include a traditional monitor stand, as they are designed for industrial uses. Most commercially available monitor stands use the VESA mounting standard; should you choose to purchase a commercially available monitor stand, verify it will properly support the weight and mounting scheme of your MON6000AP Series monitor.
Maple Systems is not responsible for damage to unit, mounting surface or any other components caused by improper mounting.
Panel Mounting
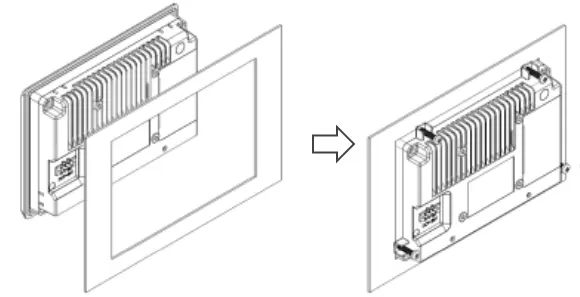
MON6000AP units can be panel mounted using the mounting holes located on the rear of the unit. Use the included clamps to fasten the unit to the panel, cut out to the proper dimensions on the datasheet corresponding to your monitor size. Tighten the panel bolts with a torque force range between 7 ~ 8.5 inch/lbs. to ensure an adequate seal. Over torqueing the bolts may possibly negate NEMA or IP rating, or cause damage to the unit or panel.
VESA Mounting
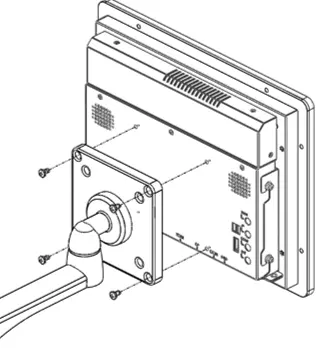
In addition to panel mounting, the MON6000AP Series offer VESA 100 mounting as an option. VESA 100 x 100 mm threaded inserts are located on the rear of the unit. Use M4 threaded mounting screws to attach your VESA mounting bracket (not provided by Maple Systems) to the Monitor.
I/O Ports
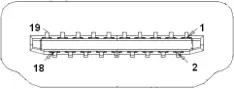
HDMI
Connector Type: High Definition Multimedia Interface® Socket
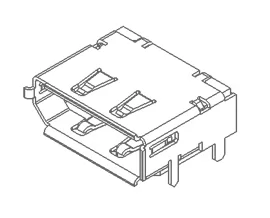
DisplayPort
Connector Type: DisplayPort Interface Connector Socket
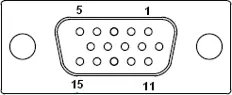
VGA
Connector Type: DE15P Video Graphic Array Port
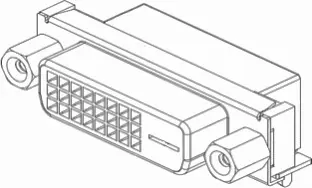
DVI-D
Connector Type: Digital Visual Interface-Digital Only Connector
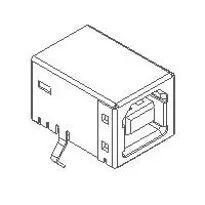
USB
Connector Type: USB Type-B Client Port
Note: USB Client Port is designed for the provided USB cable only, and is required for proper touch operation of the monitor.

Audio-In
Connector Type: 3.5mm audio jack input
On-Screen Display (OSD) Operation
Your MON6000AP Series monitor has Power and On-Screen Display (OSD) buttons physically located on the rear panel. If the monitor is powered on, but does not have an active connection to a computer, the power indicator will illuminate RED. When there is an active PC connection, the power indicator will illuminate GREEN.
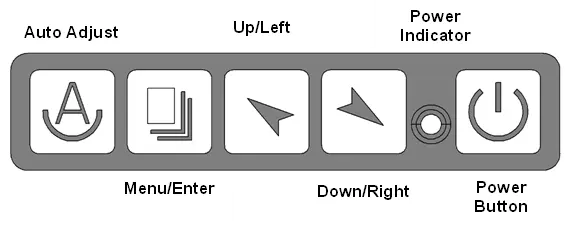
The table below shows the buttons and their respective operations.
| Button | Function with OSD menu active | Function with OSD menu inactive |
|---|---|---|
 | Turns the power ON or OFF | Turns the power ON or OFF |
 | This button scrolls left through menus. In a submenu, this button increases the selected parameter value. | Adjust brightness value of the monitor downward (decrease display brightness) |
 | Scrolls right through menus. In a submenu, this button decreases the selected parameter value. | Adjust brightness value of the monitor upward (increase display brightness) |
 | If an OSD menu parameter is highlighted, pressing this button will select the highlighted menu item/icon and enter the parameter adjustment submenu. If there is no highlighted parameter, this button is used to exit the On-Screen Display menu. | Enters the On-Screen Display menu. |
 | Automatically Adjusts the Monitor’s Image settings | Opens the input menu to allow change of display input connection. |
OSD Menu Parameter Adjustment
The On-Screen Display (OSD) menu structure is shown below. Each adjustable parameter within each submenu is listed.
Main Menu
This is the initial OSD menu that shows up when the Menu button is pressed.
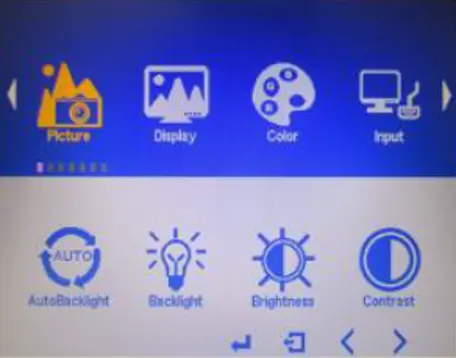
Picture Menu
In the Picture menu, the following parameters can be adjusted:
Backlight
Brightness
Contrast
Sharpness
(Exit to Main Menu)
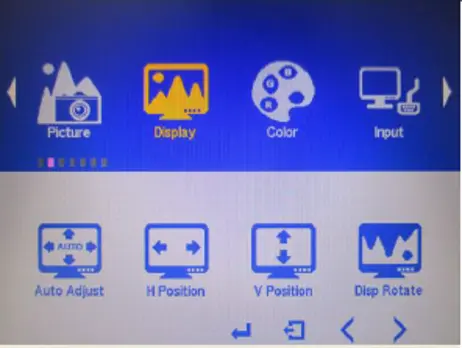
Display Menu
(VGA Input only – below parameters are greyed-out if not connected via VGA)
In the Display menu, the following parameters can be adjusted:
Auto Adjust
H Position
V Position
Display Rotate
(Exit to Main Menu)
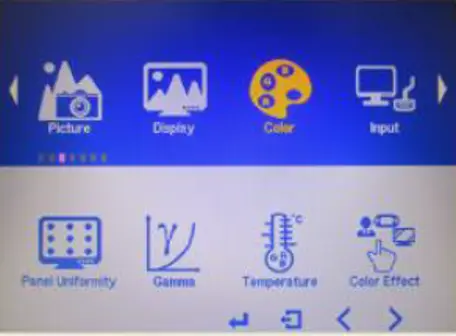
Color Menu
In the Color menu, the following parameters can be adjusted:
Panel Uniformity
Gamma
Color Temperature
Color Effect
(Exit to Main Menu)
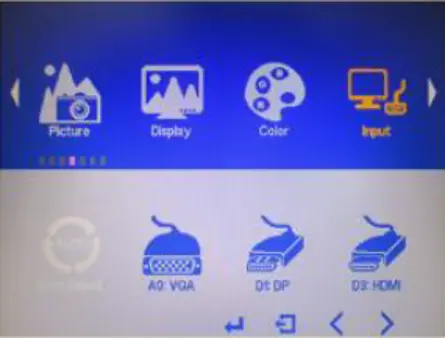
Input Menu
In the Input menu, the following parameters are shown:
Auto Select
Analog 0: VGA
Digital 1: DP
Digital 3: HDMI
(Exit to Main Menu)
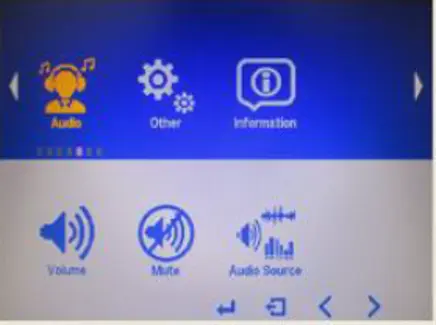
Audio Menu
In the Audio menu, the following parameters are shown:
Volume
Mute
Audio Source
(Exit to Main Menu)
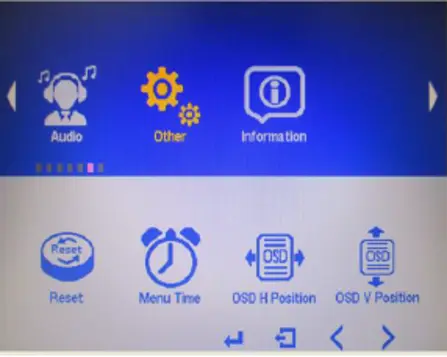
Other Menu
In the Other menu, the following parameters are shown:
Reset
Menu Time
OSD H Position
OSD V Position
Language
Transparency
Rotate
(Exit to Main Menu)
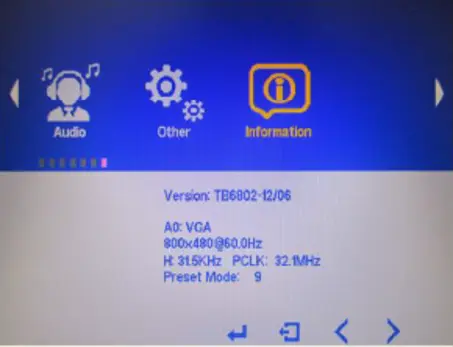
Information Menu
The Information menu provides information of the current PC connection. Selecting Exit will exit the OSD menu.