Introduction
All Maple Systems HMIs programmed with EBPro (EasyBuilder Pro), including every cMT X Series and cMT Series model, are compatible with ODVA EtherNet/IP (Explicit Messaging). Configure your Controller and HMI/cMT with the following parameters to establish reliable communication.
Supported Series: Crevis EtherNet/IP NA-9188
Website: http://www.crevis.co.kr/
HMI Settings
| Parameters | Recommended | Options | Notes |
|---|---|---|---|
| PLC type | ODVA EtherNet/IP (Explicit Messaging) | ||
| PLC I/F | Ethernet | ||
| Port no. | 44818 | ||
| PLC sta. no. | 0 |
Please click [Tag Editor] when adding this driver to initiate tag information. To edit address tag, please see the factory manual.
![Tag Editor dialog showing the Assembly_Object selected under Struct-Defined, with five members listed including Input_Produced and Output_Consumed with BYTE[255] data types.](https://media.maplesystems.com/wp-content/uploads/2026/06/02-tag-editor-assembly-object-members.webp)
Tag Editor Setup
Create a New Data Type
In Tag Editor, right-click Object-Defined and select New data type. Enter a name for the new data type (e.g.,Tags) in the Name field.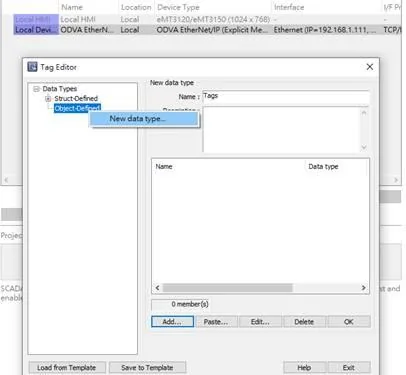
Add an Address
Click Add to open the Add Data Member dialog. In the EIP Data section, enter the member name, set the Class, Instance, and Attribute values in hex, then select the appropriate Data Type and click OK.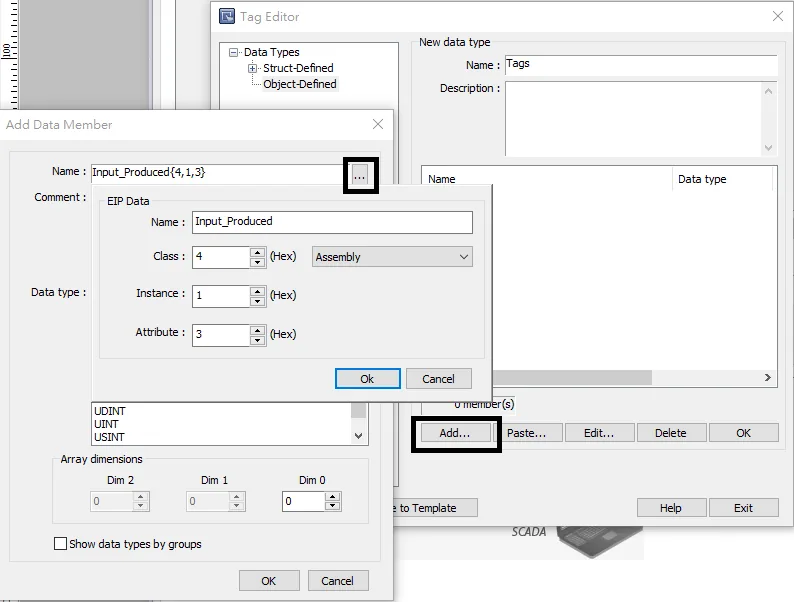
Adding Vendor ID: Example
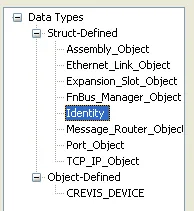
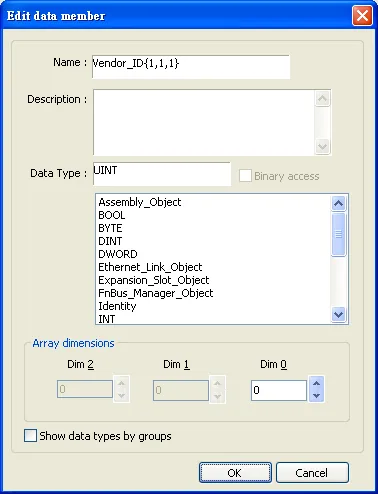
The following is an example of how to add Vendor ID in Tag Editor. See 3.2.3 Identity Object in the factory manual for the detail of this ID.
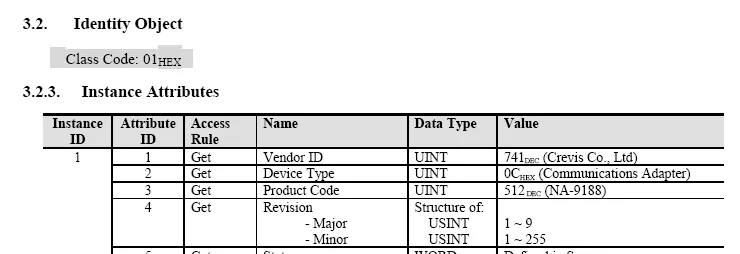
Under Struct-Defined select Identity to add Vendor_ID. {1,1,1} represents {Class code, Instance ID, Attribute ID}. Enter UINT in the Data Type field according to the factory manual. When finished, this data member can be found in Identity Object.
Support Device Type
| Data type | EasyBuilder data format | Memo |
|---|---|---|
| Bool | bit | |
| Byte | 16-bit BCD, Hex, Binary, Unsigned | 8-bit |
| SInt | 16-bit BCD, Hex, Binary, Signed | 8-bit |
| USInt | 16-bit BCD, Hex, Binary, Unsigned | 8-bit |
| Word | 16-bit BCD, Hex, Binary, Unsigned | 16-bit |
| Int | 16-bit BCD, Hex, Binary, Signed | 16-bit |
| UInt | 16-bit BCD, Hex, Binary, Unsigned | 16-bit |
| DWord | 32-bit BCD, Hex, Binary, Unsigned | 32-bit |
| DInt | 32-bit BCD, Hex, Binary, Signed | 32-bit |
| Real | 32-bit Float | 32-bit |
| UDInt | 32-bit BCD, Hex, Binary, Unsigned | 32-bit |
| Array | Word array for ASCII input and display | Length=word |
Wiring Diagram
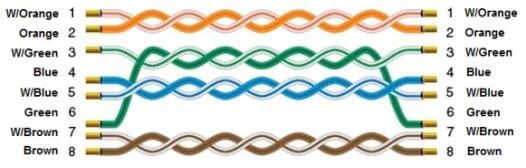
NOTE: Connect the HMI to the PLC using a standard Ethernet cable (straight-through).
The diagram below shows the Ethernet cable wiring.