Introduction
All Maple Systems HMIs programmed with EBPro (EasyBuilder Pro), including every cMT X Series and cMT Series model, are compatible with Beckhoff TwinCAT PLC – Free Tag Names (Ethernet). Configure your Controller and HMI/cMT with the following parameters to establish reliable communication.
Supported Series: CX8000,CX90x0,CX1010,CP62xx,CX5010,CP62xx,CX1020,CX2020,CPxxxx,C6920,CX2030,CPxxxx,CP6930,CX2040,C65xx,C69xx
Website: http://infosys.beckhoff.com/
HMI Settings
| Parameters | Recommended | Options | Notes |
|---|---|---|---|
| PLC type | Beckhoff TwinCAT PLC – Free Tag Names (Ethernet) | ||
| PLC I/F | Ethernet | ||
| Port no. | 48898 | ||
| PLC sta. no. | No need to set station no. | ||
| Online simulator | YES | ||
| EasyAccess 2.0 | NO |
Support Device Type
| Data Type | EBPro (EasyBuilder) Data Format | Memo |
|---|---|---|
| Bool | bit | |
| Word | 16-bit BCD, Hex, Binary, Unsigned | 16-bit |
| Int | 16-bit BCD, Hex, Binary, Signed | 16-bit |
| UInt | 16-bit BCD, Hex, Binary, Unsigned | 16-bit |
| DWord | 32-bit BCD, Hex, Binary, Unsigned | 32-bit |
| DInt | 32-bit BCD, Hex, Binary, Signed | 32-bit |
| Real | 32-bit Float | 32-bit |
| UDInt | 32-bit BCD, Hex, Binary, Unsigned | 32-bit |
| LInt | 64-bit Signed | 64-bit |
| ULInt | 64-bit Unsigned | 64-bit |
| LWord | 64-bit Unsigned | 64-bit |
| Double | 64-bit Float | 64-bit |
| String | ASCII input and ASCII display | Max length: 256 |
| WString | ASCII input and ASCII display | *Note1 |
Note1: Support WString in EasyBuilderPro V6.08.02 and later versions
Note2: EBPro (EasyBuilder Pro) V6.03.02 or later supports 64 bits data type, but please note that the address limit range is 48 bits in maximum.
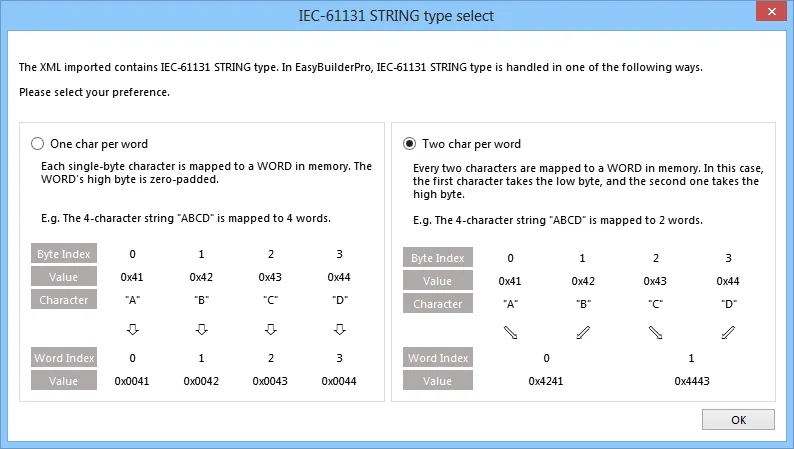
Note3: When importing, there are two modes of one/two char per word to choose from. When importing one char per word, choose Unicode data format for ASCII objects, and choose UTF-8 (Default) data format for two char per word.
TwinCAT 2 PLC Settings
To connect Beckhoff devices, HMI’s information must be registered to PLC first. The following steps describe how to register HMI’s information into Beckhoff devices.
Open TwinCAT 2 System Manager
Open TwinCat System Manager. Select [Actions] menu, and then select [Choose Target System]. Select the device you are connecting.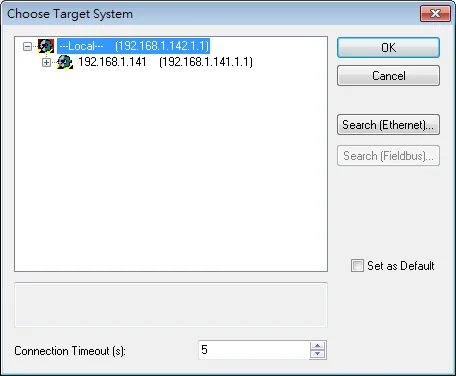
Add HMI to AMS Router
Open TwinCat System Control. Go to [AMS Router] tab, click [Add] to add HMI information. Please add the HMI information as below.n- Name: A user-defined namen- AMS Net ID: HMI’s IP address + u0022.1.1u0022n- Address: HMI’s IP address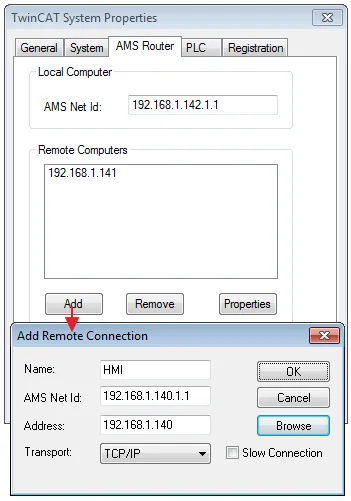
Apply AMS Router Configuration
If added successfully, you will see a new item in Remote Computers. Click [Apply] to apply the configuration.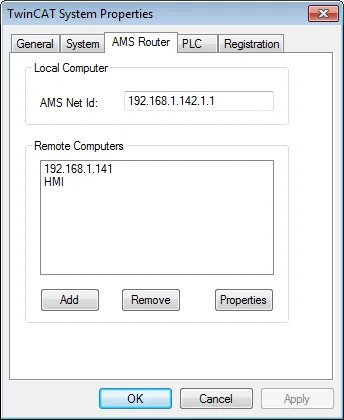
Activate TwinCAT 2 Configuration
Open TwinCat System Manager again. Select [Actions] menu, and then select [Activate Configuration] to apply the new settings.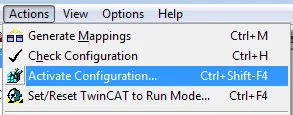
TwinCAT 3 PLC Settings
To connect Beckhoff devices, HMI’s information must be registered to PLC first. The following steps describe how to register HMI’s information into Beckhoff devices.
Choose TwinCAT 3 Target System
Double click [SYSTEM], and then select [Choose Target System]. Select the device you are connecting.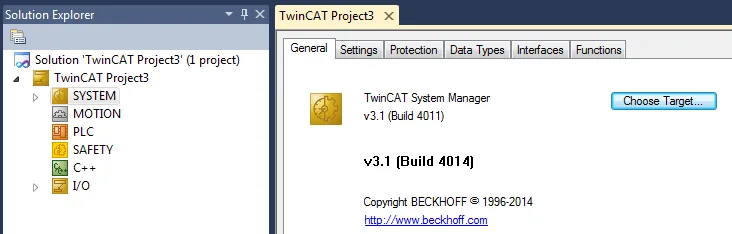
Add HMI Route Entry
Expand the SYSTEM layer, select [Routes]. Click [Add] to add HMI information as below.n- Name: A user-defined namen- AMS Net ID: must be HMI’s IP address + u0022.1.1u0022n- Transport Type: TCP_IPn- Address: HMI’s IP address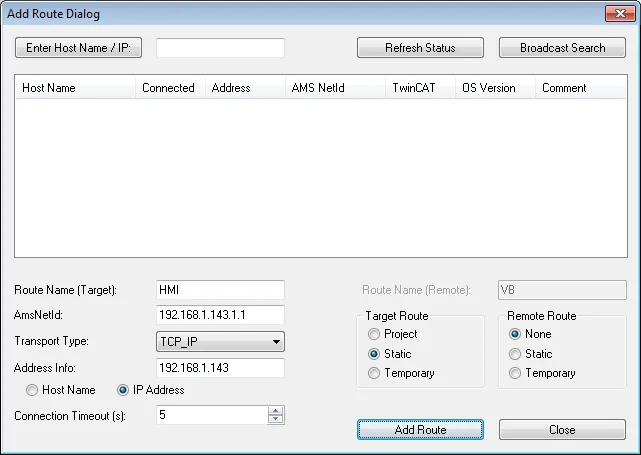
Apply Routes Configuration
If added successfully, you will see a new item in Remote Computers. Click [Apply] to apply the configuration.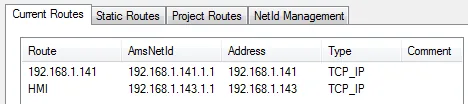
Activate TwinCAT 3 Configuration
Select [TwinCAT] menu, and then select [Activate Configuration] to apply the new settings.
How to Import Tags
EBPro (EasyBuilder) supports two ways to import tags.
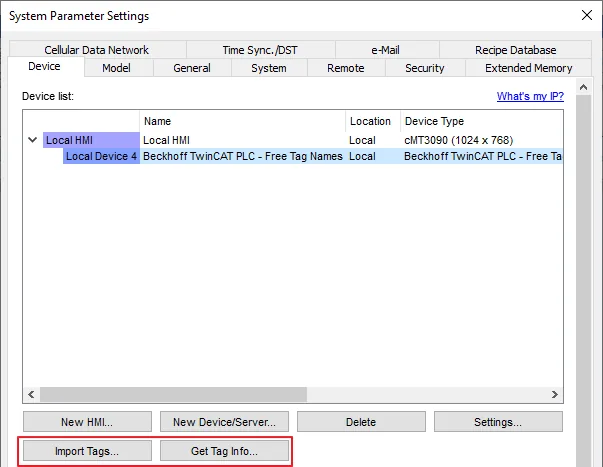
Get Tag Info
[Get Tag Info] could retrieve the tags directly from Beckhoff devices. Select the network adapter to access the Beckhoff devices.
Import Tags
There are three formats for importing tags: Linear, Hierarchical, EBproTag
The files generated after compilation in TwinCAT2 and TwinCAT3 programming software can be directly imported to EasyBuilder. Supported file types:
- TwinCAT2:
.tpyand.EXP - TwinCAT3:
.TcDUT,.TcGVL,.TcPOUand.TPY
- TPY files can be imported as linear or hierarchical
- TwinCAT2 does not support the conversion of global_tag from Linear to Hierarchical
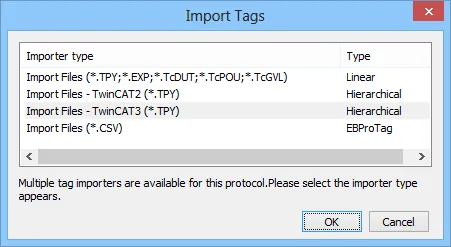
Import and select hierarchical way, support filter tag function.
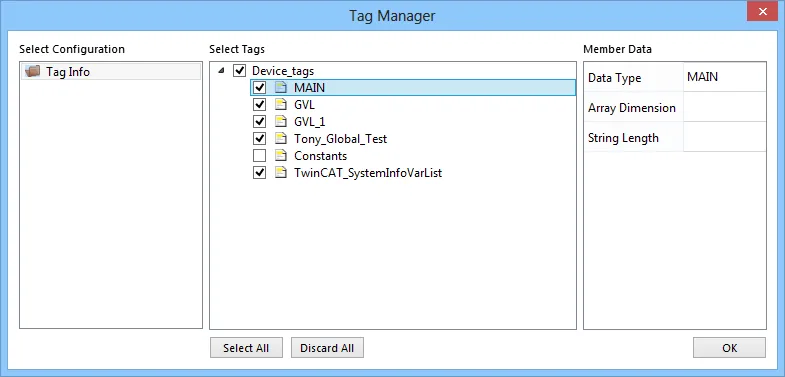
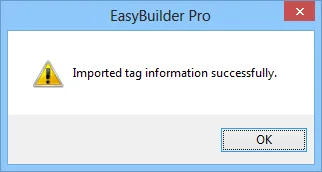
Select PLC Software Version. Select the file type and then click [Import]. The invalid address types will be displayed in Error Status field. The “Import successfully” message will be shown upon completion.
NOTE:
- Tag name can not include “.”.
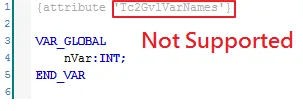
- GVL files with
Tc2GvlVarNamesattribute are not supported.
- Except for
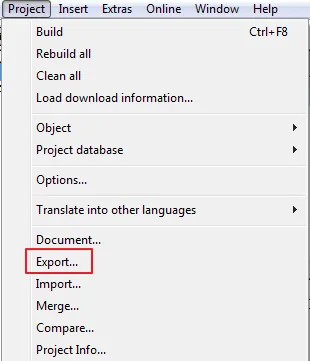
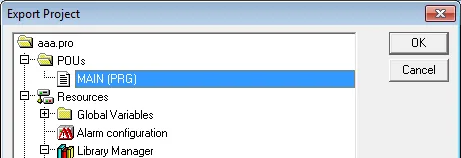
.EXPfile of TwinCAT2, after the TwinCAT project is compiled, other file types are generated and placed in the same folder as the project. To generate.EXPfiles, please select [Project] » [Export], and then select the tag location to be exported.
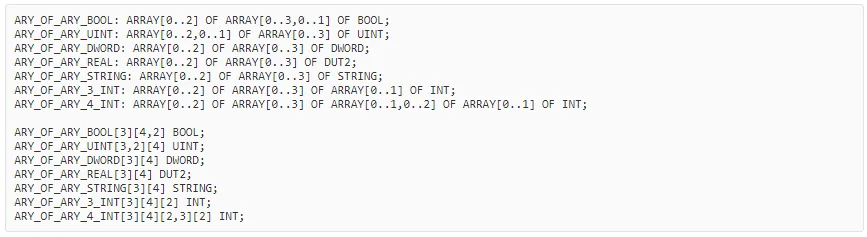
- Only use linear type import to support array of array addresses.
Wiring Diagram
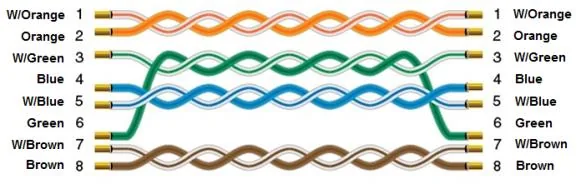
The diagram below shows the Ethernet cable wiring.