Introduction
All Maple Systems HMIs programmed with EBPro (EasyBuilder Pro), including every cMT X Series and cMT Series model, are compatible with a Rockwell/Allen-Bradley EtherNet/IP ControlLogix Free Tag Names. Configure your Controller and HMI/cMT with the following parameters to establish reliable communication.
Supported Series: Rockwell ControlLogix, CompactLogix, FelxLogix Ethernet, CompactLogix 1768-L43 1768-L45 with 1768-ENBT/A Ethernet module
Website: https://www.rockwellautomation.com/
HMI Settings
| Parameters | Recommended | Notes |
|---|---|---|
| PLC type | Rockwell EtherNet/IP (ControlLogix) – Free Tag Names | |
| PLC I/F | Ethernet | |
| Port no. | 44818 | |
| PLC sta. no. | The same as CPU Slot No. |
PLC Settings
Set PLC IP Address
In RSLogix5000 / Studio 5000, open Controller Properties and go to the Internet Protocol tab. Set the IP address, subnet mask, and gateway for the controller’s Ethernet port.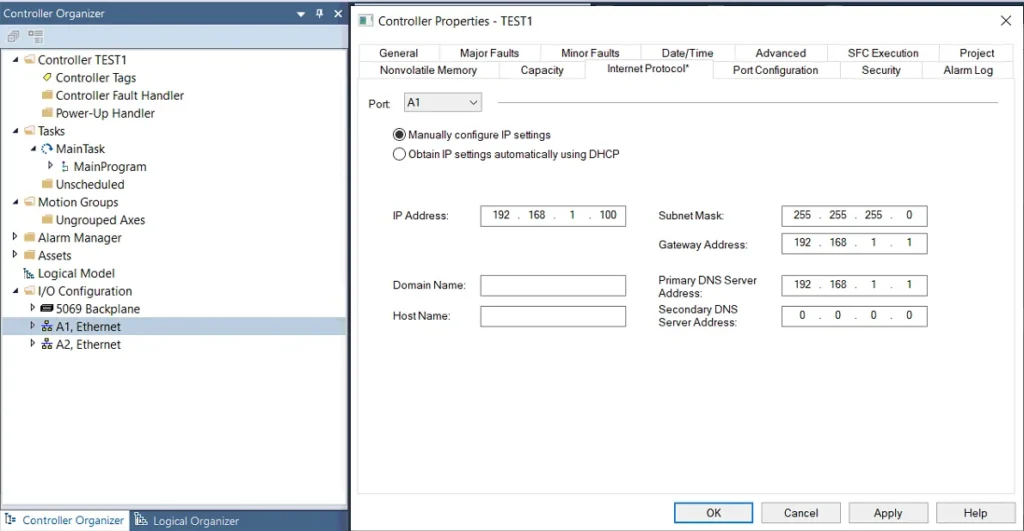
Create New Controller Tags
Create new tags in RSLogix5000 / Studio5000 (Controller Tags and Program Tags are both supported). Both the Controller Tags editor and the Program Parameters and Local Tags panel are available for defining tags.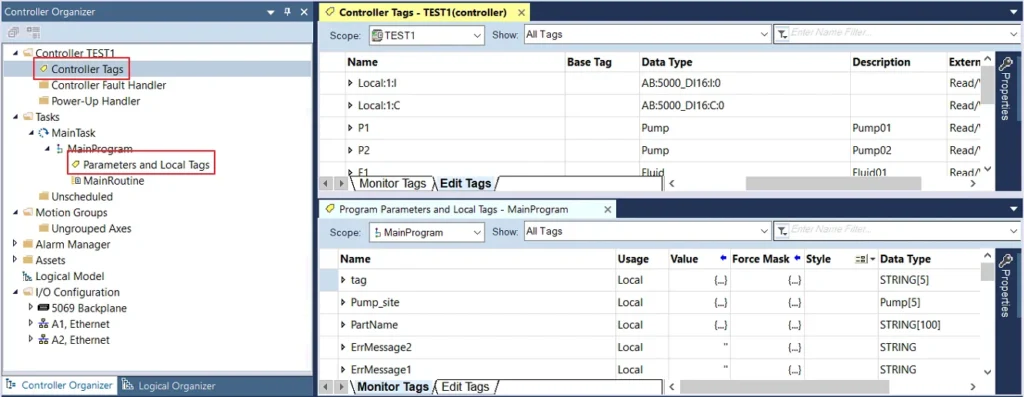
Tag Import Methods
There are two ways to get tags: import .L5X or .CSV files (click Import Tags…), or connect to the PLC directly (click Get Tag Info…). After creating a project using one of these methods, use the same method for future maintenance to prevent compilation failure.
- Recommended for PLC Offline: Import
.L5X - Recommended for PLC Online: Get Tag Info
| Feature | L5X | CSV | Get Tag Info |
|---|---|---|---|
| Can Description be Imported? | Yes | Yes | No |
| Need Adding Data Type? | No | Yes | No |
NOTE: Description is only supported for atomic tags. Not supported for structure or array tags.
Get Tag Info
Verify Communication Parameters
After adding the driver in EBPro (EasyBuilder Pro), confirm that all communication parameters are correct, then click Get Tag Info.Select Tags to Import
In the Tag Manager dialog, select the tag information to be imported, then click OK.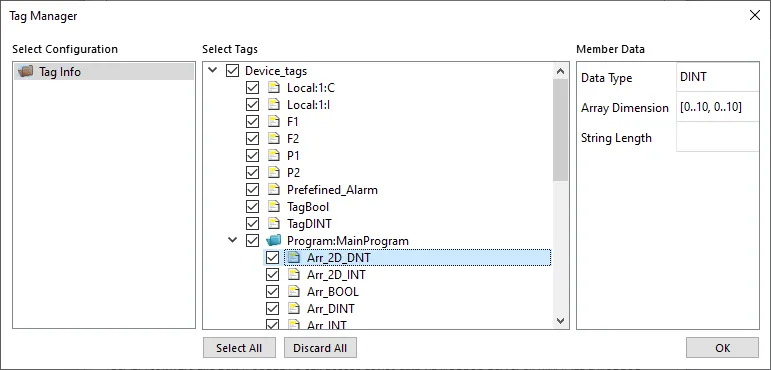
Confirm Import Success
Click OK after the tag information is imported successfully.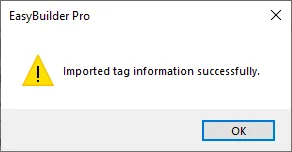
Review Imported Tags
View the imported tag information in the list, then click the close icon X to exit.
Import Tag (L5X)
Export L5X File from RSLogix
Export the.L5Xfile from RSLogix5000 software. Navigate to *File u0026gt; Save As u0026gt; .L5X**.Select L5X Importer in EBPro (EasyBuilder Pro)
Add the driver in EBPro (EasyBuilder Pro), click Import Tags, select *Import Files (.L5X), and click OK**.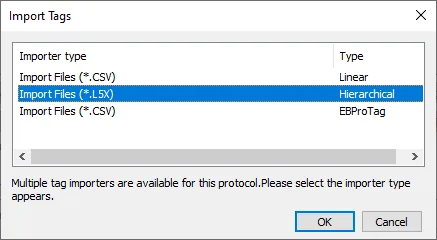
Review Imported Tag Information
View the imported tag information in the Tag Manager, then click the close icon X to exit.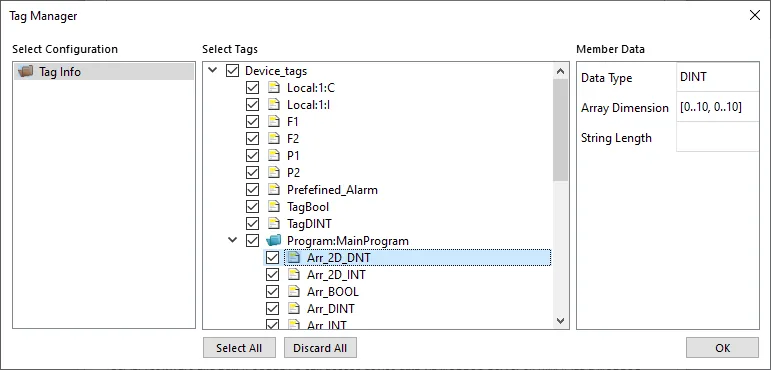
Confirm Tag Import Success
Click OK after the tag information is imported successfully.
Import Tag (CSV)
Tags edited in RSLogix5000 can be exported as a CSV file and then imported into EBPro (EasyBuilder Pro).
Export Tags to CSV from RSLogix
Export tag data to a CSV file using Tools u0026gt; Export u0026gt; Tags and Logic Comments.The separator character in the CSV file must be a comma,— otherwise the file is invalid. To change the separator, go to Control Panel u0026gt; Date, Time, Language, and Regional Options u0026gt; Change the format of numbers, dates, and times u0026gt; Customize u0026gt; List separator. Select,and then export the CSV file.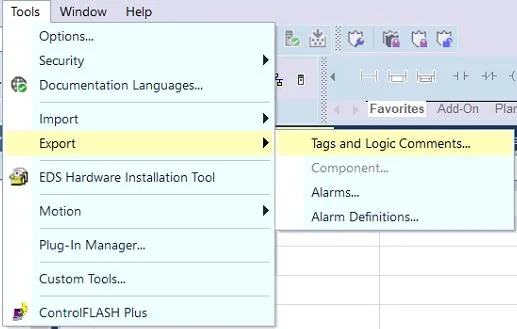
Import CSV File in EBPro (EasyBuilder Pro)
In System Parameter Settings, click Import Tags, select *Import Files (.CSV), and click OK**.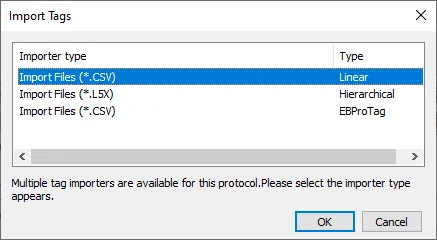
Choose Data Type Handling
Decide whether to keep the current data type (User-Defined, Strings, Predefined, Module-Defined) or replace with the default data type.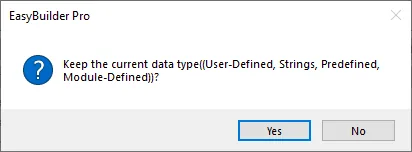
Review Unsupported Tag Warnings
A Warning window appears when unsupported tags are encountered. Check whether these tags use unrecognized data types and add the necessary ones using Data Type….
Select String Import Mode
When importing STRING tags, a dialog prompts you to choose between one char per word or two chars per word. Select the appropriate mode for your project and click OK.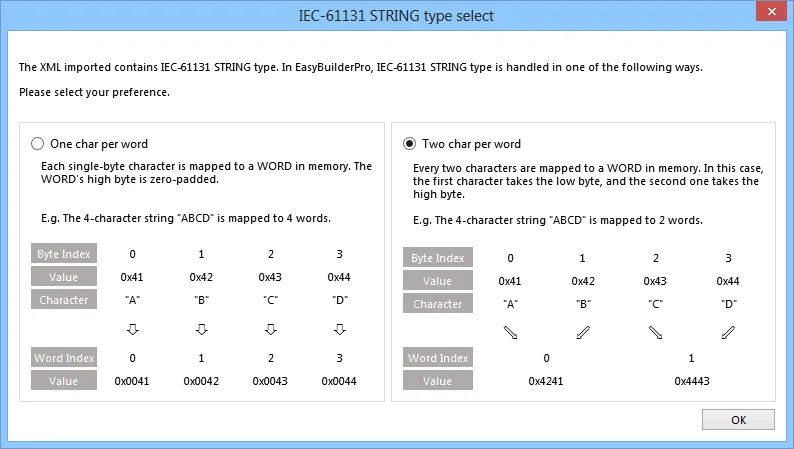
Device Address
| PLC Data Type Name | Bit/Word | EBPro (EasyBuilder) Data Format | Memo |
|---|---|---|---|
| BOOL | Boolean | Bit object | |
| BitArray | |||
| SINT | -128 ~ 127 | ||
| USINT | 0 ~ 255 | ||
| INT | Integer | 16-bit signed, ASCII | -32768 ~ 32767 |
| UINT | 0 ~ 65535 | ||
| DINT | Double Integer | 32-bit signed | -231 ~ (231-1) |
| UDINT | 0 ~ 4294967295 | ||
| REAL | Single Precision Float | 32-bit float | IEEE 754 |
| LINT | Long Integer | 64-bit signed | *Note |
| ULINT | Long Integer | 64-bit unsigned | *Note |
| LREAL | Double Precision Float | 64-bit double | *Note |
| STRING | *Note 4 |
NOTE:
- EBPro V6.03.02 or later supports 64-bit data types (cMT Series only). The address limit range is 48 bits maximum.
- Avoid using
.in tag names as this may influence macro execution. - Shorter tag names are recommended for enhancing communication efficiency.
- When importing, choose between one char per word or two chars per word. For one char per word, choose Unicode data format for ASCII objects; for two chars per word, choose UTF-8 (Default) data format.
- Data format supported for Binary Access:
INT,DINT, andSINT.
Wiring Diagram
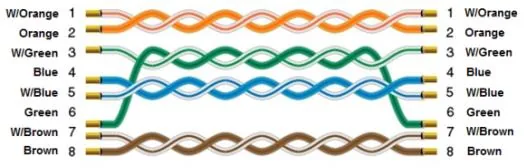
NOTE: Connect the HMI to the PLC using a standard Ethernet cable (Cat5e or higher, straight-through wiring).
The diagram below shows the Ethernet cable wiring.