Introduction
All Maple Systems HMIs programmed with EBPro (EasyBuilder Pro), including every cMT X Series and cMT Series model, are compatible with OPC UA Client. Configure your Controller and HMI/cMT with the following parameters to establish reliable communication.
Supported Series: Weintek OPC UA Server, Unified Automation, Prosys, Kepware
HMI Settings
| Parameters | Recommended | Options |
|---|---|---|
| PLC type | OPC UA Client | |
| PLC I/F | Ethernet | |
| Port no. | 4840 | |
| Security policy | None | None / Basic128Rsa15 / Basic256 / Basic256Sha256 |
| Message security mode | None | None / Sign / SignAndEncrypt |
| Re-Build Certificate when HMI Starts | ||
| Use sha-256 mode (default sha-1) | ||
| Support Uncertain Initial Value | ||
| On-line simulator | Yes | |
| Multi-HMI connect | Yes |
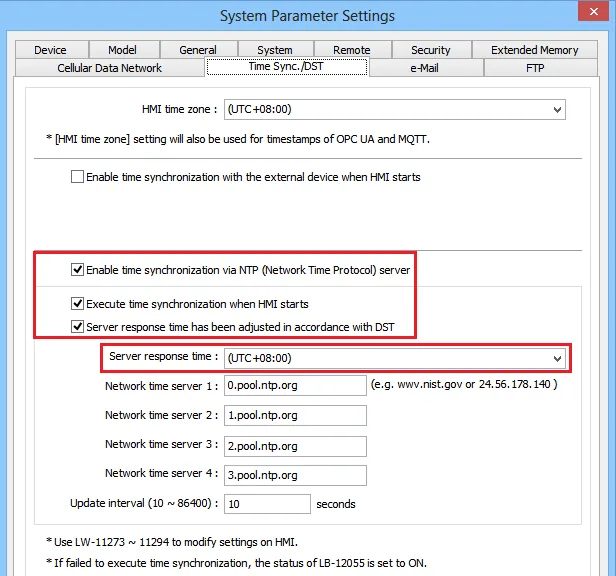
When using OPC UA Client for the first time, configure time-related settings under System Parameter Settings → Time Sync./DST.
Update Mode
Request Mode
The OPC UA client actively sends a ReadRequest packet to the OPC UA server. After the server receives the packet, it sends a ReadResponse packet back to the client.
Subscription Mode
The server regularly performs tag sampling on the PLC.
- If the value or status of the tag changes, the
PublishResponseis sent to the client on the next publishing tick. - If the values do not change, an empty
PublishResponseis sent to the client to confirm the connection is still established; otherwise a timeout occurs.
Certificate
HMI Self-Build Certificate
Re-build Mode
Does the certificate exist in the HMI?
- Yes — overwrite the certificate and reload it.
- No — create a new certificate and load it.
Not Re-build Mode
Does the certificate exist in the HMI?
- Yes — load the credentials already stored in the HMI.
- No — no certificate is present and communication with the server is not possible.
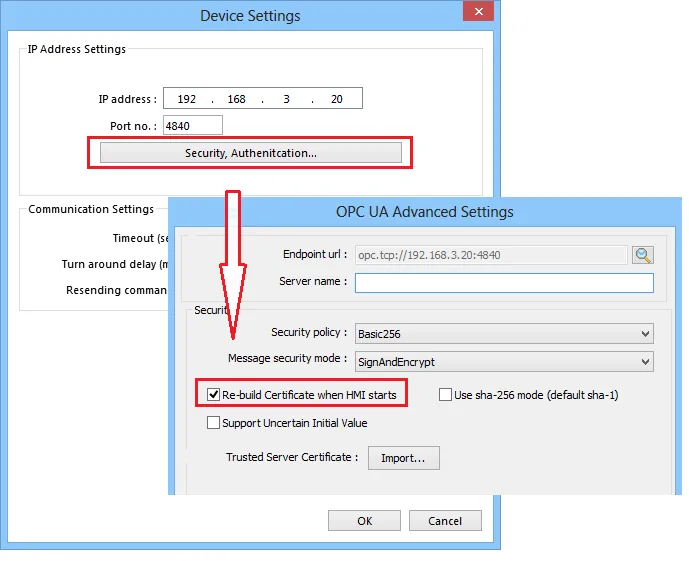
Custom Certificate
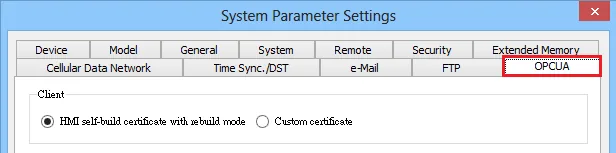
Import a custom certificate from the OPCUA tab in System Parameter Settings.
NOTE: If you choose to import a custom certificate, do not enable Re-build Certificate when HMI Starts — enabling that option will overwrite the imported certificate.
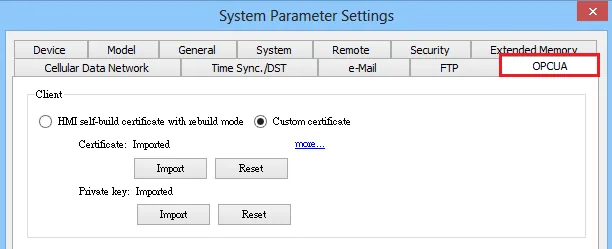
NOTE: The Custom Certificate function can only be downloaded to the HMI and cannot be used for online simulation.
Supported Data Types
| Data type | EBPro (EasyBuilder) data format | Memo |
|---|---|---|
Bool | bit | |
Int | 16-bit BCD, Hex, Binary, Signed | 16-bit |
UInt | 16-bit BCD, Hex, Binary, Unsigned | 16-bit |
DInt | 32-bit BCD, Hex, Binary, Signed | 32-bit |
Real | 32-bit Float | 32-bit |
UDInt | 32-bit BCD, Hex, Binary, Unsigned | 32-bit |
LInt | 64-bit Signed | 64-bit |
ULInt | 64-bit Unsigned | 64-bit |
Double | 64-bit Float | 64-bit |
NOTE: EBPro V6.03.02 or later supports 64-bit data types (cMT Series only). The address limit range is 48 bits maximum.
Tag Manager
Add OPC UA Client device in EBPro (EasyBuilder Pro)
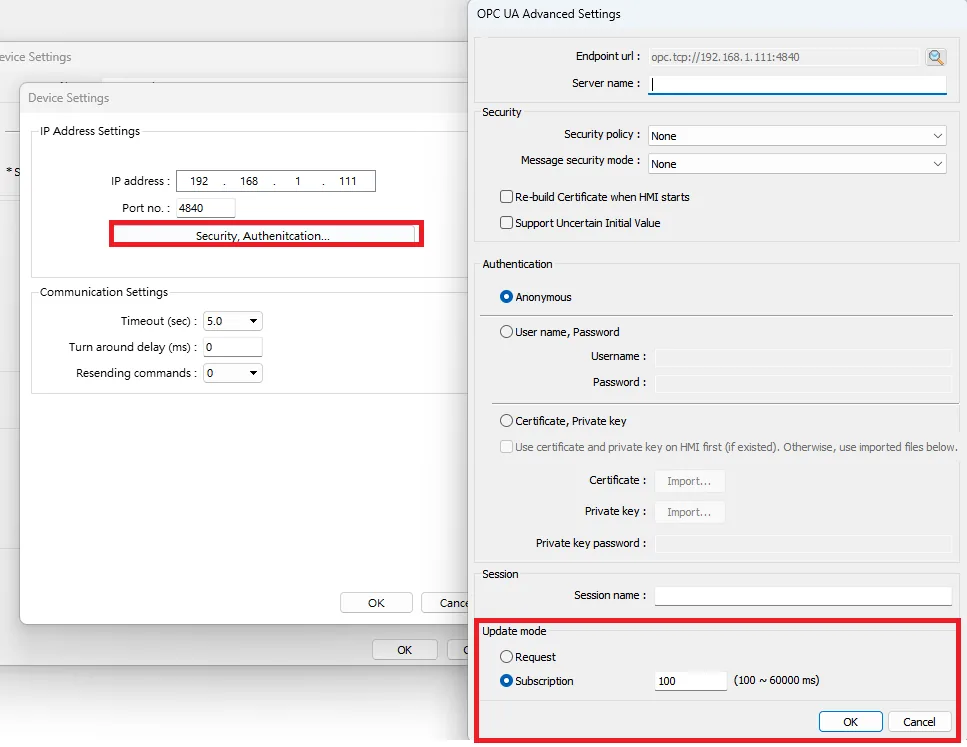
In EBPro (EasyBuilder Pro), add OPC UA Client to the device list. Set the IP address and Port no., then click Security, Authentication… to open the OPC UA Advanced Settings.Discover the OPC UA Server endpoint
Click the magnifier icon next to the Endpoint url field to open the Discover Server window. The available security parameters for the OPC UA Server are listed. Click Apply to automatically fill the Security group box fields in the OPC UA Advanced Settings window. Complete the remaining settings and click OK.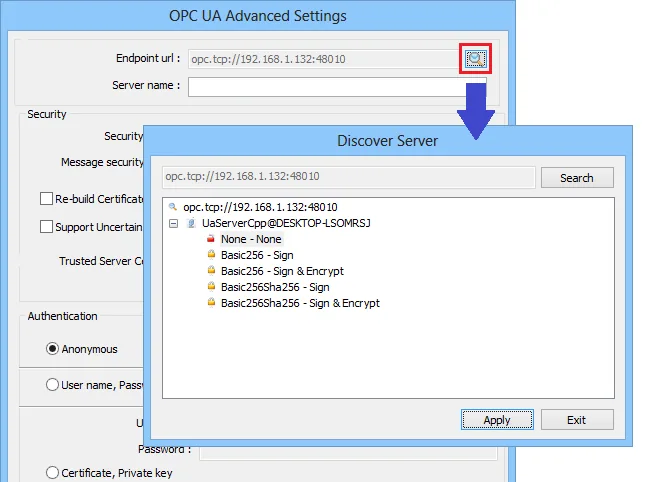
Open Tag Manager
Click Tag Manager. If a Connection failed message appears, verify the communication parameters.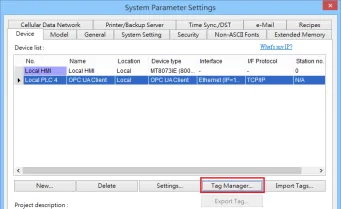
Rebrowse and expand the server node tree
Right-click Device and select Rebrowse, then expand the node tree to locate the tags to import.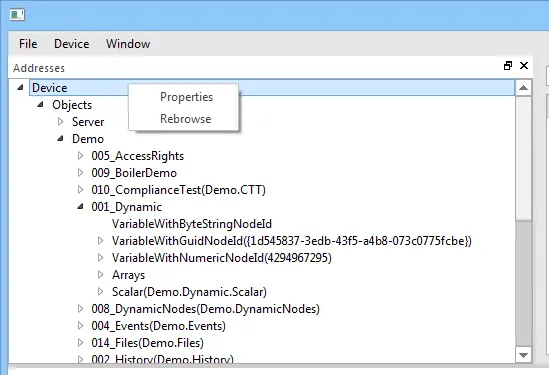
Drag addresses to the tag list
Drag the address to be added to the right-side tag area. If the node has child nodes, they will be added as well.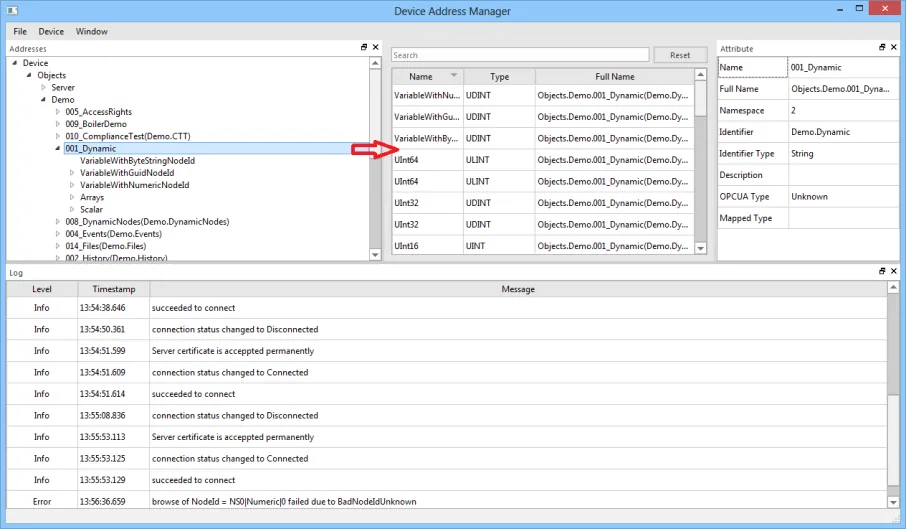
Review import results in the Log pane
The Log pane displays import results. Unsupported data types are flagged in the log. ForUaStatuserror codes, refer to https://www.opcti.com/common-error-codes.aspx.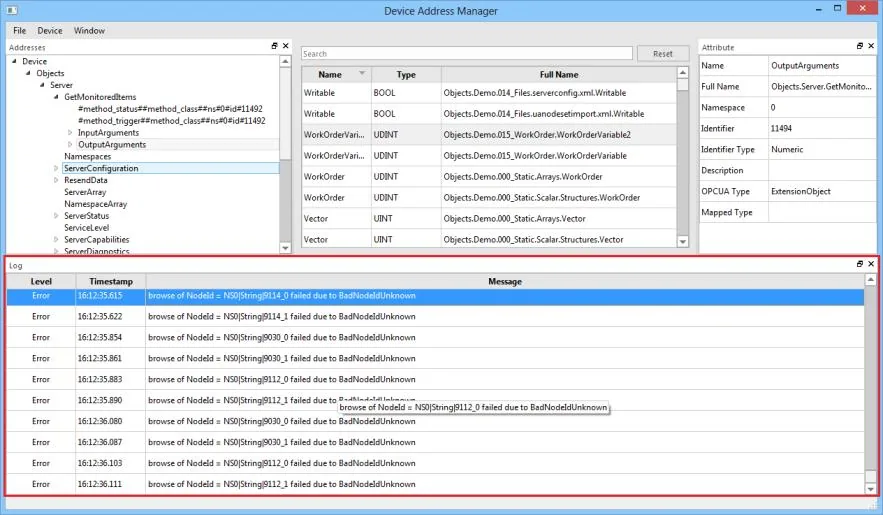
Save and exit Tag Manager
After importing addresses, save and exit: File → Save → Exit.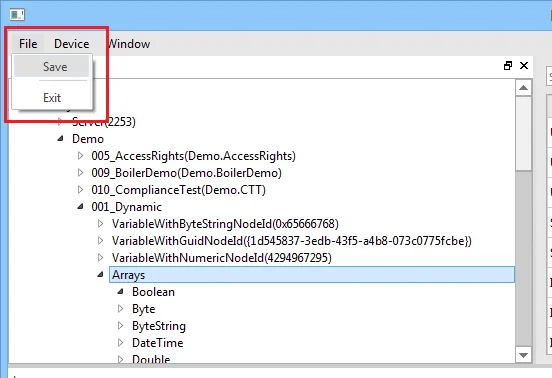
Connection Diagnostics
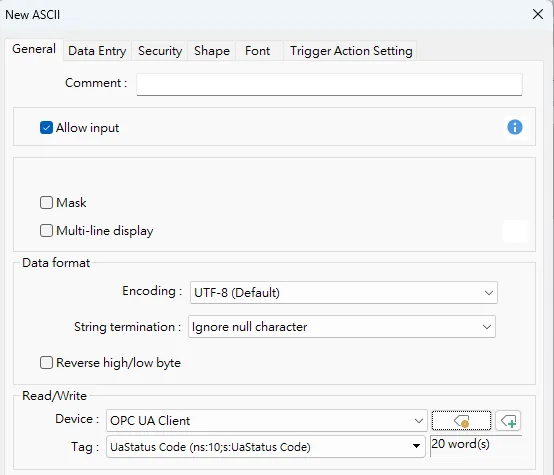
The UaStatus Code address can be used to diagnose communication connection problems. If the project was created before this address was available, open Tag Manager to retrieve the tag, then use an ASCII object to read the data.
- If the connection is successful, the value
GOODis displayed. - On failure, the relevant error code is displayed.

Common Error Codes and Solutions
1. BadCertificateHostNameInvalid
Reason: The client certificate does not match the HMI.
Solution:
- Check the Re-build Certificate when HMI Starts option and download the project again.
- If importing a client certificate, ensure the client certificate was created to match the HMI name.
2. BadCertificateTimeInvalid
Reason: The server has determined that the client certificate on the HMI has expired or has not yet taken effect.
Solution:
- Check the time setting on the HMI.
- Confirm whether the time at which the client certificate was generated is correct. If not, check the Re-build Certificate when HMI Starts option and re-download the project. After the download, confirm the client certificate again.
- To confirm the client certificate:
- Confirm from the OPC UA Server’s Credential Management System UI.
- If the OPC UA server is a Weintek HMI, confirm the client certificate from EasyWeb.
3. BadCertificateUriInvalid
Reason: The ApplicationUri in the user-created client certificate is invalid. This is common when importing a custom client certificate.
Solution: Check the Parse ApplicationUri From Client Certificate option and download the project again.

4. BadCommunicationError
Reason: Network communication failed.
Solution:
- Verify the target IP address and port number settings are correct. Ping the server to confirm reachability.
- Confirm the network cable is connected to the HMI, the network indicator is lit, and the HMI network settings are correct.
- After verification, re-download the project or restart the HMI to re-establish communication.
5. BadSecurityChecksFailed
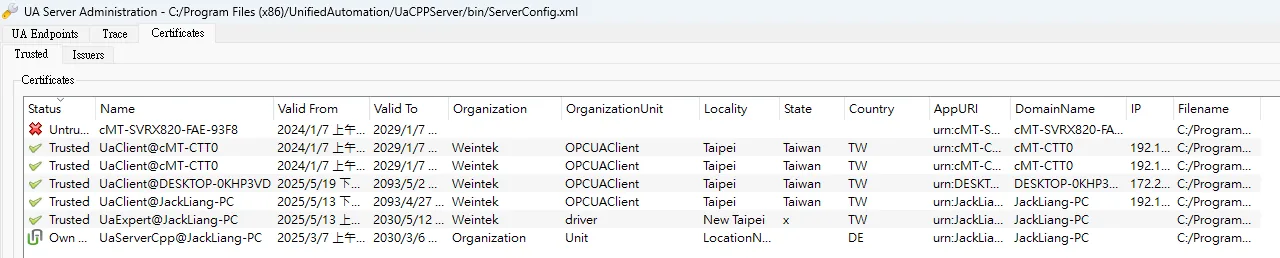
Reason: The OPC UA server does not yet trust the client certificate sent by the OPC UA Client.
Solution: Open the server’s certificate management page and trust the corresponding client certificate.
Example 1 — UA Demo Server:
1.1 Open the UA Demo Server management page and locate the corresponding certificate.
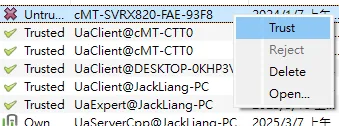
1.2 Trust the certificate
Example 2 — Weintek OPC UA Server:
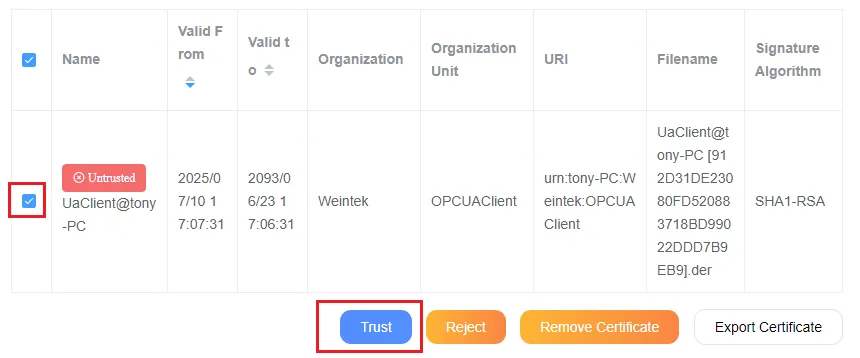
2.1 Open EasyWeb on the OPC UA server HMI. Navigate to Features → OPC UA → Certificates and switch to the Trusted Clients tab.
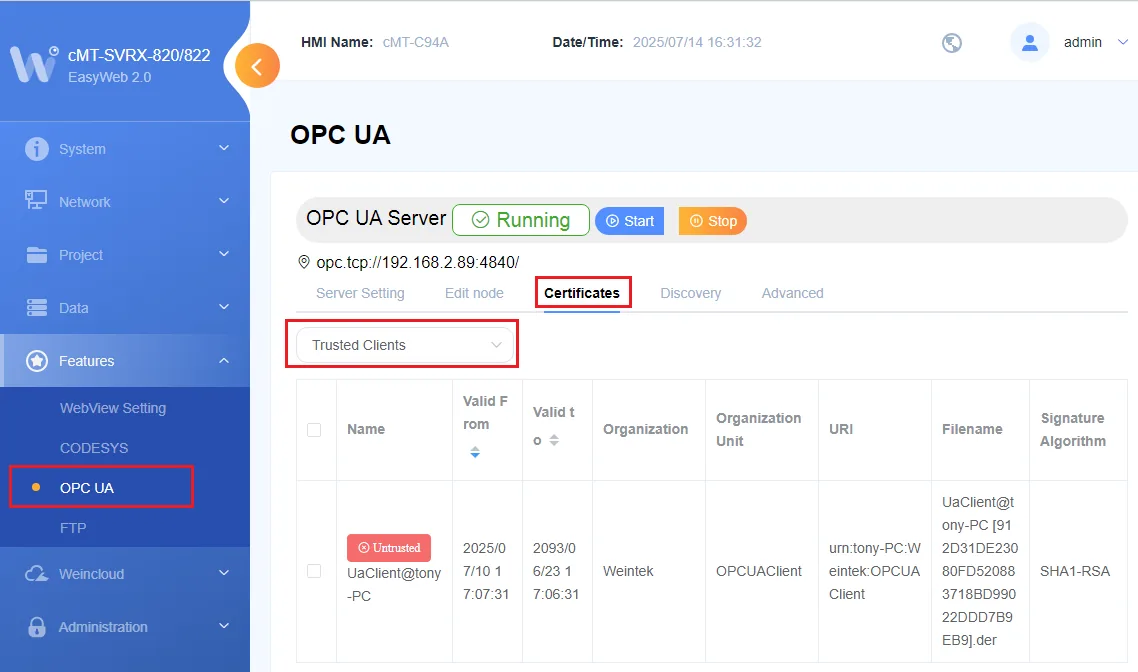
2.2 Select the untrusted certificate and click Trust.
6. BadCertificateUntrusted
Reason: The OPC UA Server does not trust the user certificate exchanged by the OPC UA Client.
Solution:
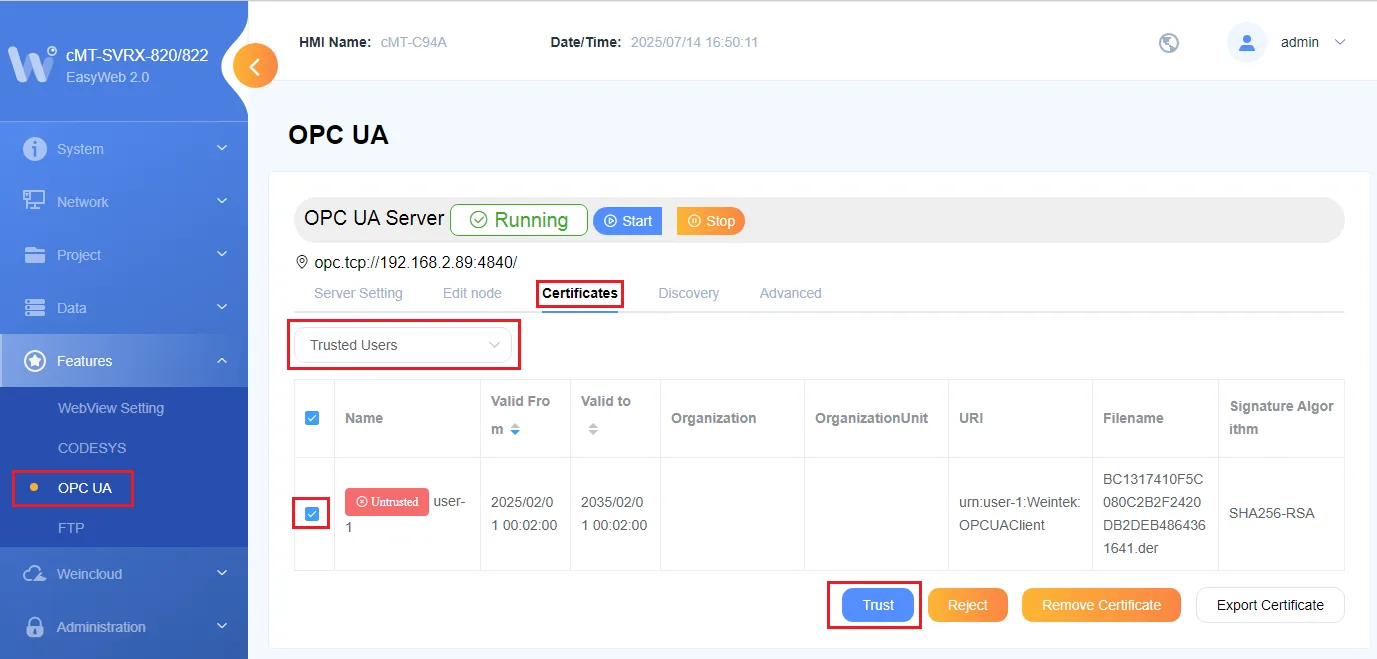
6.1 In the server’s certificate management, switch to the Trusted Users tab and trust the user certificate. Example: connecting to the Weintek OPC UA Server.
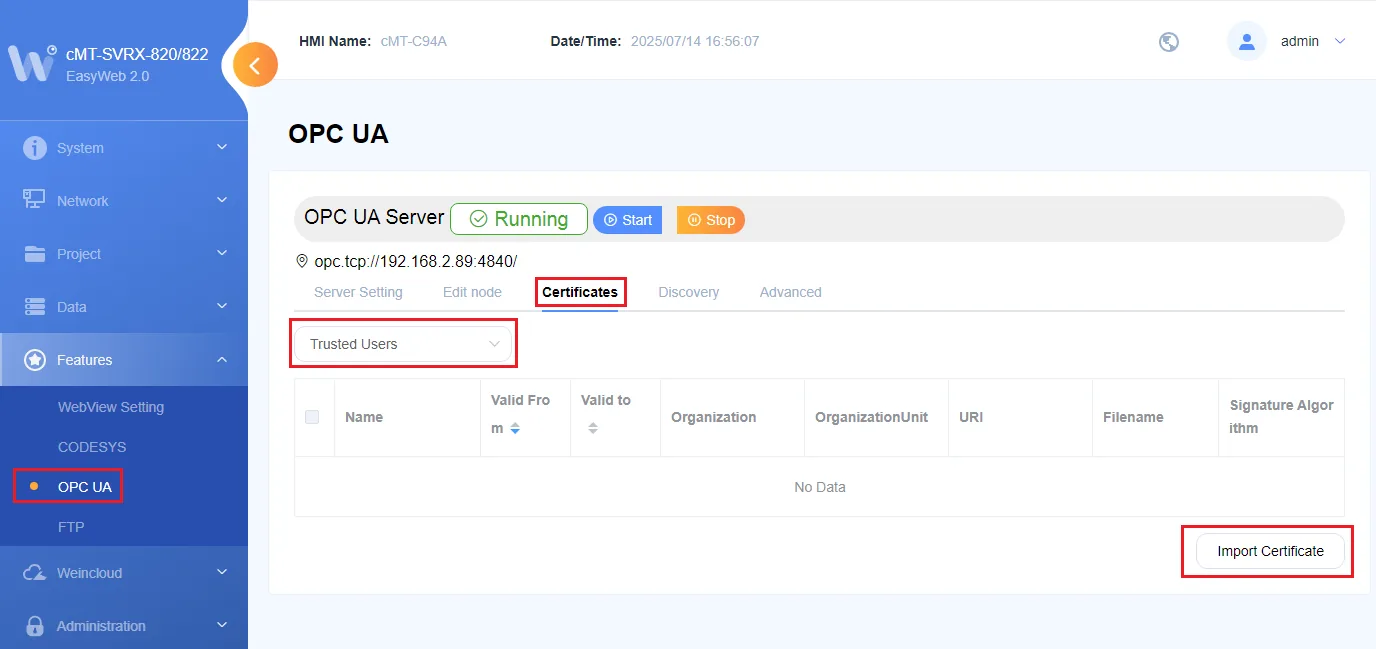
6.2 Alternatively, import the user certificate into the HMI in advance, then switch to the Trusted Users page and import the certificate.
7. BadTooManySessions
Reason: Multiple devices or sessions are simultaneously connected to the server, reaching its session limit.
Solution:
- Close any other OPC UA client software used for testing.
- Do not connect the online simulator and the HMI to the server at the same time.
Wiring Diagram
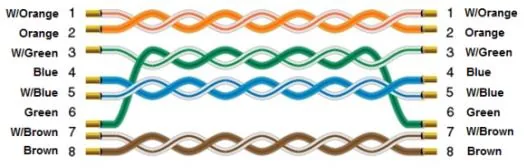
The diagram below shows the Ethernet cable wiring.