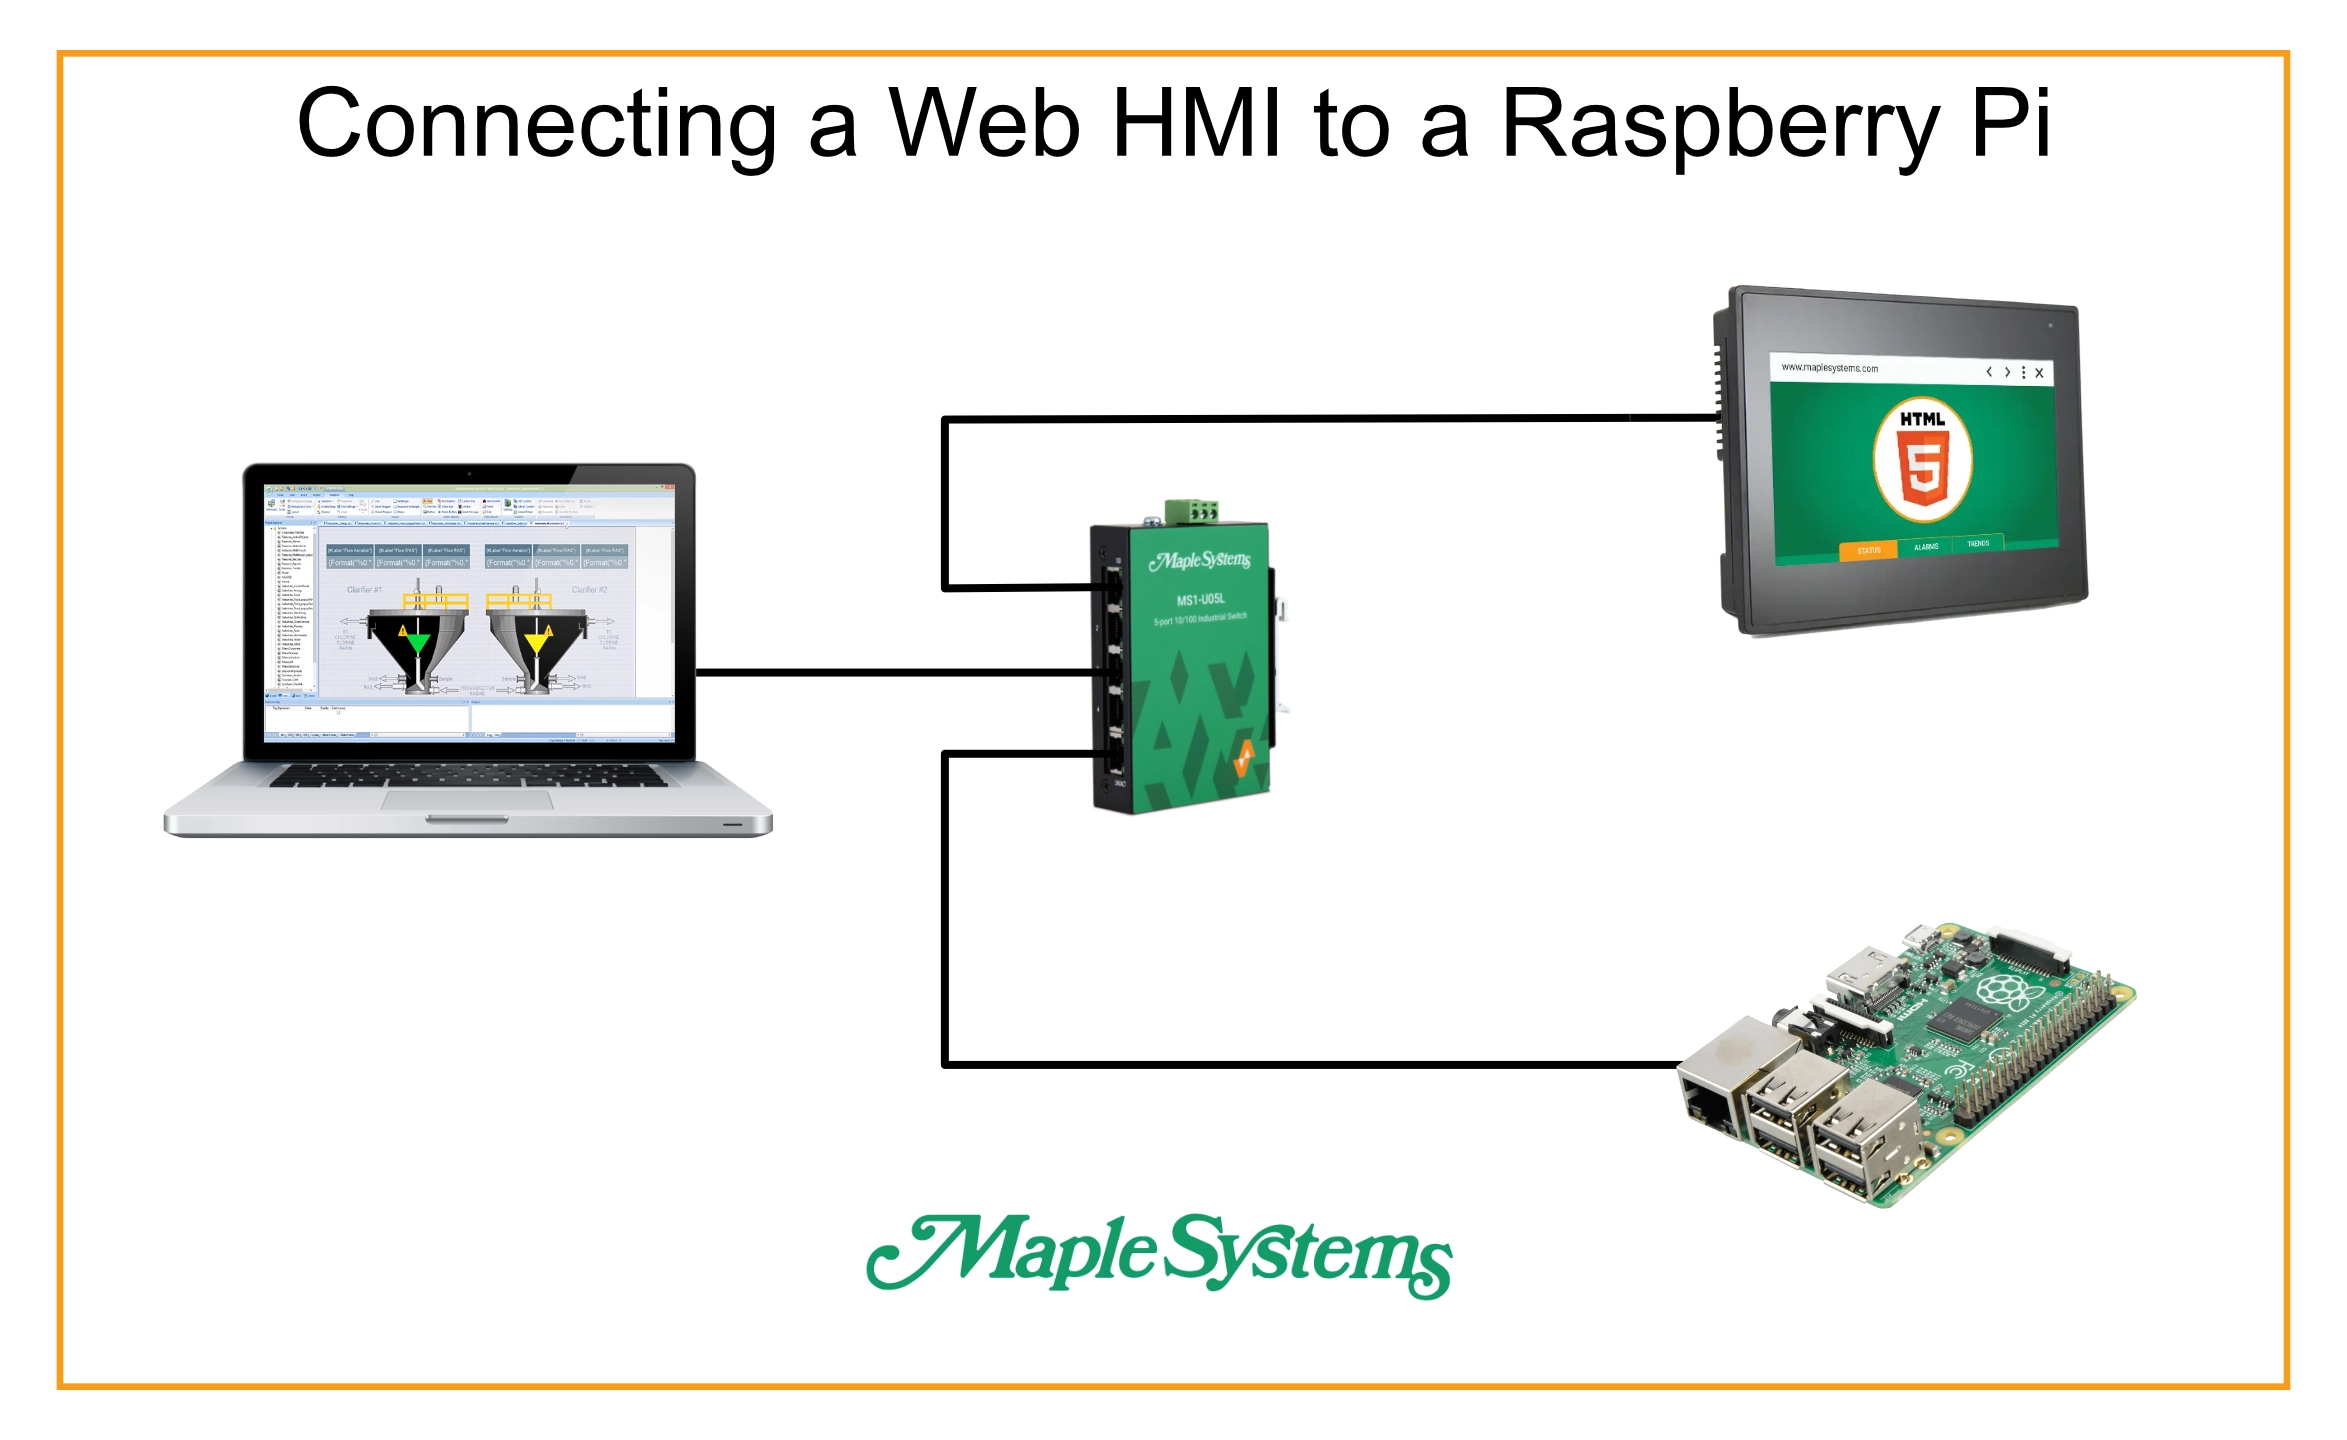
Imagine you’re in charge of an industrial plant, you’ve got your machines up and running just how you like them. However, you want to have more insight into your machine’s uptime, current status, and product counts. And all you have to use for this is a Raspberry Pi, and a Maple Systems Web HMI. This integration article will show you how to leverage these two devices to better monitor your plant.

Software Required
- Python and Flask (installed on the Raspberry Pi)
Hardware Required
- A Raspberry Pi
- Any Maple Systems Web HMI
Configuring our Raspberry Pi
Raspberry Pi Software Config
To start, we’ll load up our Raspberry Pi, and install our dependencies
Instructions: Raspberry Pi Software Config
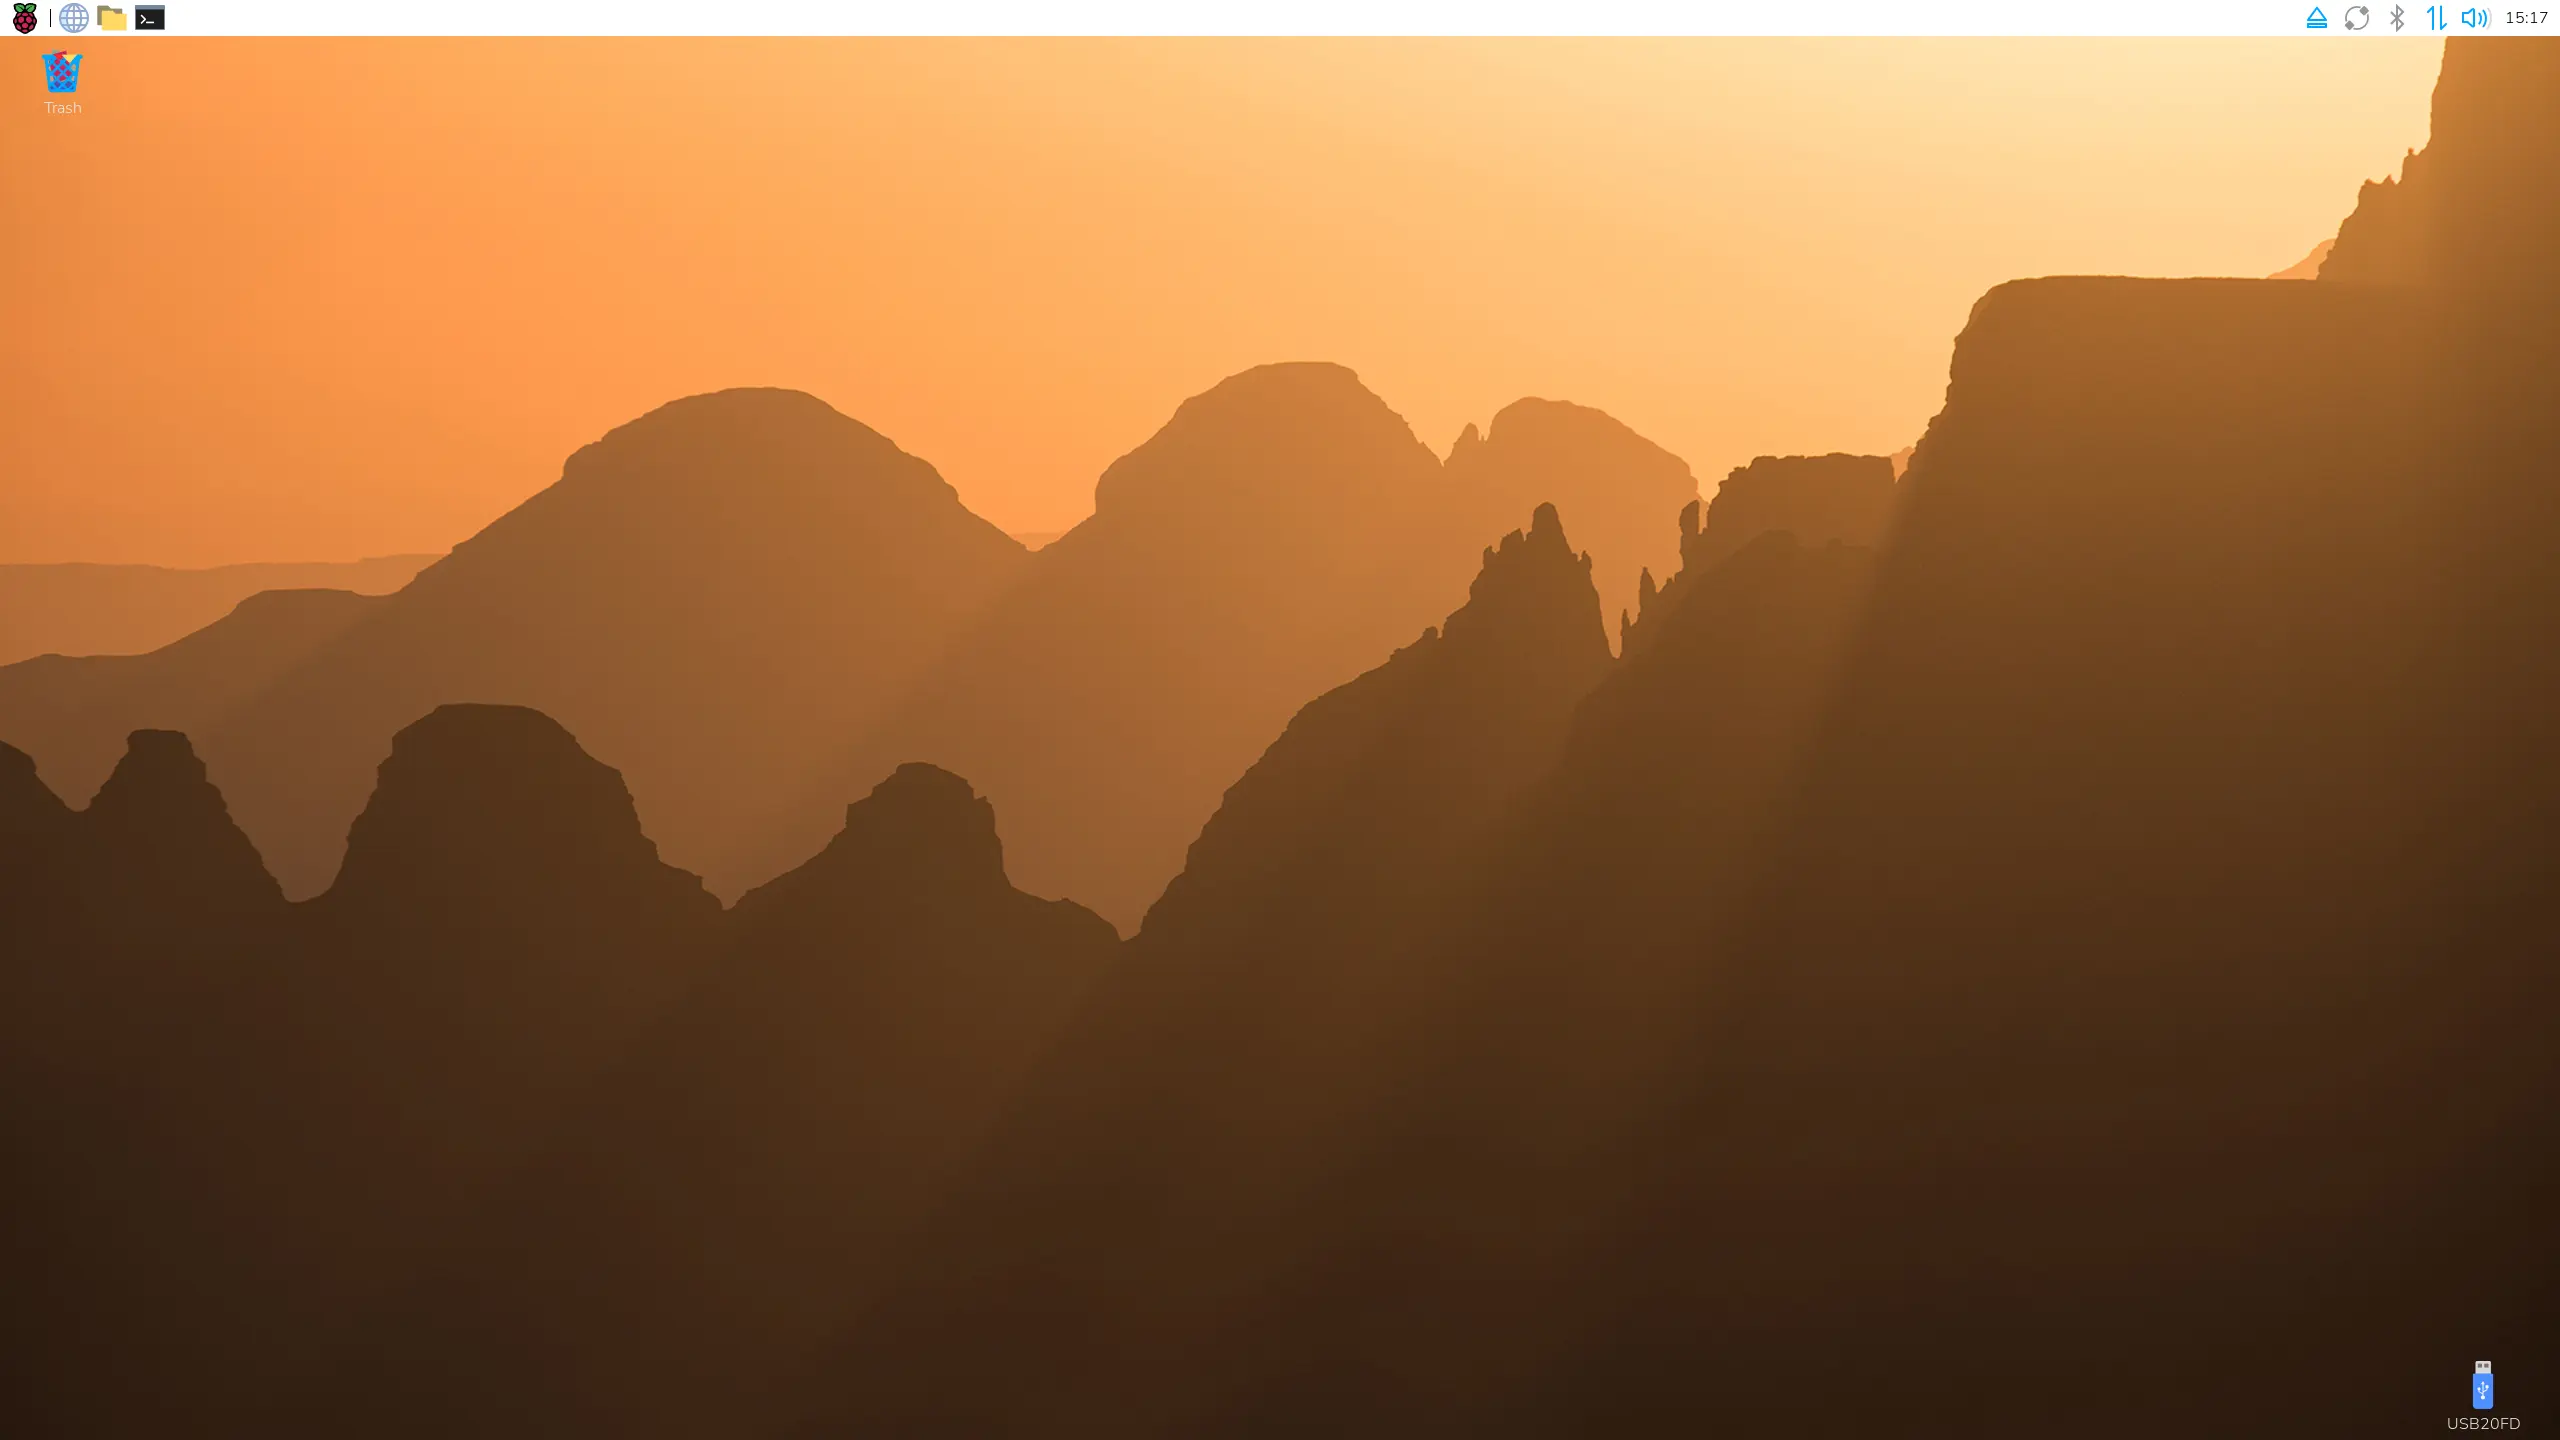
Load into our Raspberry Pi
First off, we’ll go into our Raspberry Pi’s desktop. I’m using Raspberry Pi’s default desktop OS, but we can achieve much of the same results on various other server-based OSes as well.
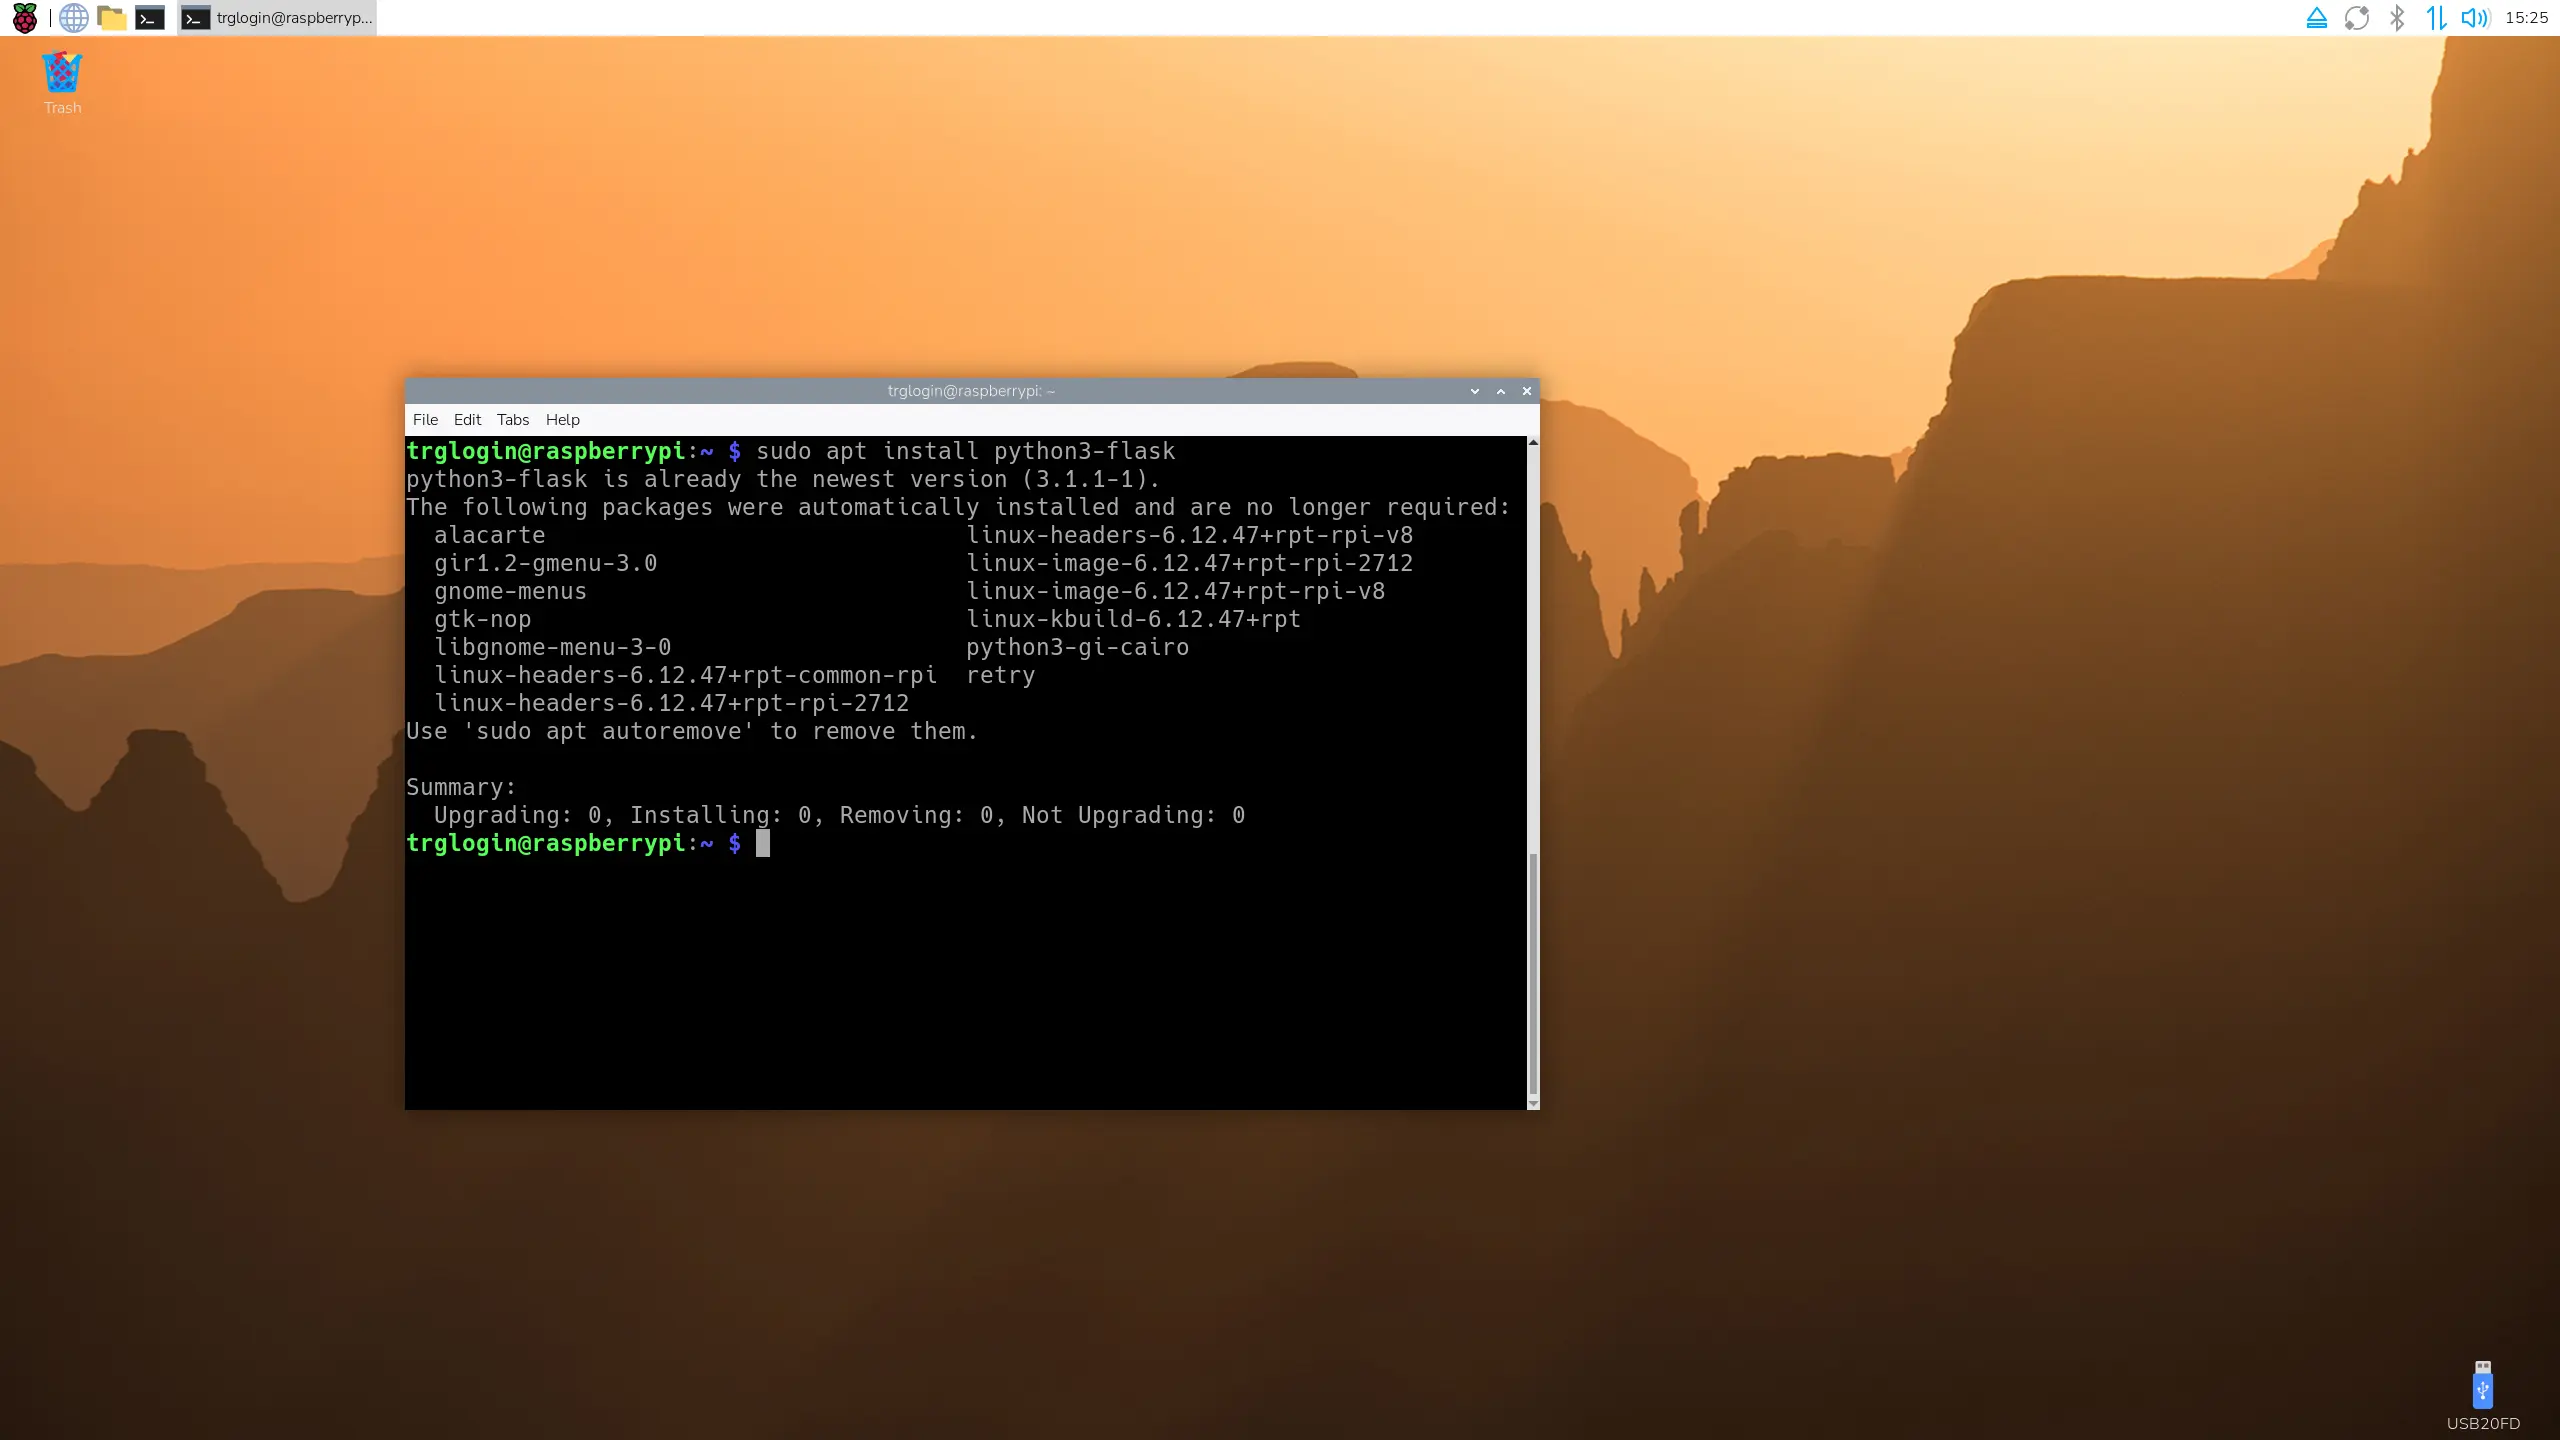
Install Python and Flask
Now we’ll open a terminal on the Raspberry Pi, and make sure Python3 and Flask are installed on our device. This will make programming and exposing our GPIO very simple.
Transfer the Web Server Files to the Pi
Once you have your web server and web page programmed, or if you’d rather just expand upon our [sample project], you can transfer those to your Raspberry Pi.
Overview of the Python Code
While we won’t go into detail for how the code works, we’ll give a basic overview of how it works
Instructions: Overview of the Python Code
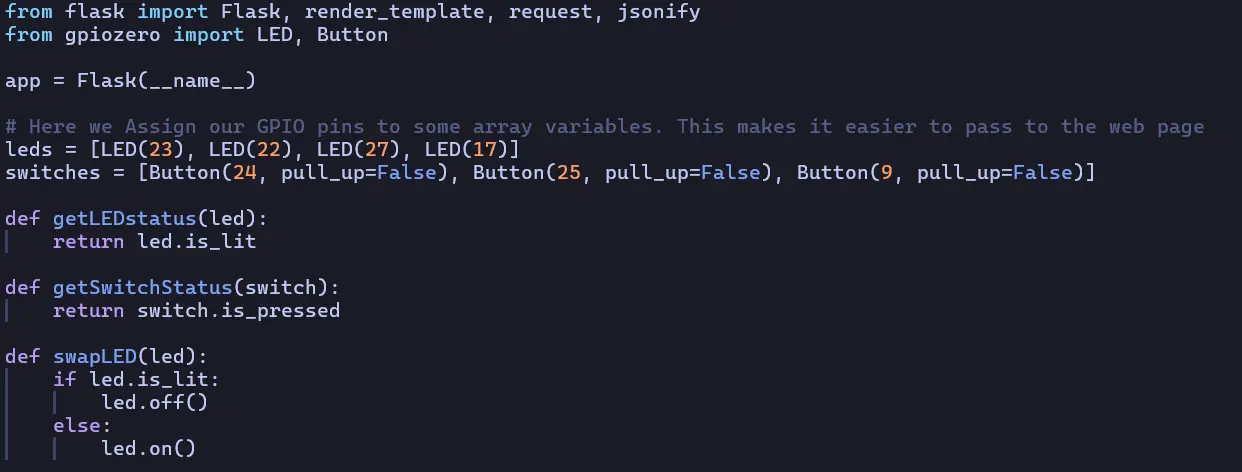
Python Initialization
First up, is app.py. At the top we import all the functions we’ll need from both flask and gpiozero (which comes pre-installed on the raspberry pi), and we define an array of LED pins, and an array of physical switches.
Initial Flask Route
From here, we create a route for the “homepage” of the web server (also known as “/”), where we render the “index.html” template, and pipe in our LED and Switch arrays

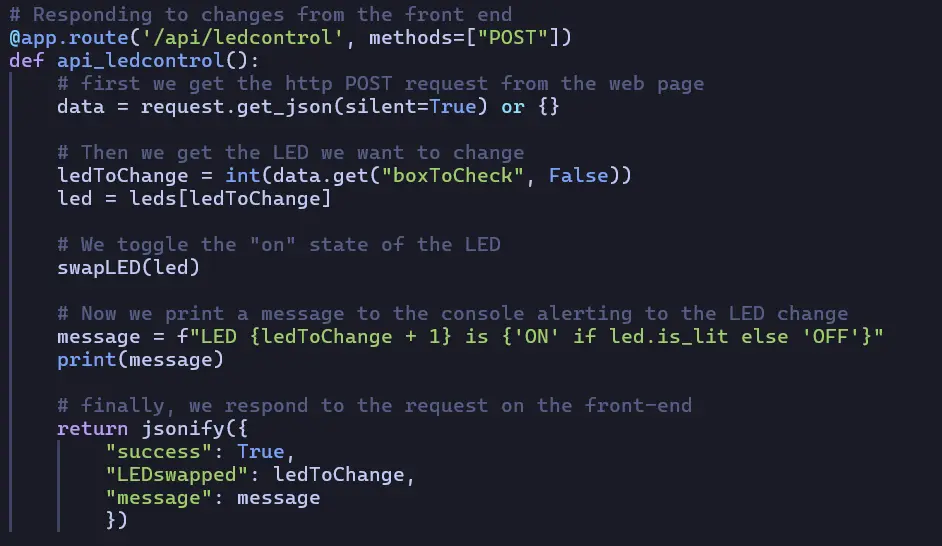
Getting LED Updates
The next route we create is one to respond to LED changes from the front-end. The front end will send Flask a message of which LED it’s going to change, and this route changes the status of that LED
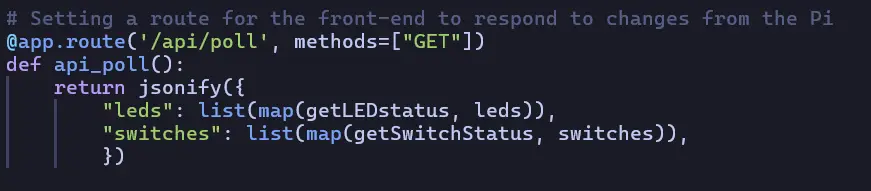
Sending Status Updates to the Front End
Now we’ll create a route where we can send the updates of all the LEDs and Switches back to the front-end when something changes.
Running our Flask Host
Finally, we set our Flask server to run at 127.0.0.1, and port 5000.

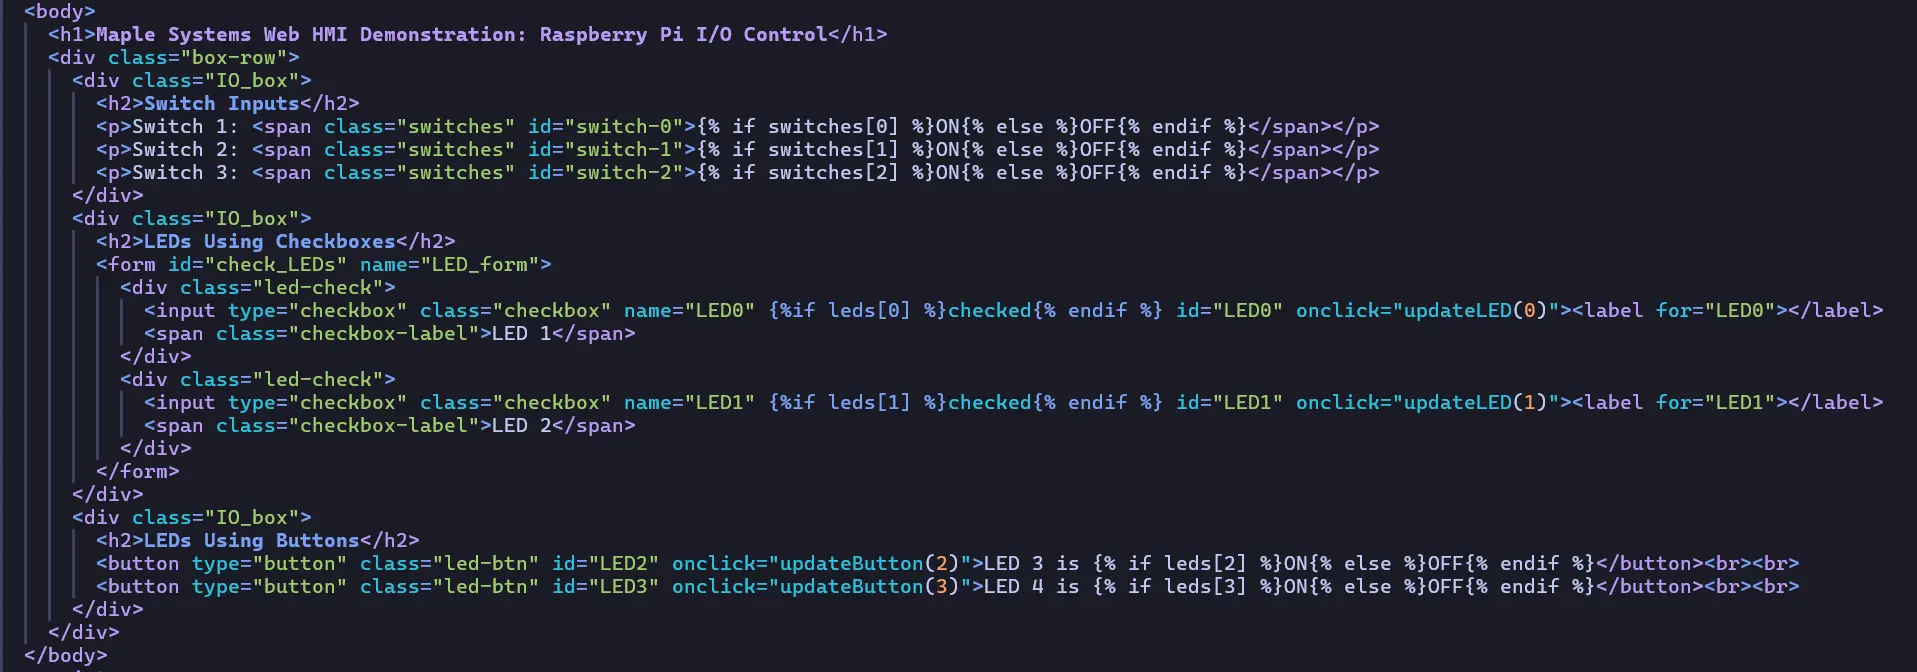
Initializing our HTML
After establishing our webpage styles, we create some simple HTML that will render the status of our variables from the Flask server variables.
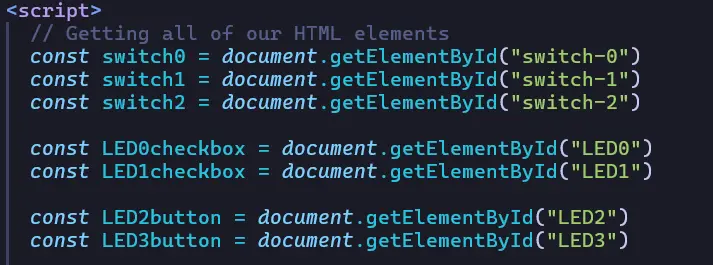
Getting References to our HTML
Now we move on to the JavaScript, we’ll start by gathering references to all of our display elements.
Updating our LEDs
Now we’ll create some JavaScript functions that will respond to when the user presses any of the buttons associated with our LEDs, and send those changes back to our Flask server.
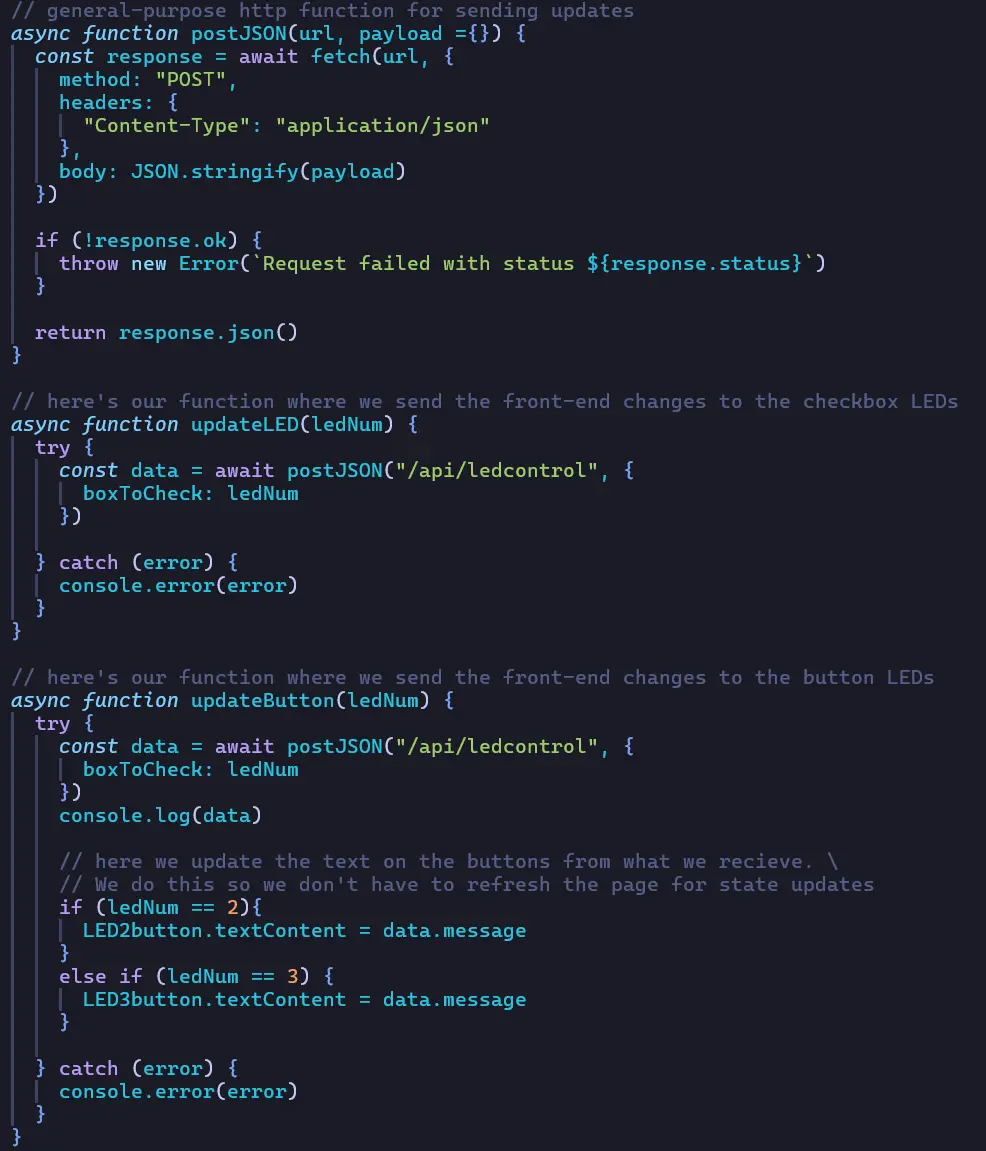
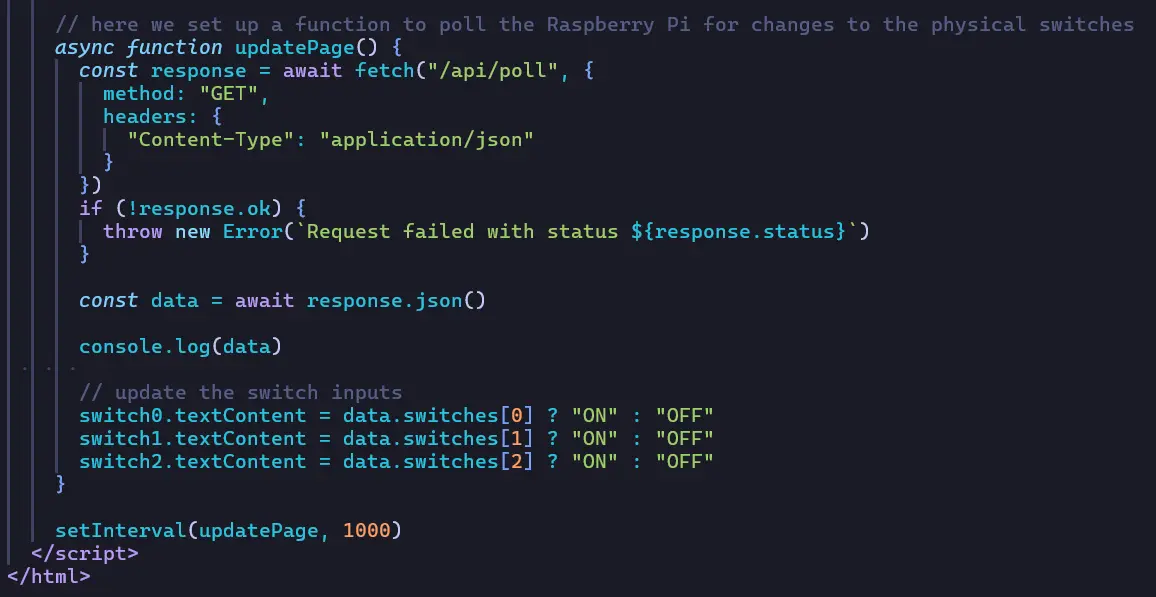
Getting Data Updates for the Switches
Finally, we’ll create a function to poll the backend for updates, and set it to fire every second.
Raspberry Pi Hardware Wiring
Now we’ll wire the GPIO to our physical switches and LEDs
Instructions: Raspberry Pi Hardware Wiring
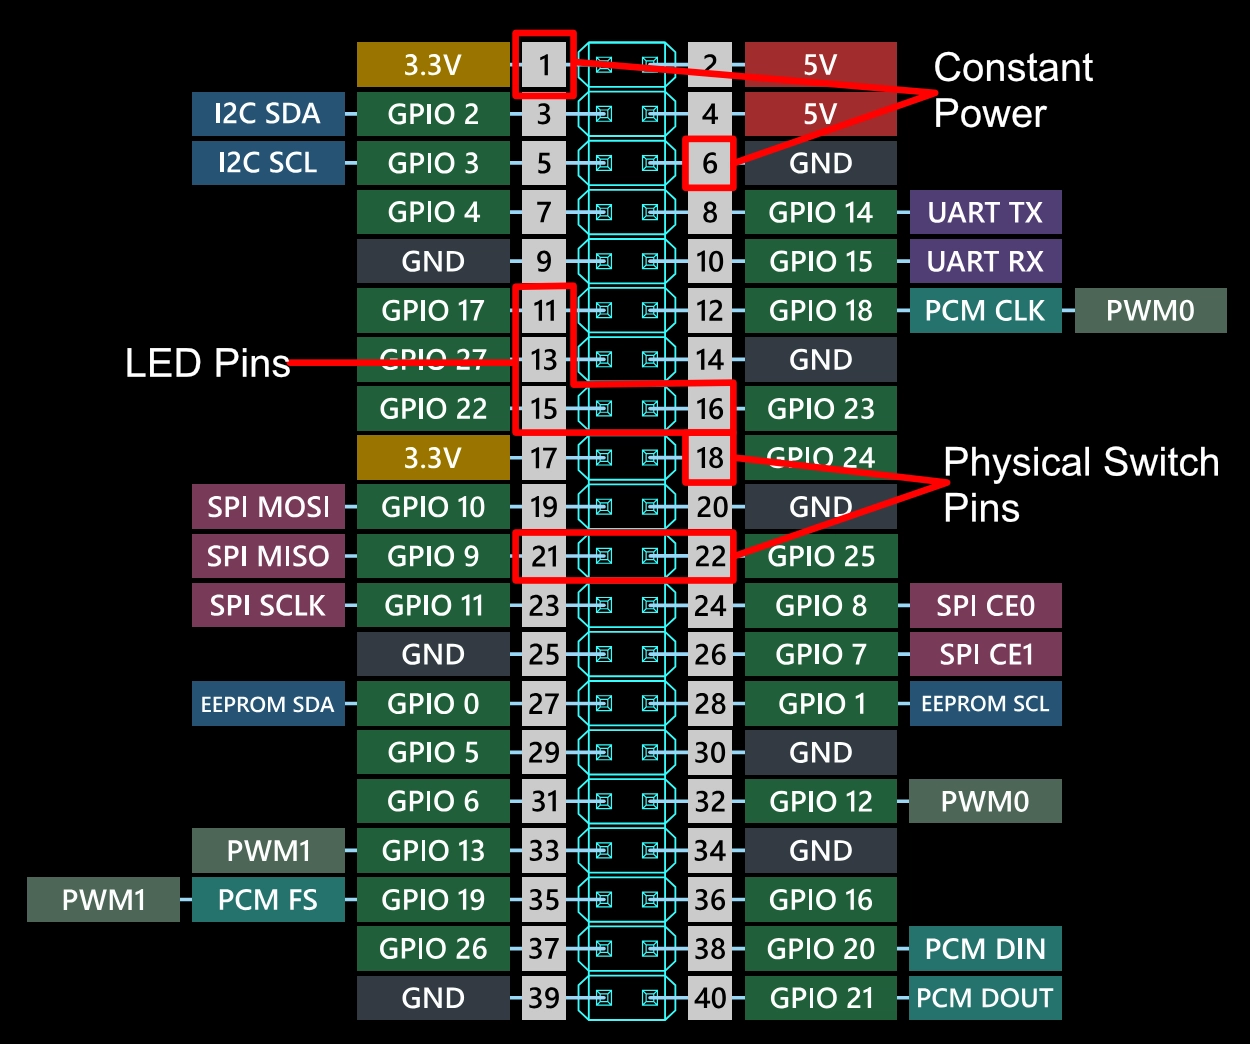
Refer to the Raspberry Pi GPIO chart
To start, we’ll make sure our GPIO pins are correct in our code. For this tutorial, I’m referring to the pins being used in the [sample project] code.
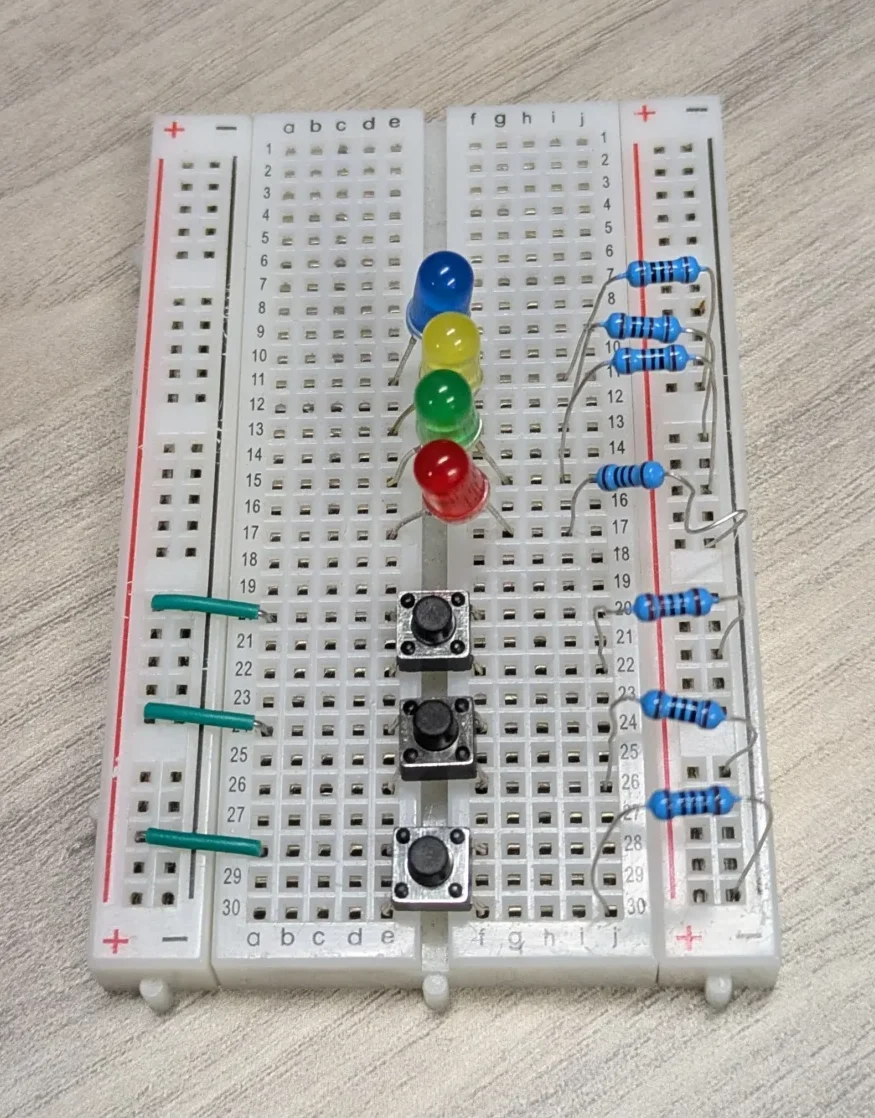
Prepare The Circuit
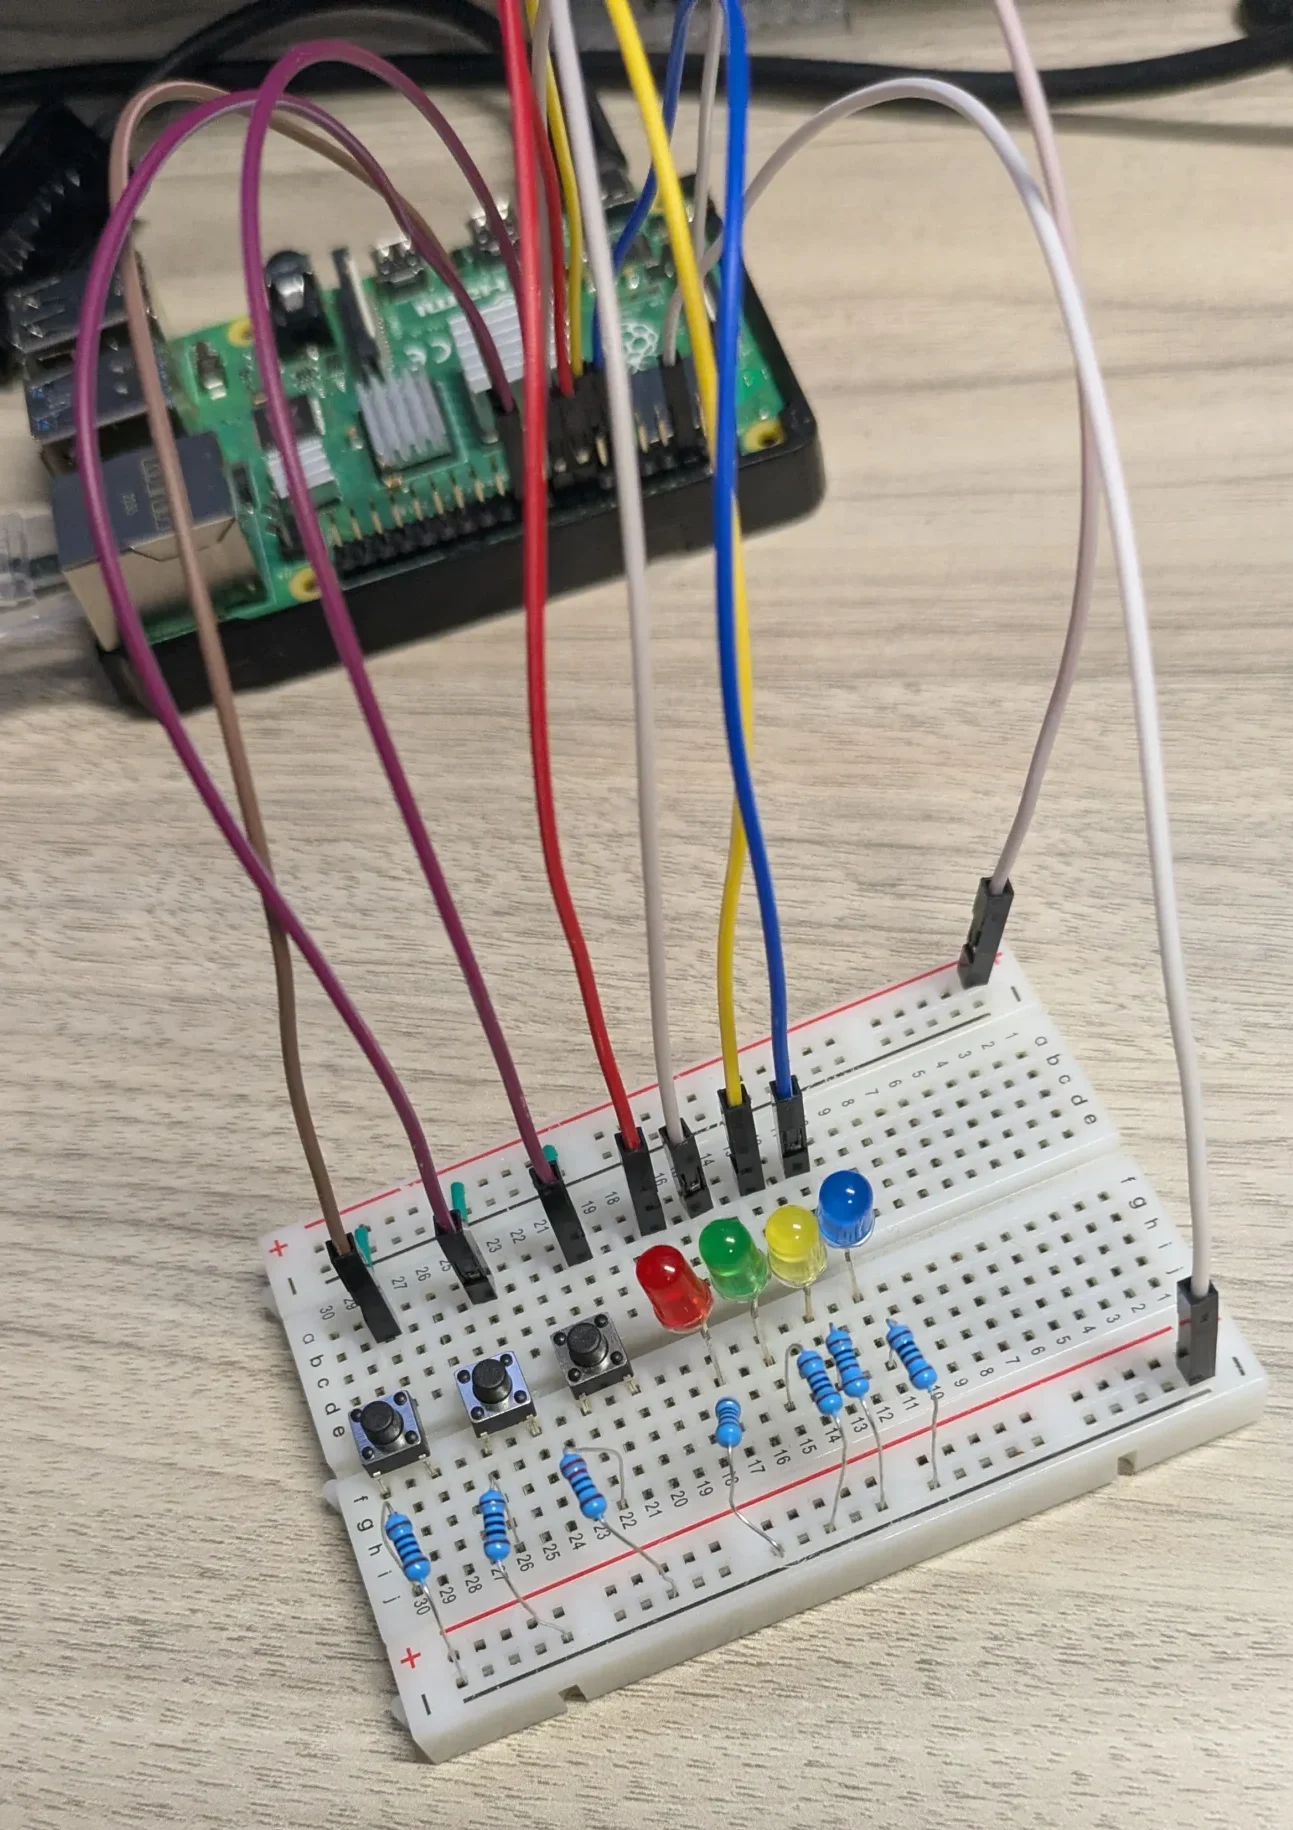
Now we’ll prepare the hardware that we’ll hook up to the GPIO, I’ll be using a breadboard for this example like so.
Add Powered Circuit
The first thing I’m wiring to the circuit is the static powered 3.3VDC positive and negative ends on either end of the breadboard. These will be tied to pins 1 and 6 respectively.
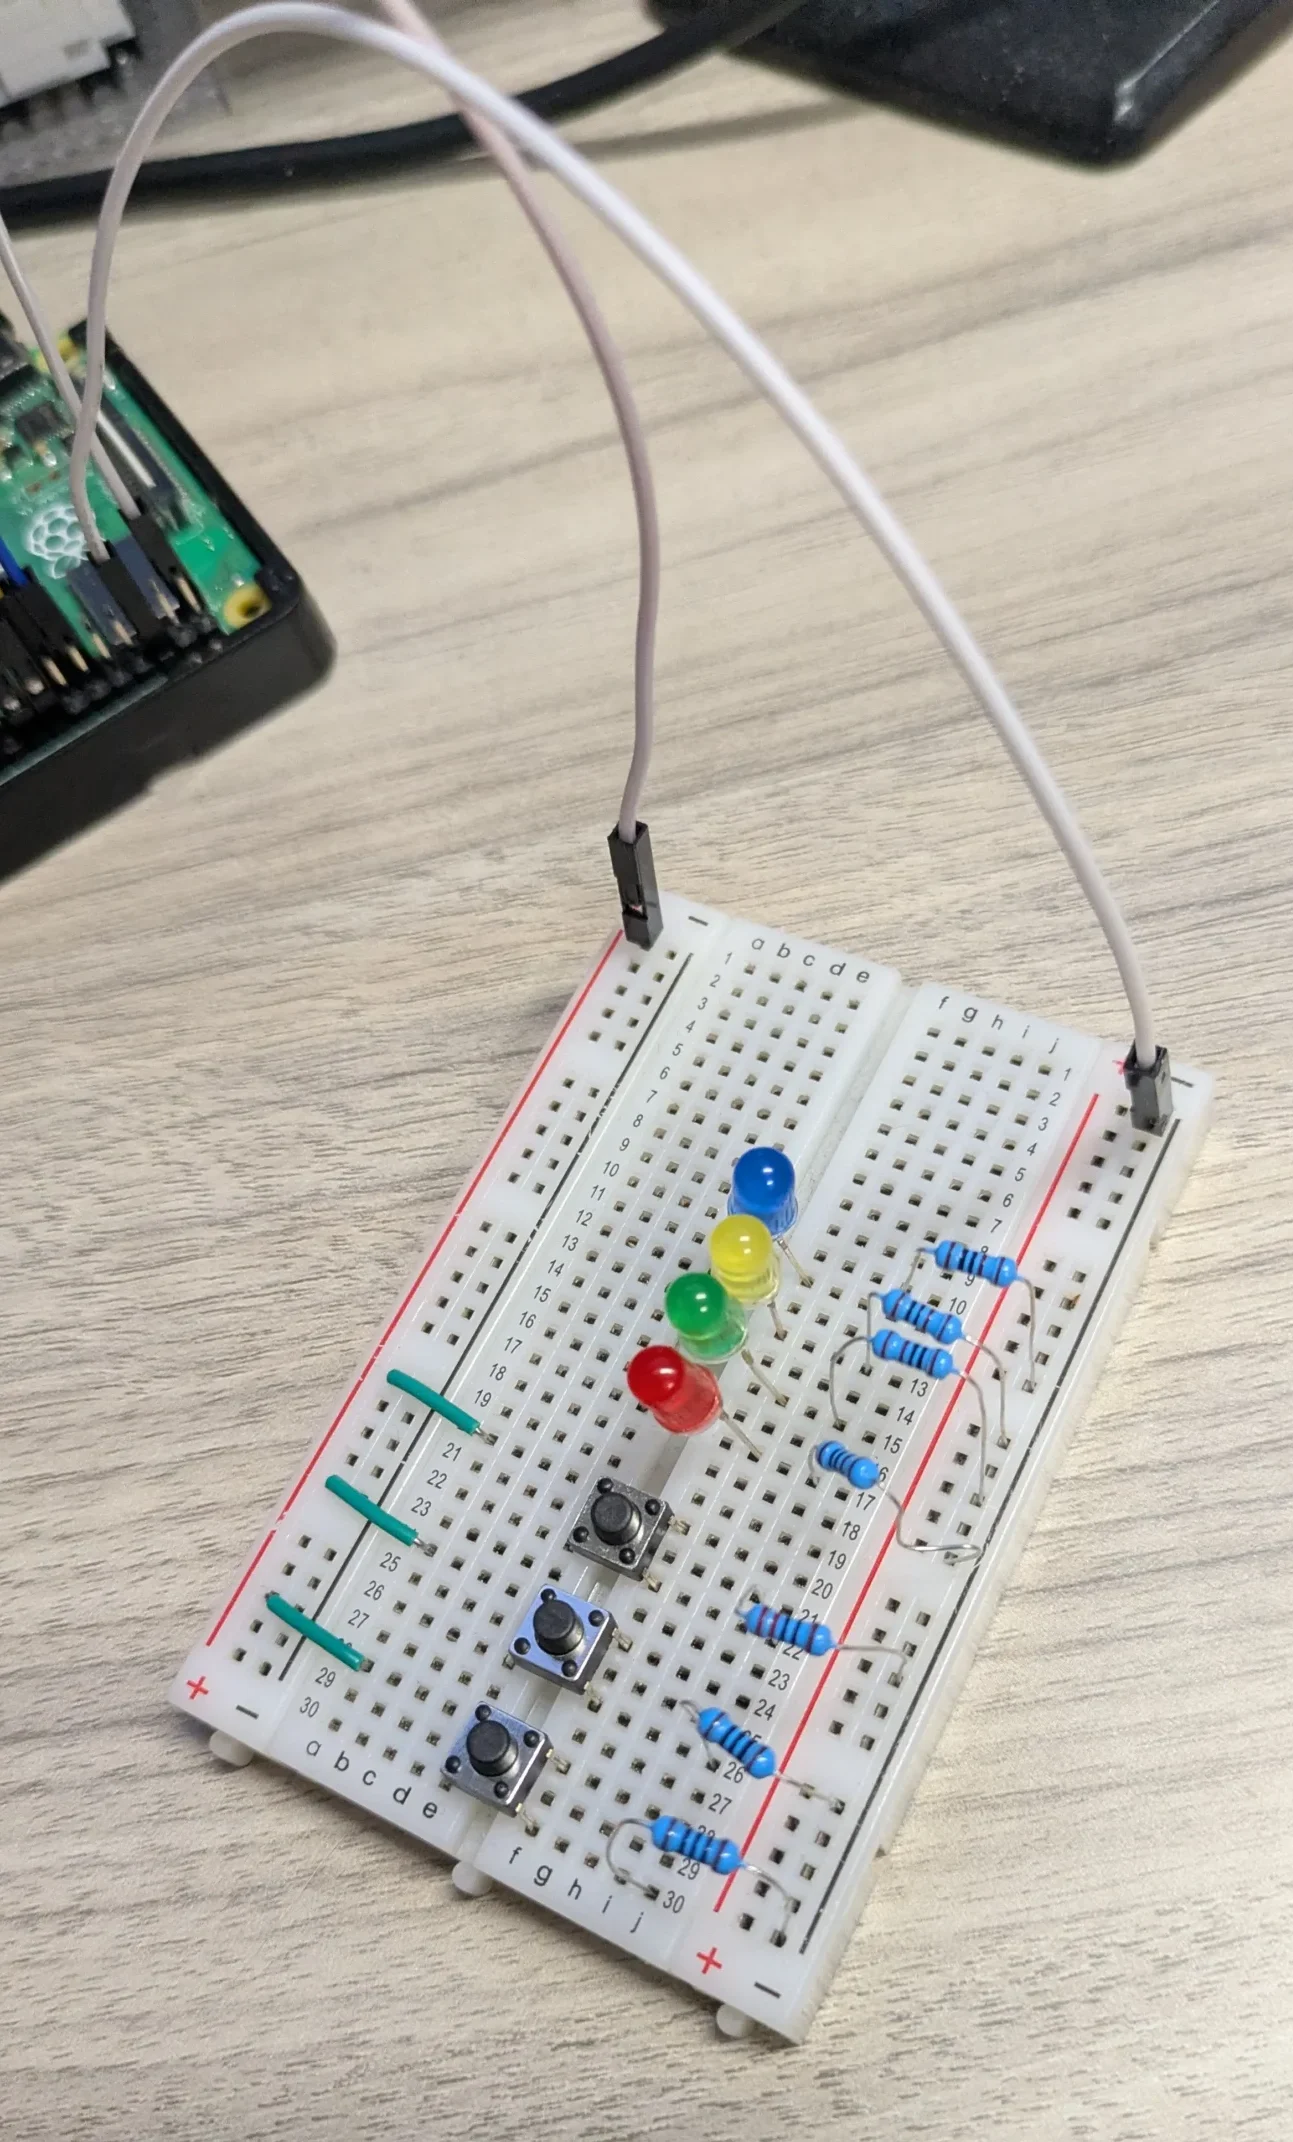
Add LED power wires
Now we’ll add four wires from pins 16, 15, 13, and 11 to the positive end of our LEDs
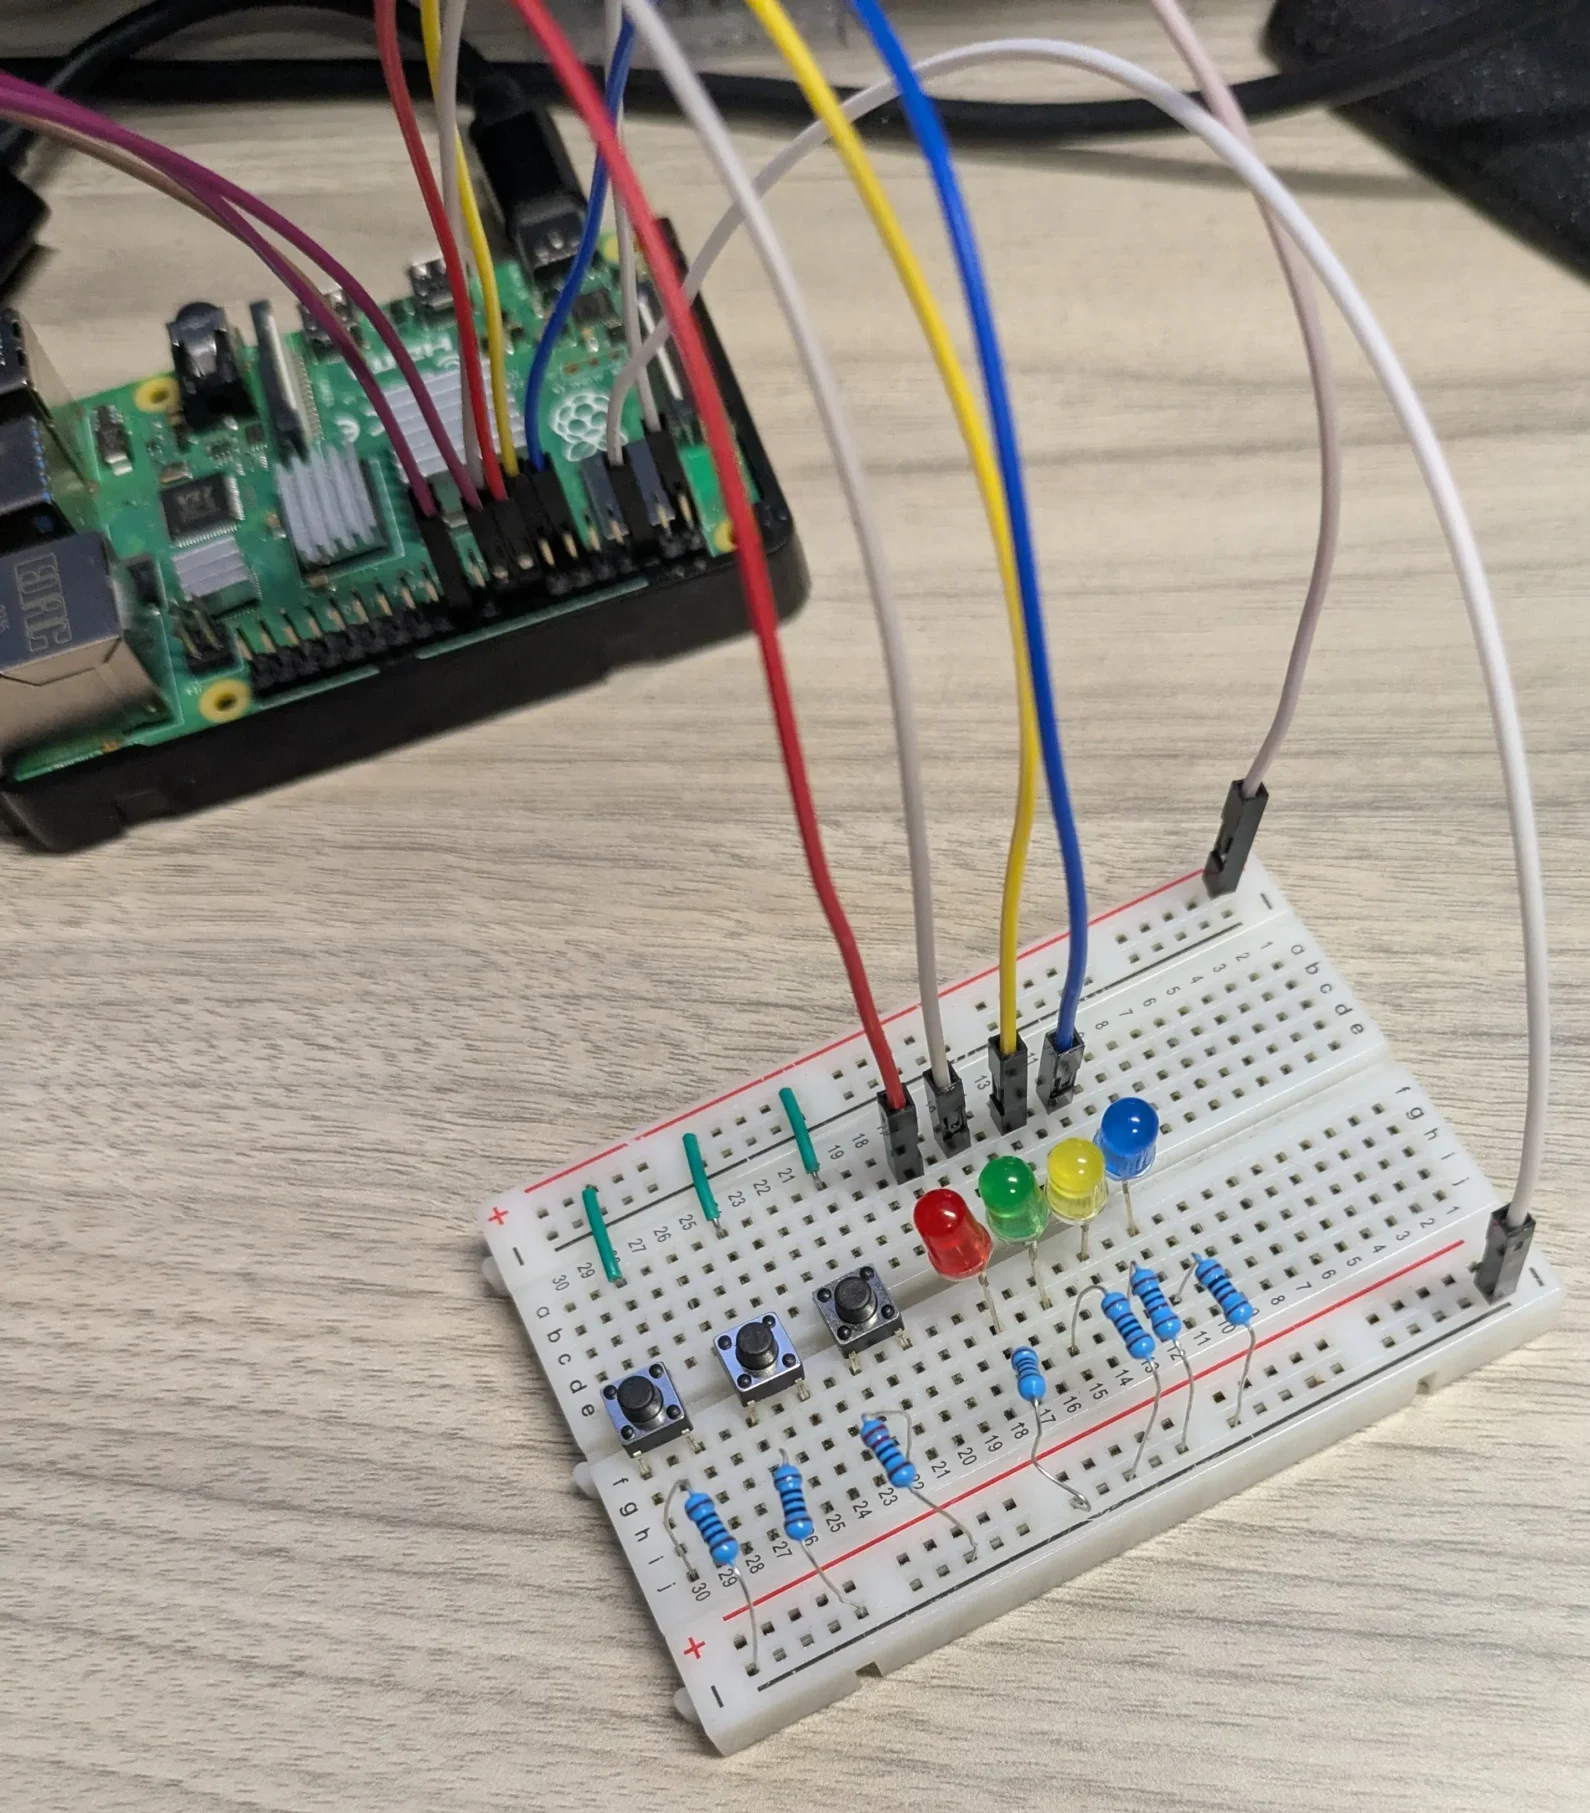
Add Wires for Physical Buttons
Finally, we’ll add wires from pins 18, 22, and 21 to the physical button circuits to finish out the sample project wiring.
After setting up our wiring and our web server, we’ll simply need to run our Flask server by opening a terminal, then typing:
$ cd web-server
$ python run app.py
And Python will take care of the rest!
Configuring our Web HMI
Web HMI Configuration
Now that we have our web server set up and running, we’ll move on to our Web HMI configuration
Instructions: Web HMI Configuration
Configure our Network
To start, we’ll want to make sure to configure the Raspberry Pi and our Maple Systems HMI to not only be on the same network, but to have IP addresses within the same network subnet.

Connect the Web HMI to the Raspberry Pi
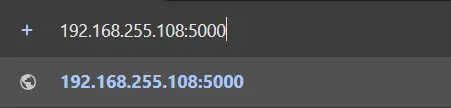
Now we’ll open the address bar of our web HMI and navigate to the Raspberry Pi’s IP address, at the port we specified in our Flask code (port 5000 in my example)
Then, once we connect our two devices, we’ll be able to control the Raspberry Pi GPIO from a Maple Systems Web HMI!
Final Thoughts
If we return to our industrial plant from earlier. We can see the potential of leveraging a Raspberry Pi as a web monitor for our machine. Even if we include the web HMI, the whole setup is very cheap, the Pi has an array of over 20 GPIO digital pins, and we can leverage the power of a general-purpose programming language like Python to process and send this data to a web dashboard.
While a Raspberry Pi may not have the ruggedness or speed of a PLC, it acts wonderfully as a web gateway and monitoring bridge, especially when paired with a Maple Systems web HMI to help display it’s data.
Resources & Documentation
The following guides and documentation are specific to the hardware used in this integration tutorial and will help you with setup, configuration, and programming:
Looking for additional learning resources? Explore our library of tutorials, example projects, and software tools to help you get the most out of your system:
Also, browse our Support Center for a complete list of installation guides, FAQs, and additional technical documentation.
About the Author
Trusted source for industrial automation & control solutions
Follow Maple Systems:
Share:


