4.3" Low-Cost HMI
$345.00
As part of our Standard Series, this model provides a high-quality unit for applications requiring straight-forward HMI functionality at a great price. Paired with our free software, the Standard Series is an exceptional value. See our Advanced and High Performance HMI Series if your project requires UL or additional features.
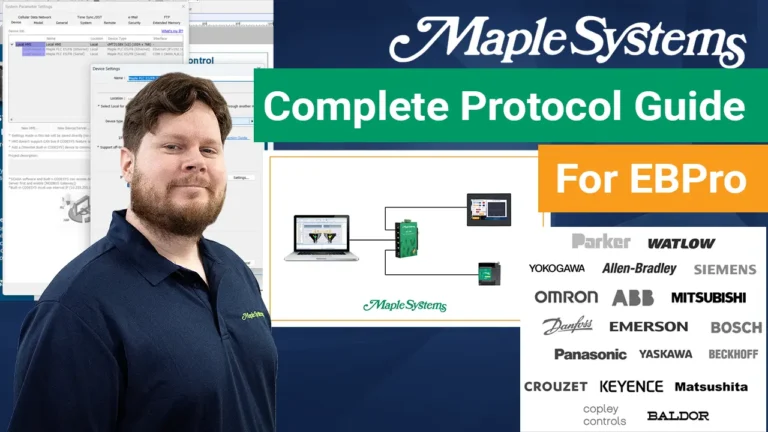
Try Before You Buy: Follow along to learn how EBPro, our 100% free HMI configuration software, allows you to develop and simulate your HMI program entirely free of charge.
- Volume discounts available.
- Customize product with your company logo. Minimum quantities apply.
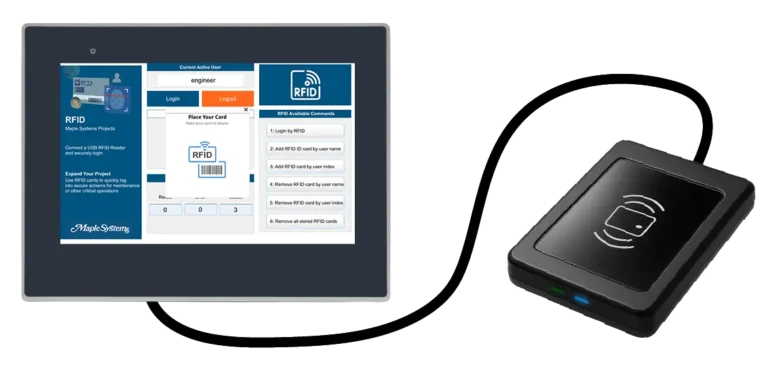
- Connect to +400 PLCs and Controllers.
- US-based technical support.
Share the product:


System
| CPU | Dual-Core RISC |
| Memory (RAM) | 128 MB |
| Memory (Flash) | 256 MB |
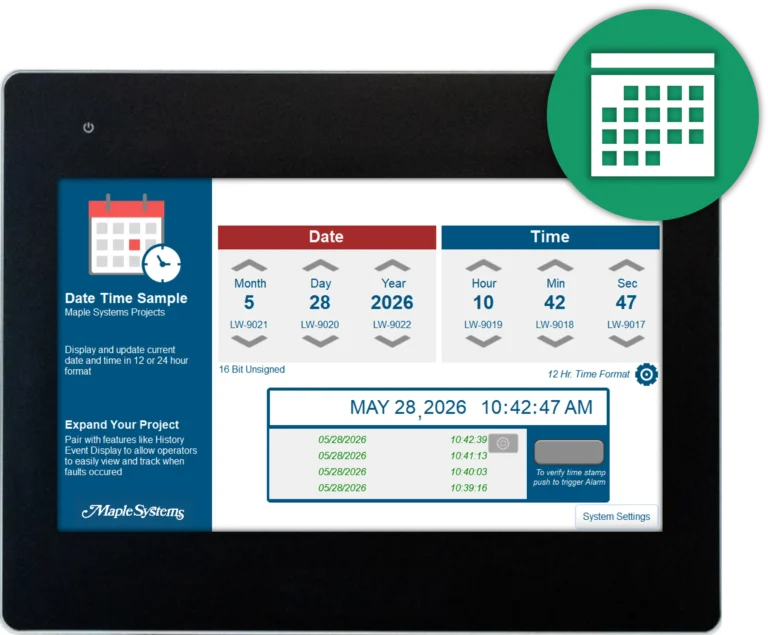
| RTC | Built-in |
| Programming Software | EBPro (Latest Version) |
I/O Ports
| Ethernet/LAN | 10/100 Base-T x 1 |
| CANbus | N/A |
| Audio Output | N/A |
| SD Card Slot | N/A |
| USB Host Ports | USB 2.0 x 1 |
| USB Client Ports | N/A |
| Wi-Fi | N/A |
| COM Port | 1 x DE9P COM1: RS-232/RS-485 2 or 4 wire, COM 3: RS-485 2 wires |
| RS-485 Dual Isolation | N/A |
| Local bus | N/A |
| HDMI Port | N/A |
| Video Input | N/A |
| Serial Ports | 1 |
Display
| Display Size | 4.3" TFT |
| Resolution | 480 x 272 |
| Luminance (cd/m^2) | 400 |
| Contrast Ratio | 500:1 |
| Backlight Type | LED |
| Backlight Lifetime (hrs) | 30,000+ |
| Colors | 16.7 M |
| Display Type | 4.3" TFT |
| Viewing Angle (H°/V°) | 140/120 |
| Size (W x H) | 3.74 x 2.13 inches [95 x 54 mm] |
Touch Screen
| Type | 4-wire resistive touch |
| Accuracy | Length (X) ±2%, width (Y) ±2% |
| Touch Panel Hardness Scale | N/A |
Electrical
| Input Power | 9.6 W |
| Power Isolation | Built-in |
| Power Dissipation | N/A |
| Current for Internal Bus | N/A |
| Current Consumption | N/A |
| Isolation Resistance | Exceed 50 MΩ – @ 500 VDC |
| Input Voltage | 24 ± 20% VDC |
| Input Current | 400 mA @ 24 VDC |
Mechanical
| Vibration Endurance | 10 to 25 Hz (X, Y, Z direction, 2G, 30 minutes) |
| Enclosure Material | Plastic, charcoal grey |
| PCB Coating | N/A |
| Dimensions WxHxD | 5.04 x 4.02 x 1.26 inches [128 x 102 x 32 mm] |
| Panel Cutout (inches) [mm] | 4.69 x 3.66 [119 x 93] |
| Weight | Approx. 0.55 lbs. [0.25 Kg] |
| Mounting | Panel mount |
Environmental
| Operating Temperature | 32° ~ 131°F (0° ~ 55°C) |
| Storage Temperature | -4° ~ 140°F (-20° ~ 60°C) |
| Relative Humidity | 10% ~ 90% (non-condensing) |
Certification
| UL Type Rating | N/A |
| NEMA Rating | NEMA4 |
| IP Rating | IP65 compliant front panel |
| CE | Yes |
| UL | N/A |
| Class 1 Div 2 | N/A |
| ATEX | N/A |
| RoHS | Yes |
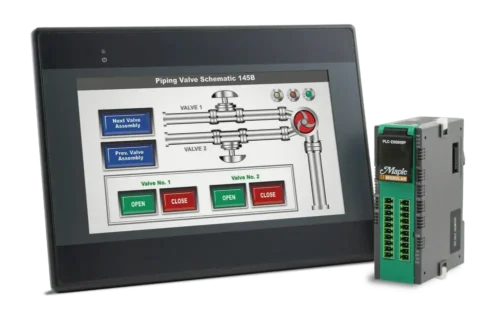
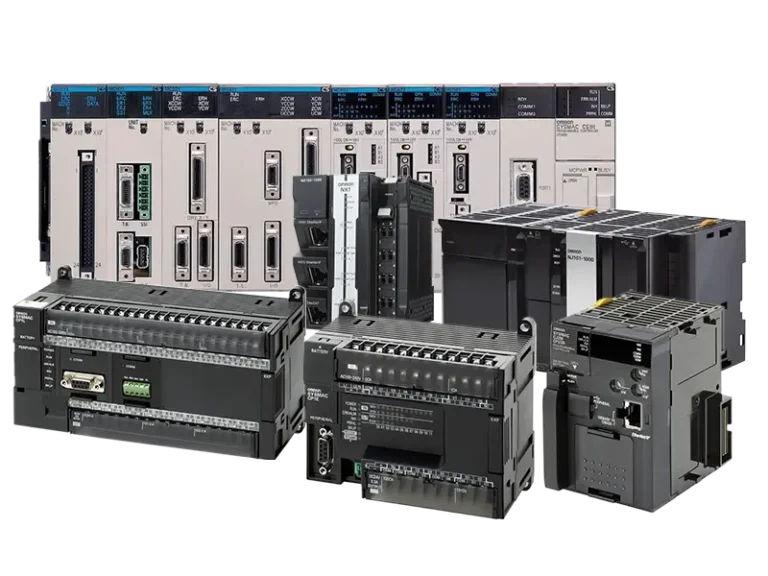
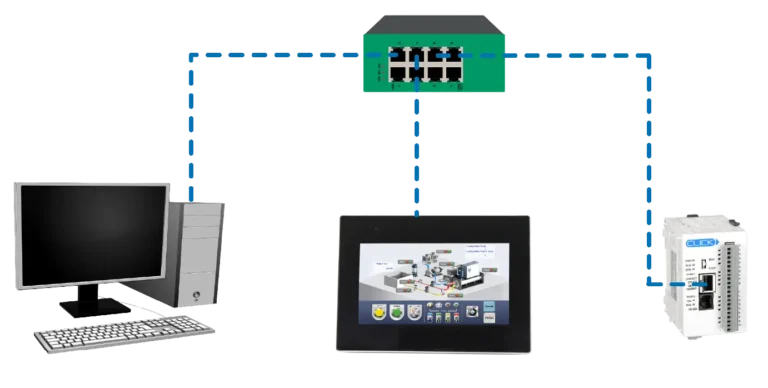
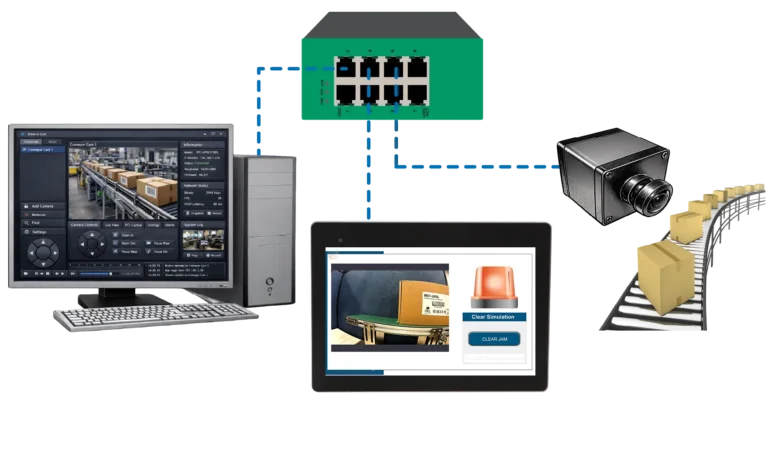
Connect a Maple Systems HMI to a Maple Systems PLC
Whether you are new to Maple Systems or know our HMIs well, pairing one of our powerful HMIs with a low-cost PLC is easy.
Unboxing an HMI5040Bv2
We'll unbox, show the I/O ports and accessories, explore a sample project and the system settings
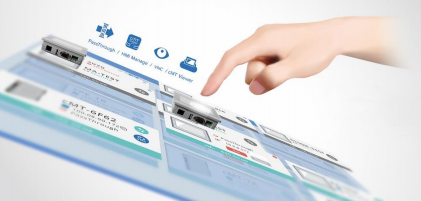
FREE User Friendly HMI Software
Download our free, full-featured HMI configuration software to create custom control applications for your industrial process. EBPro supports over 300 PLC & controller protocols, ensuring seamless integration with new or existing systems. No license or key required.

Can I customize the Startup Screen on my Maple Systems HMI?
Yes, you can replace the default startup screen on an HMI with one of your own choosing. The graphic file must be in a bitmap format (*.bmp). For best results, size the graphic so that it is the same size as the HMI screen in pixels. You can download your custom startup screen along with the project you are downloading to the HMI by selecting the “Use user-defined startup screen” option in the Download window. See Tech Note 5056, “Startup Screen on HMI5000 Series” for more information.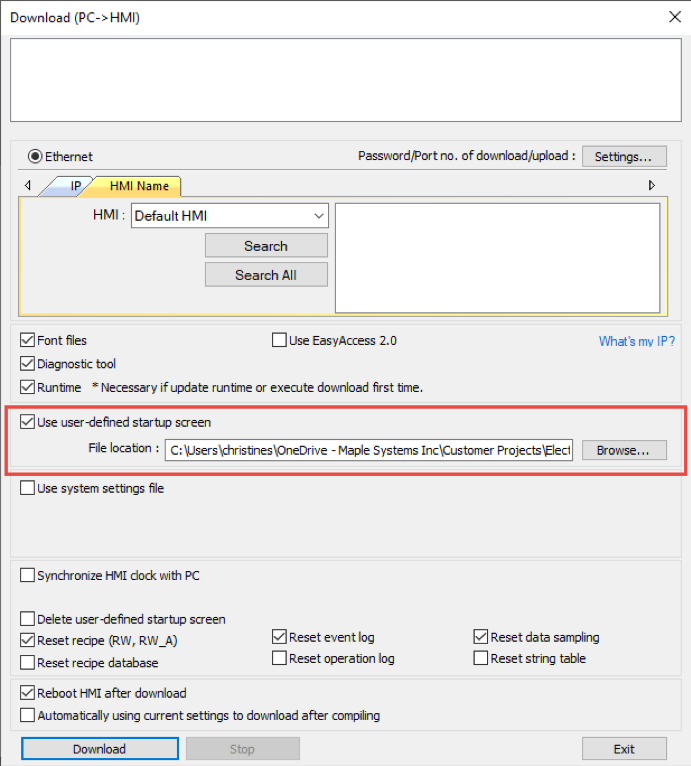
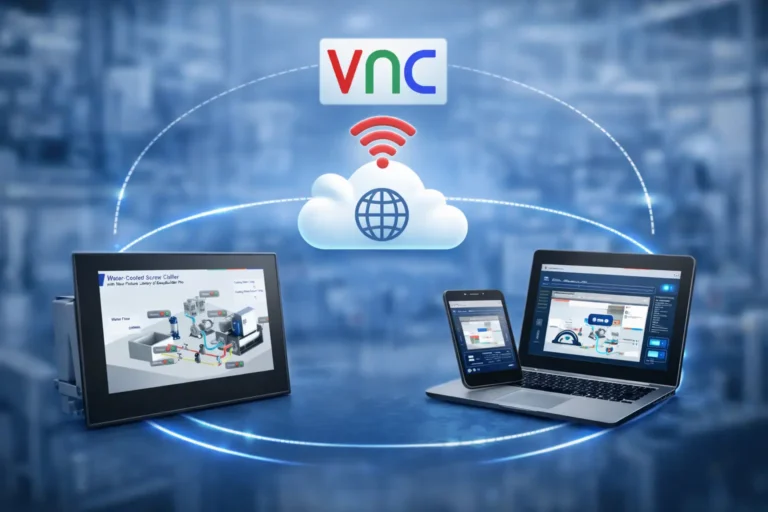
How to Enable VNC on Standard HMIs
The Standard Series HMIs now support VNC (EBPro v6.03.02.257 or later). Since the B-Series do not have the VNC tab in the System Settings window to enable VNC, it needs to be done with System Bits and Words.
LW-9530 to LW-9533 are used to store the VNC server password on the HMI in ASCII format. The easiest way to set the password is to place an ASCII Input object on a window where the operator can enter the password.
If you enable “Password from project” in the System Parameters > Remote tab, then you don’t need to enter the password with LW-9530 through LW-9533.
A Set Bit on the Common Window assigned to LB-12092 can be used to enable the VNC server. A Set Bit on the Common Window assigned to LB-12093 can be used to enable the Multi-Connection.
Note: LB-12092 must be turned OFF before LB-12093 can be toggled ON or OFF.

VNC-related System Tags
Maple Systems HMI File Extensions
The software for Maple Systems HMI’s has changed and improved over the years, as such the file types and extensions have changed along with it.
Below is a list of file extensions associated with the relevant software and HMI model series:
HMI5000 Series models:
*.emtp file – Working EBPro and EZwarePlus project file
*.ecmp file – Compressed EBPro and EZwarePlus file
*.exob file – Compiled EBPro and EZwarePlus runtime file
cMT and cMT-X Series models:
*.cmtp file – Working EBPro and EZwarePlus project file
*.ccmp file – Compressed EBPro and EZwarePlus file
*.cxob file – Compiled EBPro and EZwarePlus runtime file
HMI5000 Legacy models:
*.mtp file – Working EZware-5000 project file
*.cmp file – Compressed EZware-5000 file
*.xob file – Compiled runtime EZware-5000 file
HMI500 Series models:
*.epj file – Working Ezware-500 project file
*.cmp file – Compressed EZware-500 file
*.eob file – Compiled runtime EZware-500 file
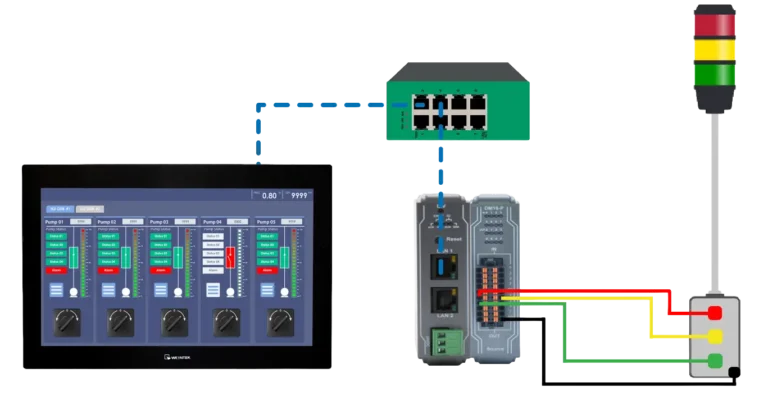
How to set up communication between Standard, Advanced or High Performance Series HMI and Maple Systems PLC
Setting up communication between a Maple Systems HMI and Maple Systems PLC is easy. We created a step by step tutorial showing you how to set up Modbus RTU and TCP communications.
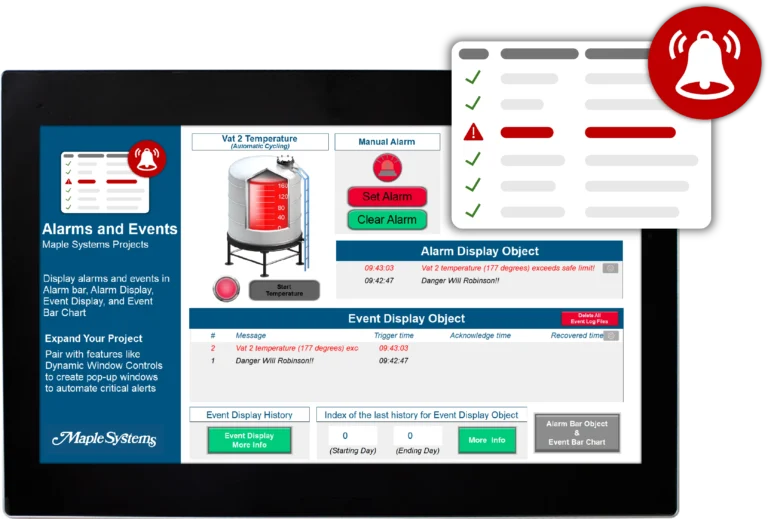
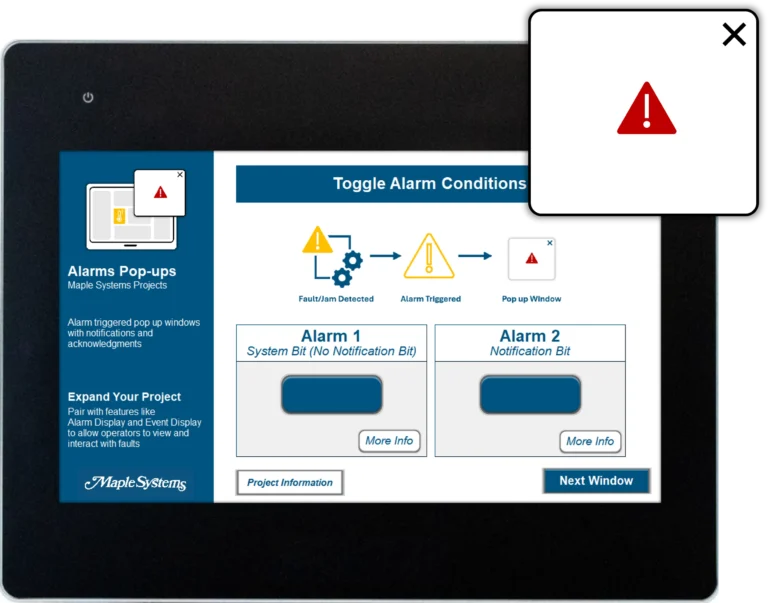
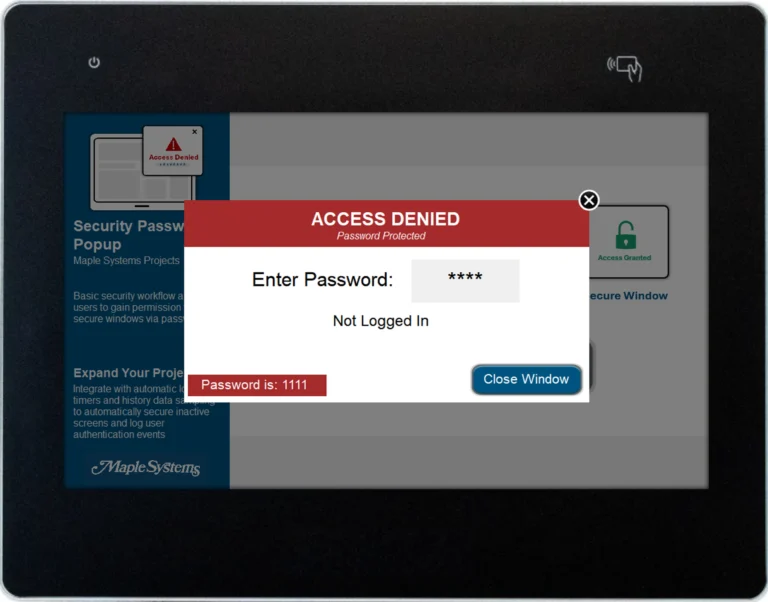
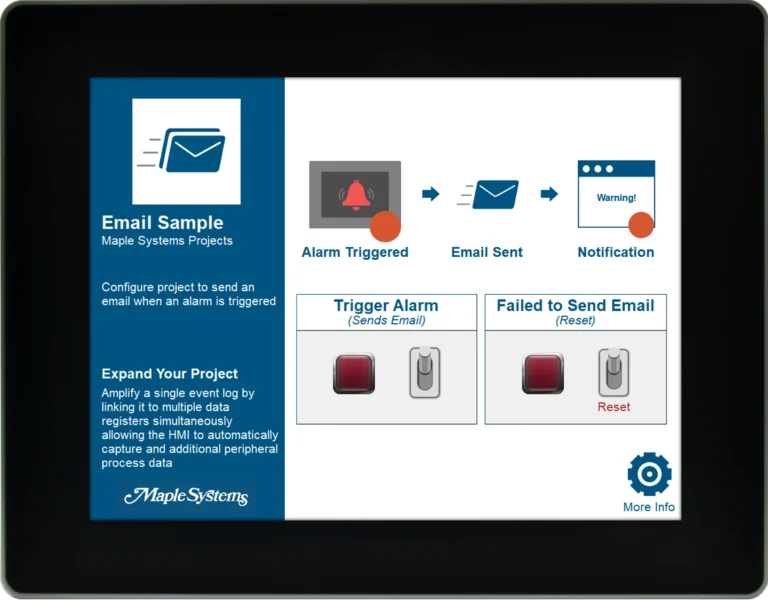
How does the Alarm feature work in EBPro?
Alarms are a two-part feature:
- The Event (Alarm) Log itself is where the alarms are configured.
- The Alarm Bar, Alarm Display, and Event Display Objects control how the alarms are viewed.
- The Alarm Bar displays the active alarms in a scrolling marquee, one after the other.
- The Event Display shows a history of the alarms including when the alarm was triggered, when it was acknowledged, and when it was cleared (returned to normal). It can also show the occurrence count and the elapsed time.
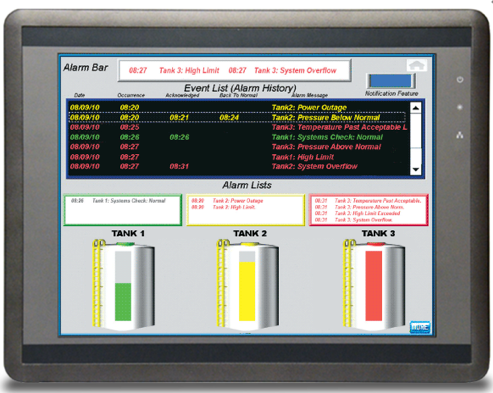
Because features and functionality vary between our Standard, Advanced, and High-Performance HMIs, refer to the software and programming manual for more information on this feature..
Do Maple Systems HMIs support file transfer through FTP?
Yes. Maple Systems Basic HMI, Advanced HMI and cMT devices come with a built-in FTP server that allows you to remotely access data logs, event files, and recipe data via FTP (file transfer protocol).
Please see tech note 5090, “Using the HMI’s built-in FTP Server” for instructions on how to use the built-in FTP server on our Basic, Advanced and Smart cMT HMIs.
Do I need to pay an additional license fee to activate features on my HMI?
The vast majority of features in EBPro do not need additional licensing, but a few situations may require a license fee to activate specific functions.
For features like our built-in CODESYS runtime, OPC/UA messaging (for cMT-SVR-200/cMT-SVR-202 only), or the EasyAccess 2.0 VPN service, users must pay a one-time activation fee to enable these functions on the HMI.
For the EasyAccess 2.0 application, which enables remote access features on your Maple HMI, the standard license includes up to 3 GB of monthly high-speed data at no extra charge. If the monthly data limit has been reached, top-up cards may be purchased to add additional bandwidth as needed.
If you know that you will need one of the features mentioned above before making a purchase, Maple Systems does offer HMI options that come with pre-activated licensing.
How do I implement EasyAccess 2.0 on my Maple Systems HMI?
Implementing EasyAccess 2.0 is easy. For complete instructions, refer to the EasyAccess 2.0 Manual available in our Support Center. Step 1: Create Domain Account:An HMI must belong to a domain in order to use EasyAccess 2.0. Anyone can create a new domain for free, all you need is a valid e-mail address. The Domain Management System is the basic system used to organize and handle HMI’s under a particular domain.
An Administrator then runs the domain and adds users and HMIs to the domain. To create a new domain go to the EasyAccess 2.0 Domain Management System (DMS) website (https://account.ihmi.net). Step 2: Manage Your Domain:When you create a domain account, you become the domain’s administrator. It’s the administrator’s responsibility to create new user accounts and to assign HMIs to specific users and HMI groups. Your domain can contain multiple HMIs, groups, and users.
Step 3: Activation:In order to use EasyAccess 2.0, you must activate the HMI in the domain. Some HMIs have EasyAccess 2.0 pre-installed and some require purchasing an activation card.
For HMIs requiring an activation card: The HMI can be activated by purchasing an activation card from Maple Systems. The activation code (from the activation card) and the hardware key are required to activate EasyAccess 2.0 in these units. The HMI’s hardware key is located in the HMI’s system settings window. Select the EasyAccess 2.0 tab and locate the 30 digit hardware key. You may also find it on Window 76 – EasyAccess 2.0 Setting. Select “Add HMI” in the domain and enter the hardware key and activation code. When an HMI is activated by an activation code, it is automatically added to the domain under which it was activated. Open window 76 – “EasyAccess 2.0 Setting” on the HMI. With the HMI connected to the Internet, push the Start button to initiate the connection to the EasyAccess 2.0 server. For HMIs with EasyAccess 2.0 pre-installed: The HMI can be activated by obtaining a Session ID and Password from the domain. Open window 76 – “EasyAccess 2.0 Setting.” With the HMI connected to the Internet, push the Start button to initiate the connection to the EasyAccess 2.0 server. If the HMI has not been assigned to a domain yet, a Session ID and Password will be assigned to the HMI and appear on window 76. Select “Add HMI” in the domain and enter the Session ID and Password. It should now be added to the domain. Step 4: Download and Launch EasyAccess 2.0:Download the EasyAccess 2.0 app on your PC/ iPad/ iPhone/ Android Tablet, Launch EasyAccess 2.0, enter the User ID and password. Once logged in, the program will list all HMIs assigned to this ID including all HMIs under an HMI group. Select an HMI and establish a remote connection. You can now monitor any HMI in your HMI list.

How long can an HMI hold its program while powered off?
The program will be retained for the lifespan of the HMI. The program is stored in the non-volatile flash memory (solid state memory), which can last anywhere from 10 years to 100 years, depending on how many times the user writes to it.
What is your warranty policy?
We stand behind our products and that is why we provide one of the best product warranties guarantee in the industry. View our Warranty & Limitation of Liability.Is Maple Systems software free?
Yes! Maple Systems programming software is completely free of charge. This includes EBPro, MAPware-7000, and MapleLogic—our flagship software tools for HMI, HMI + PLC combo, or PLC programming and configuration. There are no licensing fees, subscriptions, or activation codes required to download, install, or use these programs. Creating a free account on the Maple Systems website is all that is required.
Whether you’re developing your first HMI project or configuring a complex control system, you can access the full functionality of our software without any cost.
Maple Systems is committed to providing cost-effective solutions for our customers, and offering free software is a core part of that mission. Updates are also free, and support resources—including user manuals, video tutorials, and US-based technical support—are available at no additional cost. This makes it easy for engineers, integrators, and OEMs to start building and maintaining projects right away, without worrying about hidden expenses or recurring fees.
Documents
Manuals
Certifications
- CE-Declaration of Conformity – HMI5040B
- RoHS Declaration of Conformity (all series)
- REACH EU Declaration of Conformity
- Trade Agreement Act Declaration of Conformity
- EU Declaration of Conformity (Battery Regulations)
- Russian Iron and Steel Declaration
- Country of Origin Certification
CAD Files

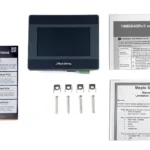
When you order the HMI5040Bv2 the following items are included in the box:
- 1 x HMI5040Bv2
- 1 x Warranty Statement
- 1 x Installation Instruction
- 1 x Product Flyer
- 1 x Power Connector
- 4 x Panel Mounting Clips
