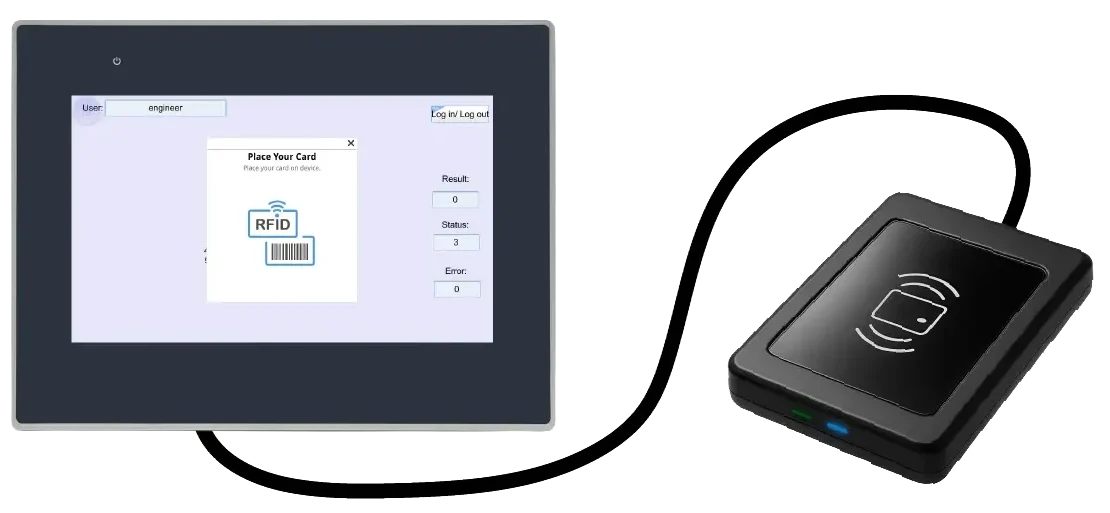
Picture a factory floor where an RFID badge reader is mounted next to the HMI and used as the primary machine login method. Operators scan their ID cards to access standard operating functions such as start and stop controls, job selection, and alarm acknowledgment.
How Role-Based Access Works
This system uses RFID credentials to dynamically assign user roles on the HMI. Each scanned badge determines the level of access granted, ensuring that operators and maintenance personnel only see the functions appropriate to their responsibilities.

Maintenance Access
When a maintenance technician scans a different badge, the HMI immediately switches to a higher-privilege role and unlocks service functions, including manual jog screens, I/O forcing pages, sensor diagnostics, and safety reset functions.
Operator Access
Operators scan their ID cards to access only basic machine operation functions such as start and stop controls, job selection, and alarm acknowledgment. Operators cannot access configuration screens and cannot make any changes to the HMI project or system settings.
System Behavior in the Background
In the background, the RFID reader sends the badge ID to the HMI. The HMI then compares the ID to a stored user table and assigns the correct security level. Each login and logout event is recorded by the HMI. Maintenance access and restricted actions are also timestamped. If an unauthorized badge attempts access, the HMI blocks the request and triggers a security alarm. This approach removes shared passwords and improves accountability. Only trained personnel can access safety bypasses, motion tests, and calibration routines.
In this tutorial, you will learn how to configure an RFID-based user login and role-based access system on a Maple Systems HMI using EBPro, including how to set up and scan an RFID reader, enable smart-card auto login, create maintenance and engineering security levels, register RFID cards to user accounts directly from the HMI, support both PC-based reader setup and direct USB connection to the HMI, and use reader commands to verify RFID communication during commissioning.
Software Required
Hardware Required
- Any Maple Systems HMI can be used. (cMT3072XH2v2 used in this example)
- RFID Reader
Network Diagram

A 7-inch HMI and a PC connect by Ethernet to the same network switch at the top of the diagram. The HMI uses IP address 192.168.255.80 and the PC uses 192.168.255.58, which places both devices on the same subnet and allows them to communicate with each other over the network.
First, configure the RFID reader in EBPro and connect it to the PC with a USB cable, not directly to the HMI. In this setup, the PC interfaces with the RFID reader, and the HMI exchanges RFID data with the PC over Ethernet.
Continue reading to follow the step-by-step procedure for configuring the RFID reader.

After you configure the RFID reader on the PC, connect the reader directly to the HMI with a USB cable.
*Note – You only need the PC to download the project to the HMI.
RFID Reader Configuration on an HMI
To configure an RFID reader on an HMI, set up the device in EBPro first, then connect the reader to the HMI (typically over USB) so the HMI can receive tag data during runtime. The HMI reads the scanned tag values, displays the data on screen, and passes the values to the application logic for identification, tracking, or job selection.
RFID Setup in EBPro
Now configure the RFID device and communication settings in EBPro so the HMI can read tag data and use it within the HMI project at runtime.
Instructions: RFID Setup in EBPro
Security Setup
– Navigate to System Parameters in the EBPro project
– Select the Security tab
– Enable Users
– Click Plugin…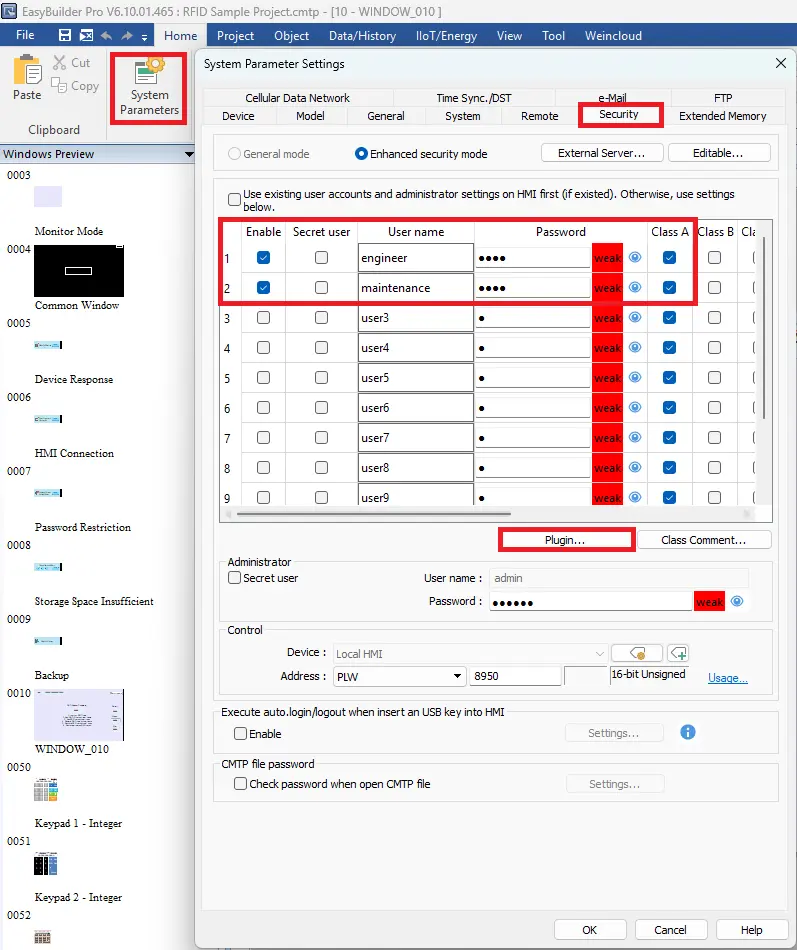
Configure Smart card
– Select the Smart card tab
– Enable it
– Enable auto login (this enables logging in by simply placing a card on the sensor)
– Set control address to PLW-0
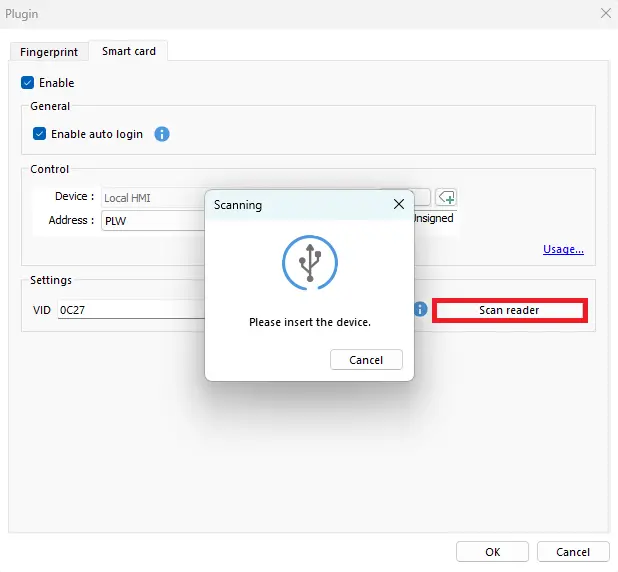
– Scan reader will indiscate to connect the USB device to the PC.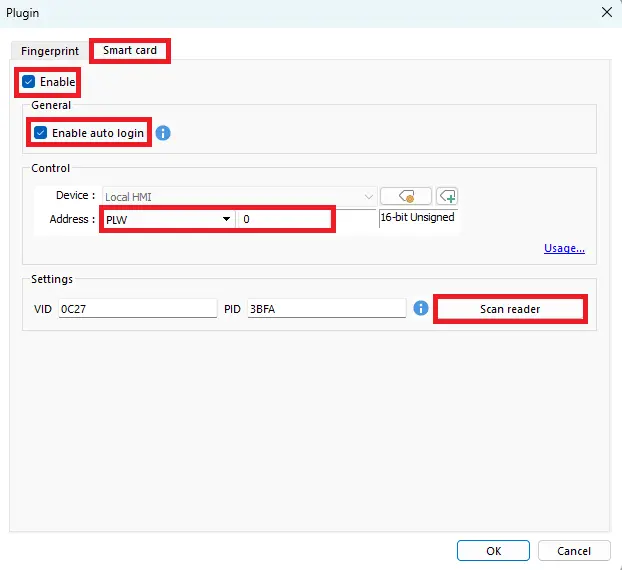
View Smart Card Control Usage
– Click Usage… to view the command, result, status, and error address and their functionality
– Command address is used to send commands to the RFID reader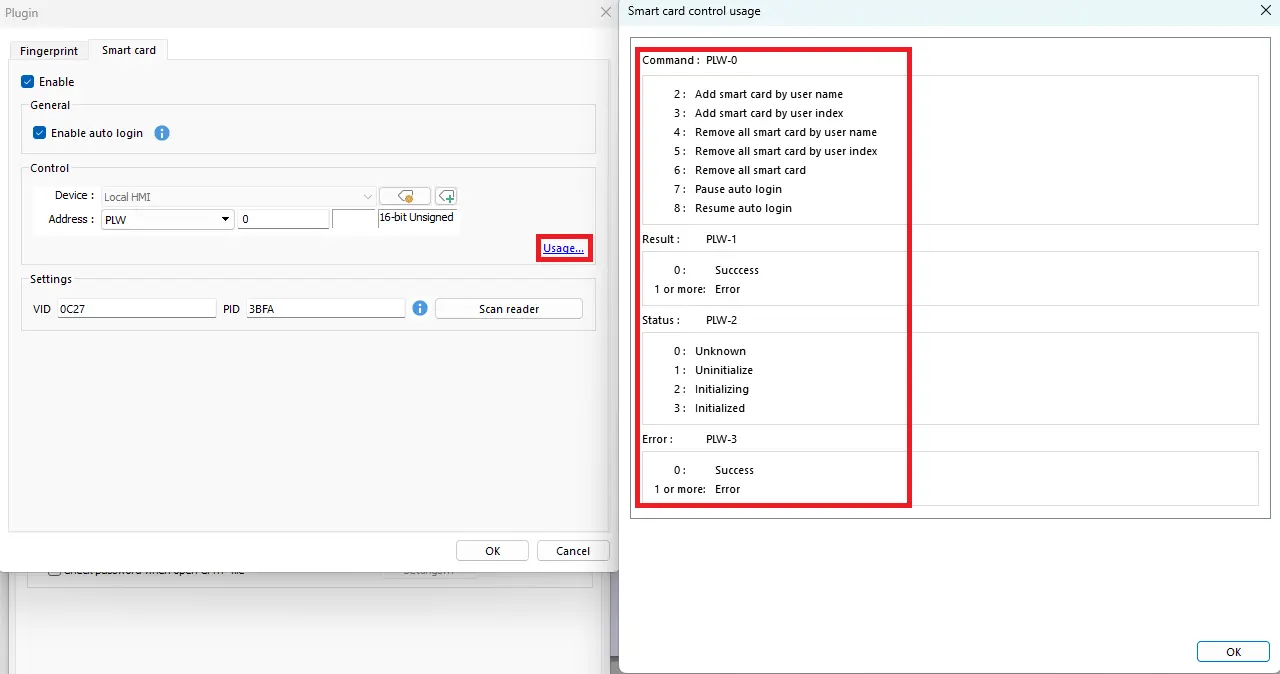
Plug in USB RFID Reader
– Click Scan reader to be prompted to plug in the USB RFID reader
RFID Scan Found
– After scanning, the device will be found
– Click Save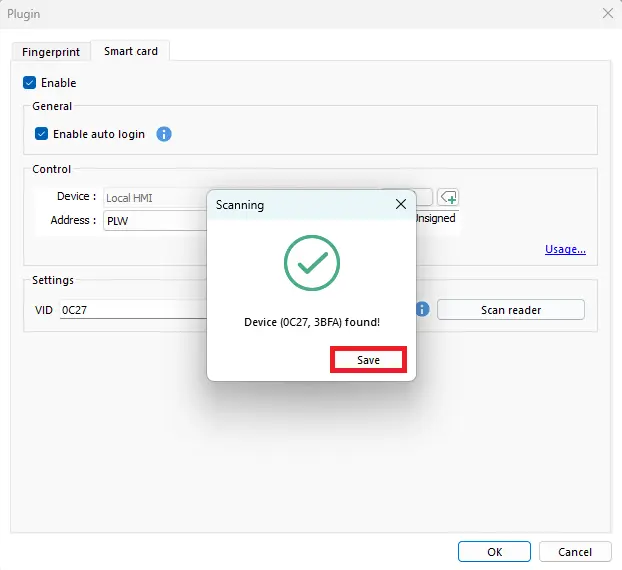
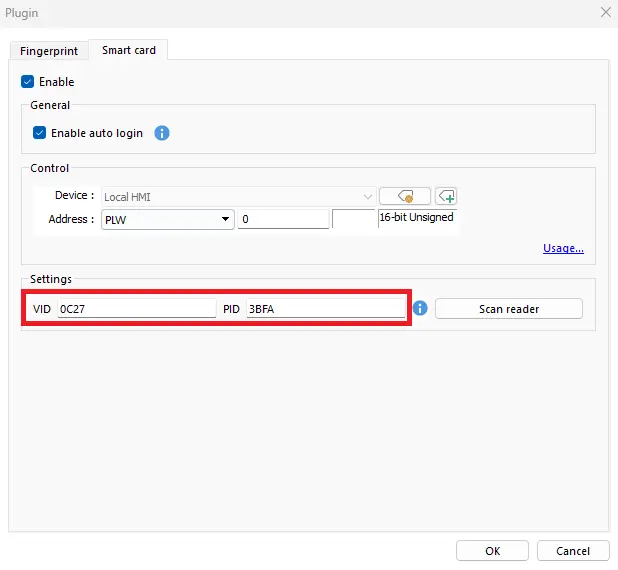
VID and PID Fields
– The VID and PID fields will be populated with the appropriate hexadecimal values
HMI Project Build
Now create and configure the HMI application so it can receive, display, and process RFID tag data during operation. Add ASCII, function keys, and numeric entry and display objects.

RFID Scanning HMI Project in EBPro
Steps to build an HMI project that reads RFID tag data, displays the scanned information, and uses user login security to control access to RFID functions.
Instructions: RFID Scanning HMI Project in EBPro
ASCII Object to display user
– Add an ASCII object to display which user is logged in
– Use LW-10754 for current user name (8 words)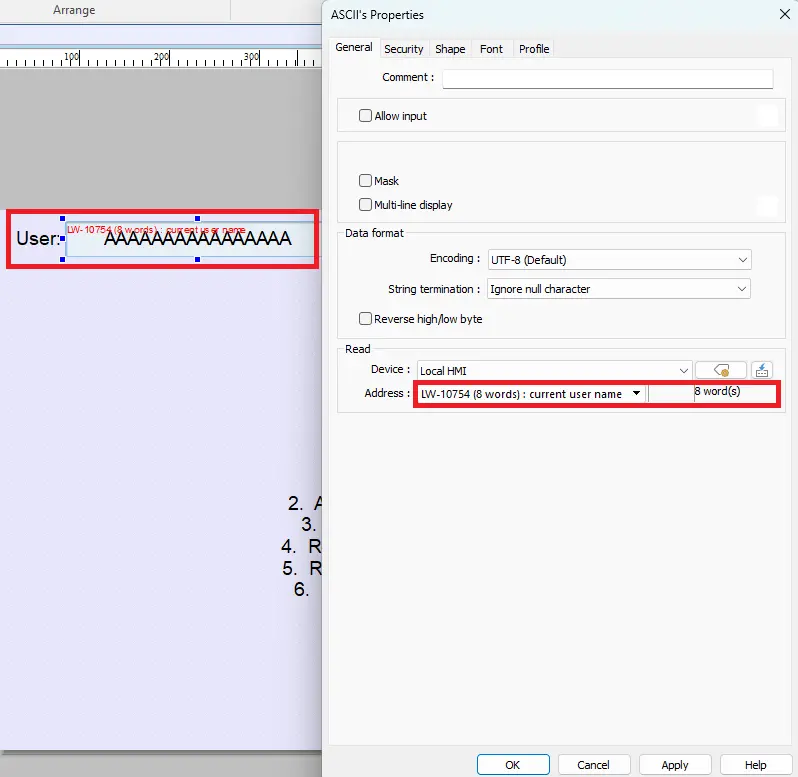
Log in / Log out
– Add a function key for Logging in and out by user index
– Choose Window 70. Login & Logout
RFID Reader Command
– Add a number entry object
– Use PLW-0 for a read/write address
– Enter a number 1-6 to initiate the command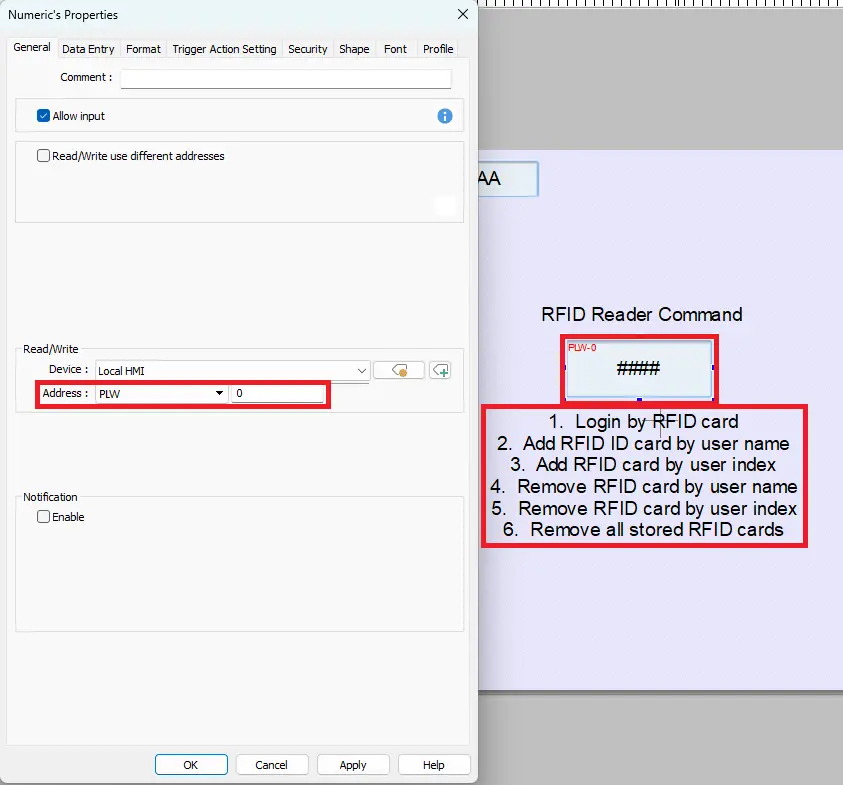
Result, Status, Error
– Add three numeric display objects for the RFID status registers
– Use PLW-1 for result, PLW-2 for status, PLW-3 for error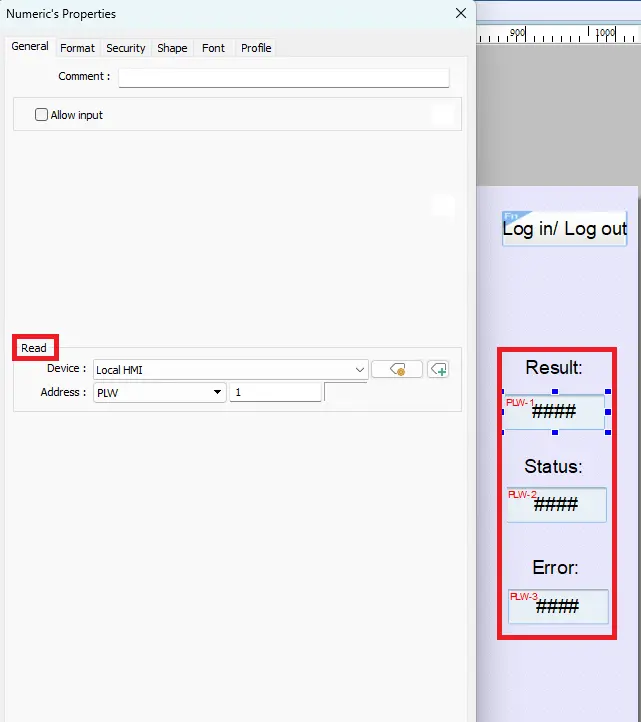
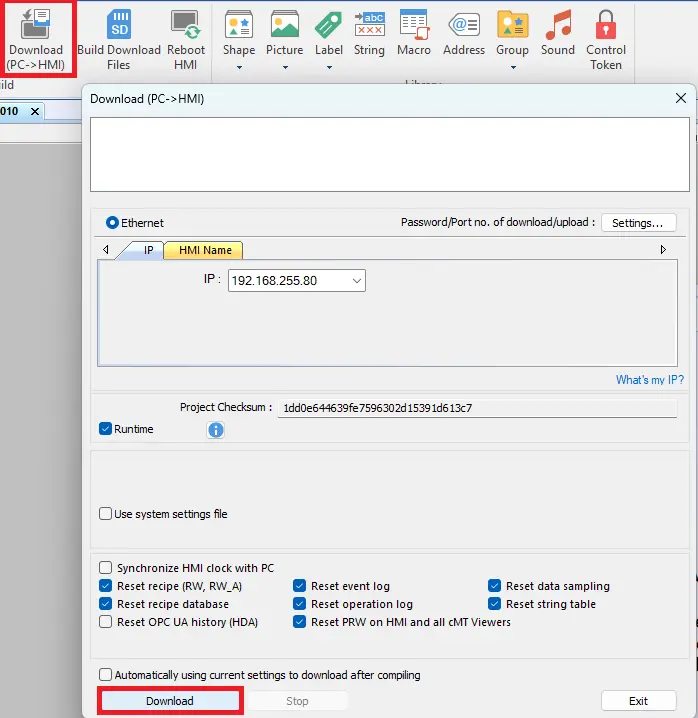
Download to HMI
– Click Download to begin the process of downloading the project to the HMI
Online – User Login
– Click the Log in/ Log out function key
– In this example engineer will be the user
– Enter password and login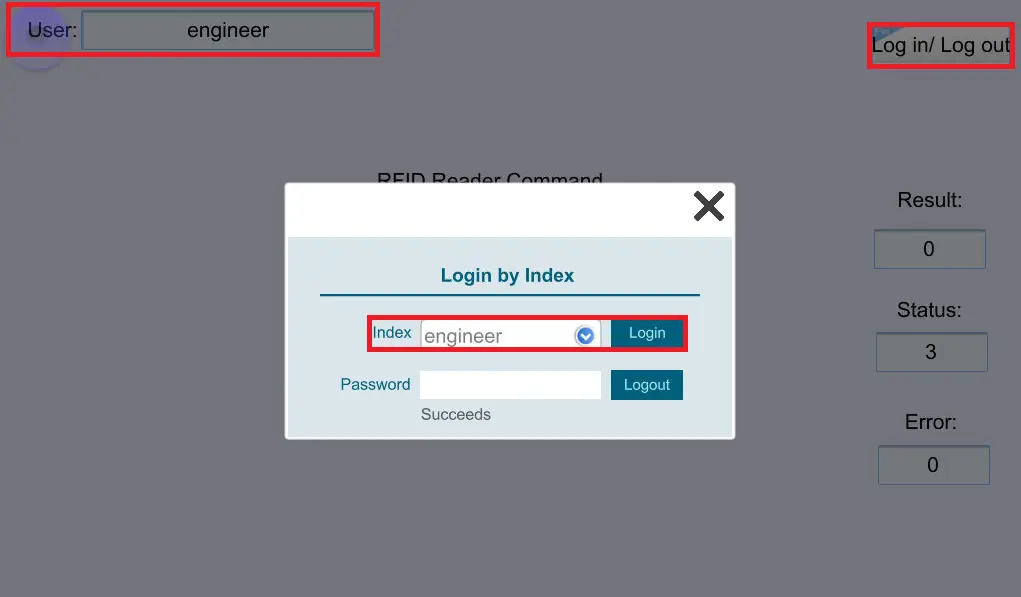
RFID Reader Command
– Use 3 which is to add RFID card by user index
– Enter 3 into the RFID Reader Command numeric entry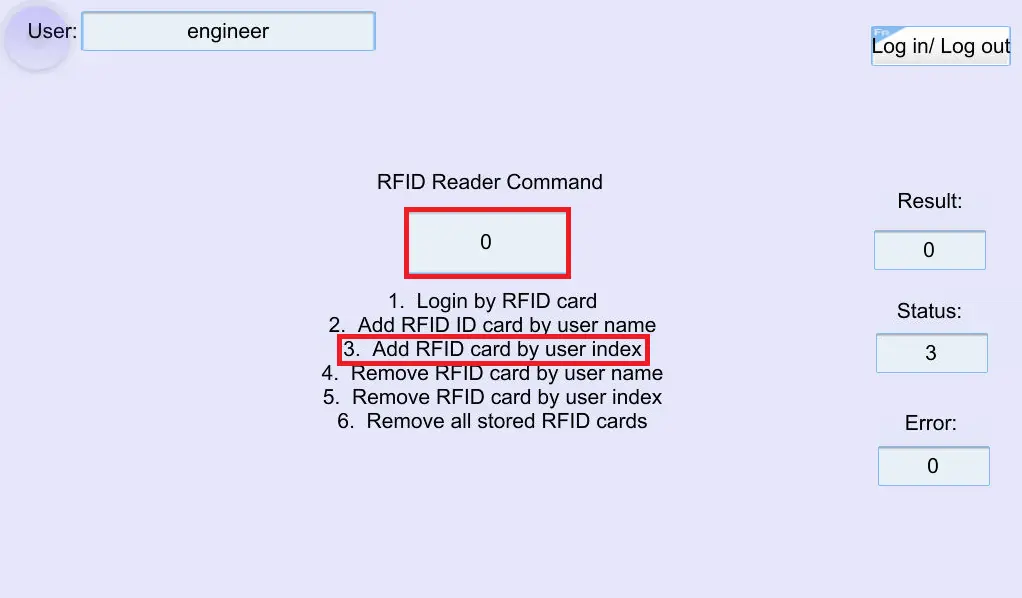
Add RFID card by user index
– Enter 3 into the keypad
– This allows to add an RFID card to a user account (engineer) by user index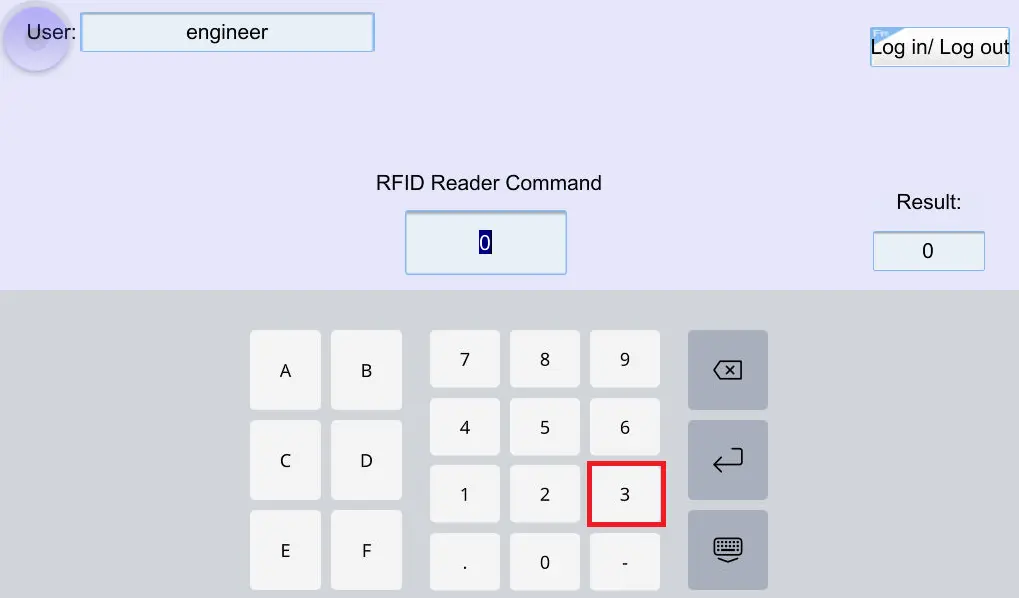
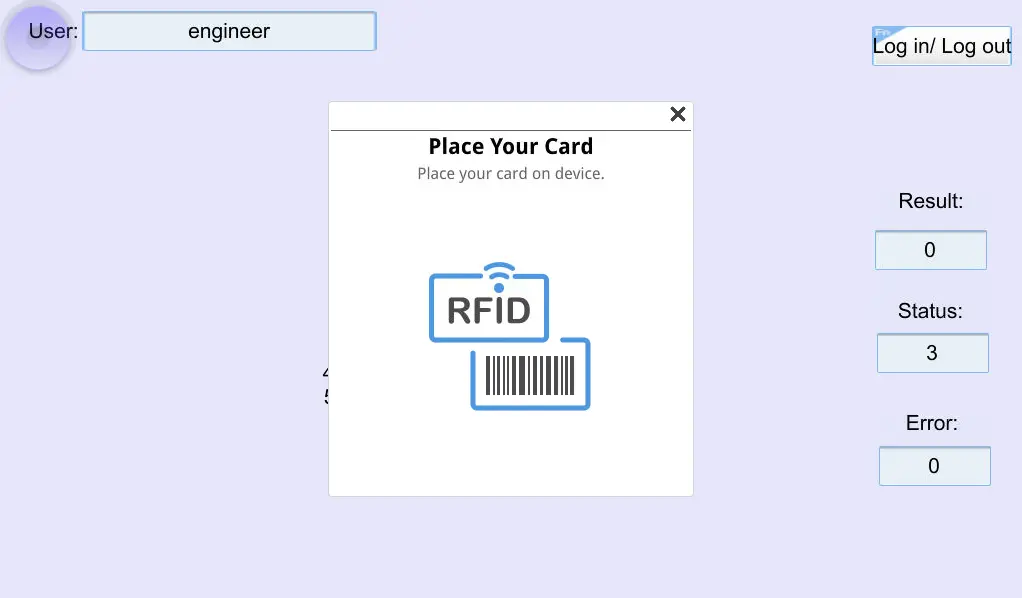
Scan the card
– A prompt pops up to place the user’s RFID card within range of the scanner
Live Simulation
An engineer logs in. After the RFID card is scanned, a prompt appears indicating that the process is complete. Select Confirm, and the card can then be used for user login. Engineer logs out. Then a maintenance worker logs in. After the RFID card is scanned, a prompt appears indicating that the process is complete. Select Confirm, and the card can then be used for user login. The maintenance worker logd out.
Recap
This tutorial shows how to integrate an RFID reader with a Maple Systems HMI to verify pallets or totes on a packaging and shipping line, prevent mis-shipments, and give operators clear pass/fail feedback.
You first configure the reader on a PC, then connect it to the HMI (typically by USB) and set it up in EBPro so the HMI can receive and display RFID tag data. You build the HMI project to display user and tag information, send reader commands, and trigger RFID-based actions using internal PLW registers.
Finally, you configure user login and smart-card security so only authorized personnel can register cards, access RFID functions, and make system changes.
Next Steps
Next steps could include adding validation logic in the HMI to compare each scanned RFID tag with the active job, order, or destination and generate a clear pass or fail result, then using that result to trigger real actions such as releasing a conveyor, diverting a pallet, or raising a fault.
You can also expand the project to log the tag ID, user, timestamp, and verification result for traceability and audits, and add dedicated diagnostic screens that show reader status, PLW result and error codes, and connection health to speed up troubleshooting.
Finally, tighten user security by limiting card enrollment and RFID commands to supervisor or engineer roles and, if required, share the verified RFID data with a PLC or higher-level system so the same validated information is used throughout the line.
Sample Project
This integration tutorial uses the EBPro Sample Project.
Resources & Documentation
The following guides and documentation are specific to the hardware used in this integration tutorial and will help you with setup, configuration, and programming:
Looking for additional learning resources? Explore our library of tutorials, example projects, and software tools to help you get the most out of your system:
Also, browse our Support Center for a complete list of installation guides, FAQs, and additional technical documentation.
About the Author
Trusted source for industrial automation & control solutions
Follow Maple Systems:
Share:


