Your cart is currently empty!
You can use a Maple Systems Web HMI to remotely view and interact with the desktop operating system of desktop PC, such as a Raspberry Pi with the help of the Virtual Network Computing (VNC) protocol. This process entails using a local VNC server application and noVNC to enable the PC to function as a gateway for remote access the Web HMI can connect to and visualize.
Although this demonstration uses a Raspberry Pi, you can apply the same setup to a desktop PC running Linux or Windows. Keep in mind that the installation and configuration process for a VNC server and noVNC may vary depending on the Operating System.
What is noVNC?

noVNC is free and open-source, browser based HTML5 VNC client software. It acts as a server to allow other devices to connect to a VNC server through a web browser without the need to install dedicated VNC client software.
Install a VNC server on a remote computer to allow devices with a VNC client to access its desktop environment. Optionally, you can also install noVNC on the remote desktop to enable access via web browsers like Chrome or Firefox.
Implementing noVNC on a remote computer alongside a VNC server is helpful as it greatly simplifies the remote connection to the computer by end-user devices by removing the requirement for users to bring their own VNC client software. We use it in this case to make a remote desktop available to a Maple Systems Web HMI.
Configuring the Raspberry Pi
This demonstration makes use of a Raspberry Pi 4 Model B 4GB model installed with the Raspbian (64-bit) OS, based on Debian 12.
The overall process of configuring the Raspberry Pi in this demonstration is fairly simple:
- Install the Raspberry Pi Operating System
- Access command line/shell
- Update package repositories and installed packages
- Install a VNC Server
- Install noVNC
- Start the VNC server and noVNC
Install the Operating System
Using the Raspberry Pi Imager, install the standard Raspbian Desktop OS for a Raspberry Pi 4 to an SD card or other bootable media. Refer to the imager documentation for specific installation settings as needed:
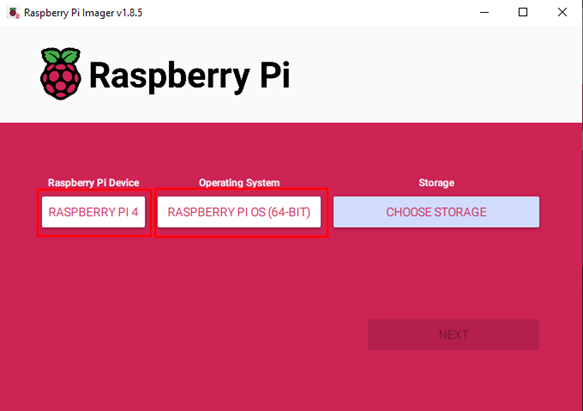
Configure SSH with either a password or public key authentication in the imager’s OS settings to enable remote access without a monitor. Also be sure to set up a user account with a password – these credentials will be used in the steps below.
Access the Shell
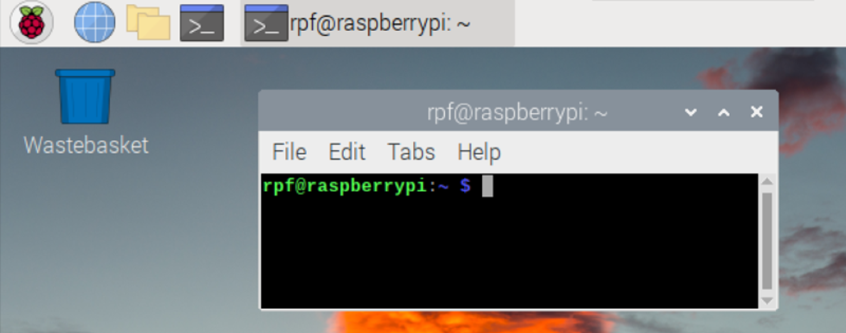
Log into the Raspberry Pi desktop with the configured user and password. To open a shell session locally, click the terminal icon:
To access the shell remotely, use ssh on a host PC to connect to the device’s IP address or hostname and log in with the configured user/password (or authorized key, if necessary):
<code><strong>C:\Users\ezekielh> ssh mstrg@192.168.150.171</strong></code>Code language: HTML, XML (xml)Update Package Repositories
Make sure the Raspberry Pi is connected to the internet, then run the following command to update the package repositories:
<code><strong>mstrg@TRG-Demo-Pi:~ $ sudo apt-get update</strong></code>Code language: HTML, XML (xml)Then execute the following command to update installed packages:
<code><strong>mstrg@TRG-Demo-Pi:~ $ sudo apt-get upgrade</strong></code>Code language: HTML, XML (xml)Install the VNC Server and noVNC Packages
This demo makes use of the TigerVNC package for the VNC server, however most any VNC server should be usable with noVNC:
<code><strong>mstrg@TRG-Demo-Pi:~ $ sudo apt-get install novnc tigervnc-standalone-server</strong></code>Code language: HTML, XML (xml)Start the VNC Server
Start the VNC server from the device’s desktop session. You can also adjust other settings here, such as changing the desktop screen size to match the WP4070AR’s resolution of 800 x 480 px.
For TigerVNC, we’ll just need to issue the tigervncserver command with the geometry parameter specified:
<code><strong>mstrg@TRG-Demo-Pi:~ $ sudo tigervncserver -geometry 800x480</strong></code>Code language: HTML, XML (xml)Start and Connect noVNC
Next, we can start the noVNC server with the websockify utility. By default, tigervncserver hosts a VNC server locally on the device at port 5901.
Using the websockify command, noVNC can be started on a port of our choice (in this case port 6080) as specified in a command parameter.
This web socket is directed to the TigerVNC Server session we started by specifying localhost:5901 as the target command parameter:
<code><strong>mstrg@TRG-Demo-Pi:~ $ websockify -D –-web=/usr/share/novnc/ 6080 localhost:5901</strong></code>Code language: HTML, XML (xml)Connecting the Web HMI
The Web HMI used in this demonstration is our WP4070A. All that needs to be done on this unit is to connect it with the Raspberry Pi’s VNC server and noVNC client.
Access the Configuration Screen
Power on the Web HMI and allow it to boot.
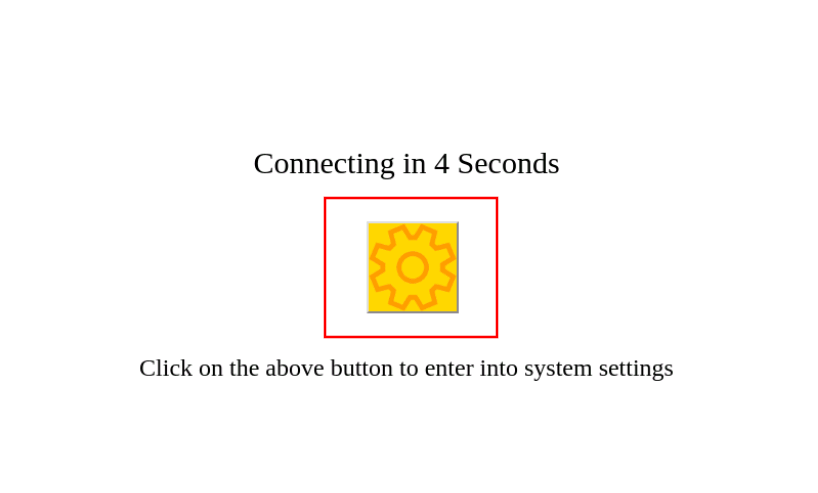
Click the settings icon before the system settings timer expires:
Open the Web App URL Menu
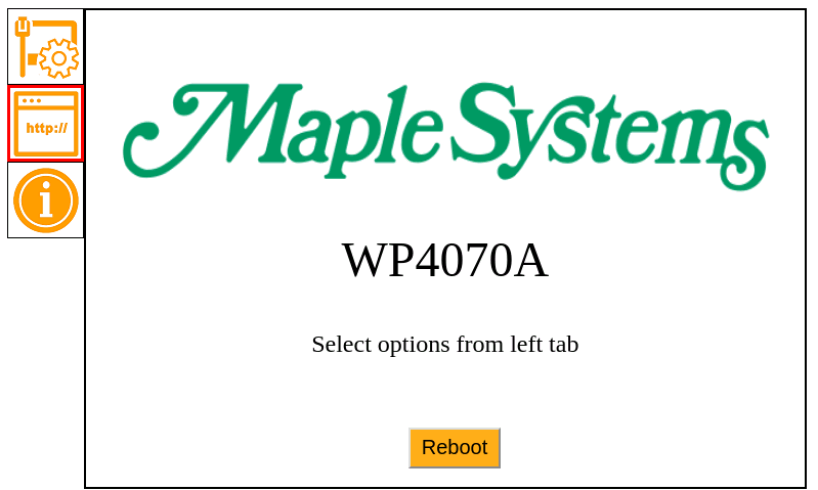
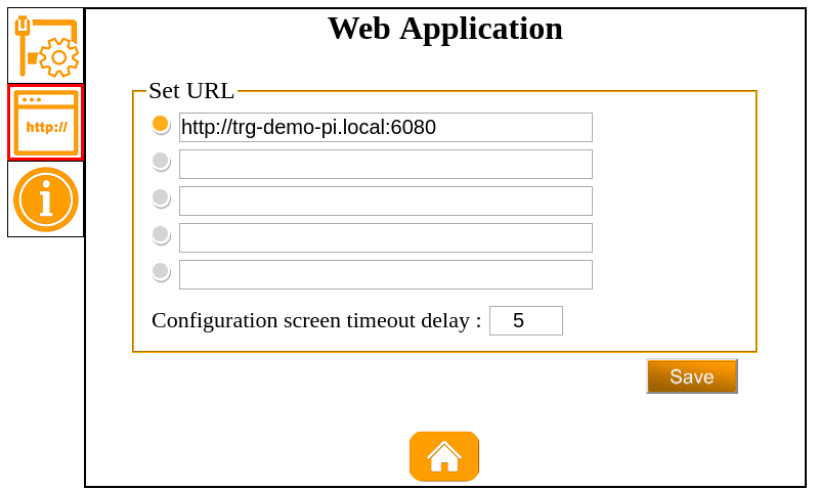
Navigate to the web app URL entry screen, enter the device password if prompted:
Enter the URL of the noVNC Server
Enter the Raspberry Pi’s IP address or hostname followed by a colon, and the port for noVNC (i.e. 6080) into the URL selection screen. The format should look like [IP or hostname.domainname]:[Port]. Then, select the URL to be the one opened at boot:
Reboot and Access noVNC
When the Web HMI reboots, allow the settings timer expire. The Web HMI will then load the noVNC home page:
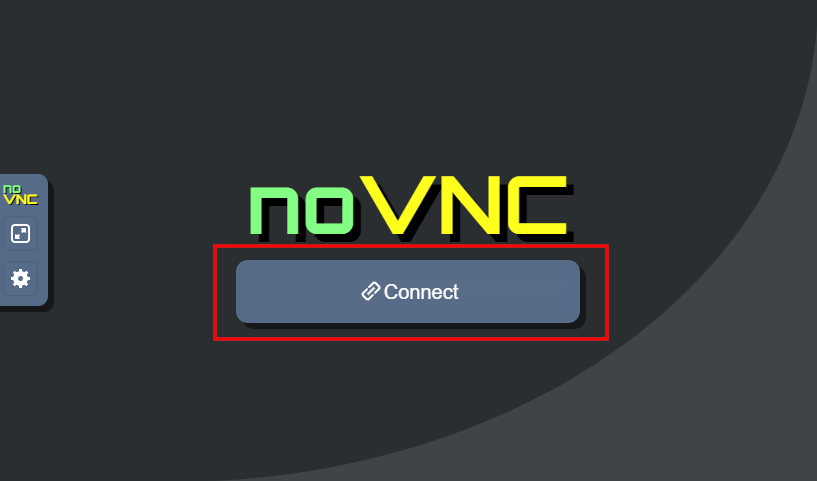
Click “Connect” in the noVNC window and enter the password (if configured) when starting the TigerVNC server.
Once connected, the Raspberry Pi Desktop is accessible via the Web HMI’s touch screen, allowing for desktop applications to be used from the Web HMI:

Conclusion
The Maple Systems Web HMI is a versatile device with Web Browser functionality that can be leveraged in a variety of ways.
Please take a moment to visit our product pages for more information on Maple Systems’ new HTML5 Web HMI series of devices.
About the Author

