In this tutorial, you will learn how to configure essential port settings such as speed, duplex mode, auto-negotiation, and flow control. It’ll also walk you through on how to apply port priority to ensure critical traffic is delivered first. This is all essential to set up ports correctly and maintain stable network communication.
Software Required
MapleLink Lite User Interface (Enter the network switch’s IP address into a web browser to access its web interface.
Hardware Required
- MS1-L05G01F
- MS1-L08G
- Embedded Industrial Box PC (A web browser is required. Use one of our Industrial Box PCs.)
Port Settings & Configuration
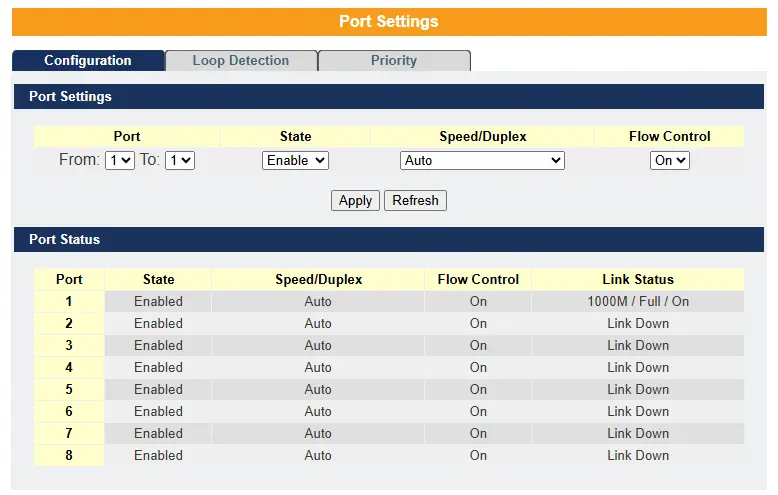
State – In the port configuration, you can enable or disable the port. If the port is disabled, it will remain inactive and perform no operations. To keep the port functioning, set it to the Enable state.
Speed – Specifies the speed and duplex mode at which the port should operate. Available speeds are 10, 100, and 1000 Mbps. You can also choose the duplex mode: Half Duplex or Full Duplex.
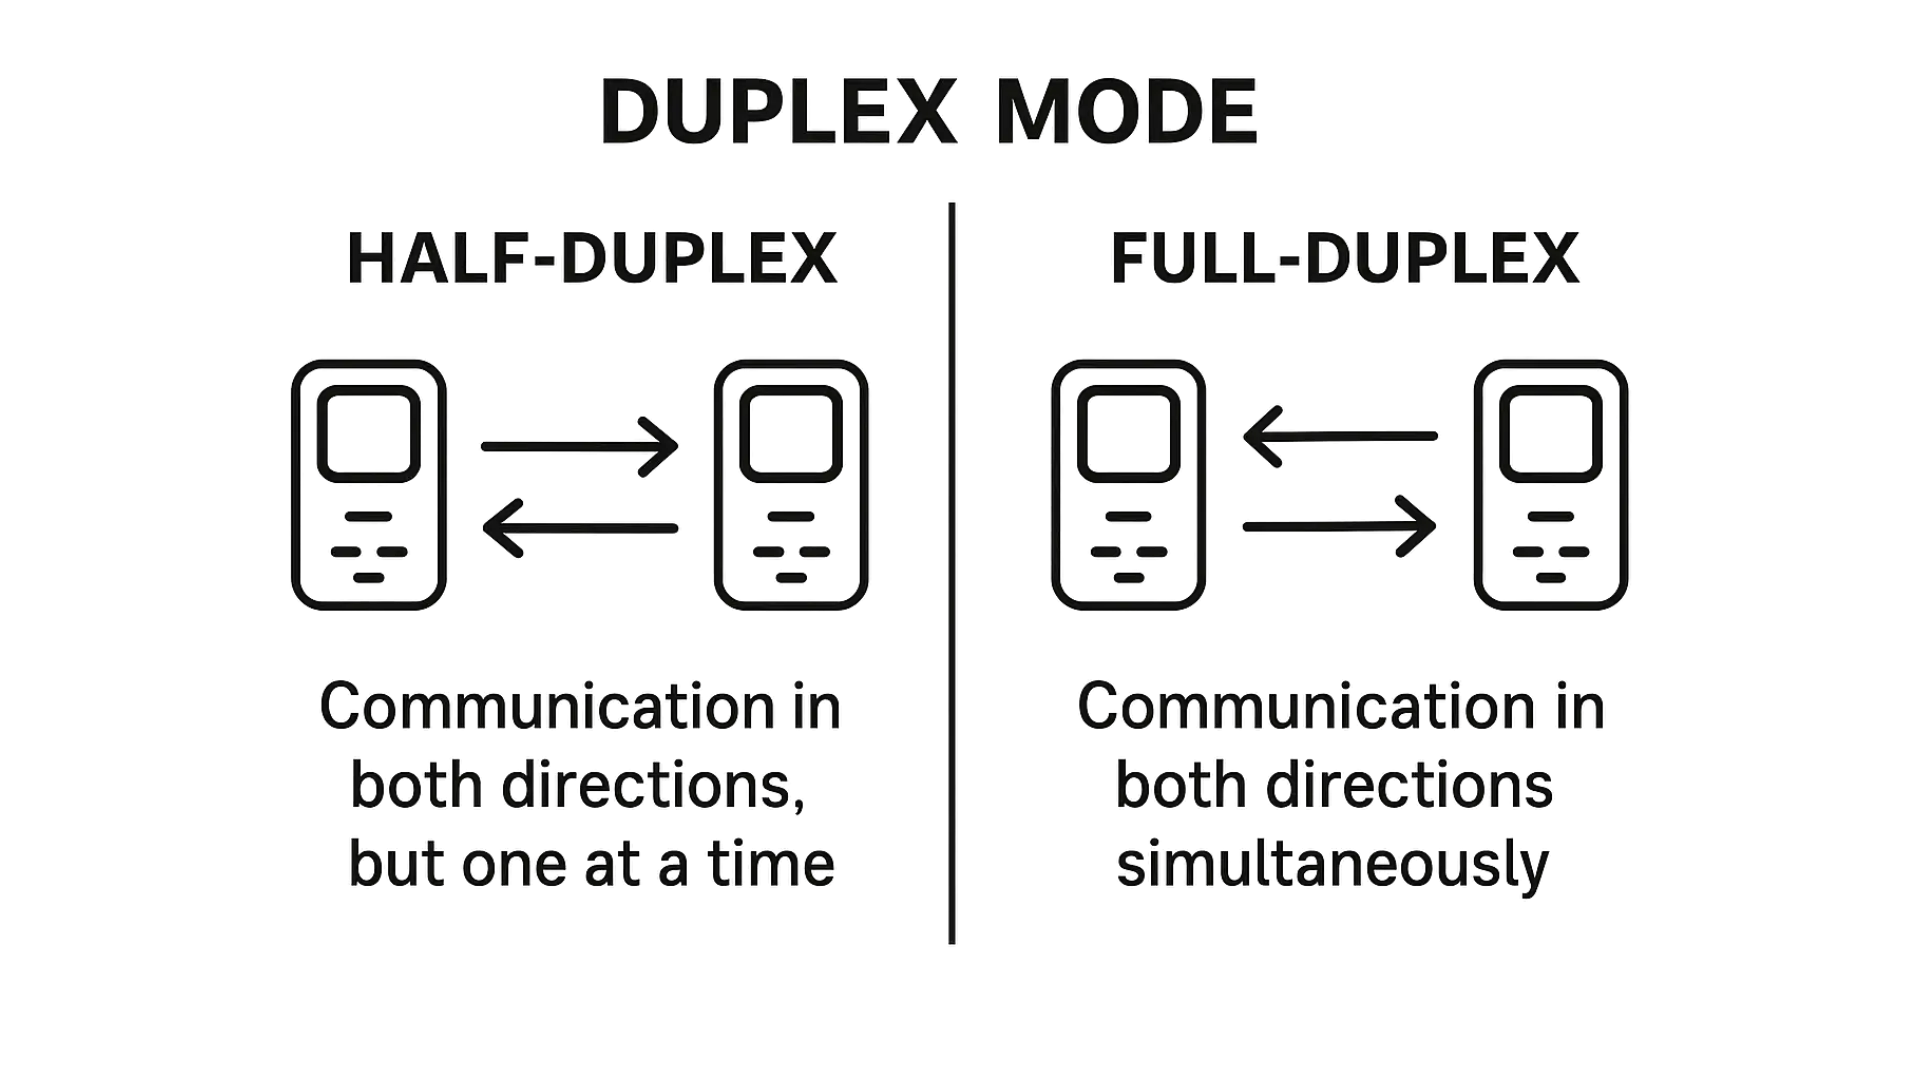
Duplex mode – A duplex communication system is a system composed of two connected parties or devices that can communicate with one another in both directions.
A half-duplex system provides for communication in both directions, but only one direction at a time (not simultaneously). Typically, once a party begins receiving a signal, it must wait for the transmitter to stop transmitting, before replying.
A full-duplex (or double-duplex) system allows communication in both directions simultaneously, unlike half-duplex systems. Landline telephone networks are an example of full-duplex communication, as both parties can speak and be heard at the same time.
A loopback test is used to verify whether a communications device is functioning correctly or to help identify a faulty node in a network. In this test, a signal is sent from the device and immediately returned (or “looped back”) to it.

One common method involves using a special connector called a wrap plug, which is inserted into a port on the device. The wrap plug redirects the transmitted (output) data back into the device as received (input) data. This creates a simulated communication circuit using only a single computer, allowing for self-testing without requiring a remote endpoint.
Auto-negotiation is a feature that allows a network port to automatically communicate with its peer port to determine the optimal connection speed and duplex mode supported by both devices.
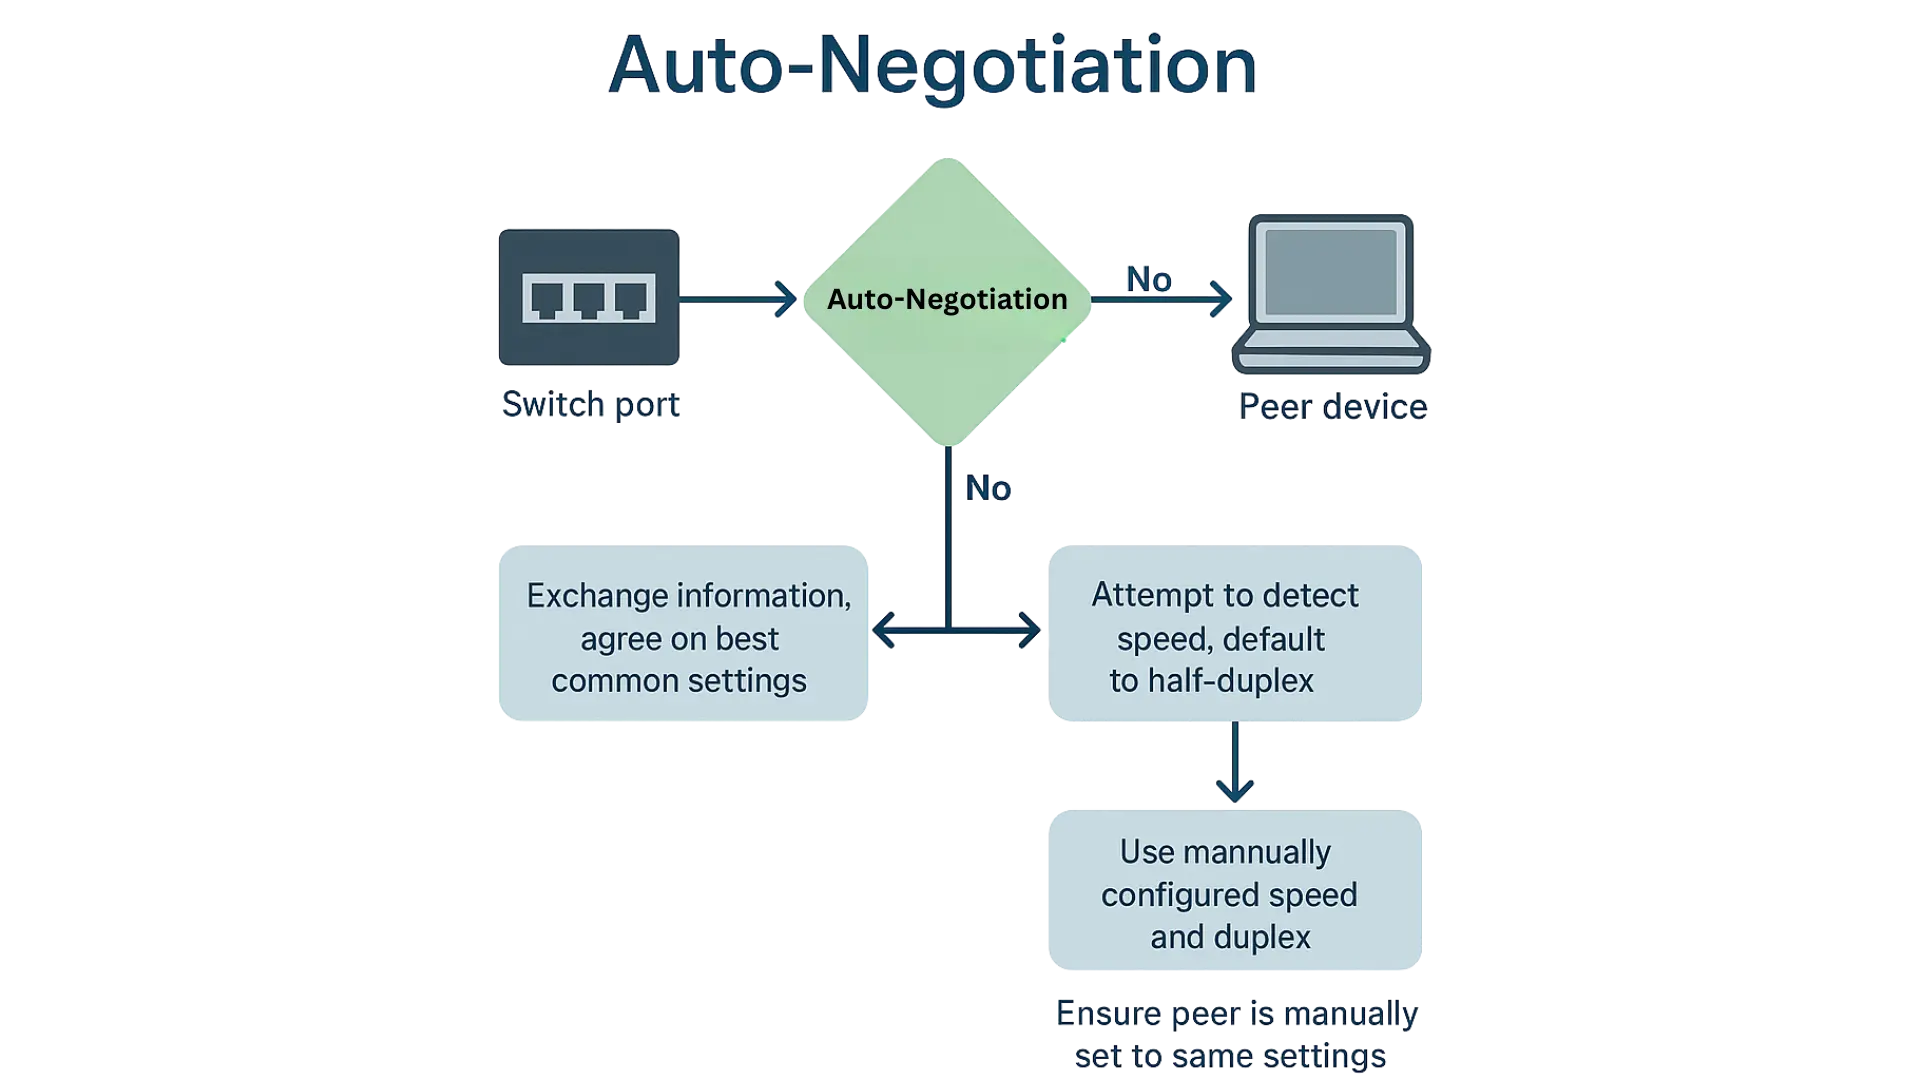
When auto-negotiation is enabled, the switch port and the peer device exchange information to agree on the best common settings. If the peer device does not support auto-negotiation or has it disabled, the switch port will attempt to detect the speed based on the signal but will default to half-duplex mode.
When auto-negotiation is disabled on the switch port, it will use the manually configured speed and duplex settings. In that case, you must ensure the peer device is manually set to the same speed and duplex mode, or the connection may fail or perform poorly.
Auto-MDI/MDIX is a computer networking feature that automatically detects the type of Ethernet cable needed—straight-through or crossover—and adjusts the connection accordingly. This eliminates the need for crossover cables when connecting devices like switches to each other or establishing peer-to-peer PC connections.

When Auto-MDIX is enabled, either type of cable can be used, and the interface will automatically correct any mismatched wiring. For Auto-MDIX to function properly, the speed and duplex settings on the interface must be set to “auto.”
Flow Control
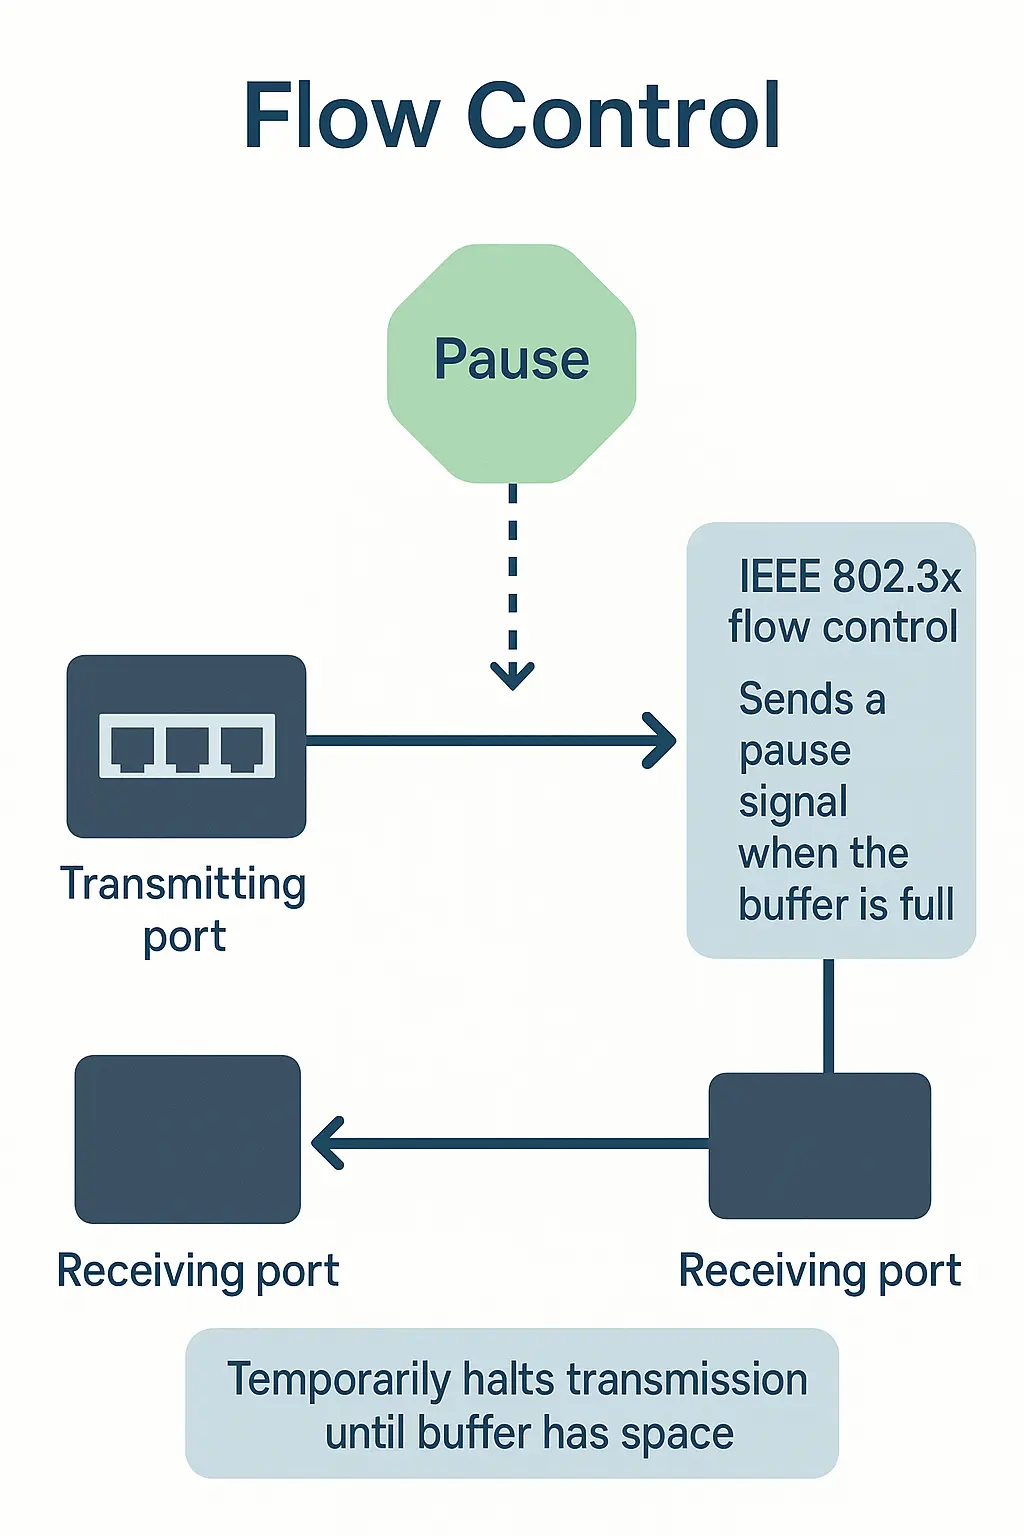
A high concentration of traffic on a port can reduce bandwidth and overflow the port’s buffer memory, resulting in packet drops and frame loss. IEEE 802.3x flow control, used in full-duplex mode, helps prevent this by sending a pause signal to the transmitting port when the receiving port’s buffer becomes full. This temporarily halts transmission until the buffer has space again, allowing data to be resent later.
Note : 1000 Base-T does not support force mode.
Default Settings:
– The default port Speed & Duplex is auto for all ports.
– The default port Flow Control is Off for all ports
Port Settings Priority
Typically, networks operate on a best-effort delivery basis, meaning all traffic is treated equally and has the same chance of being delivered in a timely manner. During periods of congestion, all traffic is equally likely to be dropped. The Port Priority feature allows you to prioritize specific types of network traffic based on their importance. By implementing Port Priority, you can make network performance more predictable and improve overall bandwidth utilization.
Under 802.1p priority settings, you can select a priority level for packets received on the port. This priority will only be applied to packets that do not already have an 802.1p priority tag.
1.1.1.1. CLI Configuration
| Node | Command | Description |
| enable | show queue cos-map | This command displays the current 802.1p priority mapping to the service queue. |
| enable | show qos mode | This command displays the current QoS scheduling mode of IEEE 802.1p. |
| configure | queue cos-map PRIORITY QUEUE_ID | This command configures the 802.1p priority mapping to the service queue. |
| configure | no queue cos-map | This command configures the 802.1p priority mapping to the service queue to default. |
| configure | qos mode high-first | This command configures the QoS scheduling mode to high_first, each hardware queue will transmit all of the packets in its buffer before permitting the next lower priority to transmit its packets. |
| configure | qos mode wrr-queue weights VALUE VALUE VALUE VALUE VALUE VALUE VALUE VALUE | This command configures the QoS scheduling mode to Weighted Round Robin. |
| interface | default-priority | This command allows the user to specify a default priority handling of untagged packets received by the Switch. The priority value entered with this command will be used to determine which of the hardware priority queues the packet is forwarded to. Default: 0. |
| interface | no default-priority | This command configures the default priority for the specific port to default (0). |
| enable | show diffserv | This command displays DiffServ configurations. |
| configure | diffserv (disable|enable) | This command disables / enables the DiffServ function. |
| configure | diffserv dscp VALUE priority VALUE | This command sets the DSCP-to-IEEE 802.1q mappings. |
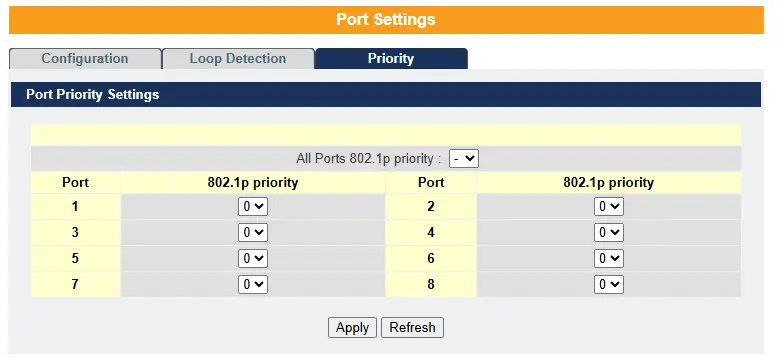
| Parameter | Description |
| Port Priority Settings | |
| Port | Selects a port or a range of ports on which to configure the priority. |
| Priority | Select a priority for packets received by the port. Only packets without 802.1p priority tagged will be applied the priority you set here. |
| Apply | Click Apply to take effect the settings. |
| Refresh | Click Refresh to begin configuring this screen afresh. |
| Port Priority Status | |
| Port | This field displays a port number. |
| Priority | This field displays the priority for a port. |
What is 802.1p Priority?
802.1p is a way to mark how important a message (Ethernet frame) is as it moves through a network switch.
Think of it like priority stickers on packages:
- High-priority sticker → gets delivered first
- Normal sticker → delivered when possible
- Low-priority sticker → waits until others are done
This helps switches decide which data to send first when the network is busy.
Typical 802.1p Priority Mapping
| PCP Value | Priority Name | Typical Traffic Type |
|---|---|---|
| 7 | Network Control | Routing protocol messages, control traffic |
| 6 | Internetwork Control | High-priority network signaling |
| 5 | Voice | VoIP traffic (latency sensitive) |
| 4 | Video | Streaming video |
| 3 | Critical Applications | Important business-critical data |
| 2 | Excellent Effort | Bulk data transfer |
| 1 | Background | Low-priority apps |
| 0 | Best Effort (default) | Normal traffic |
How It Works in a Switch
- Switch looks at the PCP number in the tag.
- It puts the frame into the matching priority queue.
- High priority queues are sent first when the link is busy.
– 802.1p makes sure important traffic gets through the network first, so voice, video, or control data don’t get delayed by less important traffic.
Real-World Scenario
Optimizing Network Port Settings in Industrial Automation
Setting:
A food processing plant operates a highly automated packaging line that relies on a network of PLCs, industrial PCs, IP cameras, and SCADA systems. These devices are interconnected through managed industrial Ethernet switches. The network supports both control traffic (time-sensitive) and monitoring traffic (non-critical) across multiple switches and VLANs.
The Problem:
After a recent plant expansion, operators begin noticing occasional delays in real-time machine status updates on their HMI screens. Video feeds from IP cameras are sometimes jerky, and in rare cases, robot controllers appear to momentarily lose synchronization, triggering system warnings.
An investigation reveals that:
- Some switch ports are misconfigured—running half-duplex while connected to devices that expect full-duplex.
- Auto-negotiation is disabled on several ports, leading to speed mismatches.
- The plant uses a mix of crossover and straight-through cables, and some connections fail without Auto-MDIX enabled.
- High volumes of traffic from video streams are congesting ports shared with control traffic.
- No Port Priority is in place to differentiate between critical control data and non-essential traffic.
The Solution: Configuring Port Settings and Port Priority
The plant’s network engineer performs a port-by-port audit and optimization using the switch’s port settings menu:
Port Configuration Adjustments:
- Enables auto-negotiation on all ports to ensure speed and duplex are matched correctly between switch and device.
- Verifies all key devices (PLCs, HMIs, SCADA servers) operate in Full Duplex mode at 100 or 1000 Mbps.
- Activates Auto-MDIX where available, eliminating cable-type issues for future maintenance and reducing connection errors.
- Performs loopback tests on ports showing instability to validate the integrity of individual switch ports and cables.
Enabling Flow Control:
- Enables IEEE 802.3x Flow Control on full-duplex ports connected to bandwidth-sensitive devices to prevent buffer overflows and packet loss during peak loads.
Implementing Port Priority:
- Assigns High Priority to ports carrying control traffic, such as PLC-to-PLC or PLC-to-HMI communication.
- Assigns Medium Priority to ports used for SCADA polling and event logging.
- Assigns Low Priority to ports connected to IP cameras, engineering laptops, and general monitoring devices.
This ensures that if congestion occurs, critical automation traffic is delivered first, reducing jitter and eliminating latency in time-sensitive applications.
Outcome:
- Communication stability is restored across the plant. HMIs update in real time, and robot synchronization errors disappear.
- Video feeds no longer interfere with control processes.
- The maintenance team can now plug in diagnostic laptops without worrying about cable types or manual speed settings.
- Overall network performance improves, and operations become more resilient during high-demand periods.
Resources & Documentation
Lite-Managed Network Switches Resources:
- Industrial Network Switches
- Industrial Lite-Managed Network Switches – MS1 Series Datasheet
- MS1-L05G01F Quick Start Guide
- MS1-L08G Quick Start Guide
- What is a network switch?
- Industrial Network Switch Operations Manual – Lite-Managed Series
More
Tutorials
Sample Projects
Software Downloads
See our Support Center for a complete list of Quick Start and Installation Guides
About the Author
Trusted source for industrial automation & control solutions
Follow Maple Systems:
