Using the Upload Function
Technical Note 5059
Applicable Model(s)
HMI5000 Series
cMT Series
Title
Using the Upload Function
Date
10/05/2022
Rev
02
P/N
0907-5059
Summary
The Technical Note describes the upload process for the HMI5000 Series and the cMT series.
- EZWare-5000
- EBPro
Solution
Section 1 (Legacy HMI – EZware-5000)
1.
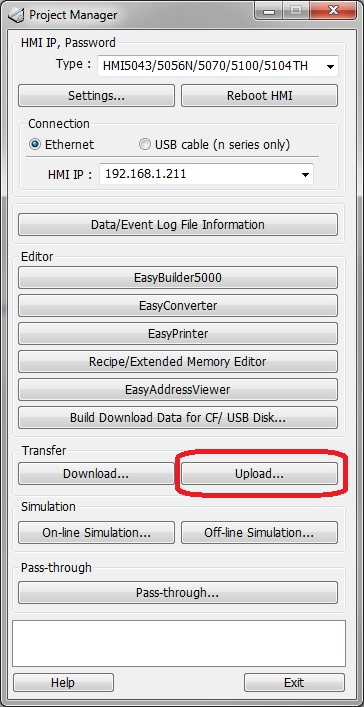
With the HMI connected to the PC via USB or Ethernet cable, open Project Manager (EZware-5000) and click the Upload button.
2.
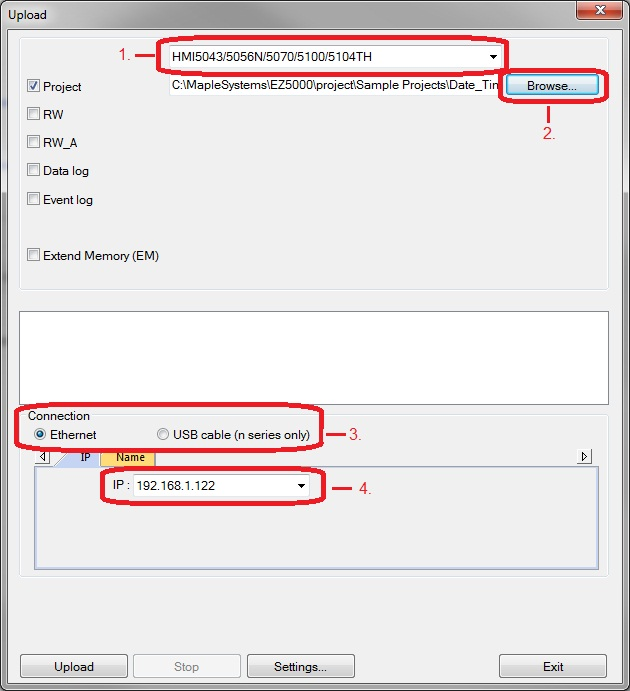
Once the Upload dialog box opens, (1) select your HMI type. (2) Click Browseto select the file location and provide a name for the file. (3) Select your connection type. If uploading via Ethernet, (4) designate the HMI IP address. If uploading via USB, select “USB cable (n series only)” in the connection frame.
3.
Click the Upload button. When uploading is complete, the word “finished” will appear in the status frame. Click the Exit button.
4.
To open the file in EZware-5000 click the Tools menu in EZware-5000 and select Decompile.
5.
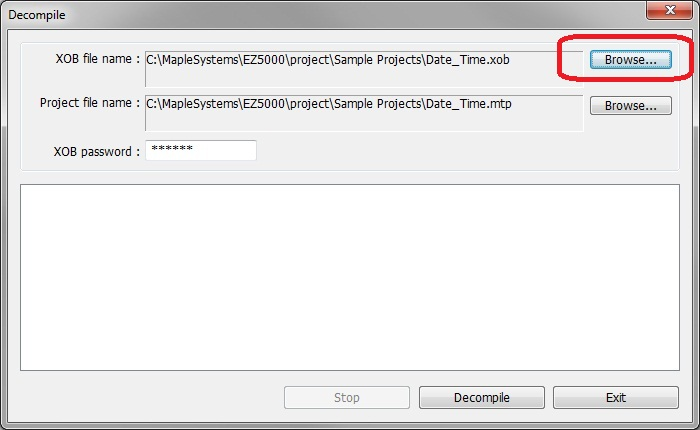
Click the Browse button next to “XOB file name” and navigate to the XOB file you just uploaded.
6.
Click Decompile and the decompiler will create an MTP file with the same file name along with library files containing the shapes and pictures used in the project.
7.
Click the File menu and select Open to open the MTP project file.
Section 2 (HMI5000/cMT Series – EBPro)
1.
With the HMI connected to the PC via USB or Ethernet cable, open the Utility Manager from your EBPro installation directory(C:\MapleSystems\EBPro\ is the location by default).
2.
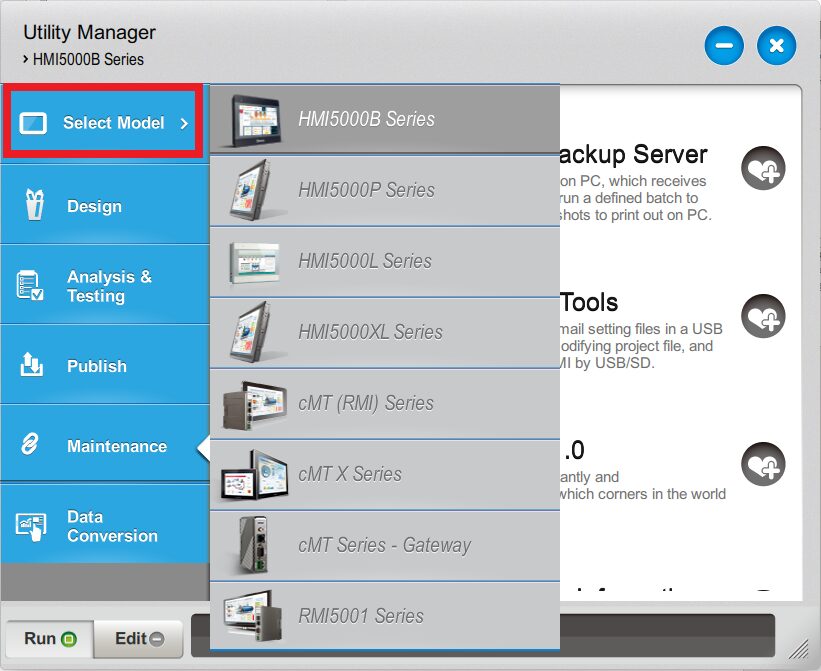
Click on the Select Model button and choose your appropriate model family in the resulting list.
3.
Select the Publish menu followed by the Upload option.
4.
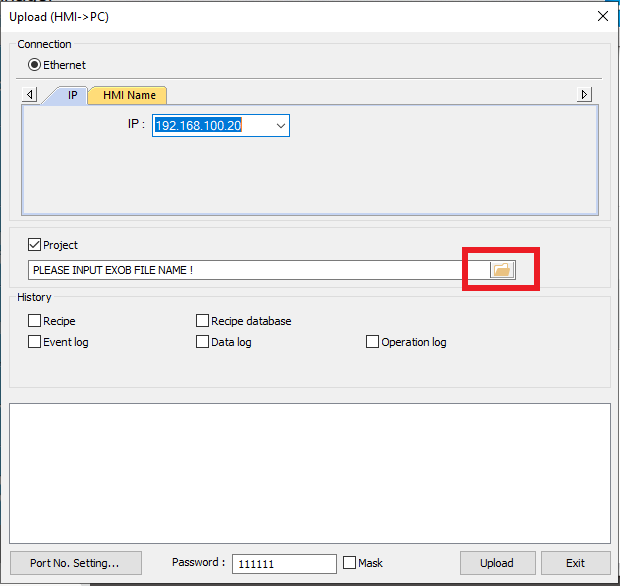
In the new window, (1) input the IP address of your unit that you are attempting to Upload from. (2) Check the boxes for any data you would like to upload. (3) Check your passwords is correct (default is 111111) (4) Click the folder icon next to the “PLEASE INPUT EXOB FILE NAME!” field.
5.
When the browse window pops up chose the location of where you would like the file to be uploaded to and give it a name then click Ok. The “PLEASE INPUT EXOB FILE NAME!” field should now be populated with the file path you selected, and your desired name for your file.
6.
Click Upload, once complete you will see the word “finished” in the status dialog box.
7.
To open your file in EBPro, select the File menu and then choose the Decompile option.
8.
Click Browse next to the “EXOB File Name” field and browse to the location of where your file was just uploaded to then click Open. The “Project file name” field will auto populate with the same file path as the file you are decompiling, only it will have the new *.emtp file extension.
9.
Click File and Open to browser for this newly created *.emtp file.
