Uploading Logged Data to a USB Flash Drive
Technical Note 7014
Applicable Model(s)
HMC3000
HMC7000
MAPware-7000
Title
Uploading Logged Data to a USB Flash Drive
Date
09/22/2022
Rev
01
P/N
0907-7014
Summary
This Technical Note describes two methods of uploading logged data from an HMC to an external USB flash drive, and pairs with the sample project Logged Data to a USB Flash Drive.
Solution
Method 1: USB Host Menu
NOTE: For the HMC3070, you must use a 2GB USB Stick to perform this operation
1.
On the screen you wish to begin uploading data logs from, create a Set Bit Object and set the Tag Properties->Tag Name to the USB_host_menu_trigger tag, address S00037.
2.
With the project running, press this button. You will see a window asking if you want to perform “Memory Stick Operation”. Click “Yes”.

3.
A window will open asking if you want to “Download or Upload”. Click “Upload”.

4.
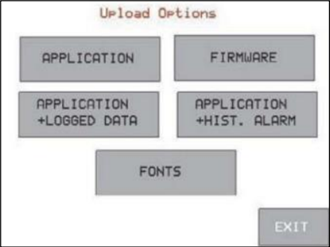
The “Upload Options” window will open. Click “Application + Logged Data”.
5.
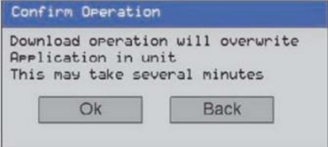
A warning window will open to “Confirm Operation”. Click “Ok” to begin the upload. This will upload both the project file and the entire data log file, so depending on the size of the project and the specified size of the data log within the project (256KB, 512KB, 1024KB, or 2048KB), this may take several minutes.
6.
Once the upload is completed, click “Exit” to leave the menu. After exiting, the HMC will reboot.
7.
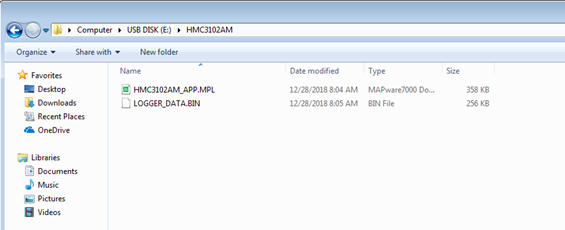
Remove the USB flash drive and insert it into your computer. Inside it, you will find a new directory named after the HMC model being uploaded from. Within is the project file, extension .MPL, and the data log file, extension .BIN:
8.
To view the data, rename “LOGGER_DATA.BIN” to “Logger.BIN” and move the file to the main directory of MAPware-7000:
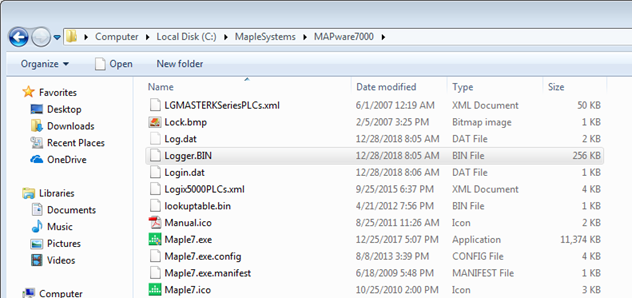
9.
With that file in the right place and named correctly, open MAPware-7000. Open the Logged Data Files window by clicking Tools -> Display Logged Data…:
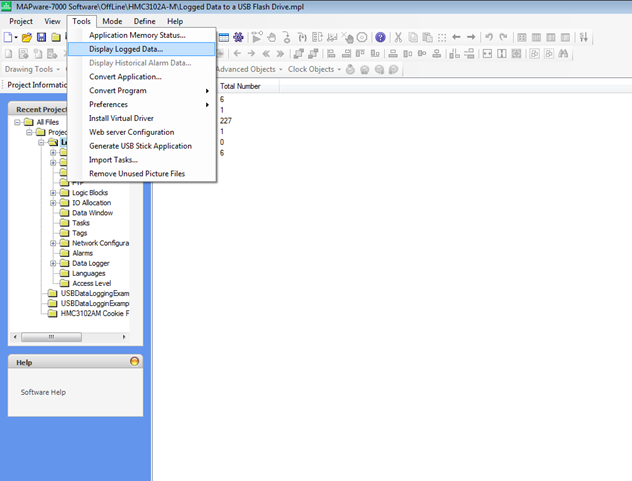
10.
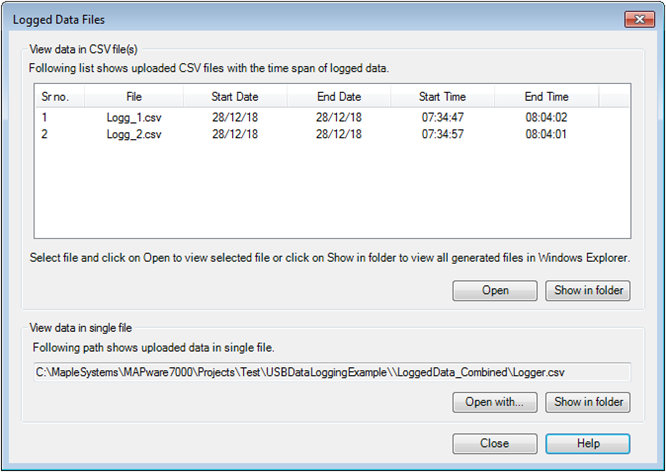
Inside the Logged Data Files window, you can choose to open each individual data group as a .CSV file. Additionally, you may view it as a single file with the “Open With…” button near the bottom right. Both the single group files and the combined file are saved inside the open project directory. In this case, that is “C:\MapleSystems\MAPware7000\Projects\Test\USBDataLoggingExample”:
Method 2: USB Data Upload Task
1.
Create an object that can initiate a USB Data Log Upload Task. There are several ways to initiate a USB Data Log Upload Task, but in the referenced sample project, it is done with a Multi-State Single-State Button.
2.
When the USB Data Log Upload Task is selected, you will see this screen:
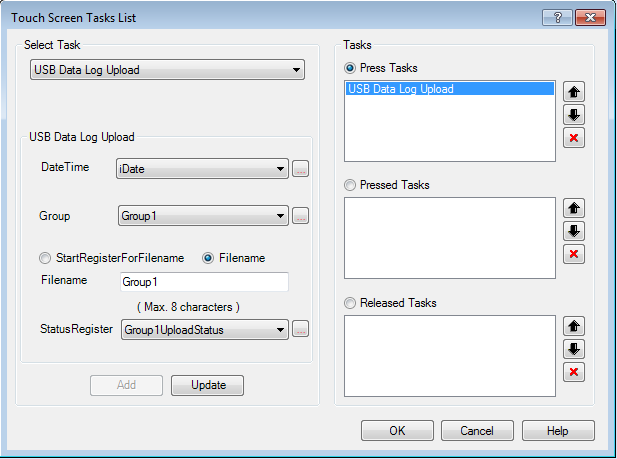
To allow this task to be performed, you must set up several registers that control how and what is uploaded.
3.
DateTime – This is the set of 12 registers that will specify the start and end times for the portion of the logged data to upload. The upload task will only upload logs that have a timestamp within the dates specified. These registers must be consecutive. The format of the registers is:
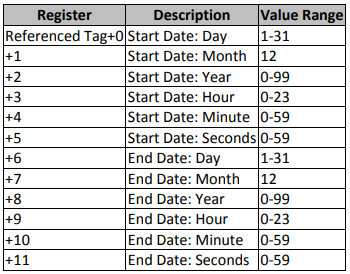
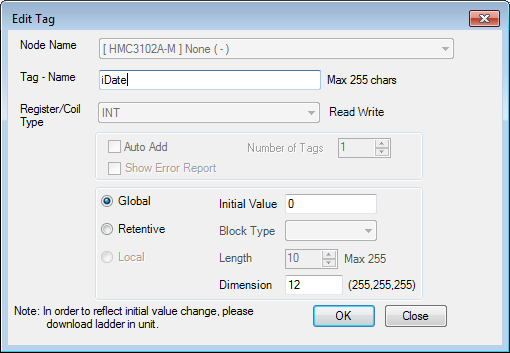
In the referenced sample project, these are specified as an INT type tag with dimension 12, as shown below:
4.
Group – This is a register with a value specifying which data group to upload. This is only valid with the values 1 – 4 stored in the register.
5.
Filename – There are two options for specifying the filename: Start Register for Filename, or Filename.
a.
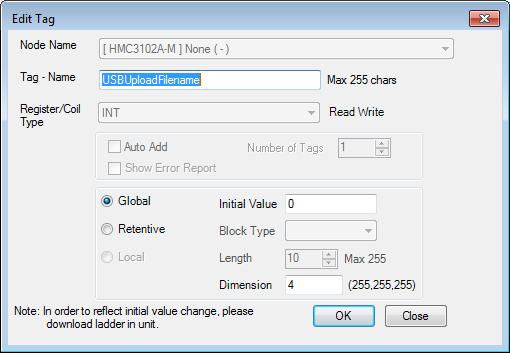
Start Register for Filename allows the filename given to the uploaded data to be set by four consecutive registers. In the referenced sample project, this is how the file for Group 1 gets its name. The registers are specified as an INT type tag with dimension 4:
These registers are set by a Numeric Entry object.
b.
Filename allows you to type a static filename to use for the uploaded .CSV file.
6.
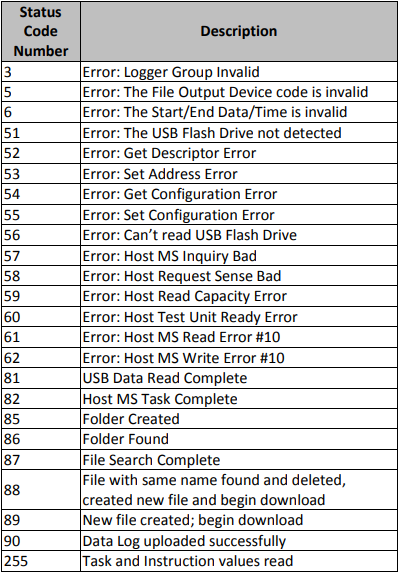
StatusRegister – This is a specified register that gets loaded with a status code for the upload. The code stored in this register will tell you if the upload completed successfully, or if there was an error. Listed below are the status codes and meanings:
7.
Once the USB Data Log Upload task is set up, click “Add” to add the task.
8.
With the project built and running on the HMC, activate the USB Data Log Upload task with the USB flash drive inserted into the HMC. If the status register is set to 90, the upload was successful. If it gets set to a value below 80, an error has occurred.
9.
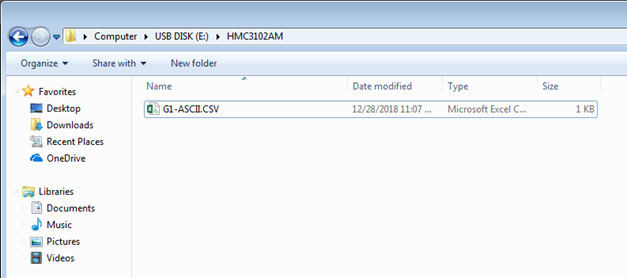
Once the upload is completed, remove the USB flash drive from the HMC and insert it into your computer. Located in a directory named after the model HMC you are uploading from, there will be a CSV file with the specified name.
