Your cart is currently empty!
I’m having trouble with International Characters displaying correctly in EBPro.
The HMI configuration software allows configuration in multiple languages. Many languages require international characters.
To set up international characters on a Windows® PC.
- From the Microsoft® Windows® Start menu, select Control Panel. The Control Panel dialog box appears.
- Select Change keyboards or other input methods beneath Clock Language, and Region
- Select Change Keyboards on the Keyboards and Languages tab.
- Select Add…
- Select the language to add using the checkboxes in the Add Input Language window. Click OK.
- The language bar will appear on the desktop taskbar. This bar allows the computer’s language character sets to switch between English and the selected language.
- Select the appropriate language on the desktop taskbar to toggle between input languages
To use international characters in an HMI project.
Select Draw > Text to create a Text Object. Characters from the language selected in the Language bar will display as they are typed.
If the international characters do not display correctly on the HMI, try the following:
- Select a Windows® True Type font that contains the international characters you require.
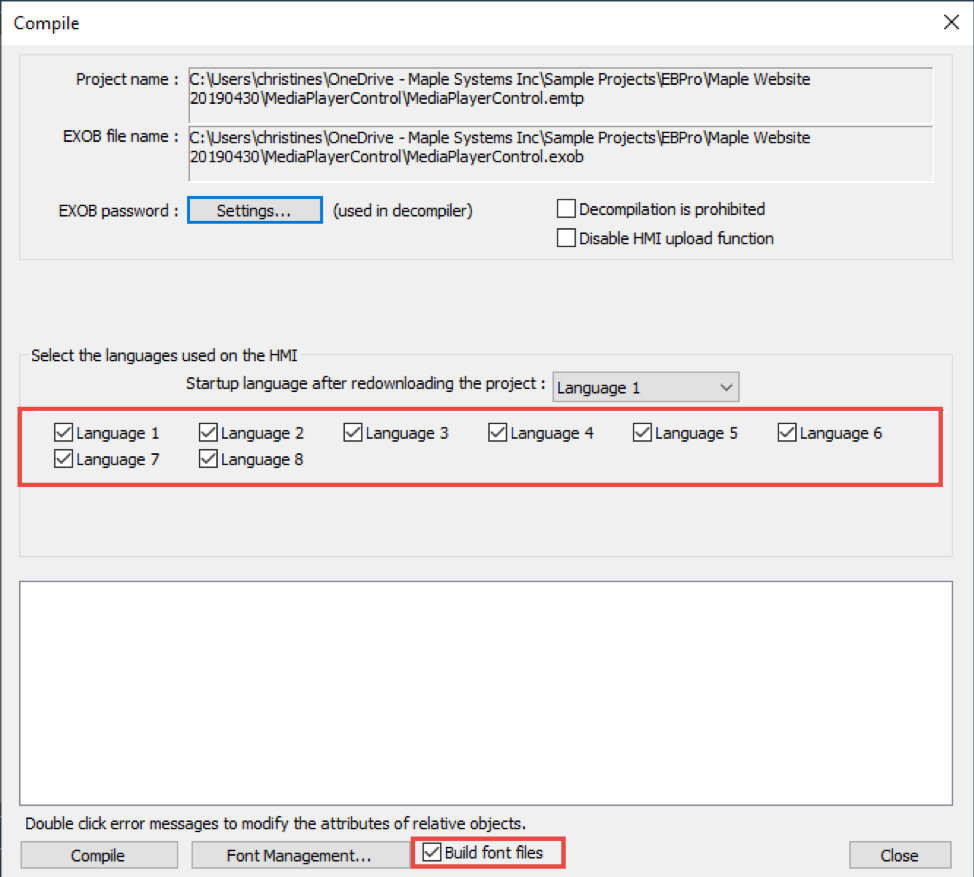
- When compiling your project, ensure “Build font files” is selected and the required language boxes are checked.
- Download your project to the HMI with the “Font files” check box checked in the download window.

